
Adjourn QAL: Week 2

Welcome to Week 2 of the Adjourn Quilt Along! This week we will be creating our first 2 blocks. If you’re making the baby size quilt, you can make a single block this week, and if you’re making the twin size or larger, I recommend making 4 blocks this week. (You can do it!)
If you’re just joining us, make sure to check out the Adjourn QAL introductory post and the Week 1 post. Those have all the information you need to know about the QAL and all the tips and techniques for prepping, cutting, and laying out all your fabric.
And don’t forget, Emily from Brown Eyed Quilter, Lilo from Trace Creek Quilting, and Rosie Girl Quilting will be offering 25% off longarm quilting on all Adjourn Quilts up to 2 months after the quilt along!
Adjourn Quilt Along Schedule:
Week 1, February 13th: Cutting fabric, strip piecing, and layout
Prize sponsor: Lamb and Loom FabricsWeek 2, February 20th: Blocks 1-2
Prize sponsor: Great Heron Thread Co.Week 3, February 27th: Blocks 3-4
Prize sponsor: Bookends QuiltingWeek 4, March 6th: Blocks 5-6
Prize sponsor: Pasadena Quilt StudioWeek 5, March 13th: Catch-up Week
Prize sponsor: Zahm Co.Week 6, March 20th: Blocks 7-8
Prize sponsor: Piece Fabric Co.Week 7, March 27th: Blocks 9-10
Prize sponsor: Rosie Girl QuiltingWeek 8, April 3rd: Blocks 11-12
Prize sponsor: Trace Creek QuiltingWeek 9, April 10th: Sashing and Assembly
Grand Prize Sponsor: Brown Eyed Quilter & Tree House Quilting Co.
Quilt supplies needed this week:
What you’ll need this week is no more than all the quilty basics:
Sewing machine
Iron & pressing board
Straight pins
Rotary cutter
Quilting ruler
If you’re looking for some recommendations on tools, I highly recommend getting patchwork pins. They are tiny and are the best for lining up pieces and (gasp!) sewing over your pins with the least chance of hitting them with your needle. (I’m a risk taker, what can I say?) And we’ll be trimming our squares, so I recommend a 6.5” or larger square ruler to make this easier.
Let’s jump in!

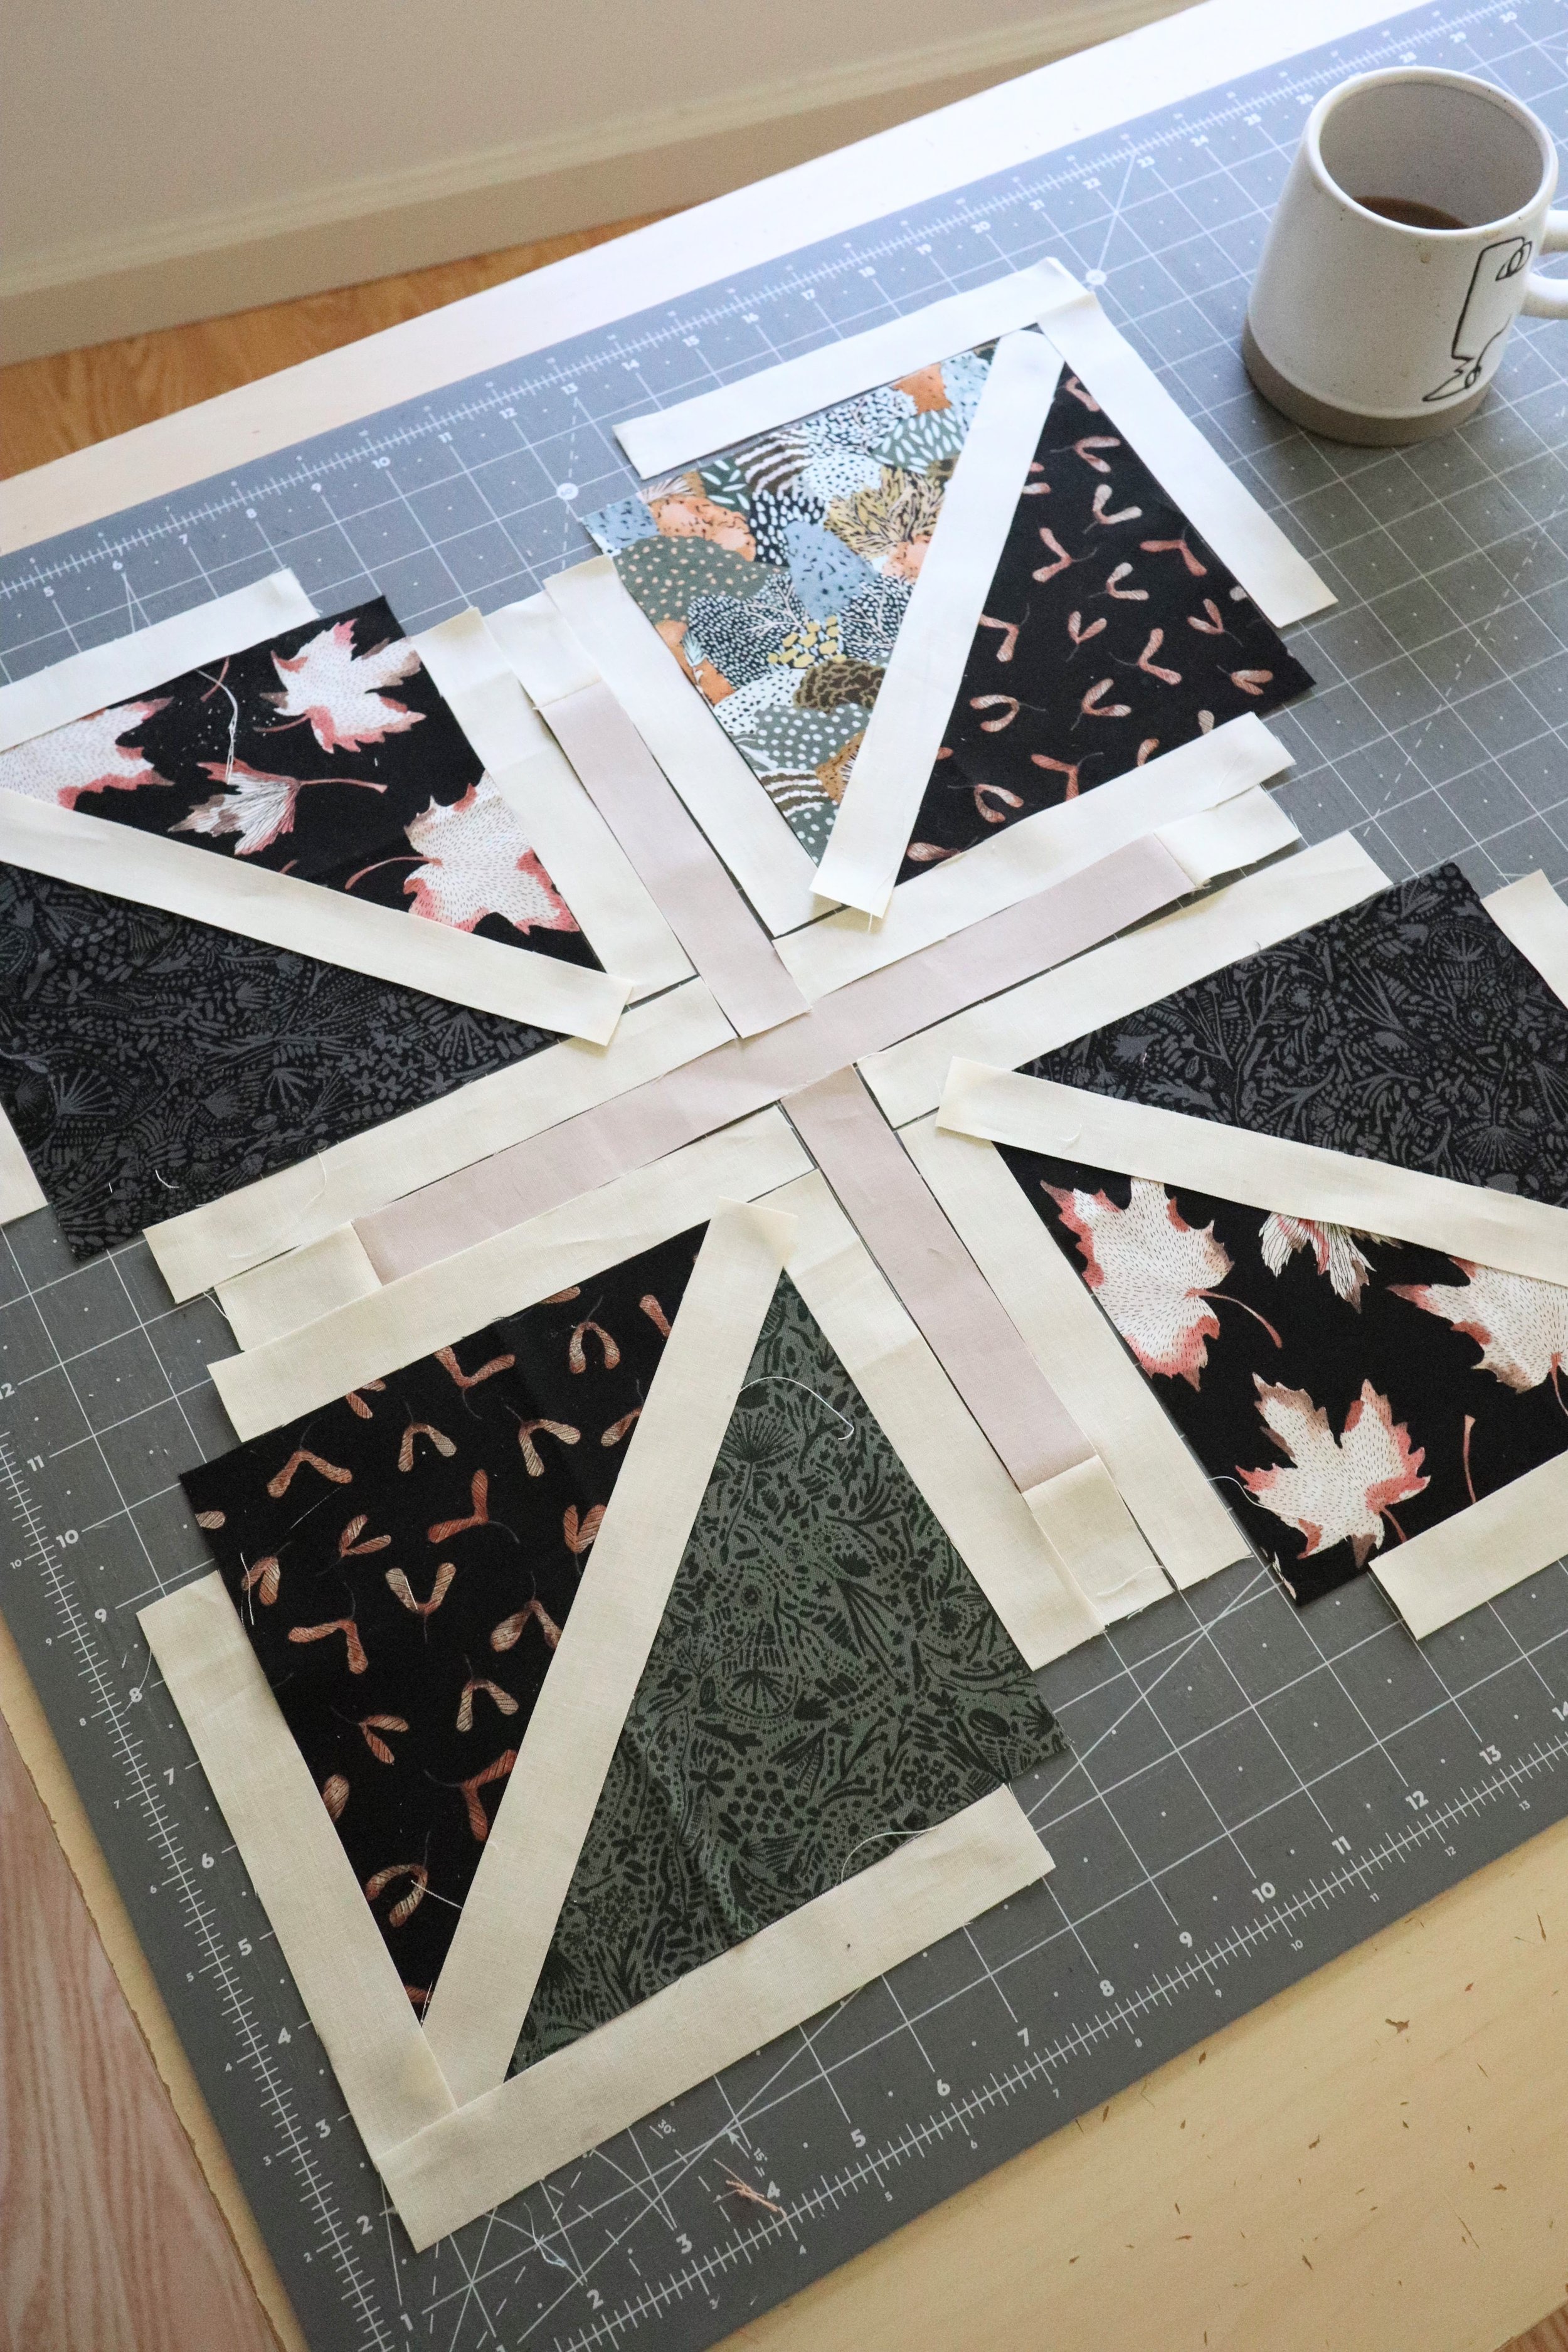
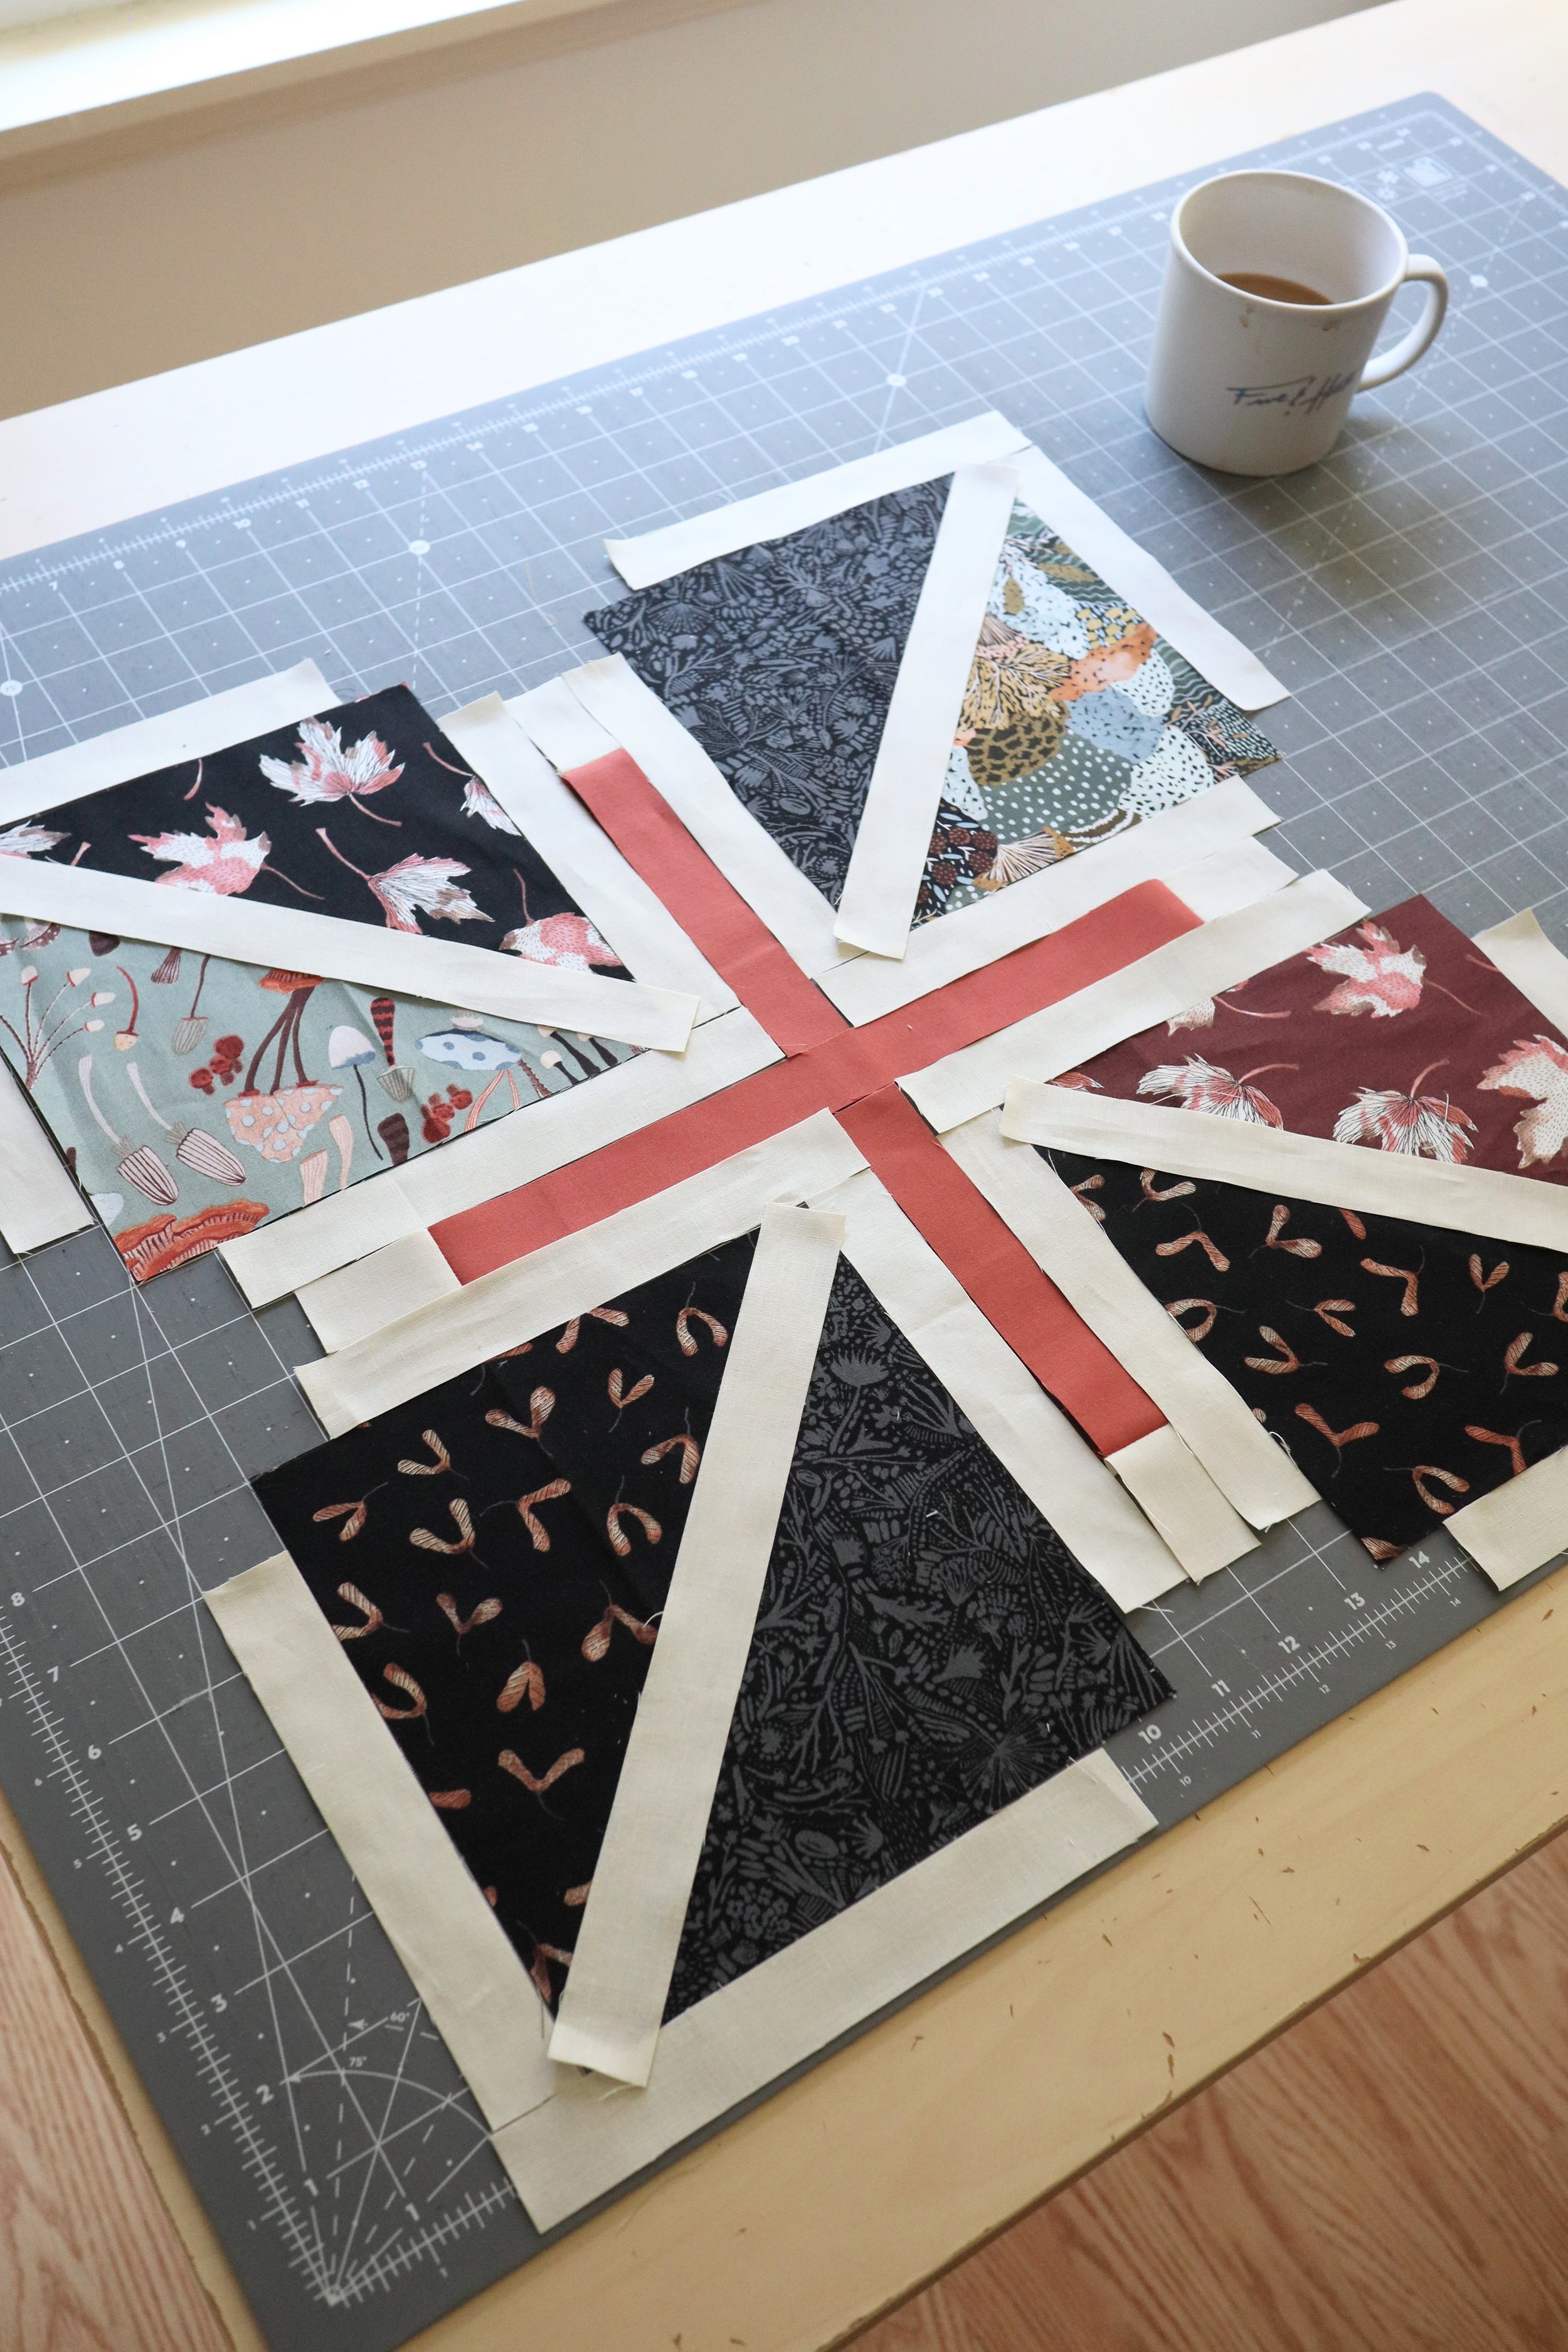
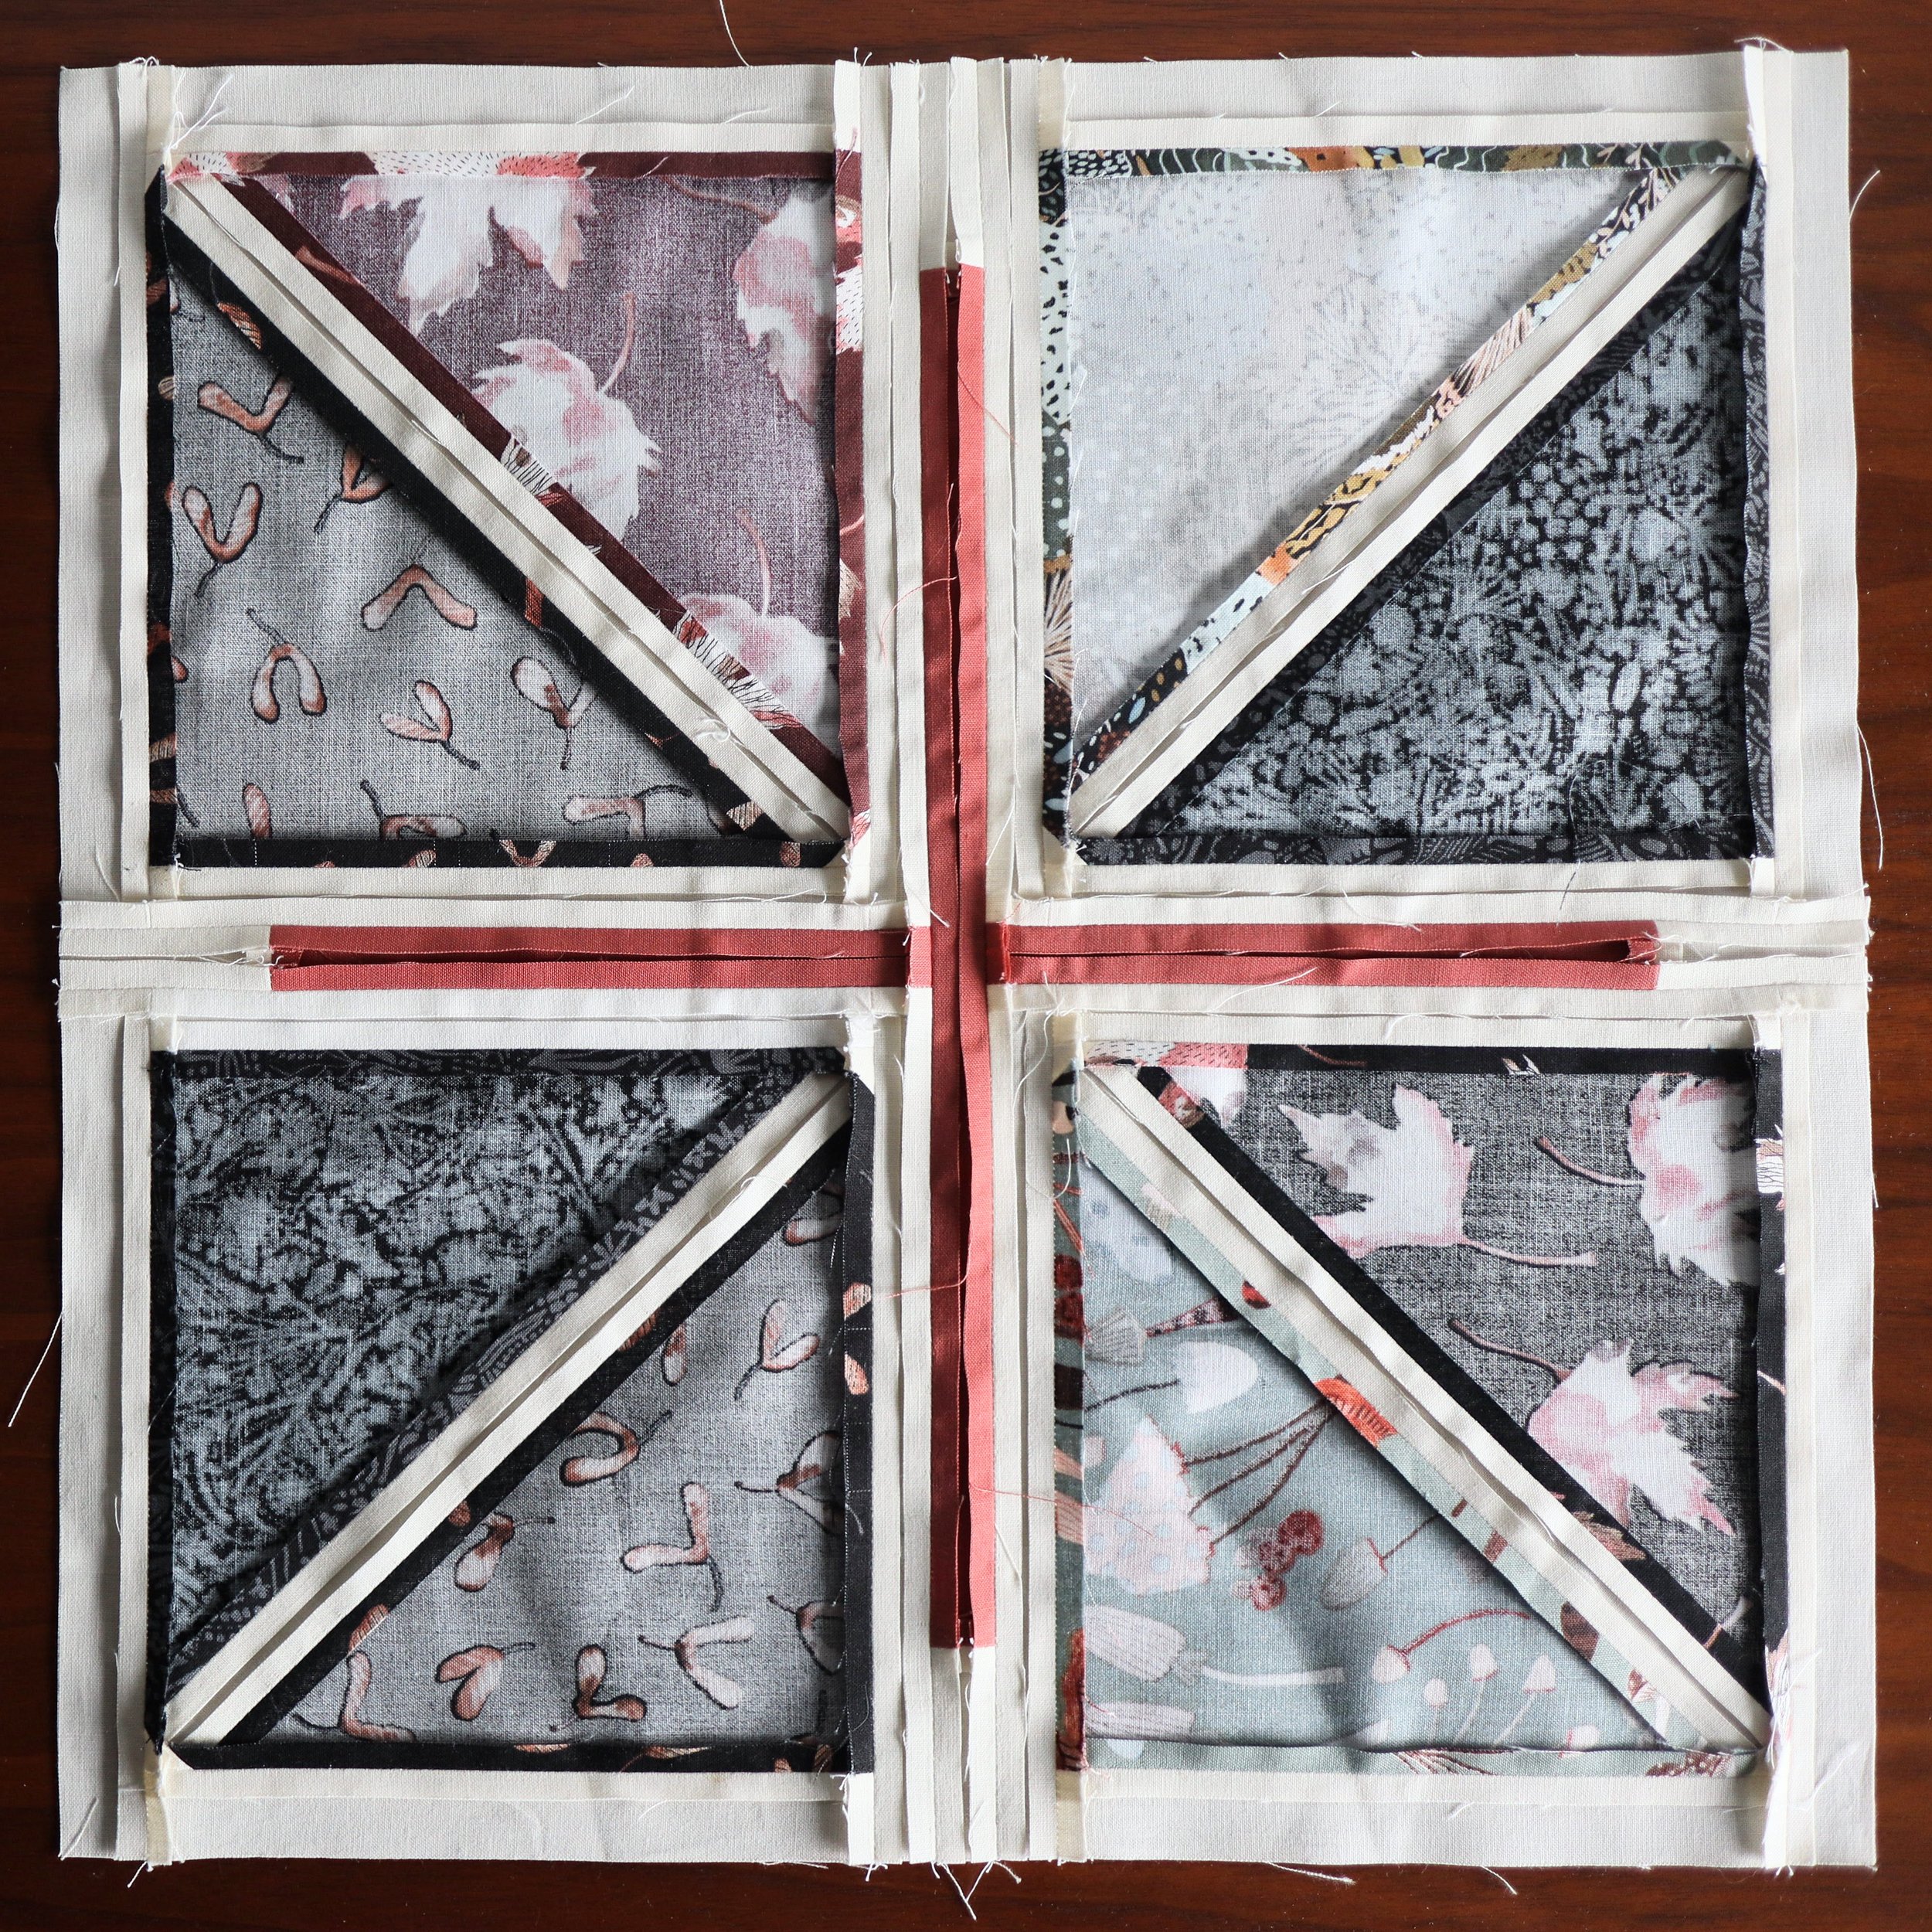
Week 2 goal: Make 2 blocks
The hardest part about making these blocks is that they take time. There’s quite a lot of pinning, sewing, and trimming involved for each block, which is why we’re only finishing two blocks at a time. If you’re making a scrappy or fat quarter Adjourn, I find that it’s especially satisfying to see your quilt top come together block by block!
I have several tips this week to help your block piecing run smoothly. For the next few weeks, you’ll want to refer back to this post for tips because we’re going to be making blocks from now until nearly the end!
TIP #1: CENTERING YOUR Pieces
There are two times during block piecing when you will be centering two pieces or sets of pieces. The first is when you add your second Color A HST to the other side of your B strip to create your A/B square unit. There are a couple different ways to make sure you’re centering these pieces. The first is to fold the HST and the strip in half, then match the creases. The second is to eyeball the tip of the second HST when you place it right sides together with the first. You’ll be trimming this square down anyway, so no need to waste time here making sure it’s absolutely perfect!
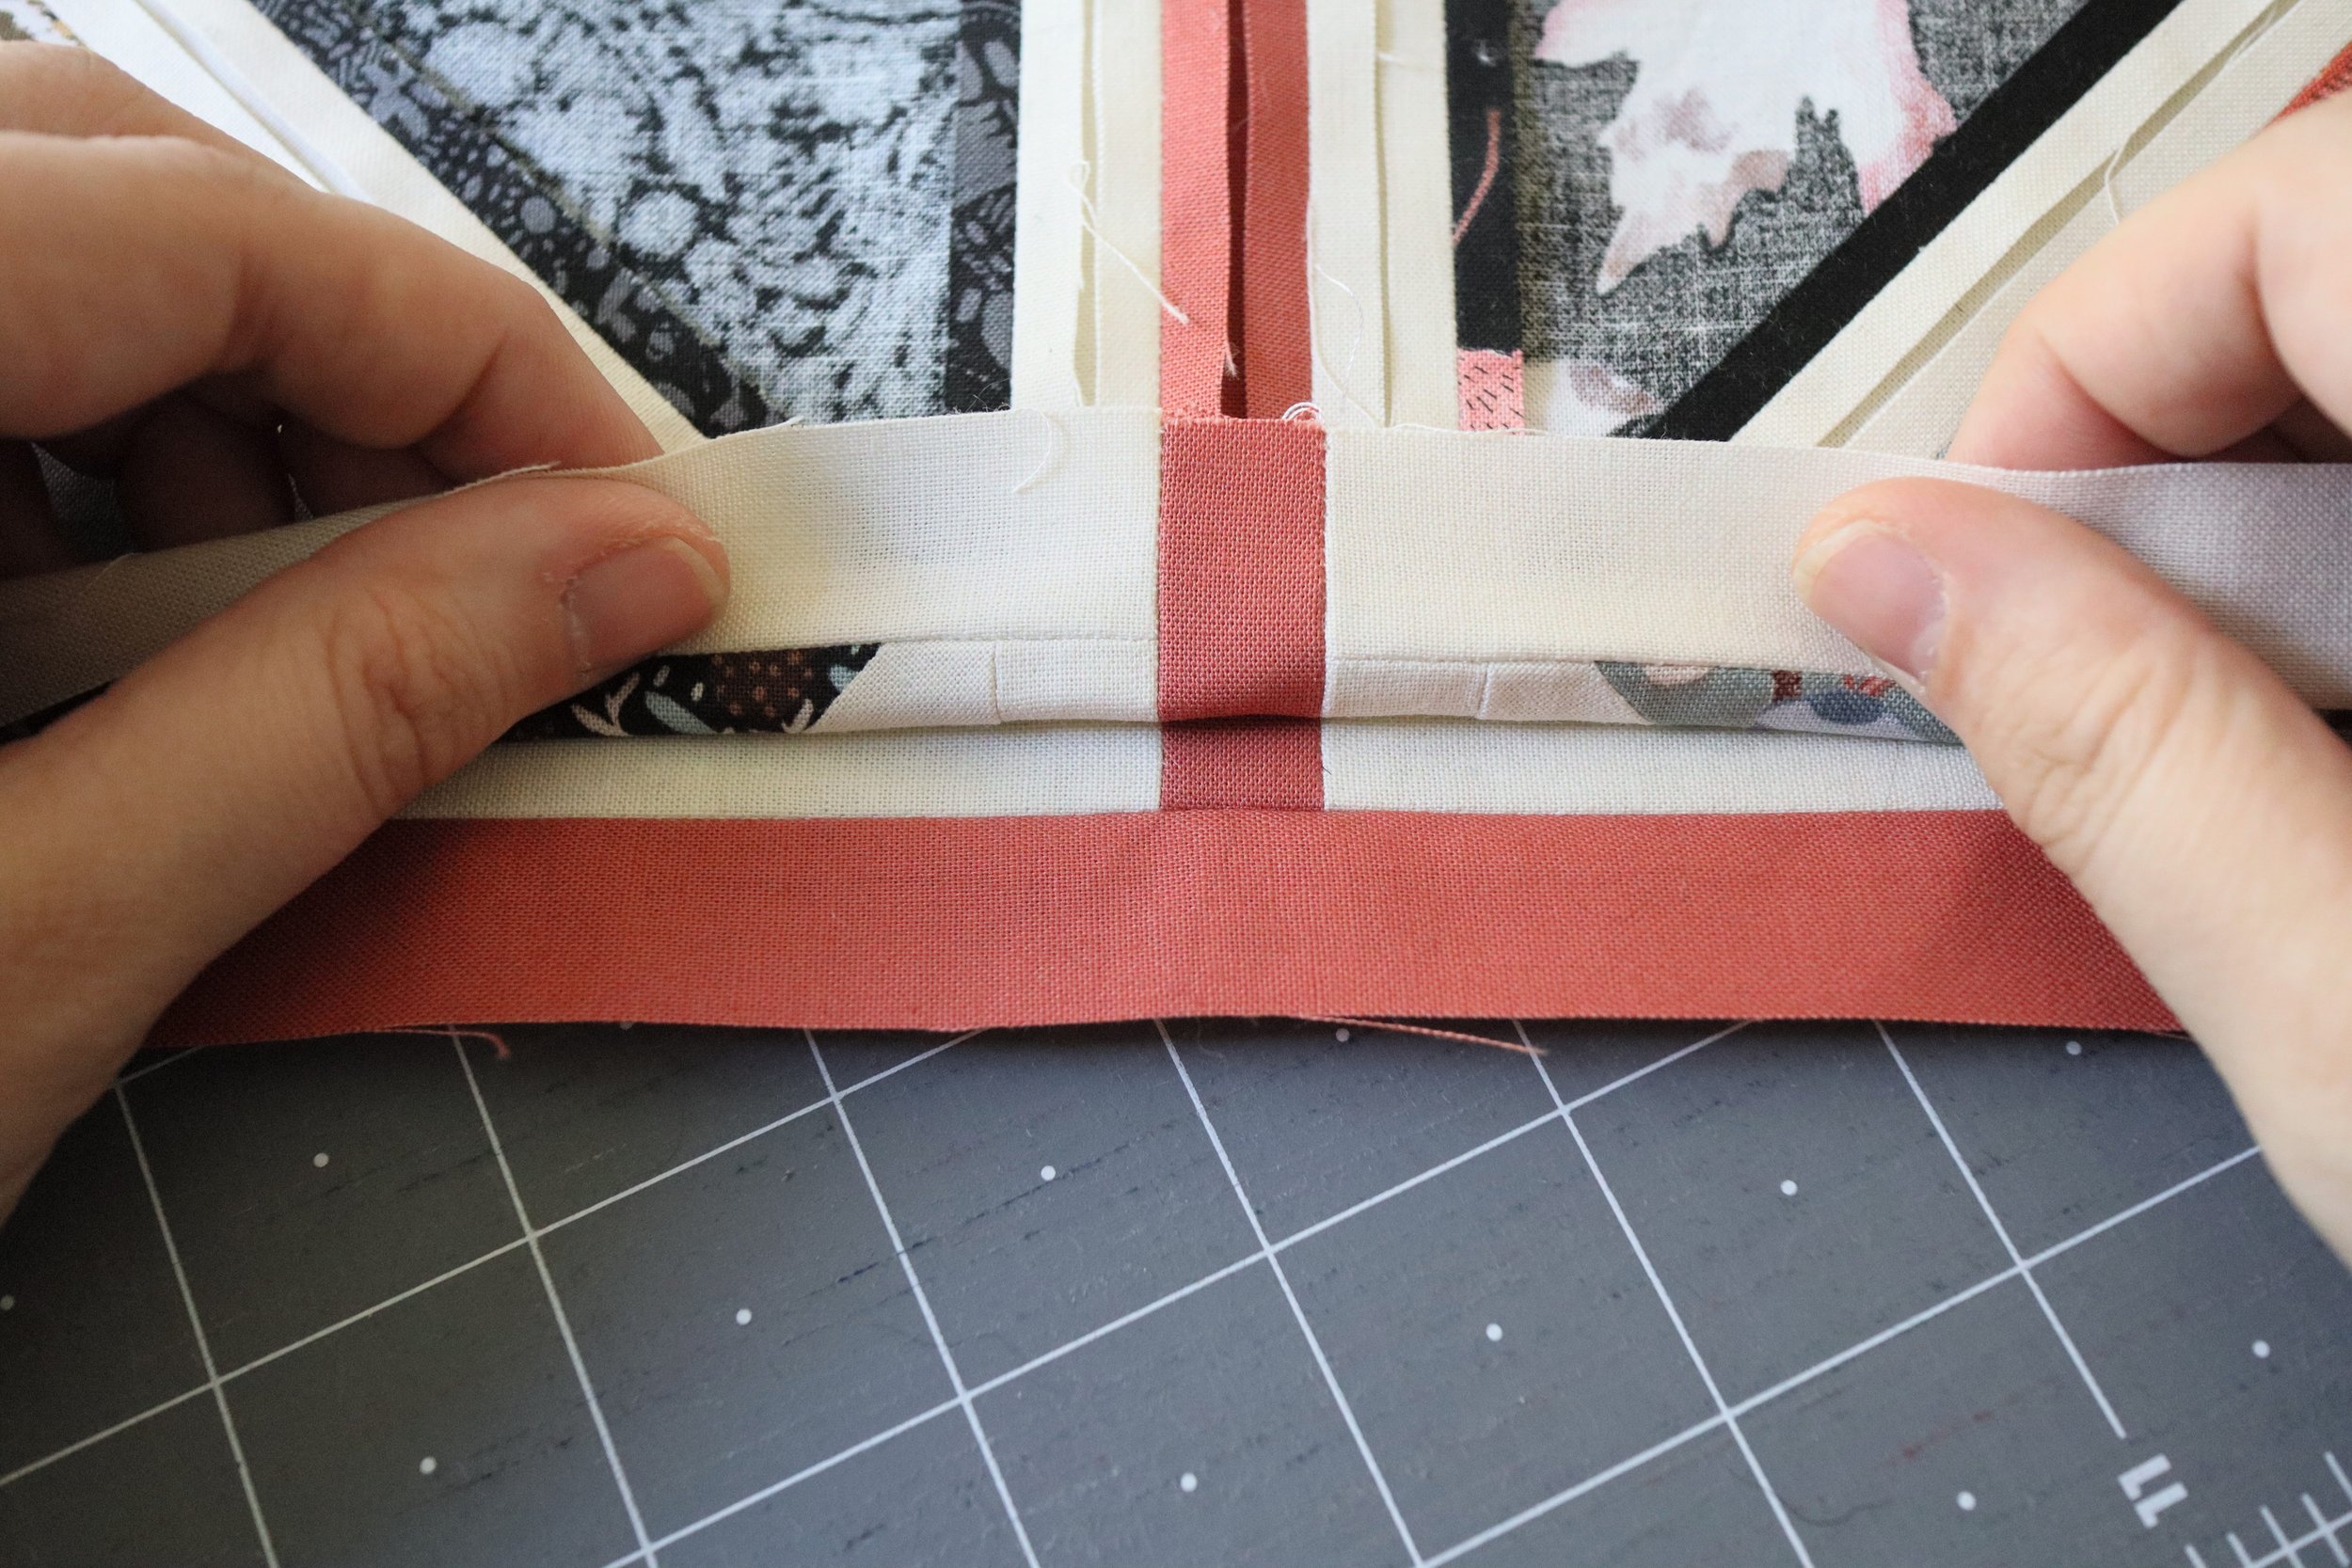
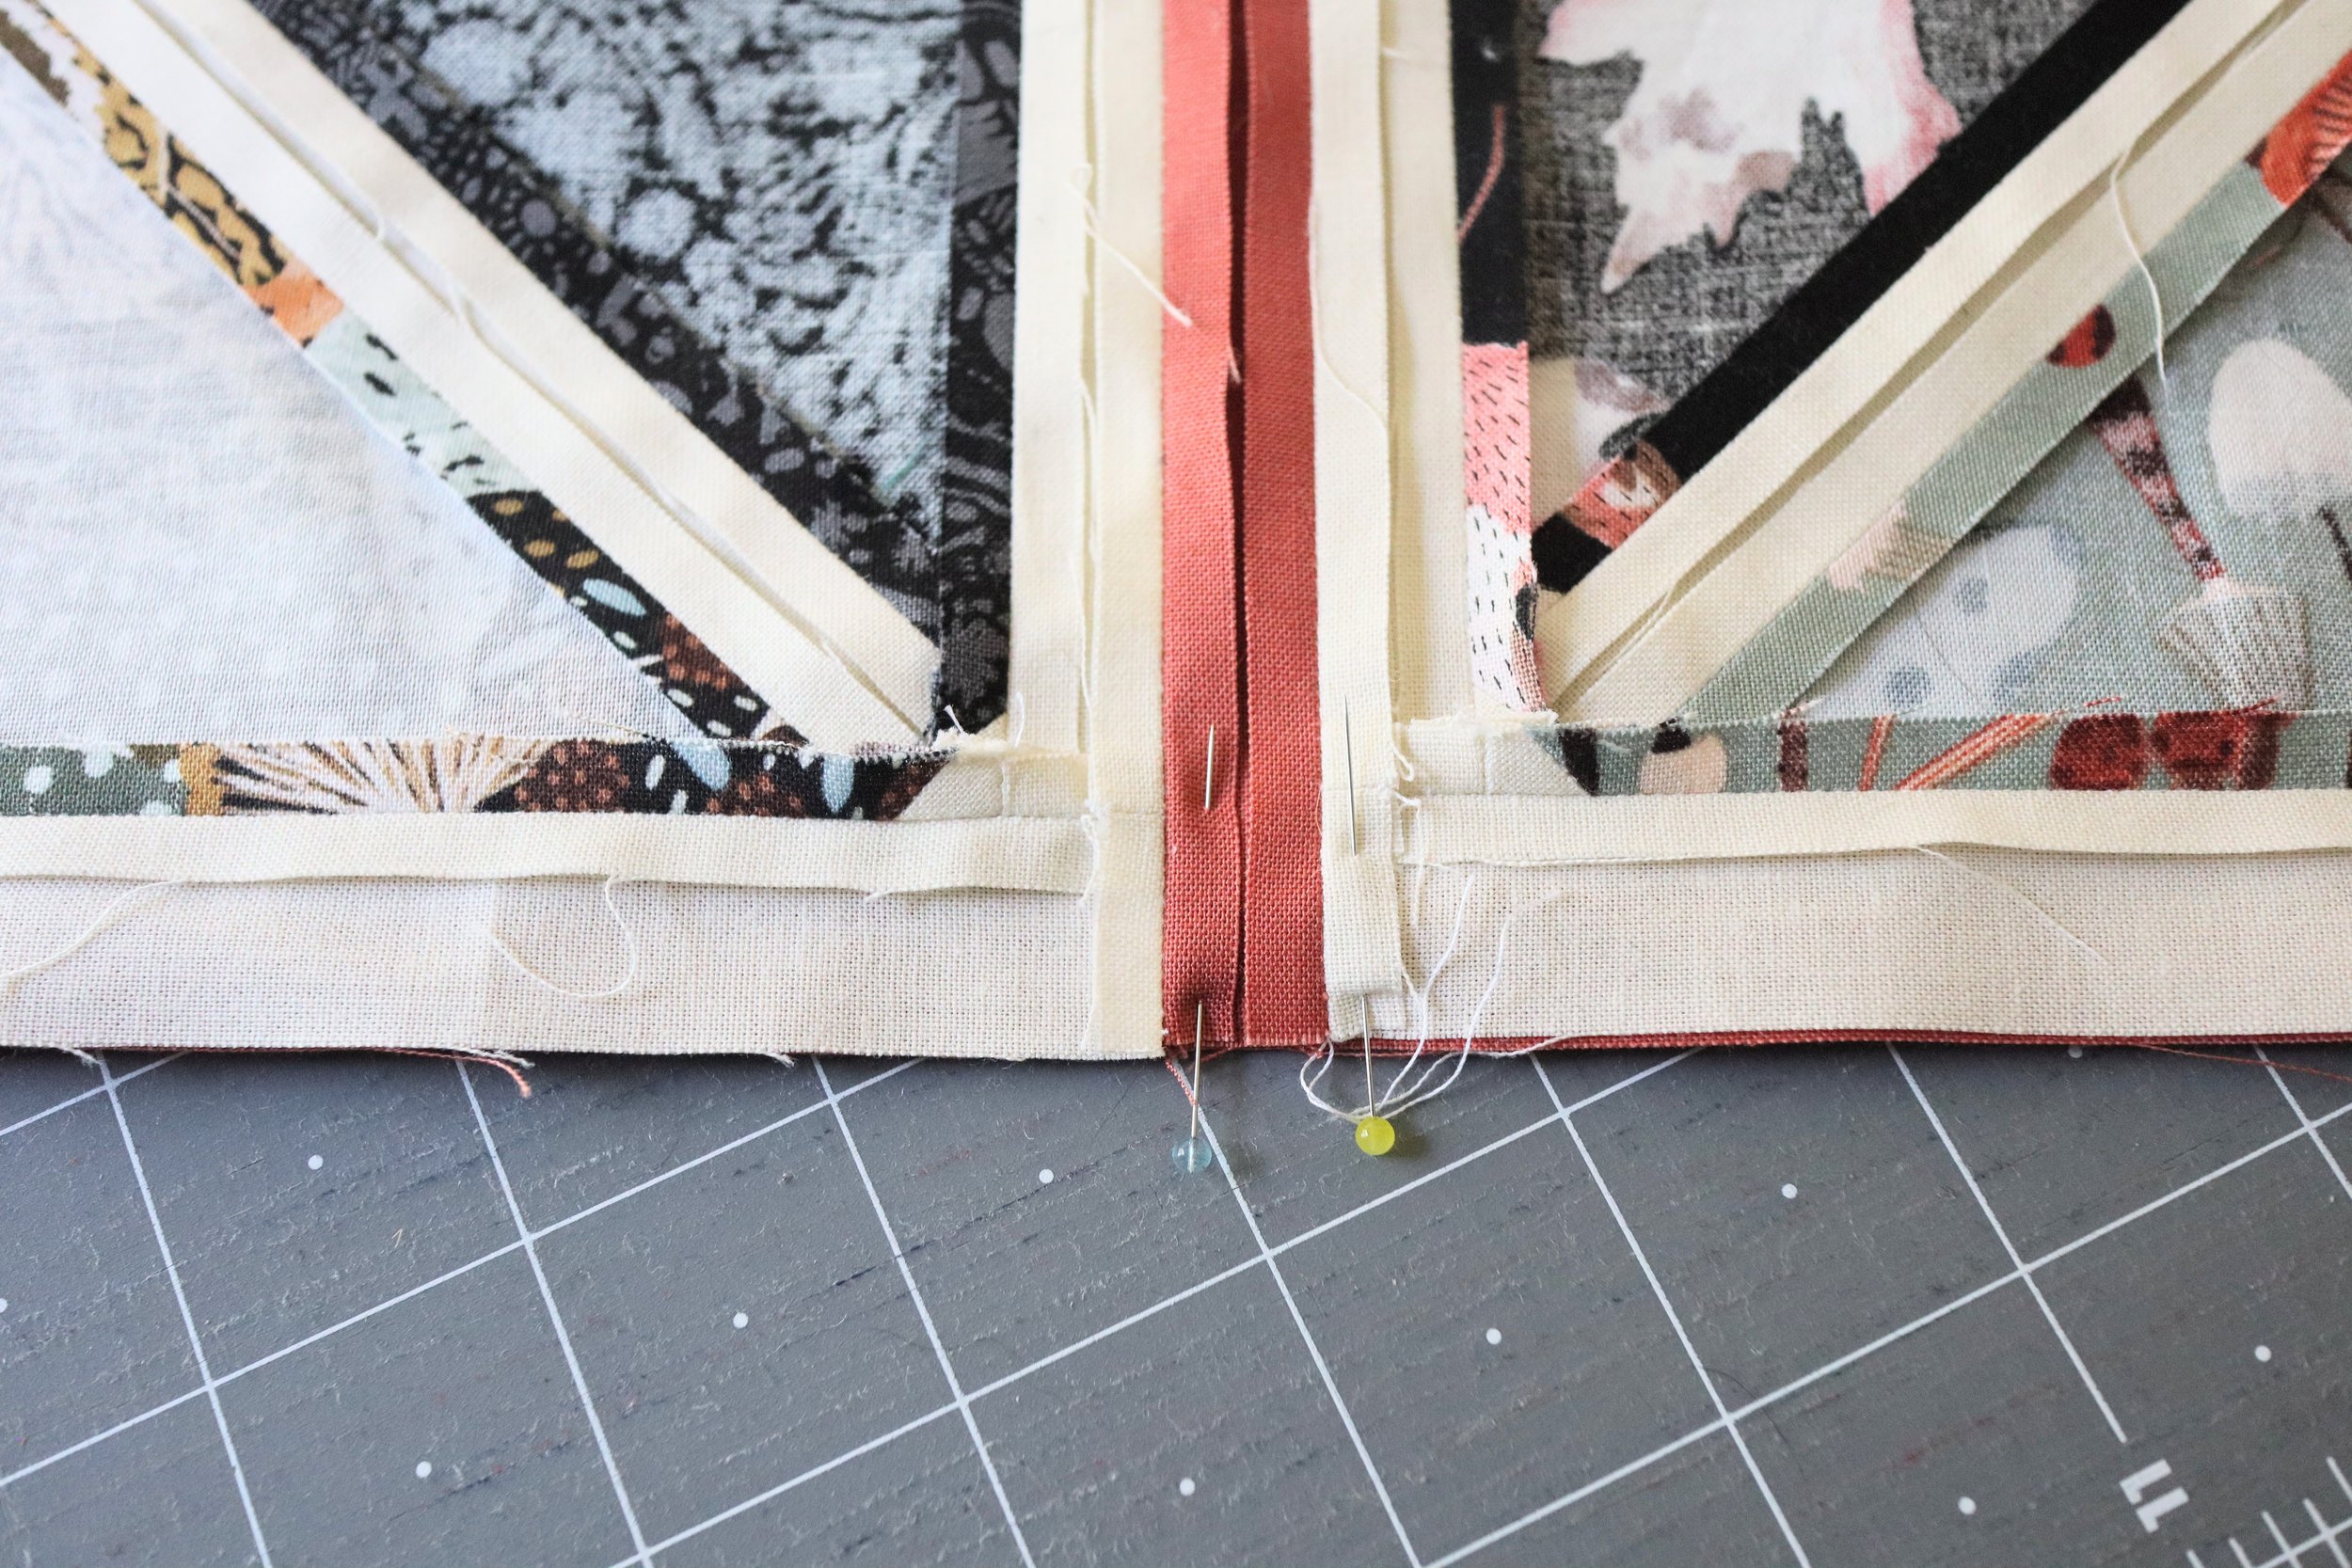
The second is when you’re centering the top half of your block with the bottom half of your block across the center C2 strip unit. Again, there are two ways to do this. The first is folding the top and bottom sections in half and matching up the creases (sound familiar?). The second is to roughly line up the two halves and then fold up the bottom edge of the top half and align the two C1 strip units. Roll the top half back down and pin it into place. Then, align and pin the two ends and add pins in between before stitching together.
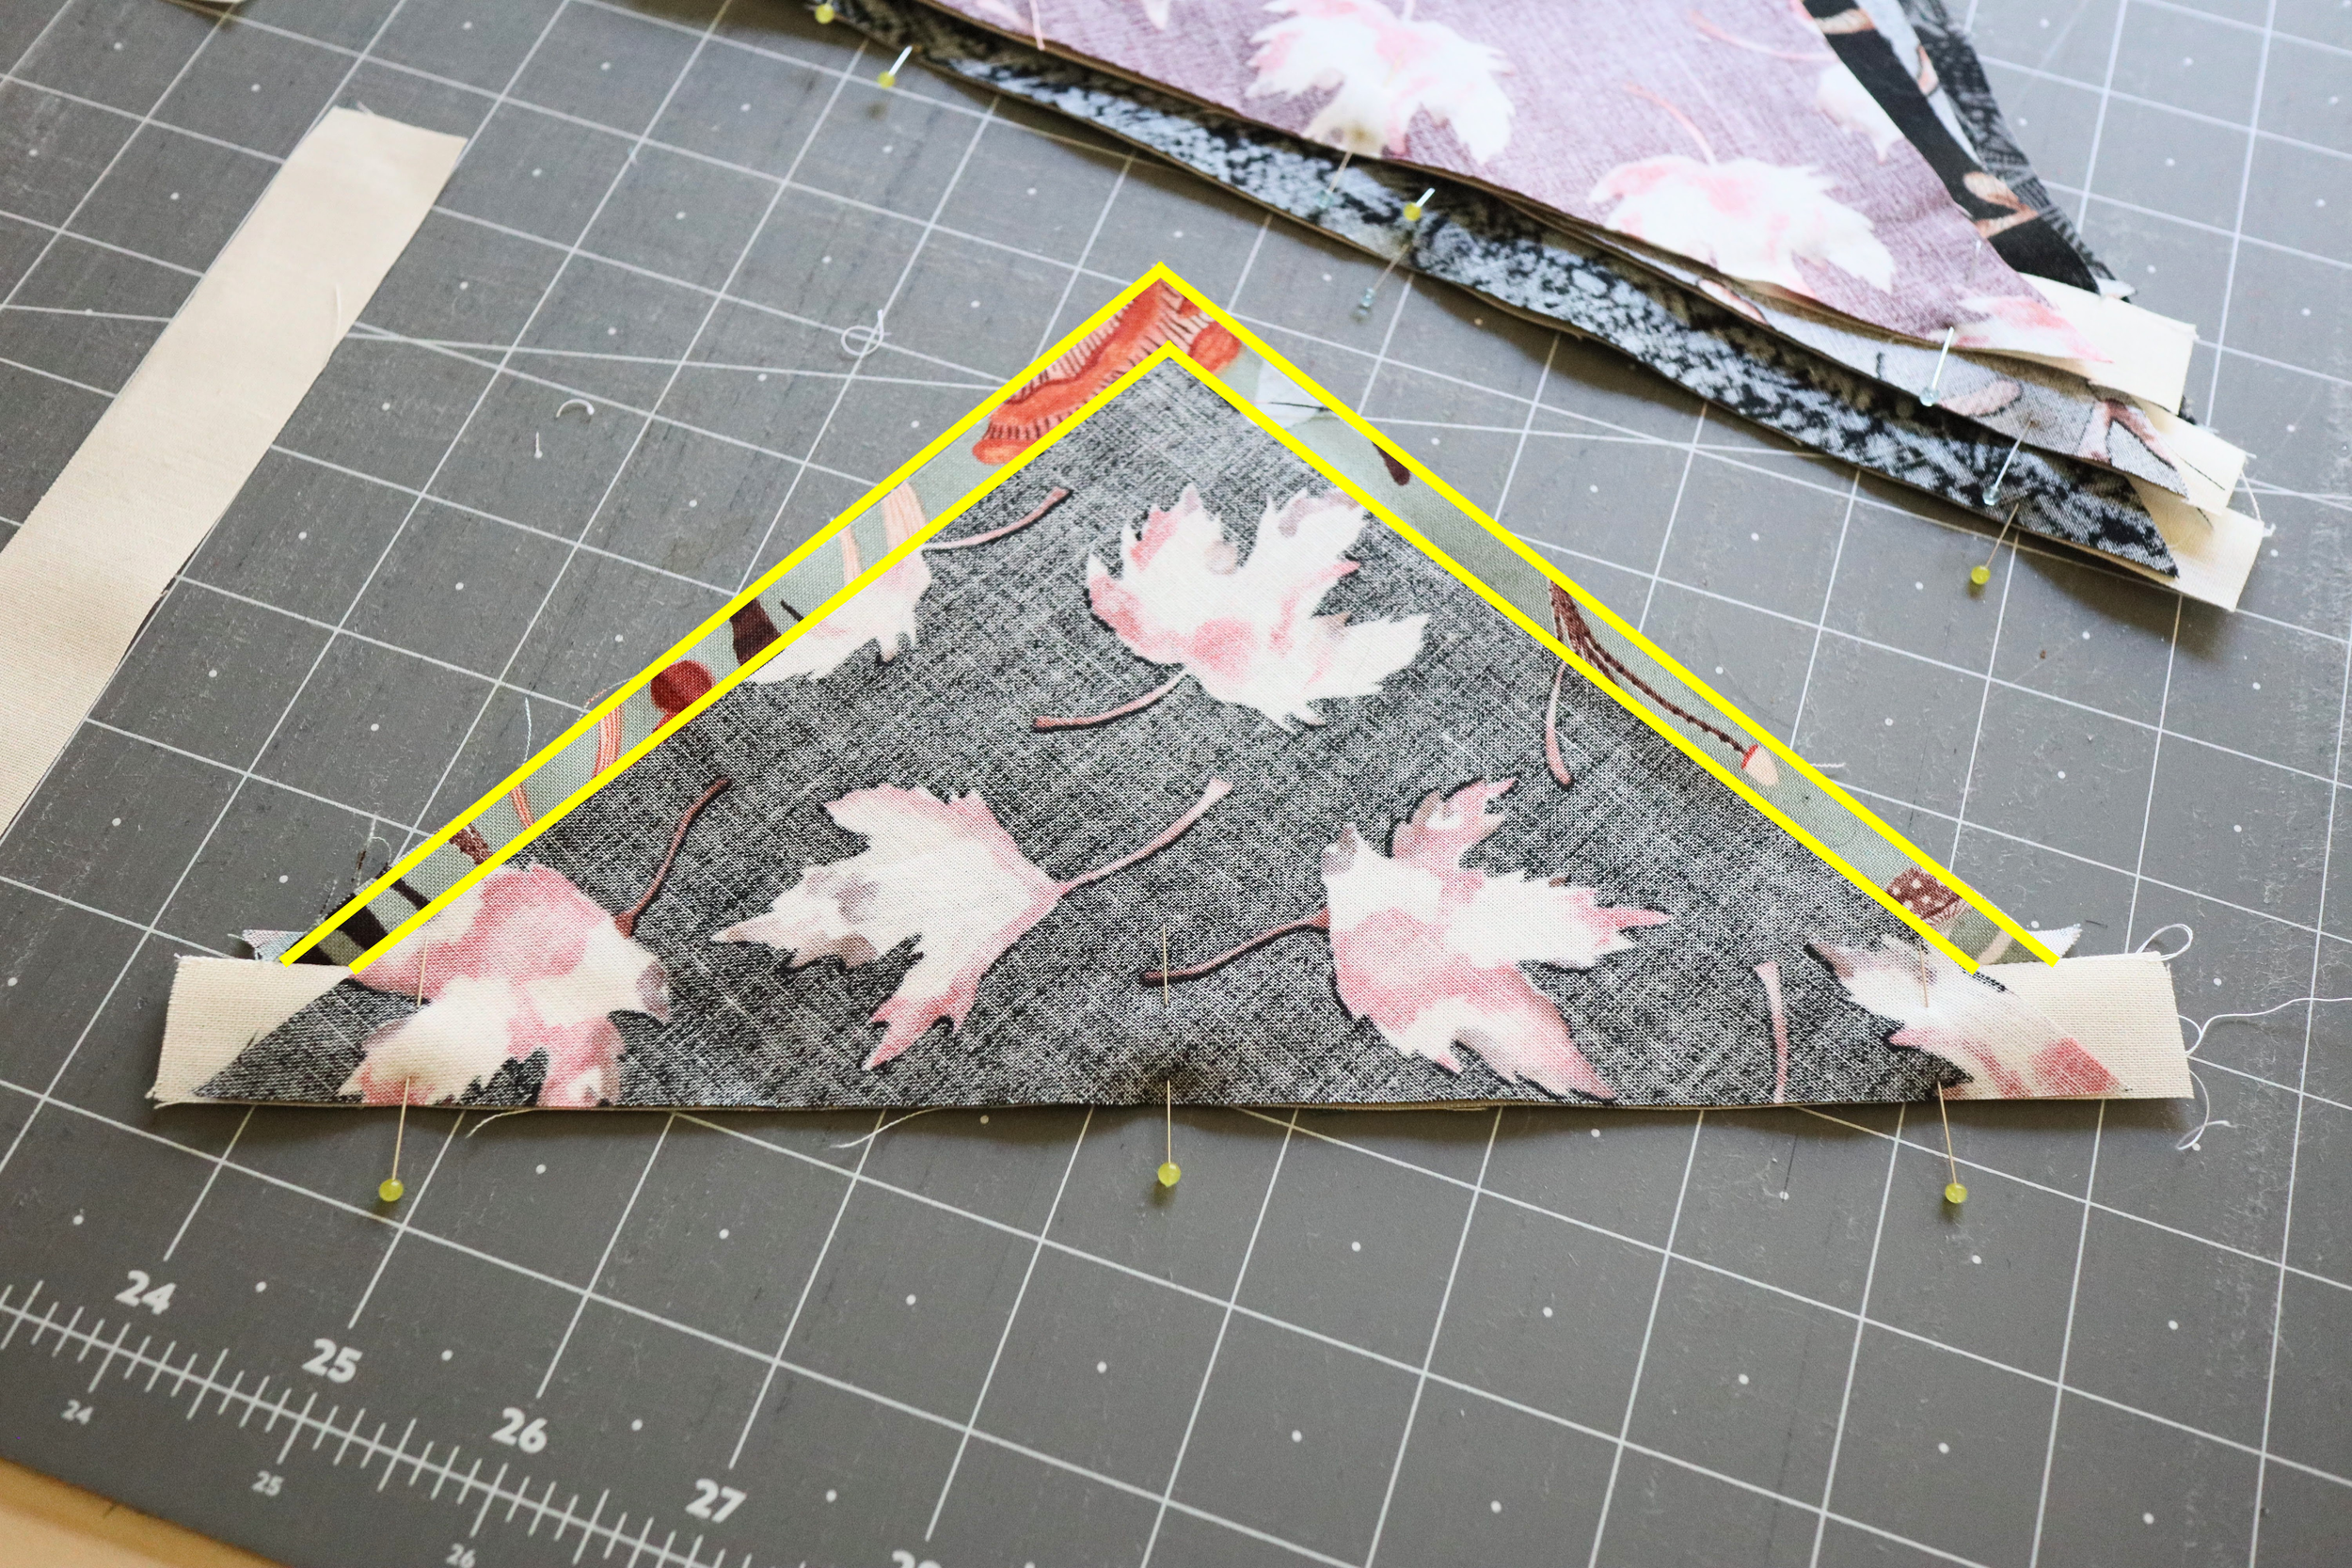
TIP #2: PIN, PIN, PIN
I’ve said it before and I’ll say it again. Pin those pieces together! Pinning will keep all your precisely cut and pieced pieces from stretching and going all wonky. Because there are so many pieces in each of these blocks, precision is key, so every little bit helps!
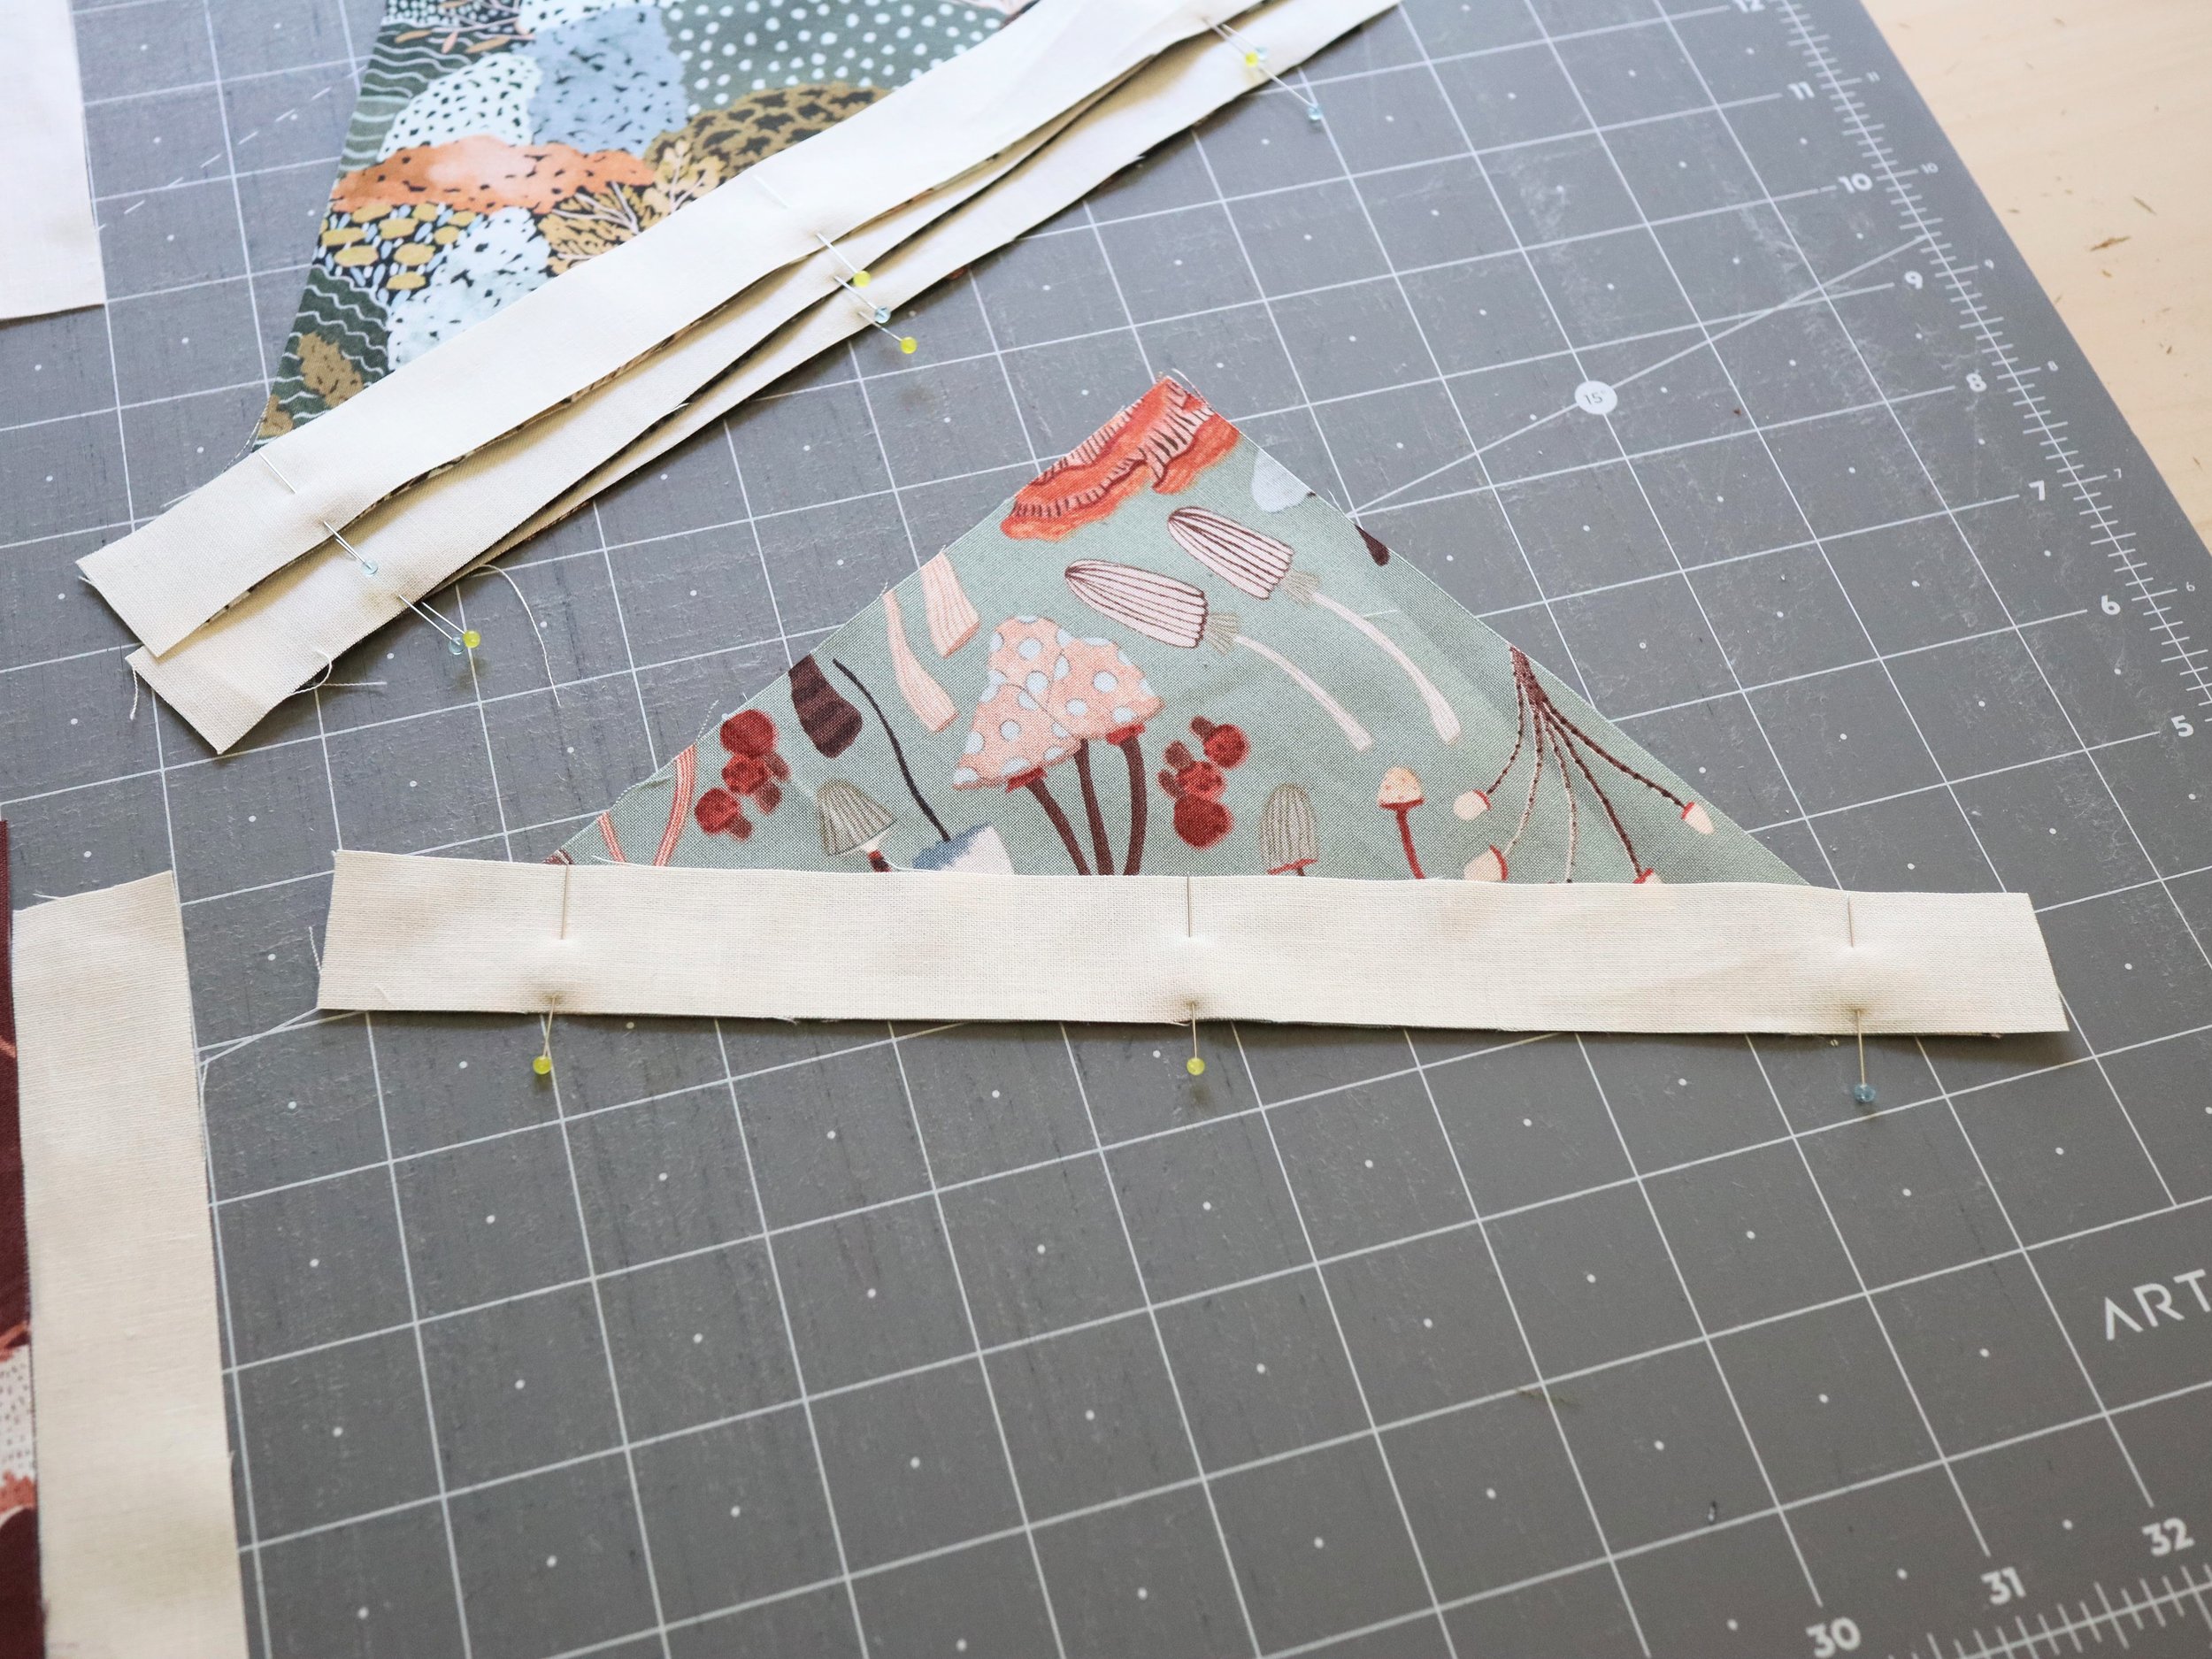
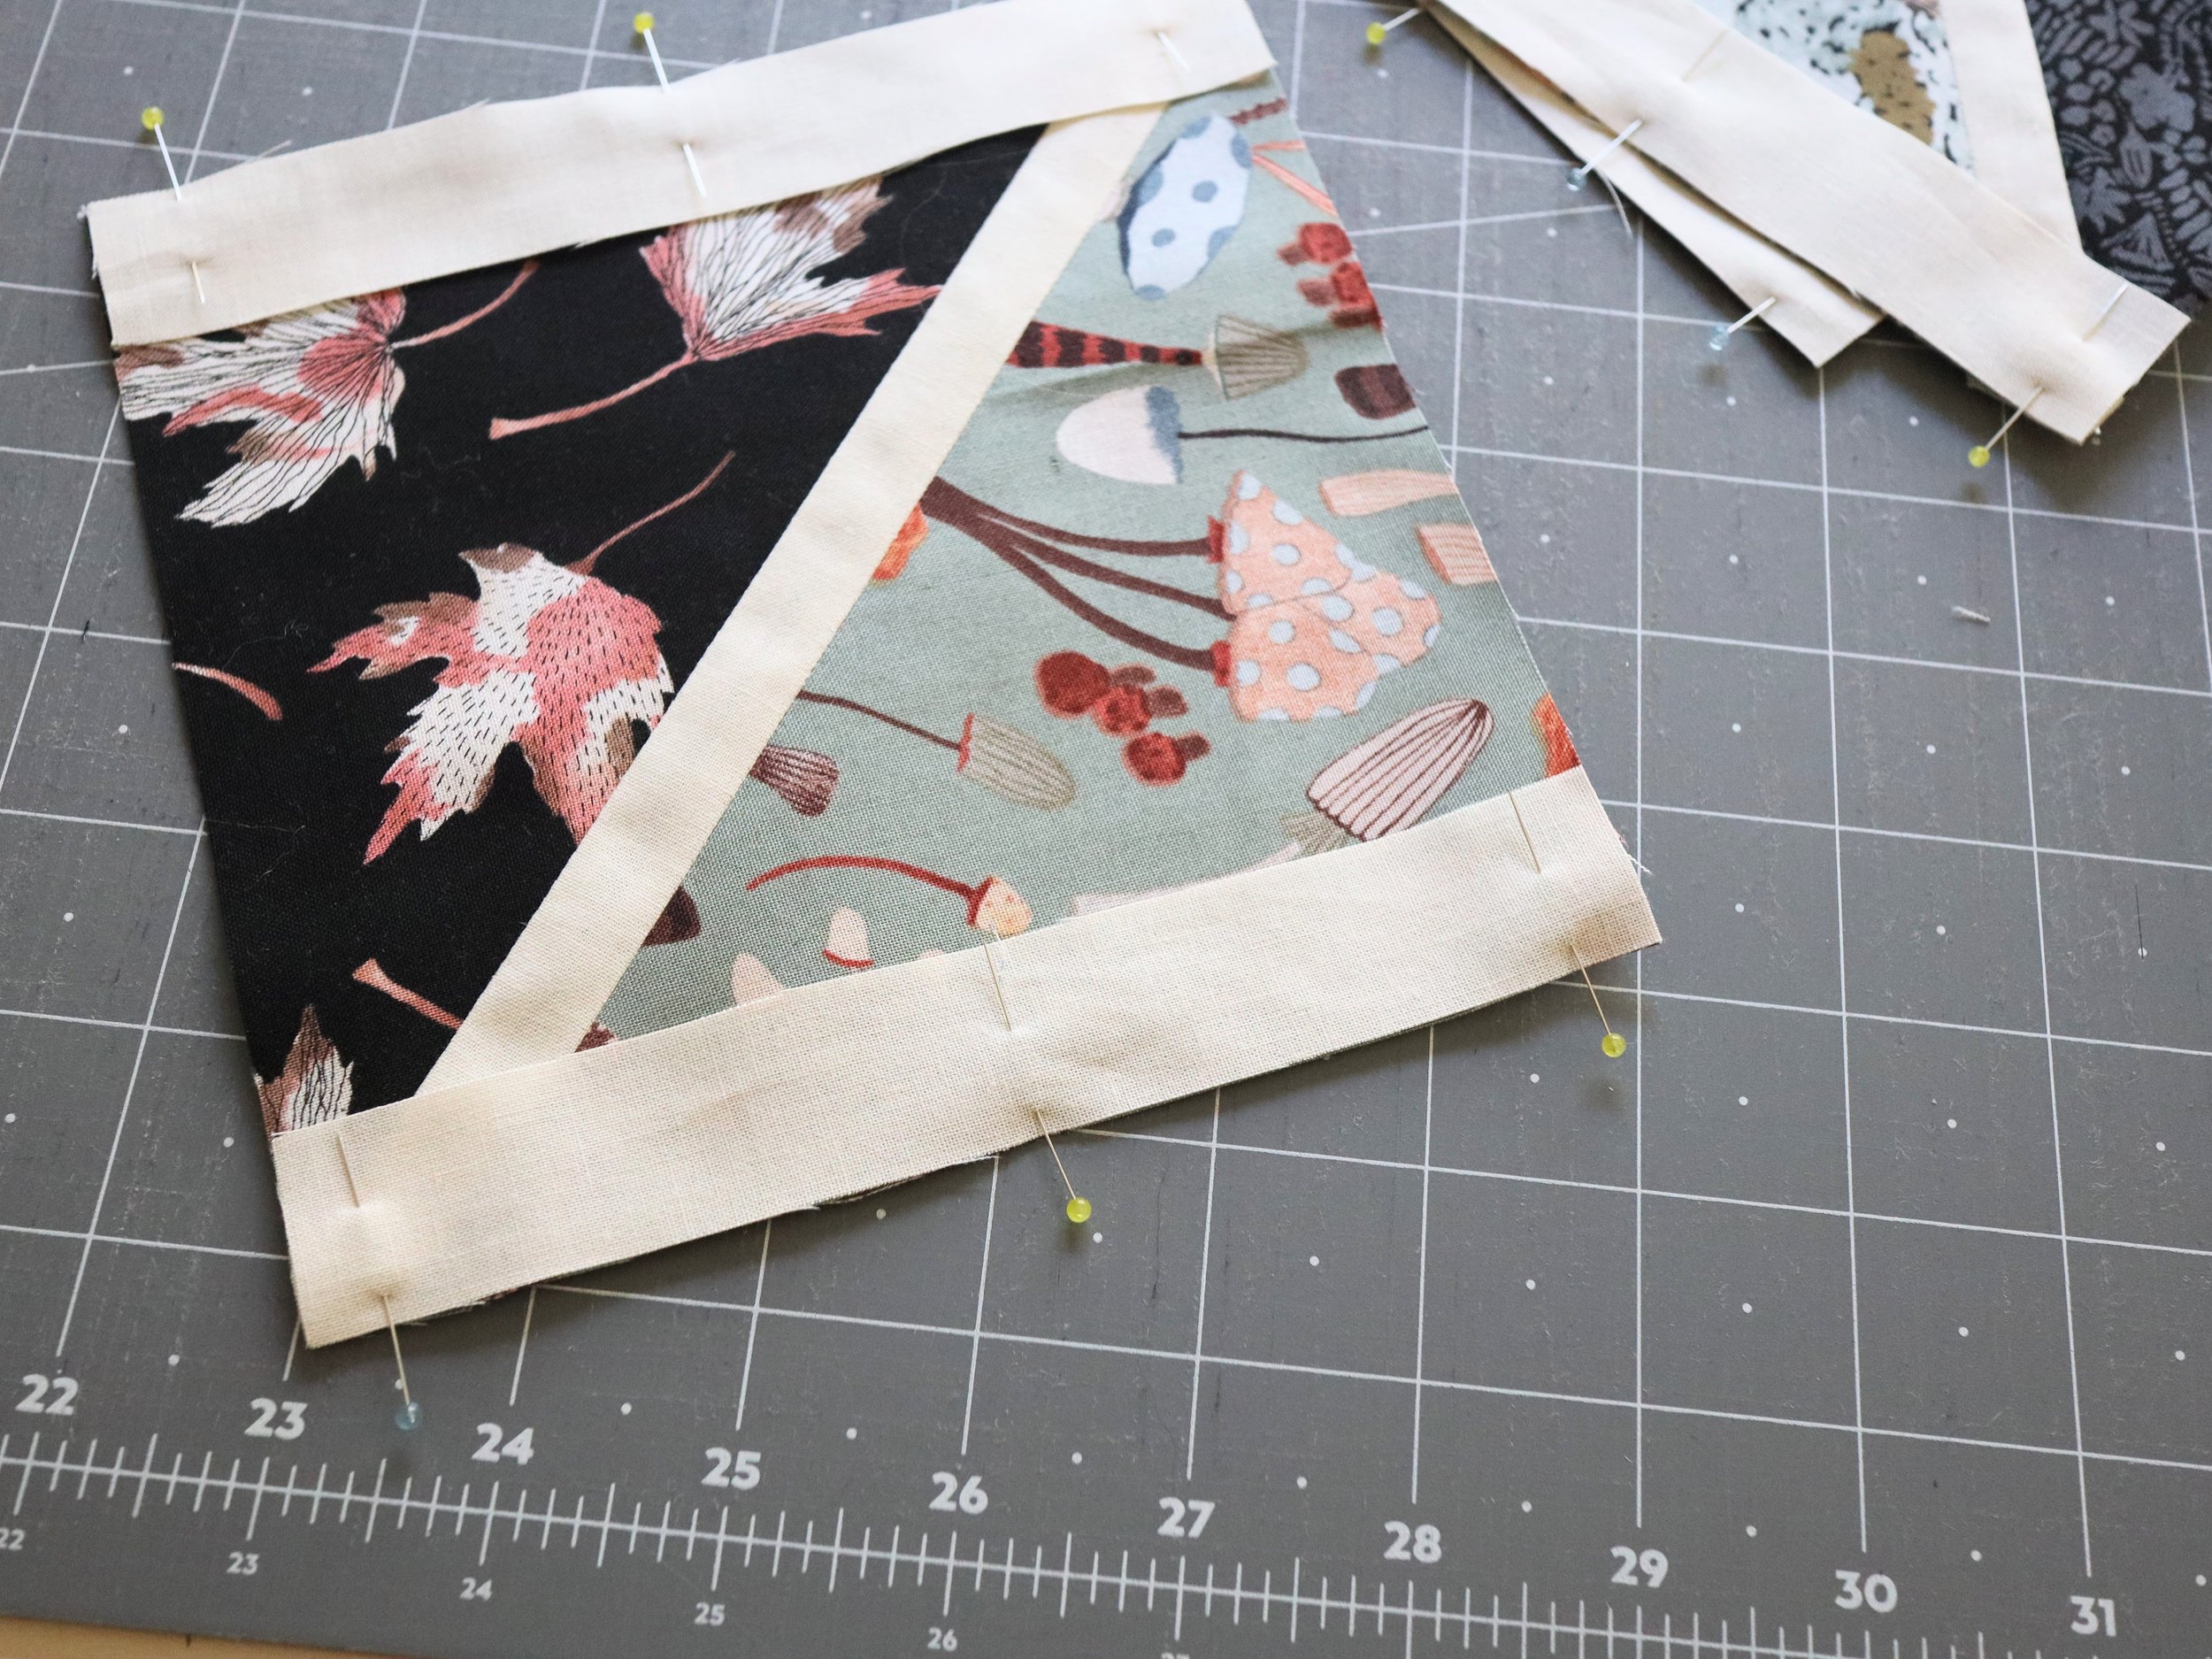
For the first section of sewing, piecing your Color A/B square units, you won’t need to match each end, but you will want to pin the pieces in place to keep it from stretching and warping your diagonal strip.
For the rest of the piecing, you’ll want to match up each end, pin in place, then pin down the center every 3-4 inches to keep your piece secure as you sew.
If you’re not a risk taker like me and don’t want to sew over your pins, just sew right up to the pin and then pull it out before sewing over that section (that’s usually what I try to do anyway unless I’m matching a tricky seam).
TIP #3: SEW WITH A SCANT QUARTER INCH
A scant quarter inch seam allowance is SO important in keeping these blocks the correct size. What is a scant quarter inch and why is it important for quilting? Let me tell you! A scant quarter inch means you’re using a seam allowance that is one thread smaller than a true quarter inch. This accounts for the tiny amount of fabric loss to pressing your seams (the bit that is taken up by the fold of the fabric). Because we’re putting so many pieces together in a single block and row of blocks, this tiny amount adds up and will make the difference between your sashing matching up to your blocks in Week 9 or not.
I’m not going to recreate the wheel here and explain how to make sure you’re sewing with a scant quarter inch seam allowance. Instead, I’m going to point you over to this fantastic blog post written by Brittany from Lo & Behold Stitchery: “The Mystery of the Scant 1/4” Seam - SOLVED!”
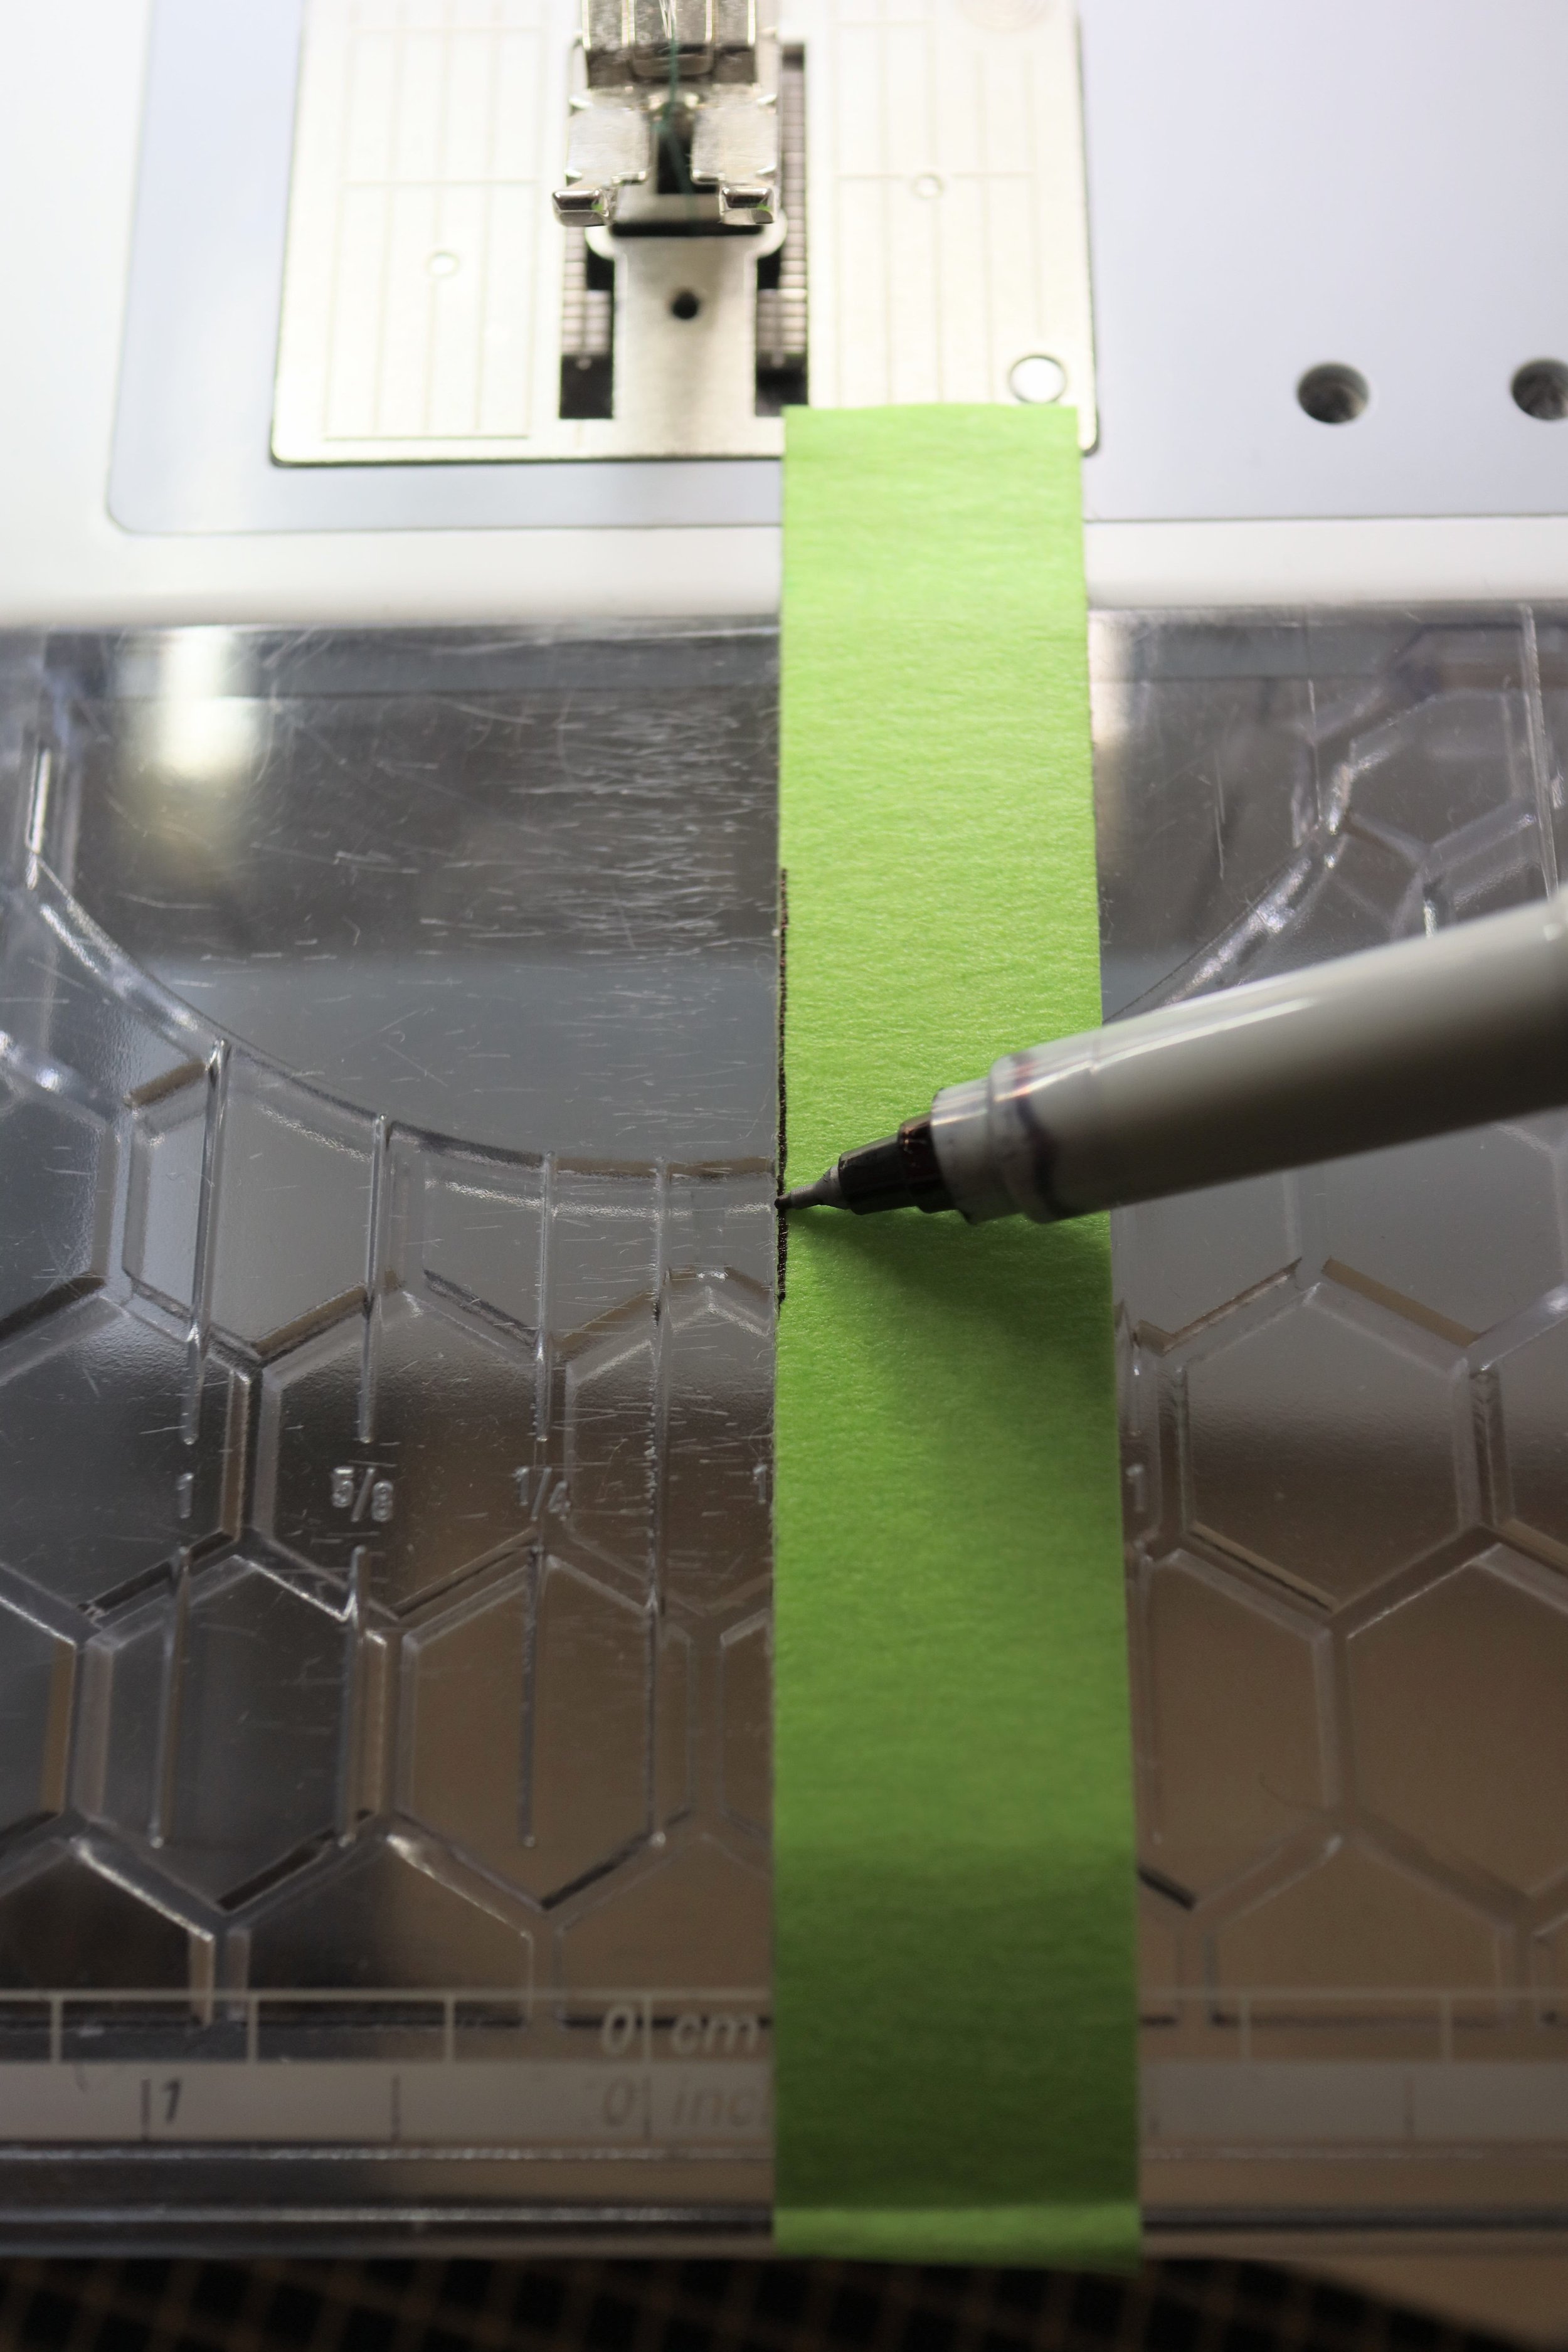
When I really want my seam allowance to be precise, my favorite trick is to place 3-4 pieces of masking tape, one on top of the other, directly on my machine along the seam allowance measurement. The layered tape creates a “wall” that you can easily line up your fabric against. I also like to use permanent marker to mark the very edge of the tape. This gives you a very clear visual cue that your fabric is lined up correctly. If you can’t see the mark, your fabric is shifted too far to the right. If you can see the base of your sewing machine, you fabric is shifted too far to the left. And just like that, you have a perfect scant 1/4 inch seam allowance!

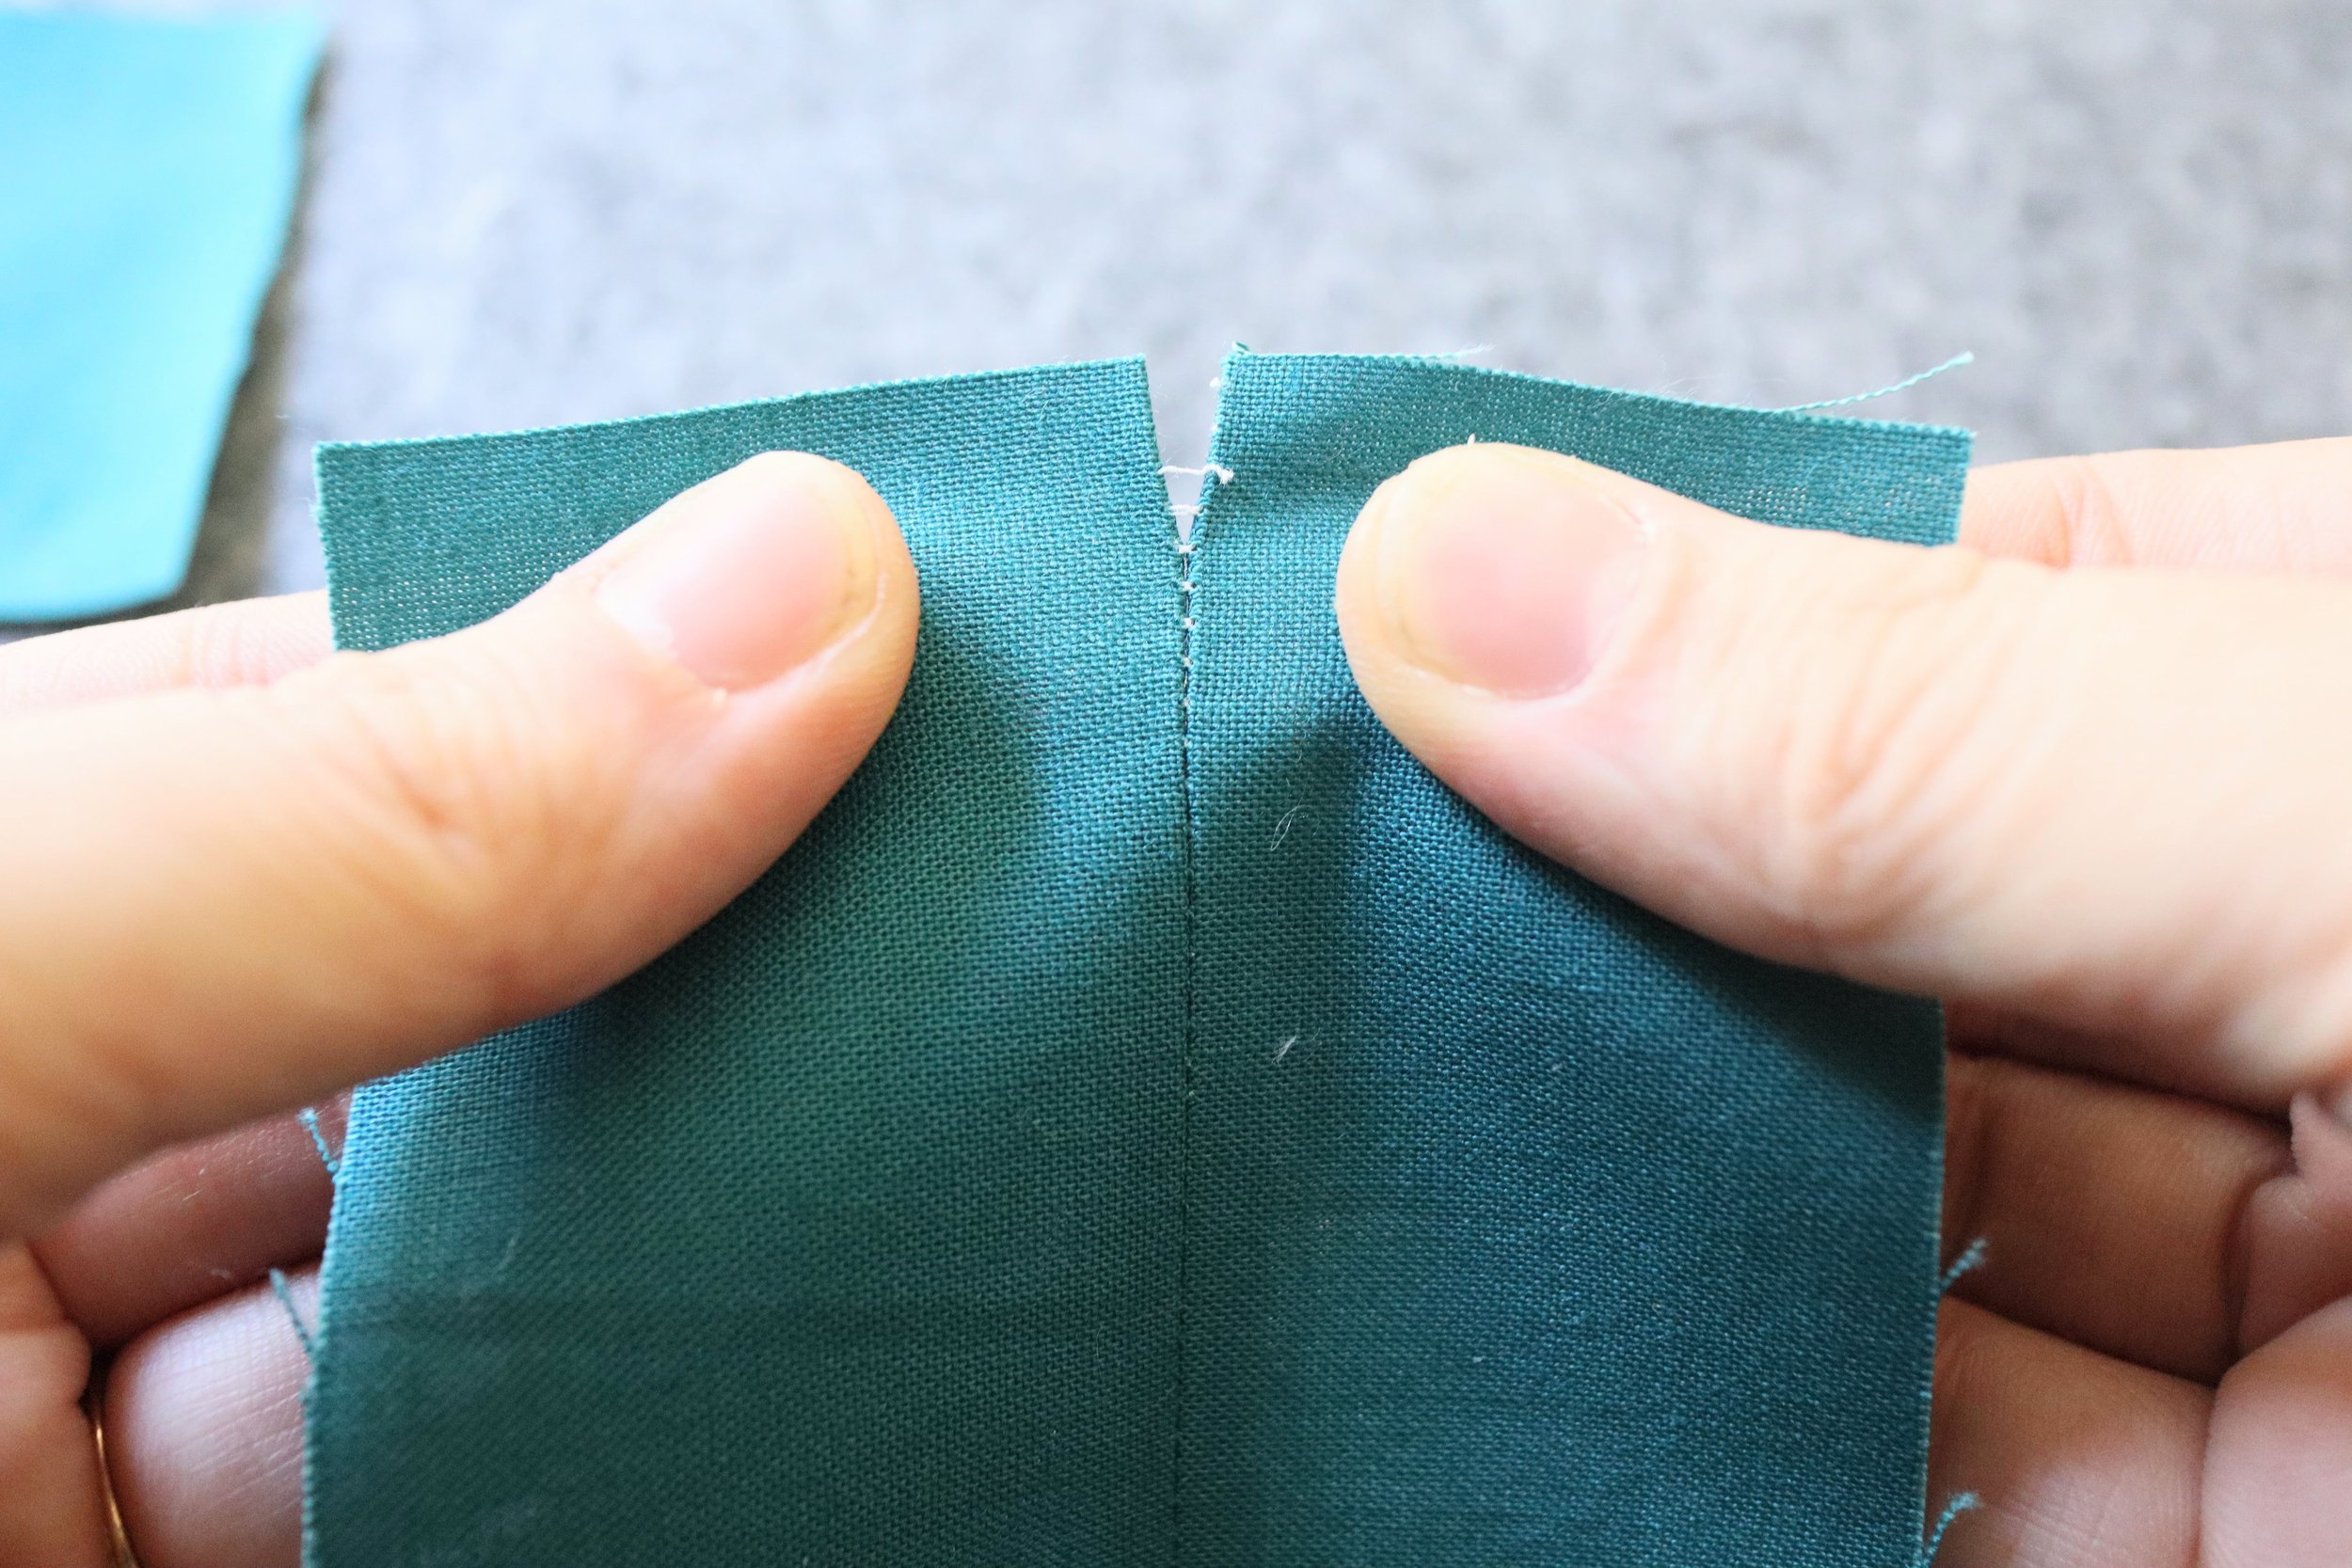
TIP #4: PRESS YOUR SEAMS OPEN
I know pressing is a hot topic for debate in the quilting world, but stick with me here. Just like our scant quarter inch is important to the overall size of the finished block, so is how we press our seams! Pressing to the side takes up slightly more fabric than pressing open, but this amount adds up! Pressing your seams open will create a more accurately sized block for this particular quilt, so try it out! If you haven’t pressed open before, I recommend finger pressing seams open (using your nail to “scratch” down the seam so it opens up). This makes it easier to press with your iron and creates perfectly flat, beautiful seams! See the video below on how to do this. I also recommend sewing with a smaller stitch length, which I’ll talk about below.
TIP #5: SEW WITH A Shorter stitch length
Because we are pressing our seams open, it’s important to use a shorter stitch length to strengthen the seams. When seams are pressed to the side, they are folded together, which makes for a stronger seam. But if you’re pressing open, the seam is prone to pulling and can start coming apart more easily at the ends. This is especially true for smaller pieces, which occur frequently in this pattern! To counter this, sew with a stitch length of 1.5-1.8. This will keep your pieces stitched tightly together and you’ll have little to no problems with threads pulling apart.

QUESTIONS?
If you have comments or questions about anything QAL related, let me know in the blog comments below or check out the Adjourn QAL Facebook Group!
The answers to frequently asked questions will be posted each week, so please let me know if there’s anything you’d like clarity on or anything you need help to troubleshoot!
WEEK 2 SPONSOR & PRIZE

Say hello to Justine from Great Heron Thread Co! I first encountered Justine’s work through the lovely hand quilting kits she put together with Amber from Alderwood Studio back when I first started hand quilting. (And let me tell you, those hand quilting kits have changed the way I organize my projects! Come back during the bonus weeks to learn more!) It’s been so much fun getting to know her more through pattern testing, creating quilt kits together, and just generally admiring all of her bright, beautiful, colorful, and happy sewing!
Great Heron Thread Co. is sponsoring Week 2 and she is giving away this lovely fat quarter bundle of Art Gallery Fabrics plus two adorable stickers!

HOW TO WIN:
Post a picture of your QAL progress to Instagram using the hashtag #AdjournQAL.
You must have a public Instagram profile to participate.You do not need to be caught up to the current QAL week to enter, all progress is celebrated!
Your photo must be posted before 12am on Monday, February 28th. The winner will be picked randomly from all qualifying posts and announced on the 28th. Good luck!
Here are my finished blocks 1 & 2 from both of my colorways. I can’t wait to see yours!

