
My Favorite Straight Line Quilting Methods
This post is a part of the Adjourn QAL Bonus Weeks!
We are talking all things machine quilting today! When it comes to quilting, the majority of quilts that I make are either machine quilted on my Bernina Artista 640 (a domestic sewing machine), are hand quilted, or are some mixture of both. We will go into the basics of hand quilting next week, but today I will walk you through some machine quilting basics along with my favorite methods for marking and quilting, specifically as it relates to straight line quilting. Let’s get started!
There are of course, a large variety of tools and notions that you can use when machine quilting, but I am a huge fan of the basics:
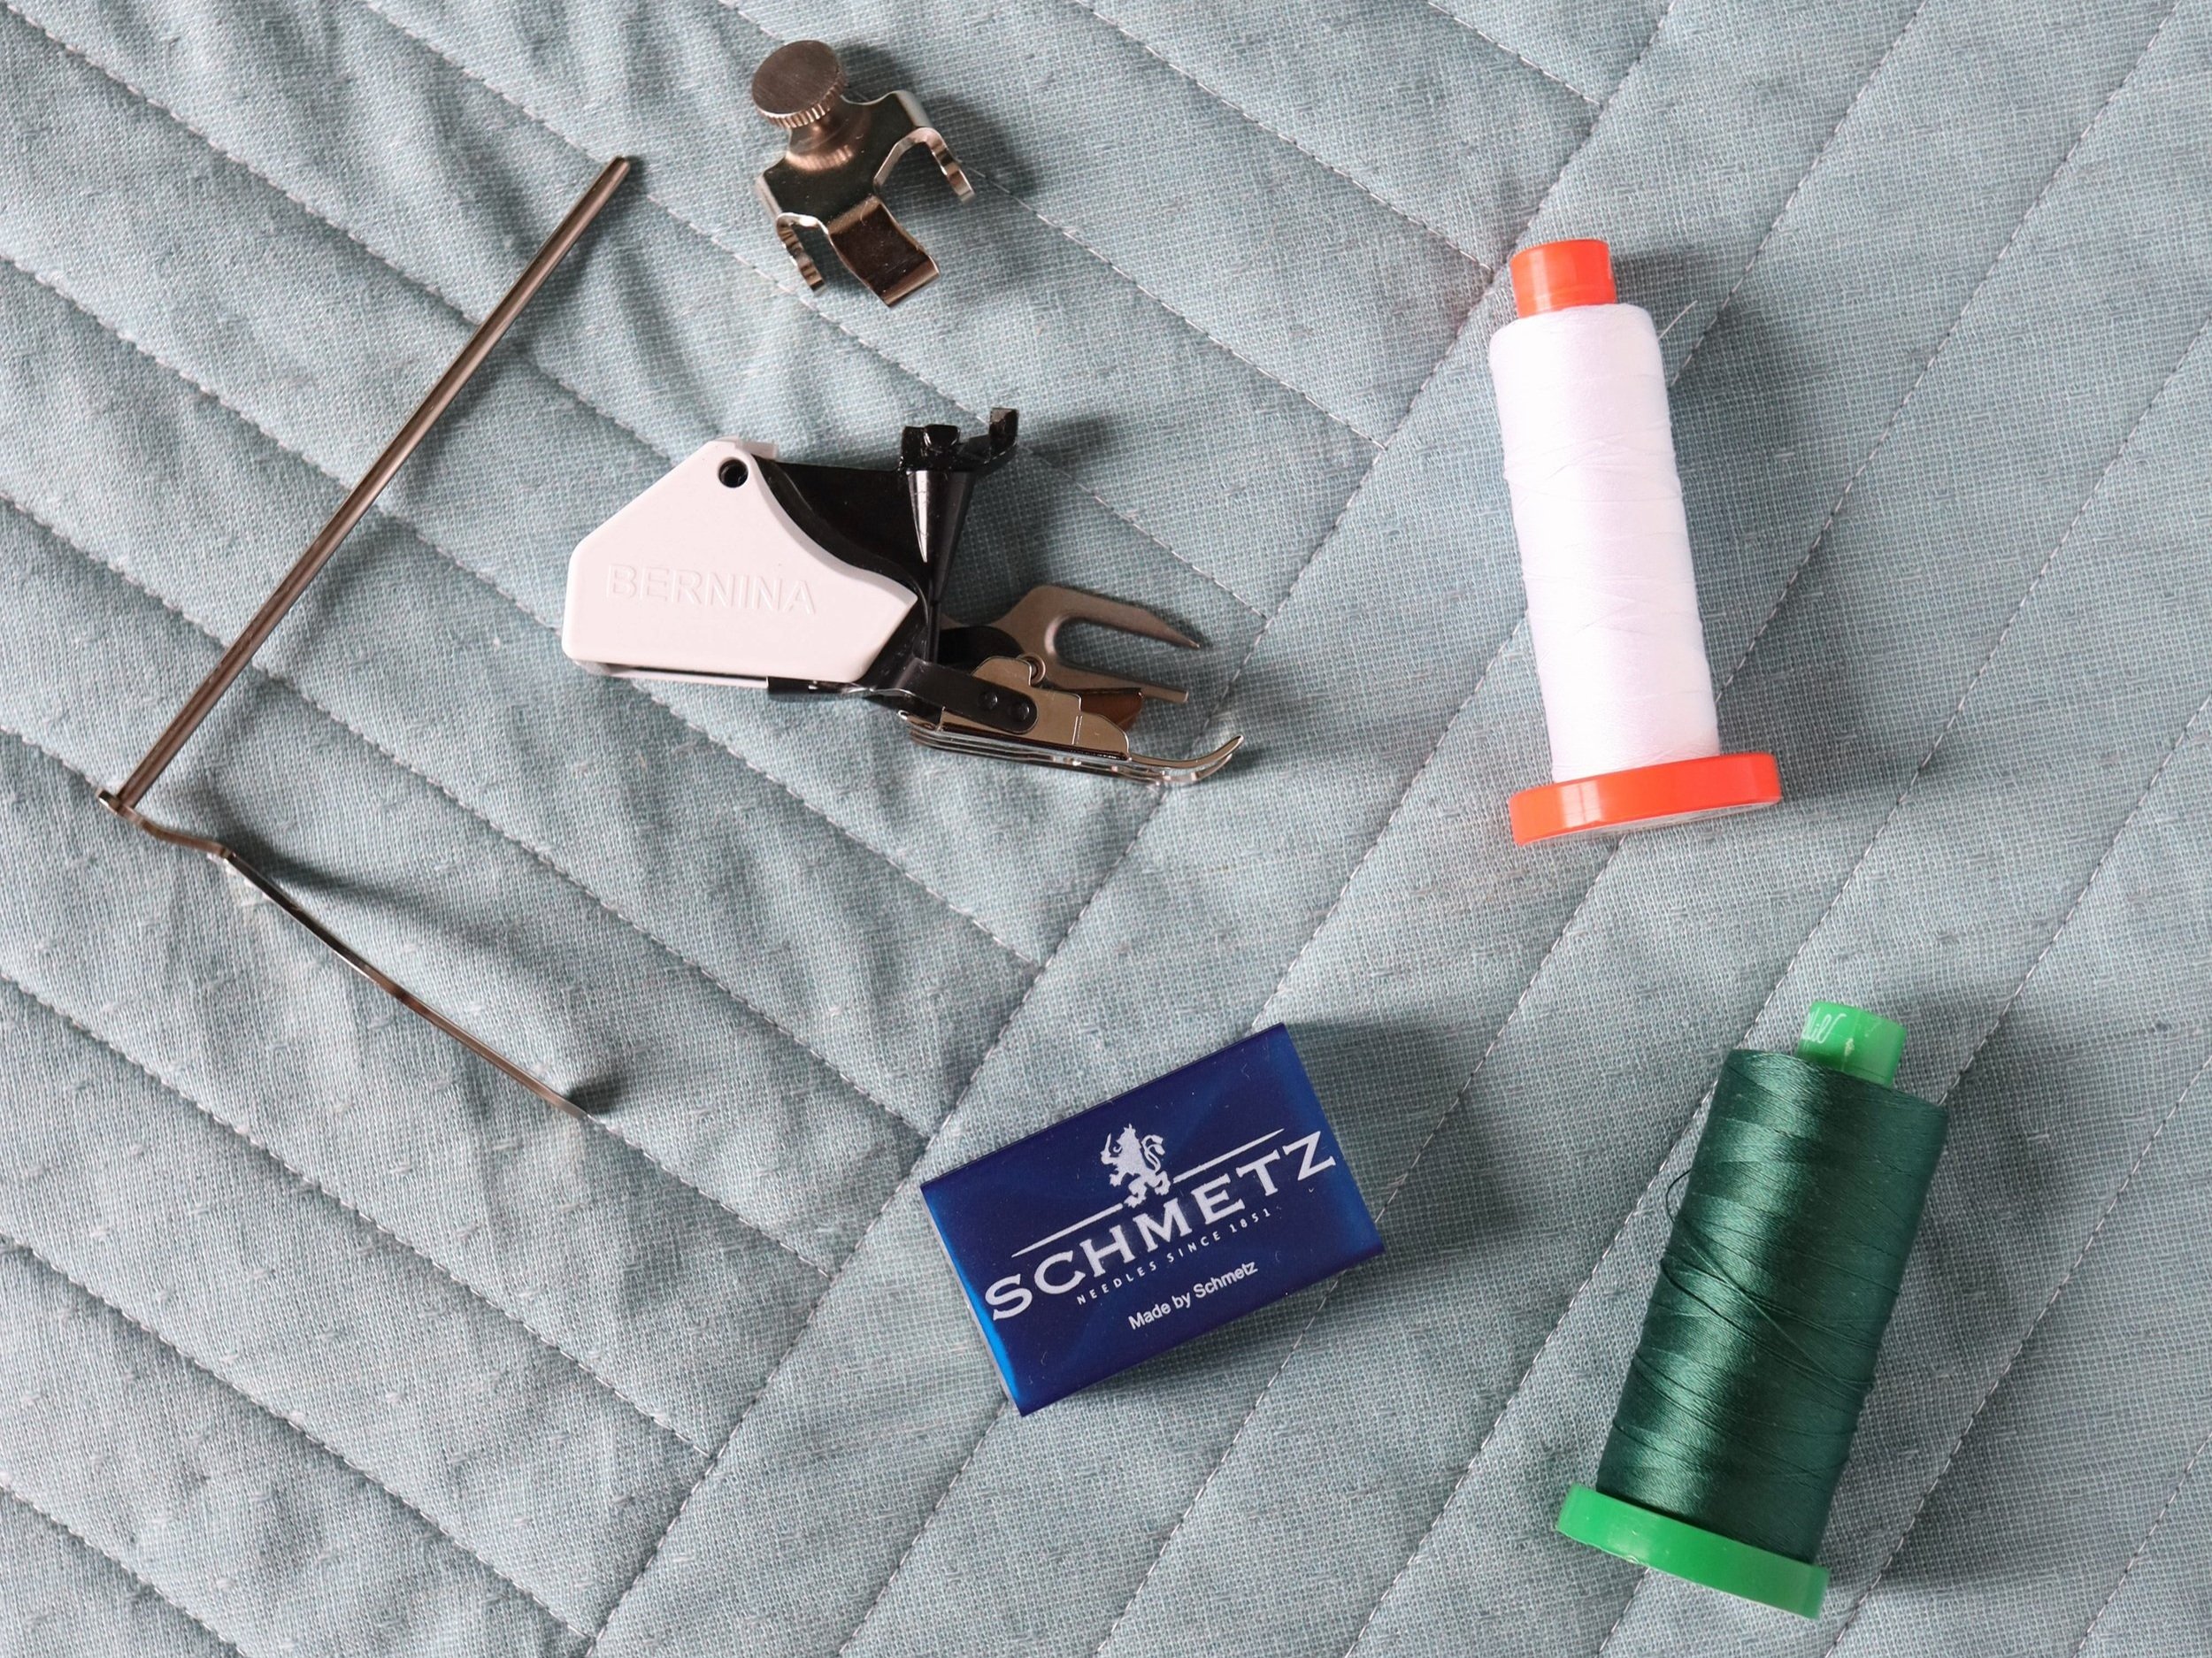
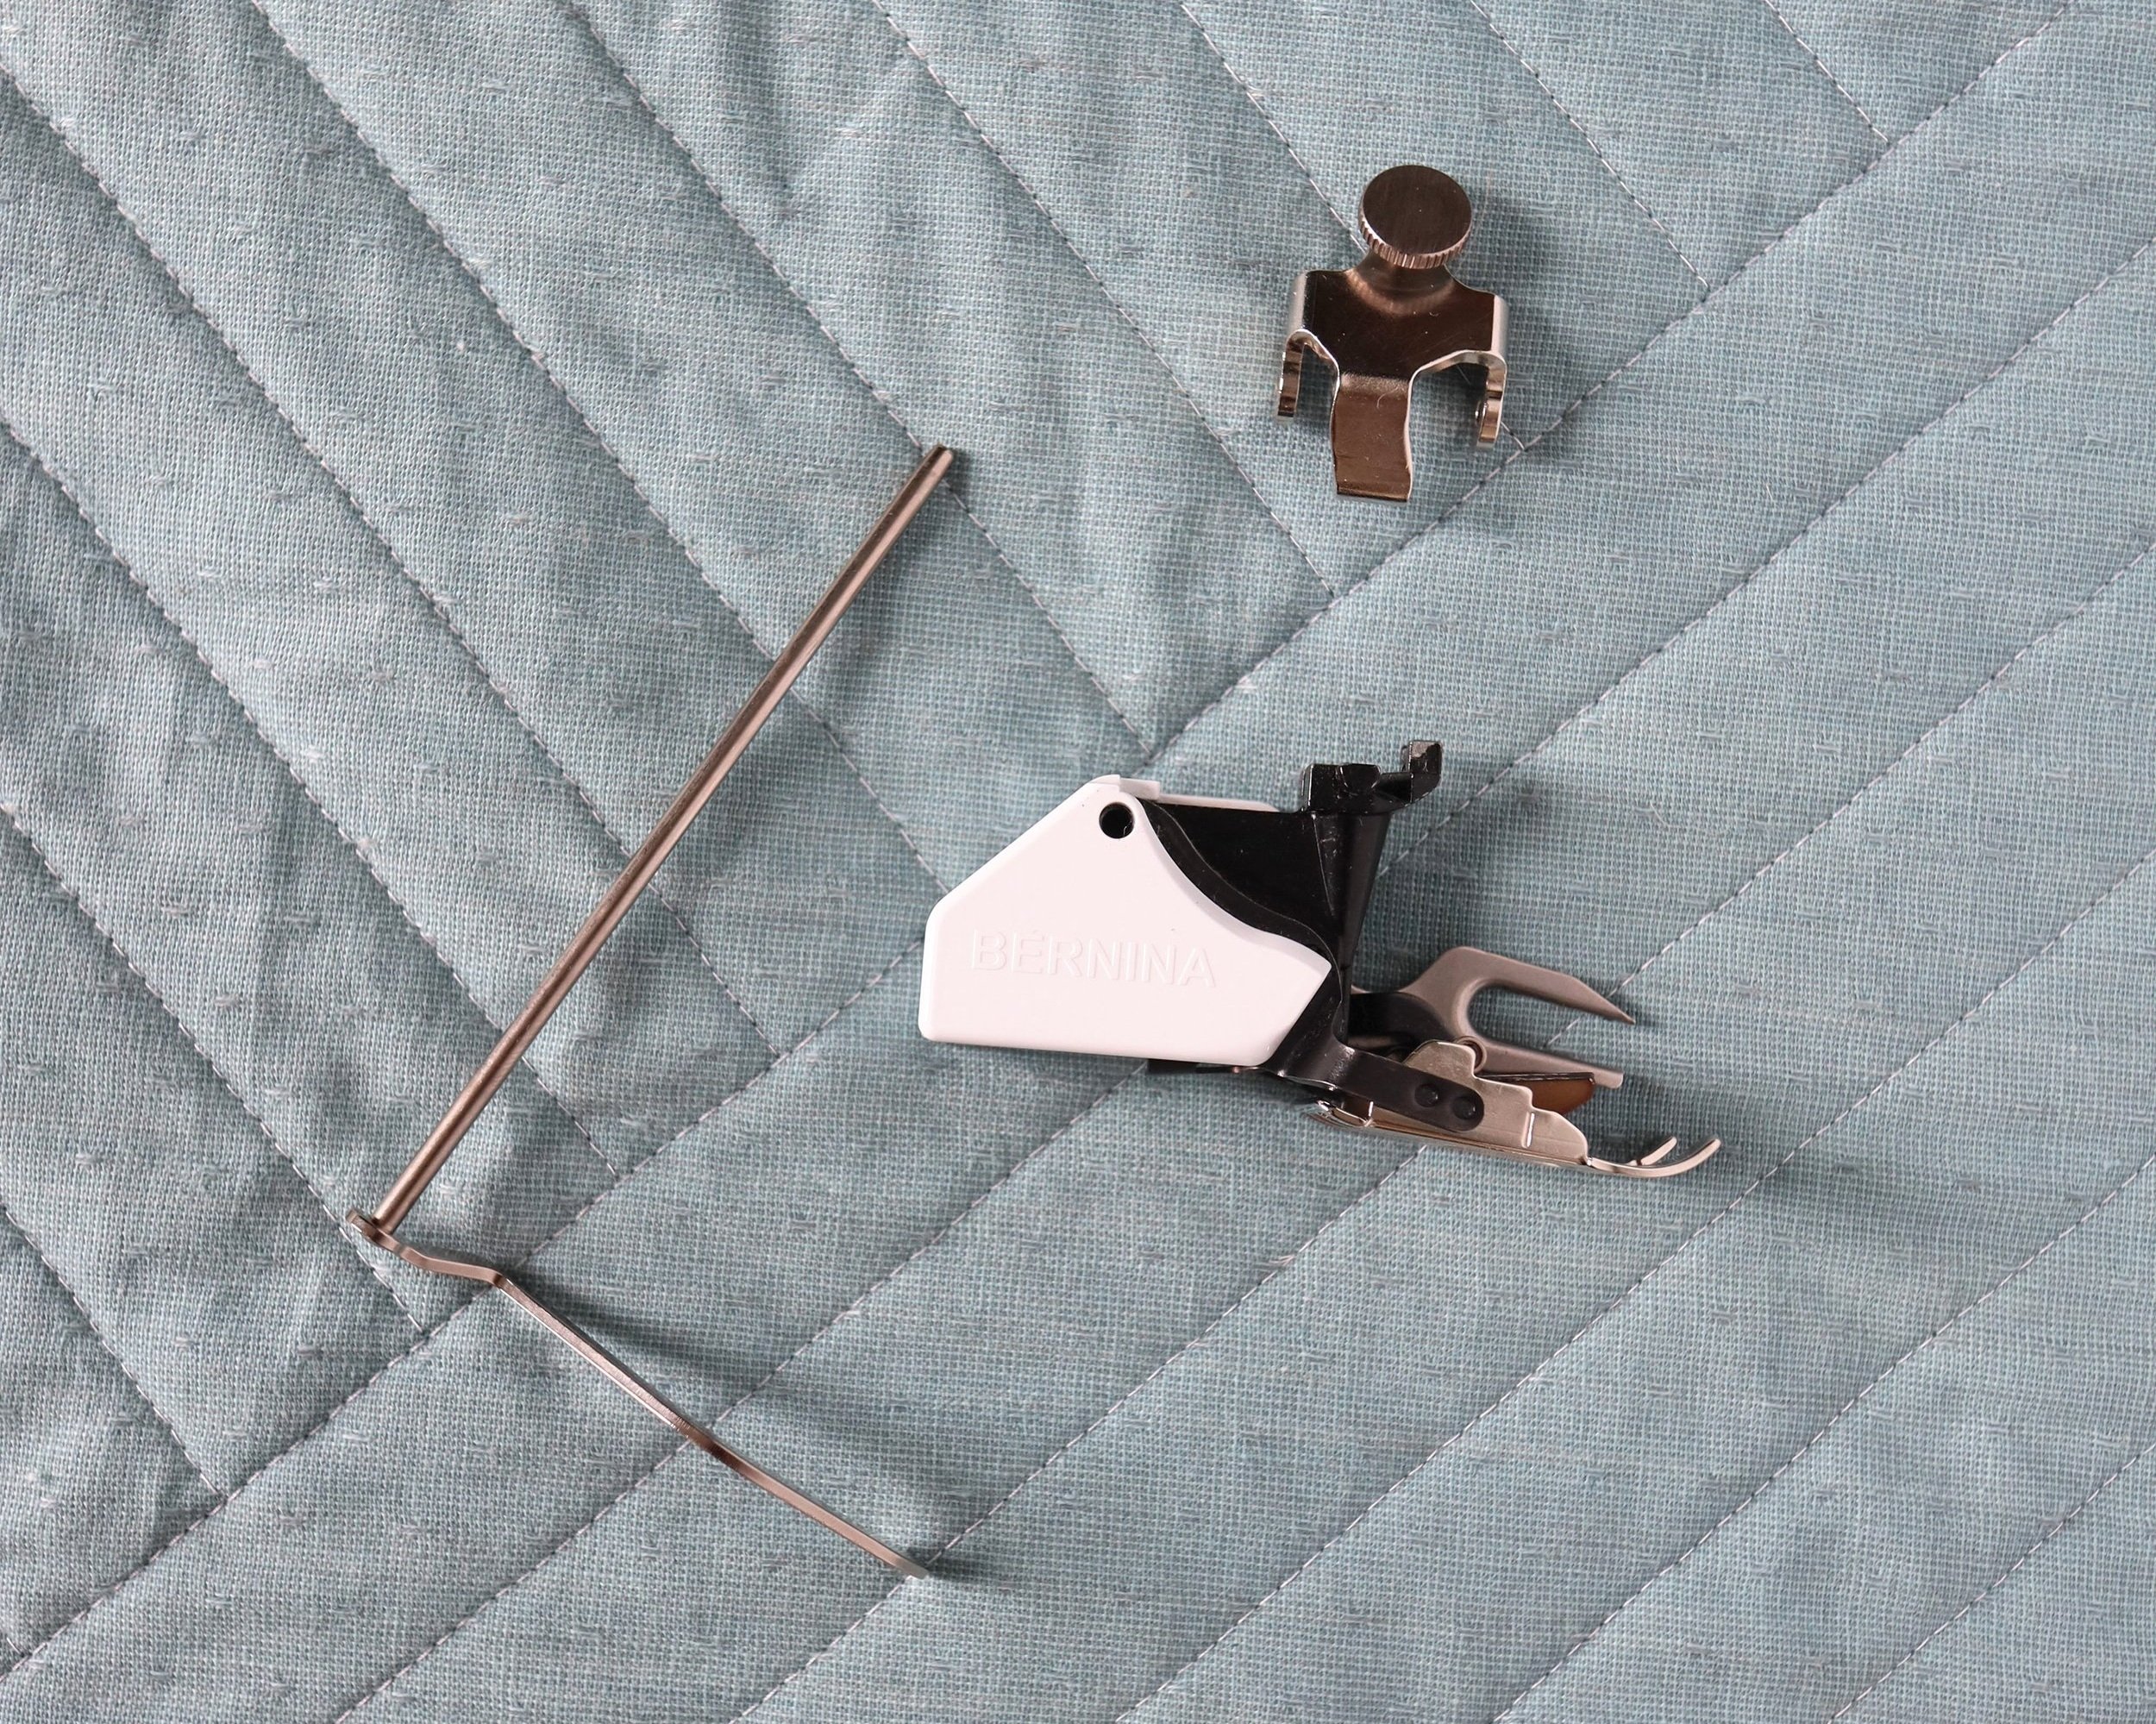
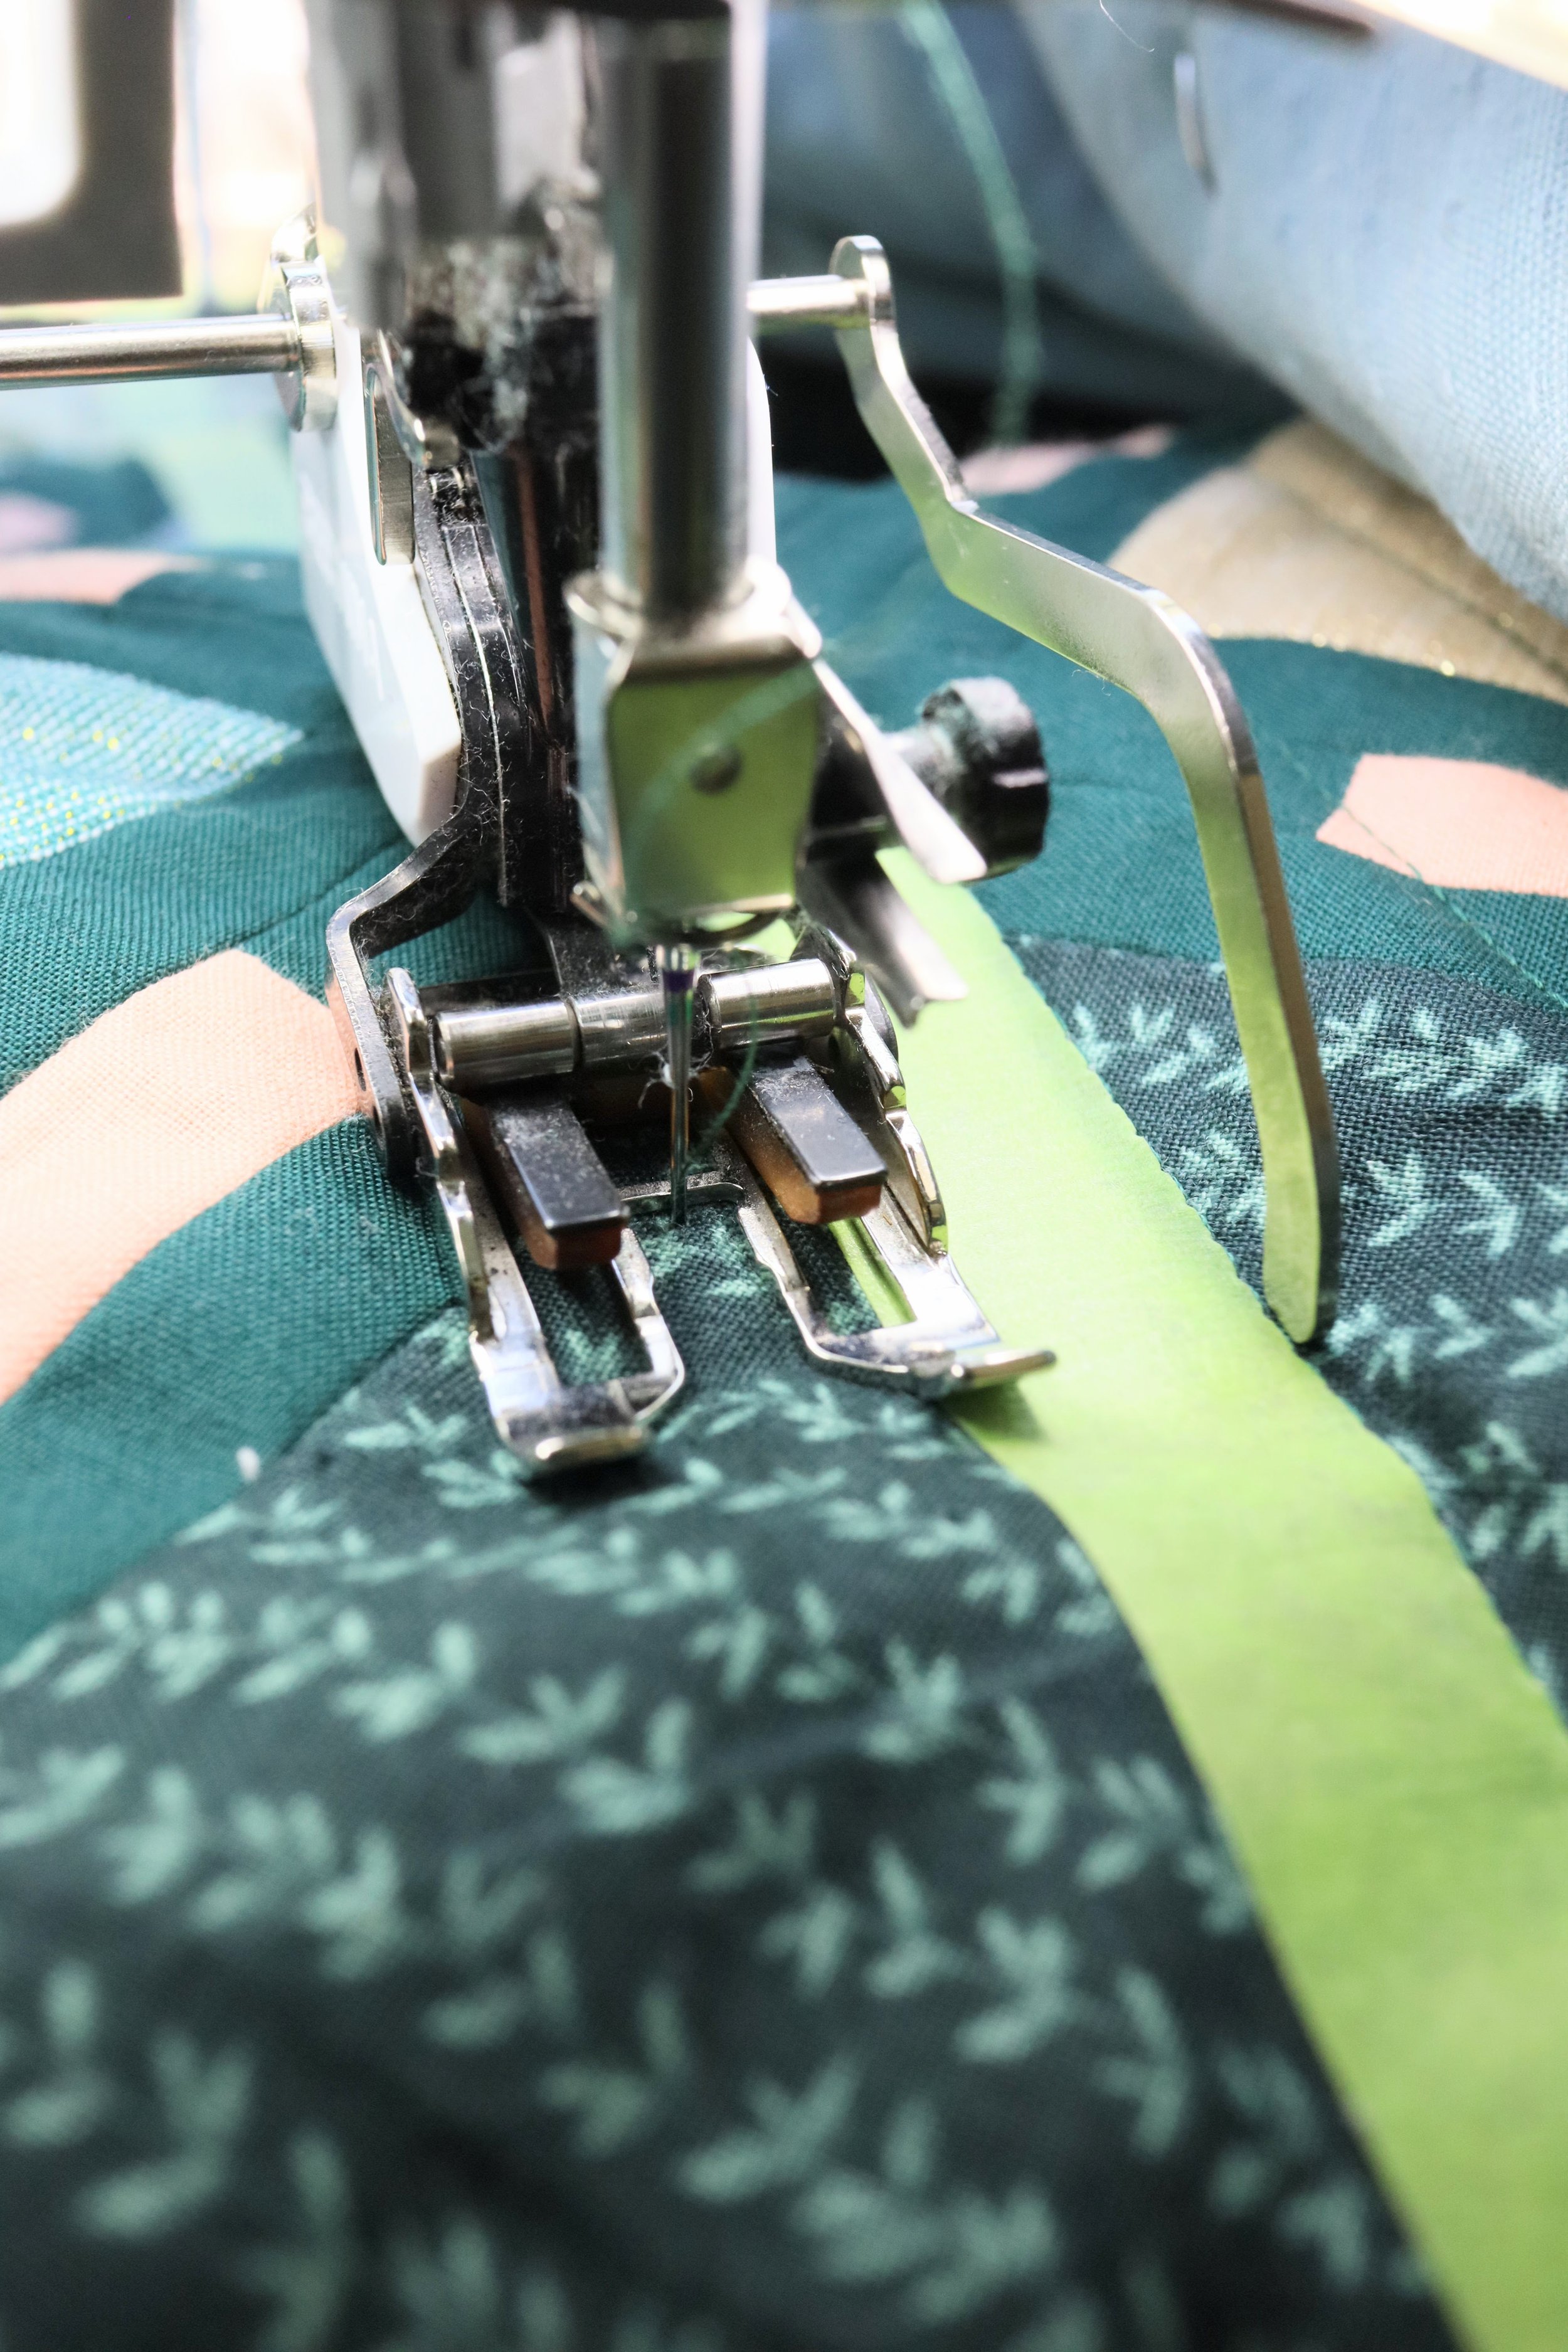
WALKING FOOT: Although you can quilt with just a standard presser foot, I think a walking foot is well worth the investment! When you’re quilting, the feed dogs (the little grippy bits on the base of your sewing machine) pull the fabric through the machine. Because a quilt is made up of 3 layers, those feed dogs actively pull on only the bottom layer of your quilt, which causes the top layers to move through at a slower pace than your bottom layers. This can create drags and pulls in your quilt as you sew multiple lines of quilting. A walking foot assists in pulling the top layers through your machine at the same or similar rate as your feed dogs, allowing for more even, flat stitching.
I can’t speak to every machine type because I’ve only ever used a Bernina, but if you’re also using a Bernina (and I suspect this is true for other sewing machine brands as well), I found that it’s worth the extra cost of getting a name brand walking foot. I used an off-brand for a couple years and, although it only cost around $30-40, I had to replace it often, every 6 months or so) because it would lose it’s grip. Since switching to Bernina’s official walking foot, it’s worked perfectly for pretty heavy use over the last two years.
GUIDE BAR: Along with the walking foot comes a guide bar! This bar attaches to your walking foot and can be moved in and out at varying distances from your needle so you can follow stitch lines or other marks on your quilt as you sew. I’ll talk about how to use this more below.
THREAD: I typically use a 40wt or 50wt thread for quilting, although I prefer the 40wt, which is slightly heavier, stronger, and allows the stitches to show up better. My go-to brand is Aurifil and I prefer to use a 100% cotton thread. I prefer 100% cotton thread because I use 100% cotton fabric and batting. Cotton does wear down over time and I want all the fibers in the fabric, batting, and thread to wear at the same rate. If you use a polyester or blended thread with cotton fabric, that polyester will maintain its structure for longer and can cause more wear on the cotton fabric as it breaks down. I’m not saying you need to change your thread type if it’s working for you! This is just the reasoning I’ve used over the years.

NEEDLES: You’ll want a strong, sharp needle to move easily through the three layers of your quilt sandwich, so I’ve found that Microtex (or sharp point needle) in a size 90/10 works really well.

MACHINE SETTINGS: I set my stitch length to 3.0 for quilting, it gives a little more breathing room for those stitches. This allows your lines to be straighter and helps improve the pull on the top layer of fabric. The other setting I always use on my machine is the needle stop position. The needle stop position is pretty straightforward - it’s the position the needle automatically stops in after finishing a stitch or a line of stitches. For quilting, I prefer my needle to stop in the “down” position so it catches and holds the fabric in place while I adjust my hand positioning or the fabric positioning. I’m sure this is slightly different for all machines, so instead of telling you how I do this, I’d recommend asking the internet for your particular machine!
MARKING TOOLS: There are so many different options out there to help you mark your quilt so you know where to sew (pens, chalk, hera marker, etc.), but my favorite is painters tape! I haven’t yet found a better way than tape to get a perfectly straight line. In my experience, any other type of marker leaves too much wiggle room. Especially on projects where precision is key or where I’ve used a contrasting thread that shows off every wiggle, tape is the way to go. I’ll talk more about this method below...
Any other tools or notions you love that I missed? Let me know in the comments below! I always love trying new tools and techniques! Now let’s get quilting!
Marking Your Quilt
First thing’s first. Unless you have a very simple quilting design (like straight lines or a grid that follows seams in the quilt), you’ll want to mark out your design on your quilt. I’ve found that even when following seams or designs in the quilt, I like to mark it out because my seams are never perfectly straight! When I know my piecing isn’t perfect (because who’s is, really?), I prefer to have my quilt lines create straight lines across my quilt even when my seams jag slightly.
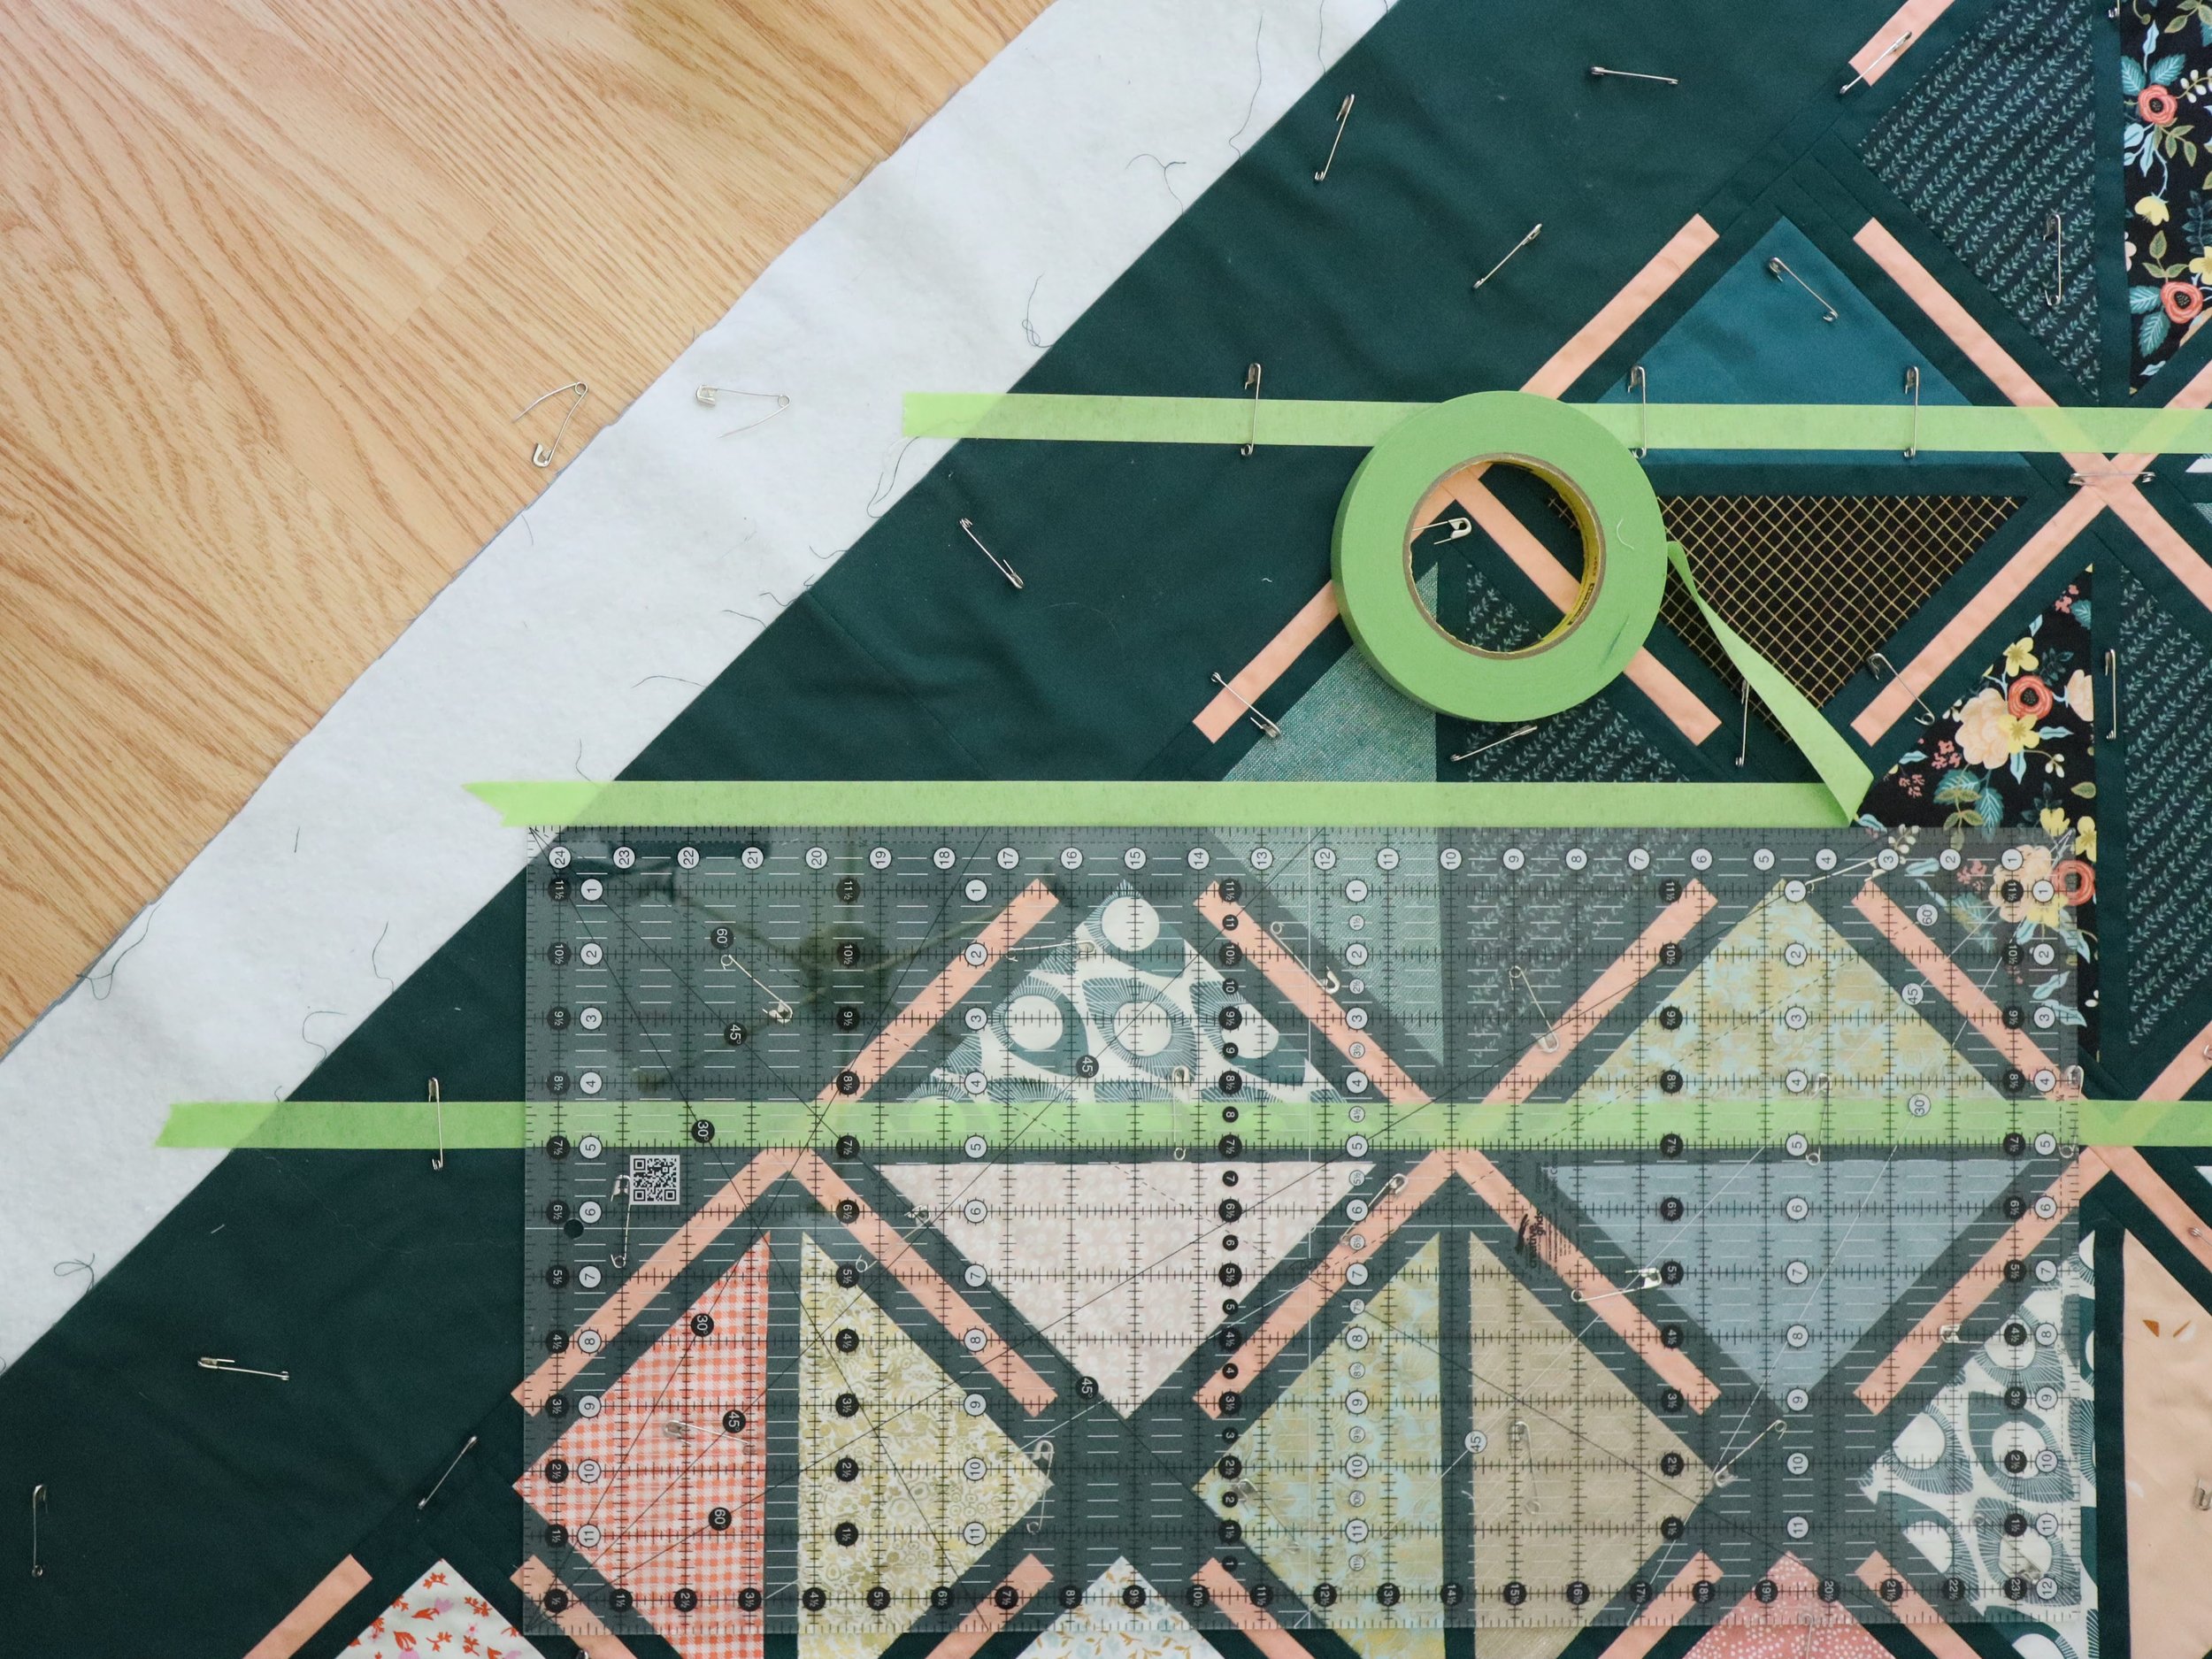
As I mentioned above, my go to marking tool is painter’s tape! I prefer to use automotive tape or freezer tape because these have the best “stick" without leaving residue on my quilt. These tapes come in multiple sizes, and you can use various sizes for various designs. If it’s available, I prefer to use tape in the same width as my planned quilting lines because I can sew on either side of the tape, which allows me to use less!
Unfortunately I did not have that for my Adjourn Quilt this time around. I used 3/4 inch tape for 1 inch diagonal quilting lines.

I used to tape every single line, and sometimes I still do that if I need very precise quilting, but for most projects these days, I use my tape along with my guide bar to reduce waste of material and time. I start with laying out tape every 5-ish inches as “anchor” points for my lines and use the guide bar in between. These taped anchor points help keep things more consistent and precise throughout the quilt because, when you use a guide bar, you tend to make tiny mistakes on each line. Then each subsequent line is based off a line with tiny mistakes and after several rows, your line may be slightly more curved or wobbly than at your perfectly measured line. Putting in taped anchor points every 5 inches or sew allows for a “resetting” point so that your lines never get too far off and the overall quilting appears consistent.

Notice the spacing between diagonal lines was such that my anchor points on this quilt switched back and forth between the center of the diagonal strips to 1/4-inch on either sides of my diagonal strips. So when it was centered on the diagonal strip, I used one piece of tape down the center, but when it was on either side, I used two pieces of tape so that both lines would be a consistent distance from the strip.
Whew! Okay, now that you understand my process, let’s get into the details of how to actually accomplish this.
I start from the center and work my way out to either side, taping along the most central anchor point. For this Adjourn Quilt, I used the diagonal lines of the blocks as my reference points of where to line up my ruler. The diagonal strips were 1/2 inch, and I wanted my quilting lines centered on these strips, so I measured down the center of the line or 1/4” out from either side of the strip (see photo description above). I laid my ruler along the diagonal strip and then placed the tape right along the edge of the ruler. I use my large 12-1/2 x 24-1/2 inch ruler when I tape because I can lay it out along a longer line to create a more consistently straight stitch across the quilt. I continue moving the ruler along the reference line and adding tape until I finish that line, then move on to the next one. Because the diagonal lines were about 10 inches apart, I also added one line in between by measuring 5 inches out from my initial tape line and taped there, then repeated the process. Pretty simple!
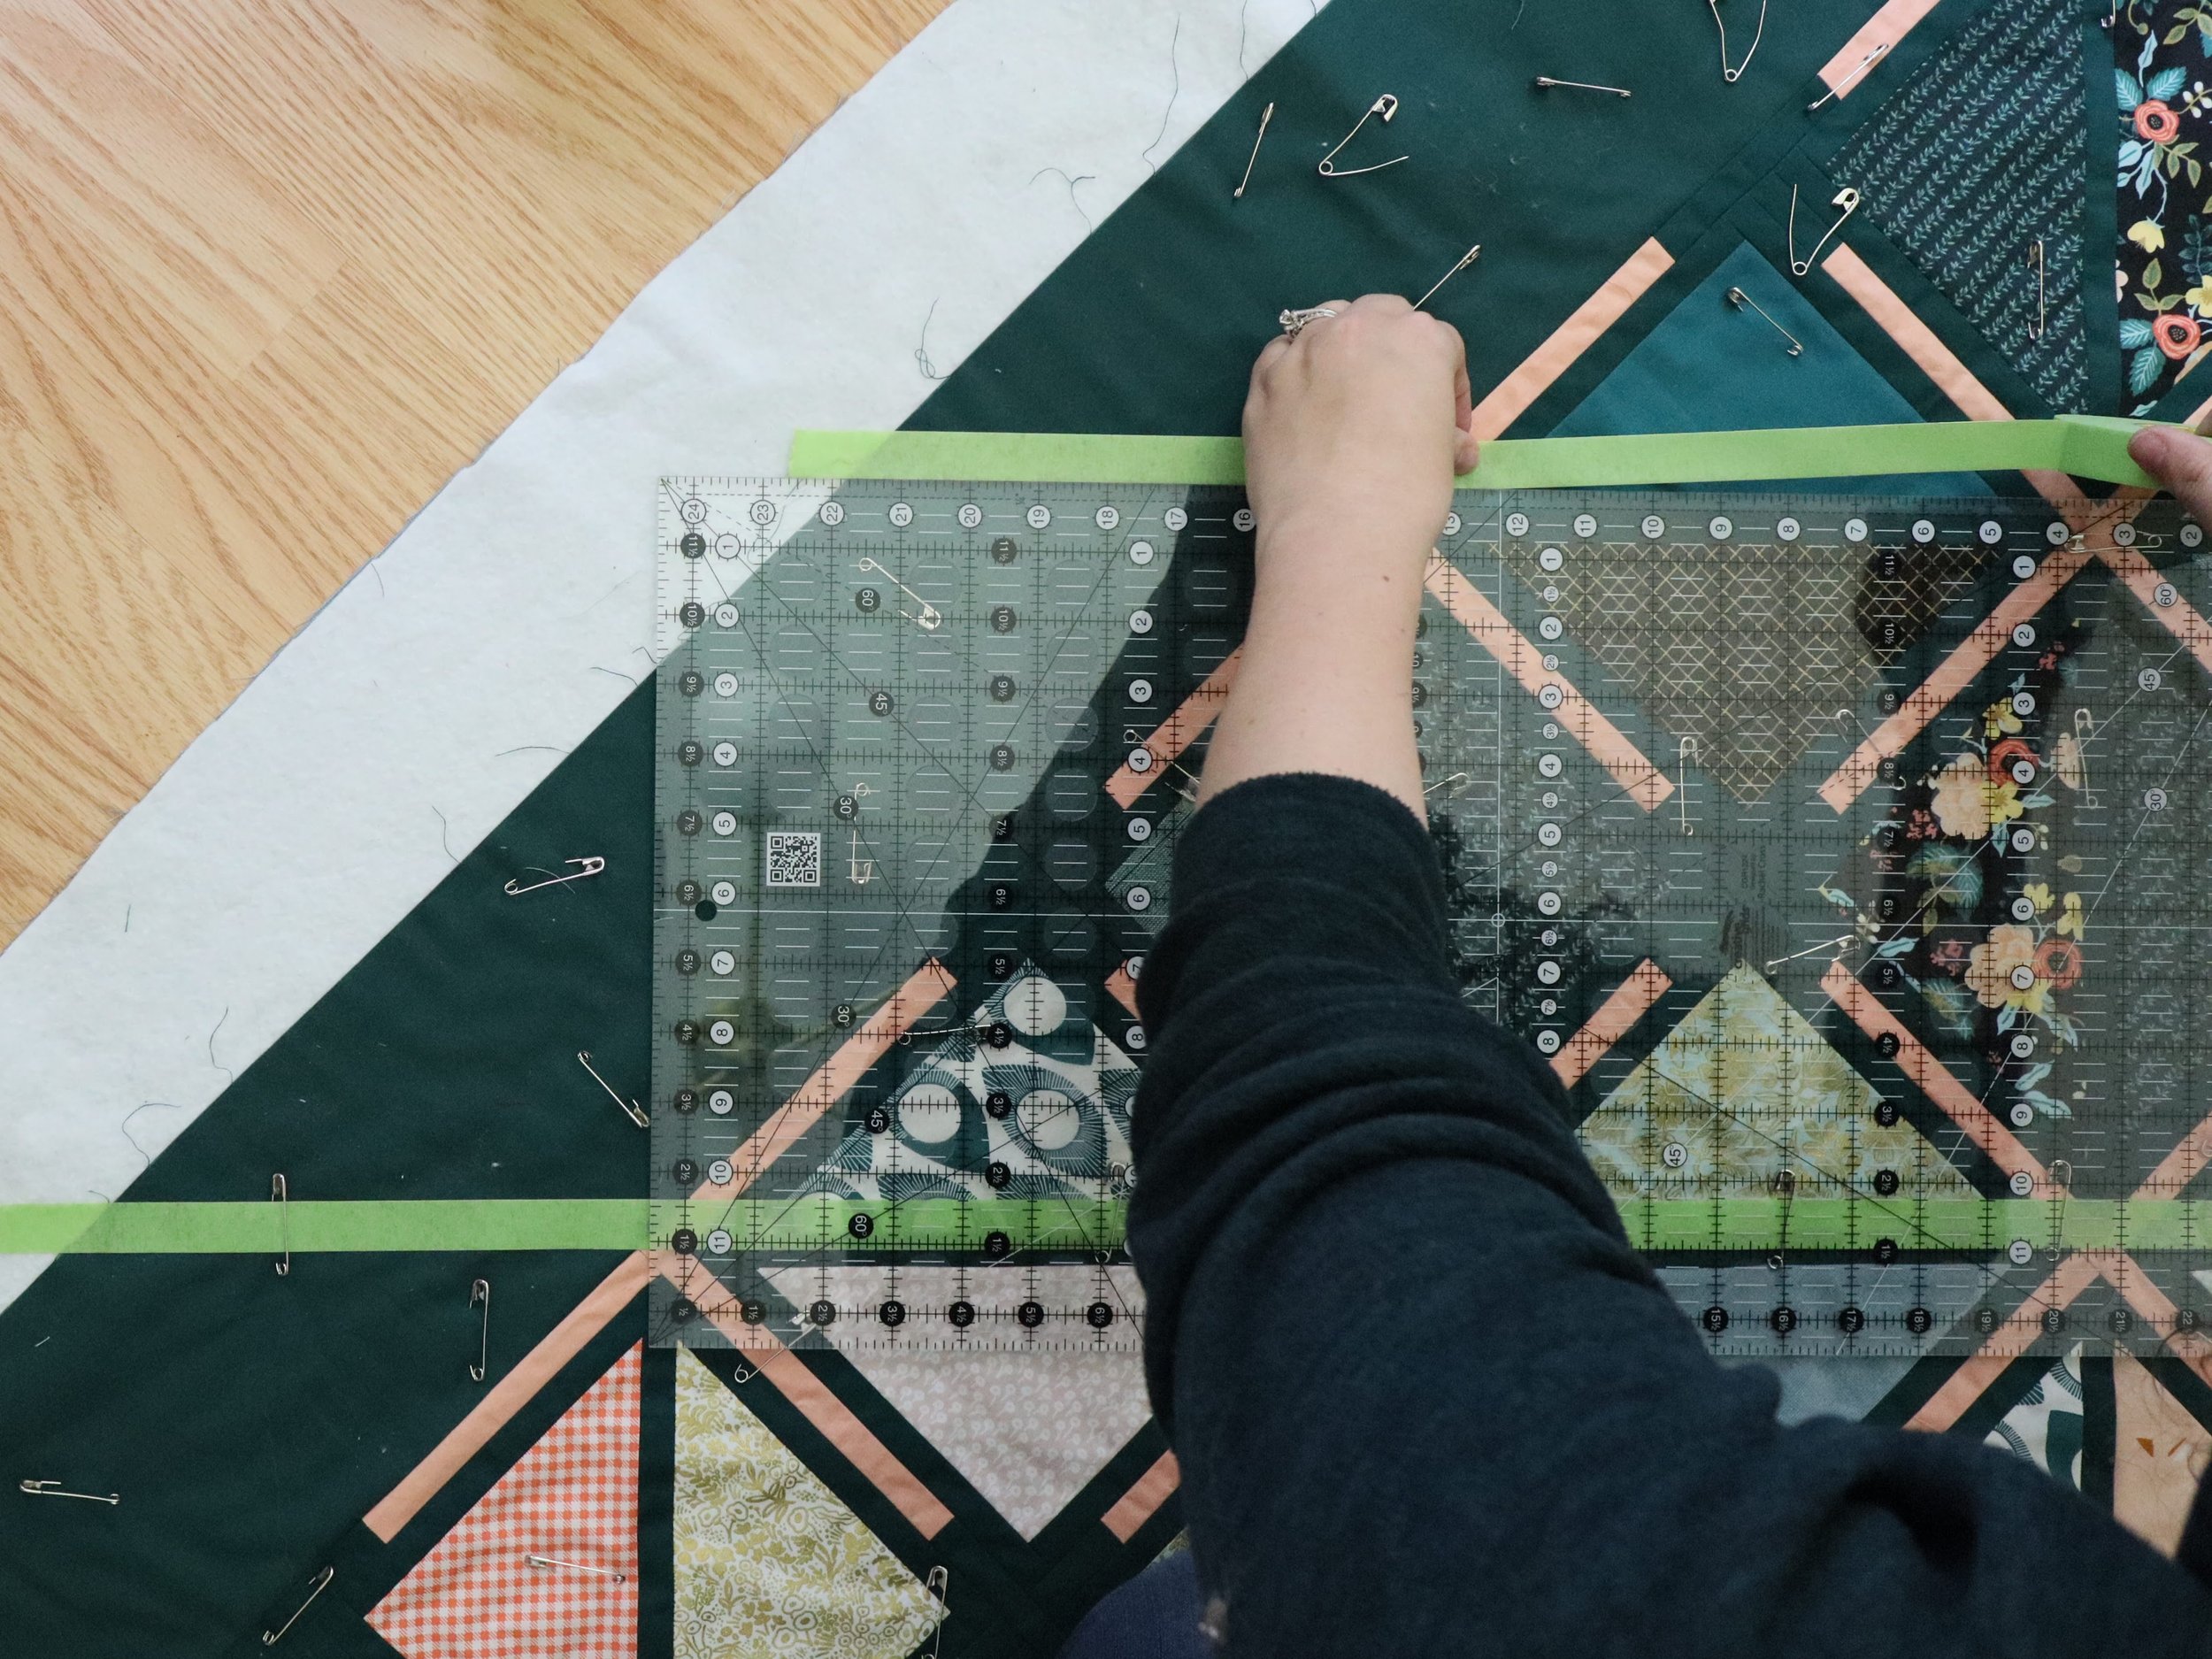
The only thing that really slows this method down is if you’re using basting pins, which I do! You could tape everything out ahead of basting to make things easier, but I like for everything to be set in place before trying to mark, otherwise your marks can shift as you spread out your quilt top. This means I end up needing to remove pins along where I’m about to tape and then add them back after taping. It can be a long process, but for me the finished product is worth it!

Adding pins back across my taped anchor lines.
Machine Quilting
Following the Tape
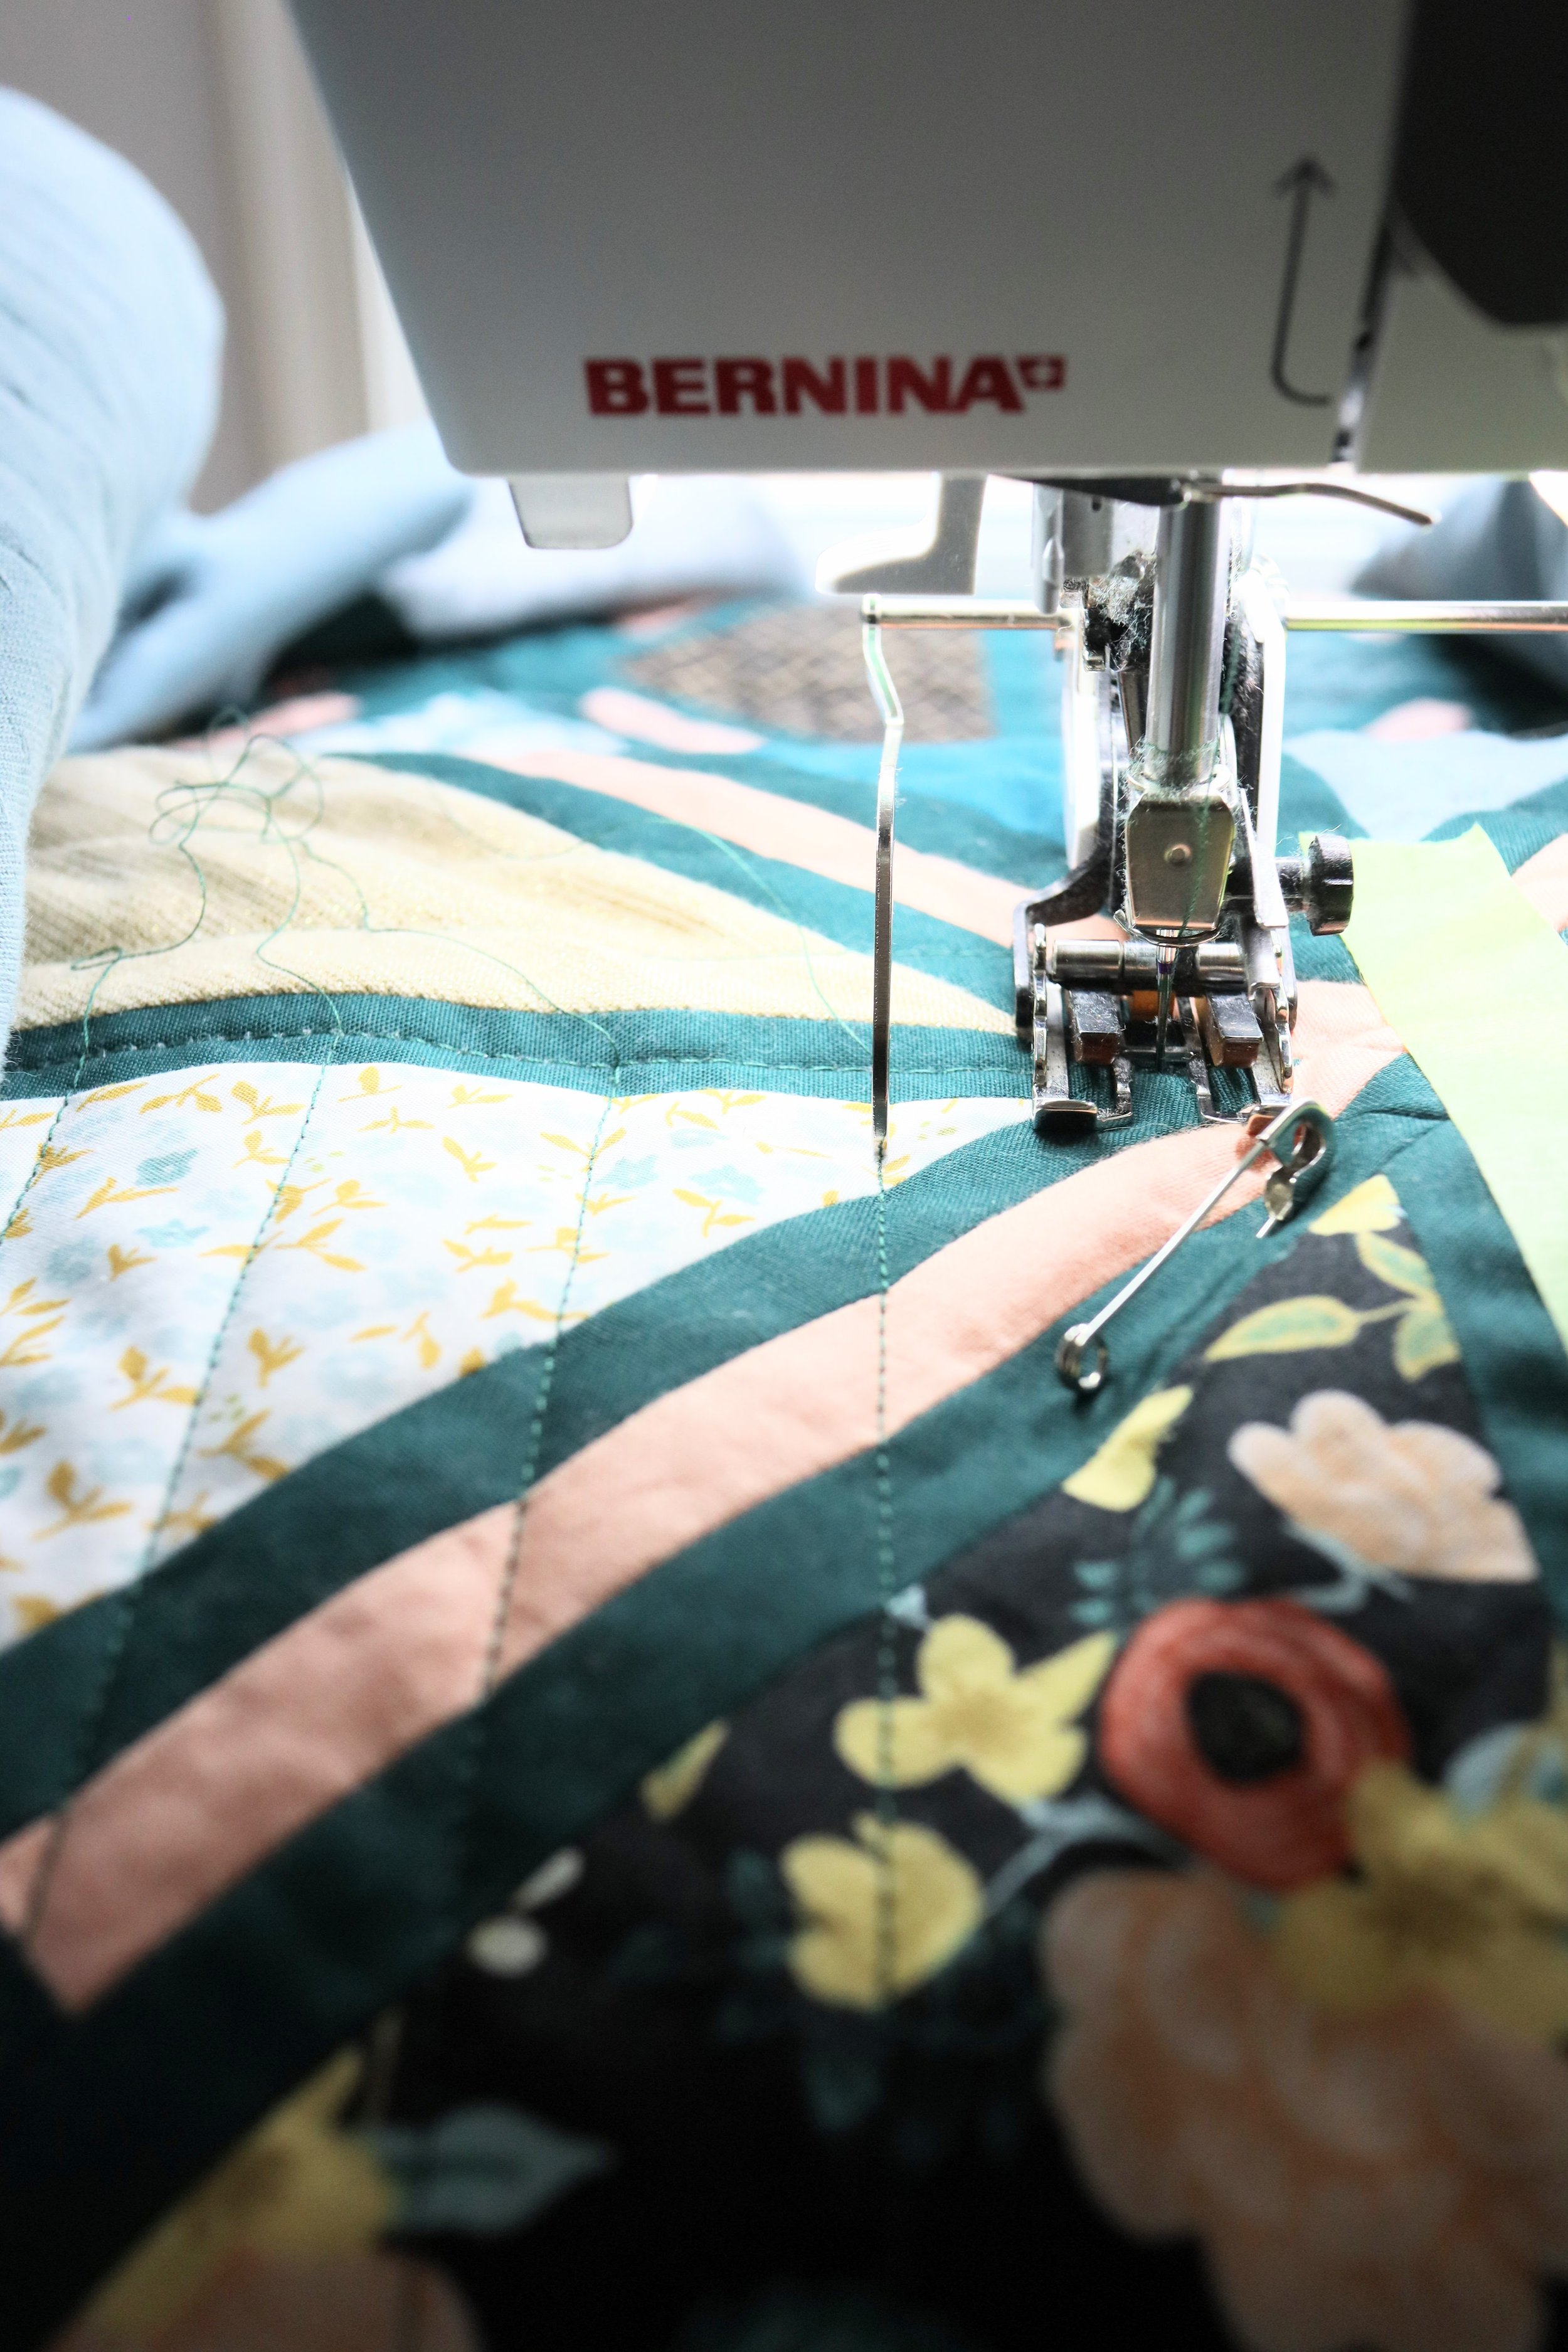
Once everything is marked, it’s time to bring the quilt to your machine! Make sure to start from the center-most line and work outward. I like to roll my quilts like a scroll and hold the quilt over my shoulder to help support the weight and to make it easier to feed through my domestic machine.

The one rule of machine quilting is to GO SLOW. It’s called a “walking foot” for a reason! The faster you sew, the more shift will happen between the layers of your quilt, resulting in pulls and puckers. I can’t say this without showing you this Instagram Reel by Katie from @crestview.quilts where she accurately highlighted the struggle all of us quilters have as we quilt!
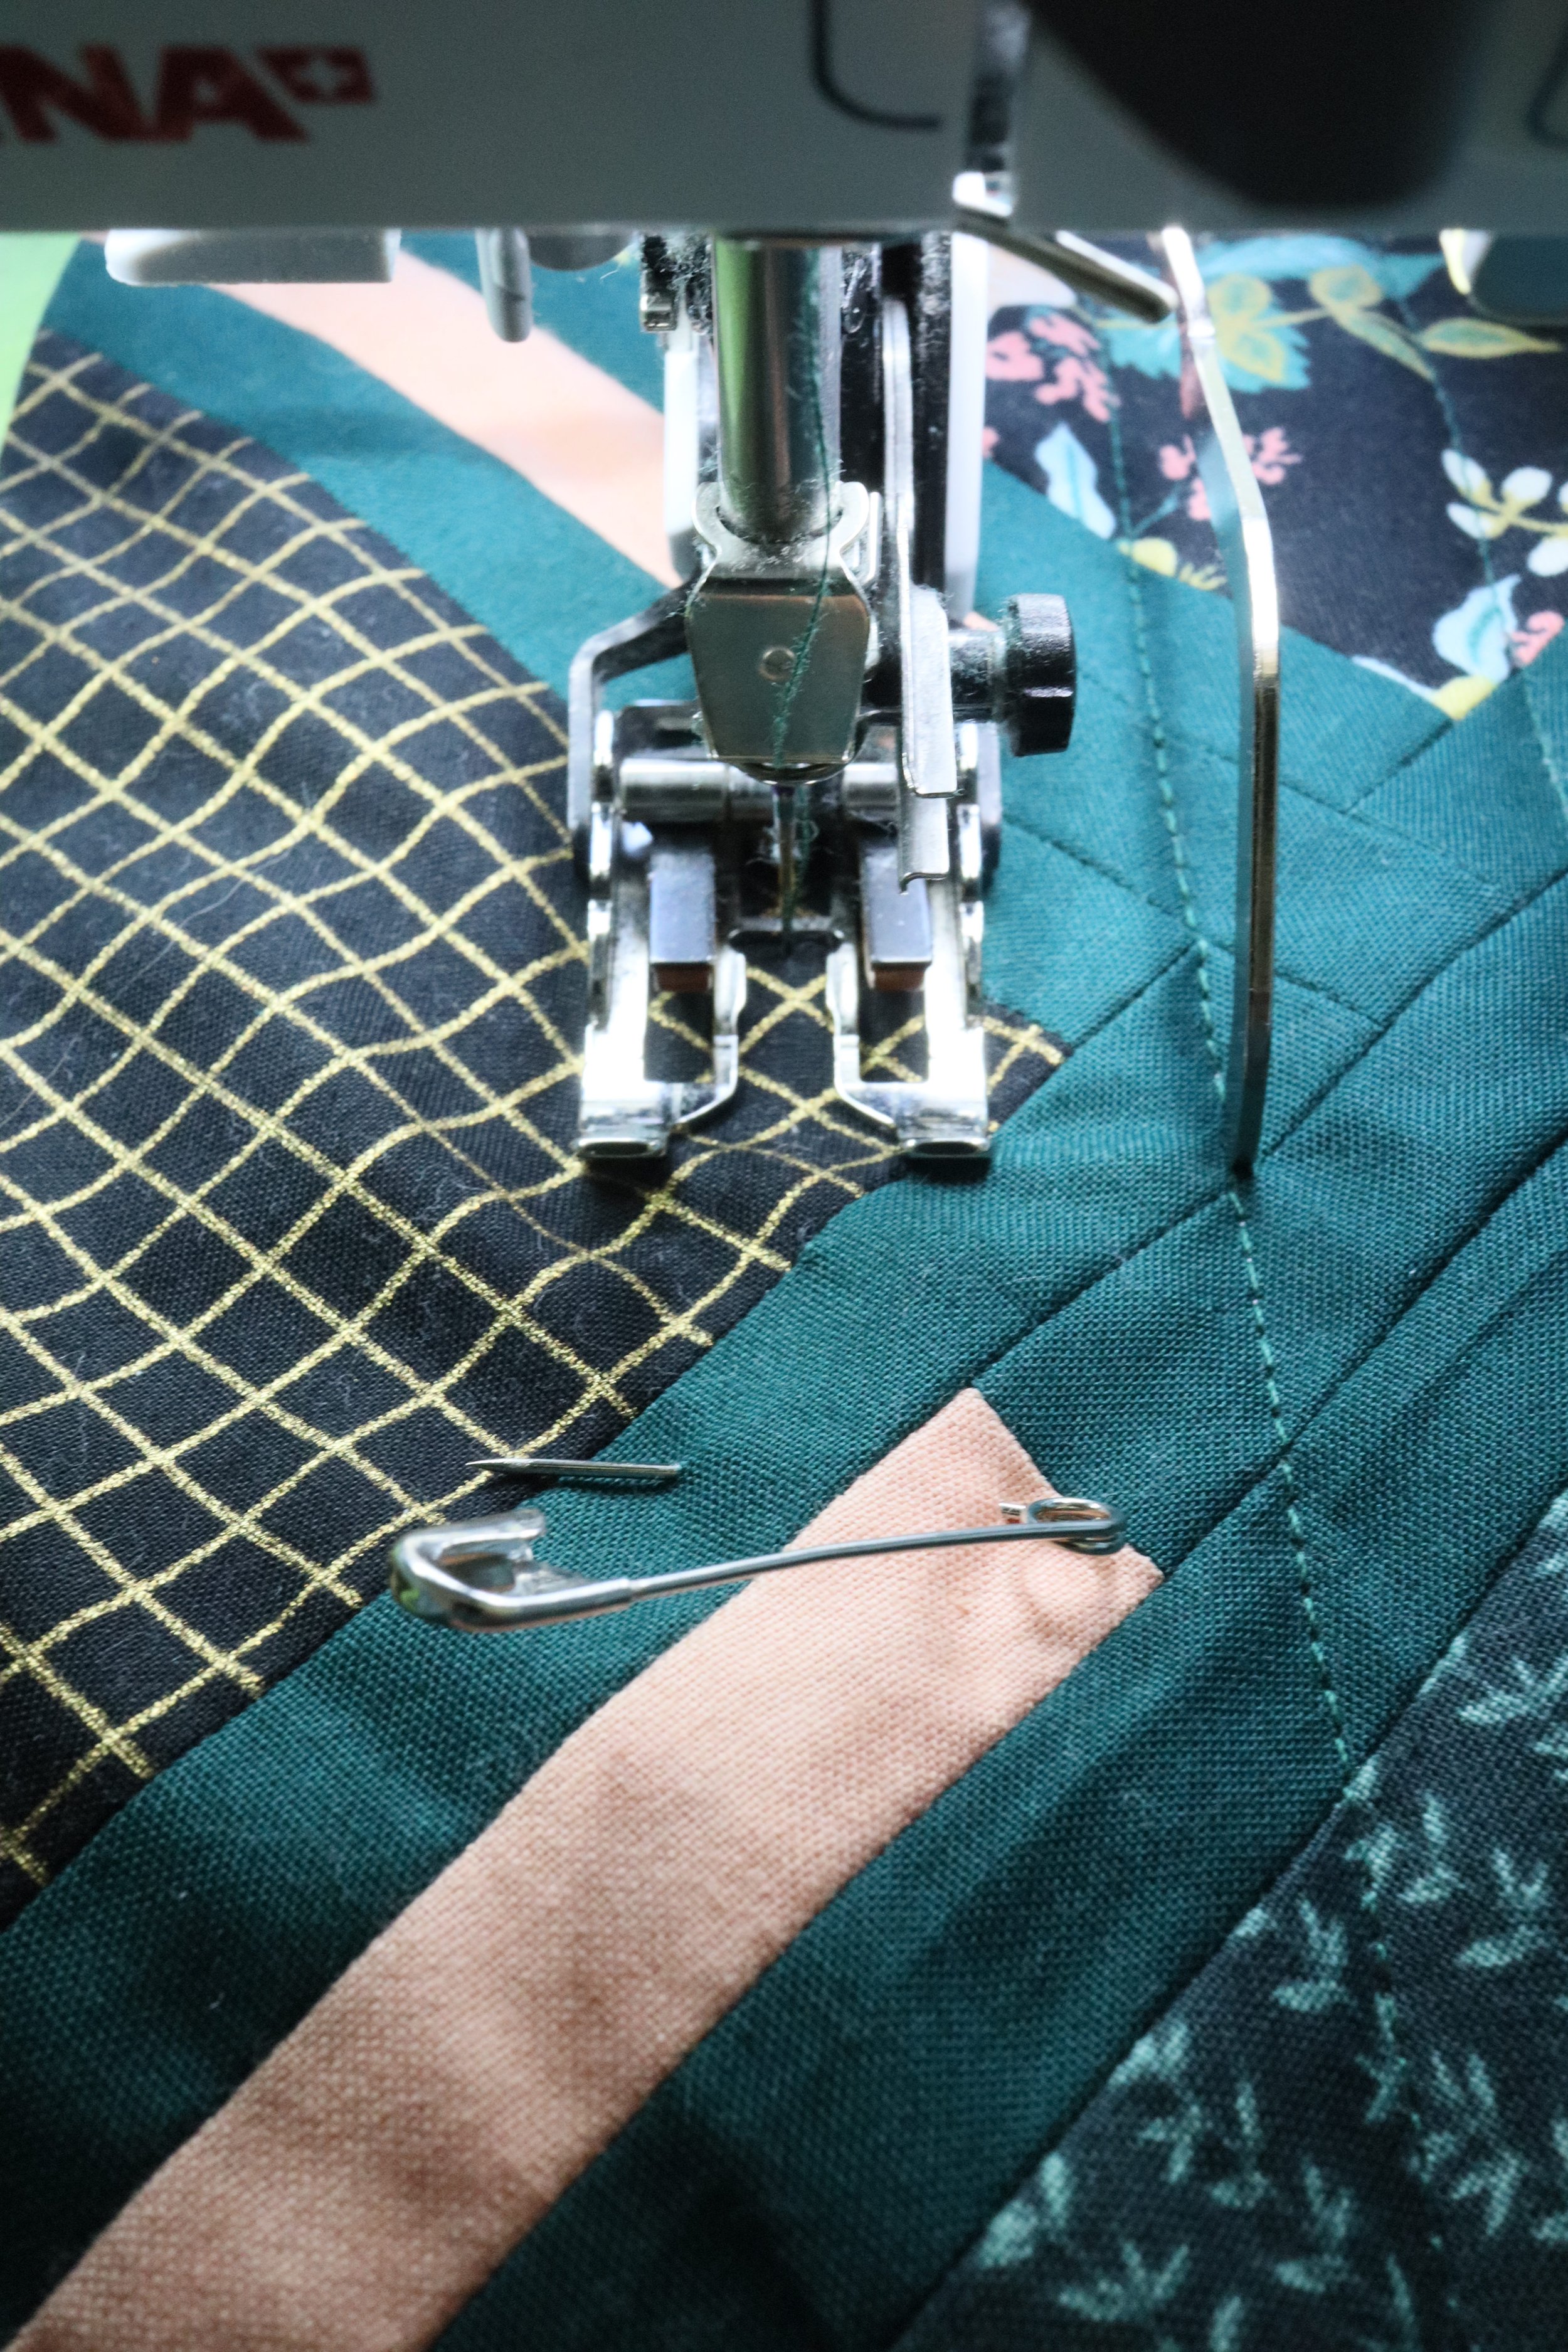
When quilting on a tape line, I sew right down the very edge of the tape. The reason why this is such a precise technique is that the edge of the tape is extremely thin and it’s really easy to see, especially if you use a bright color like mine. You can also easily see when you get off track and correct without your line having too much variance.

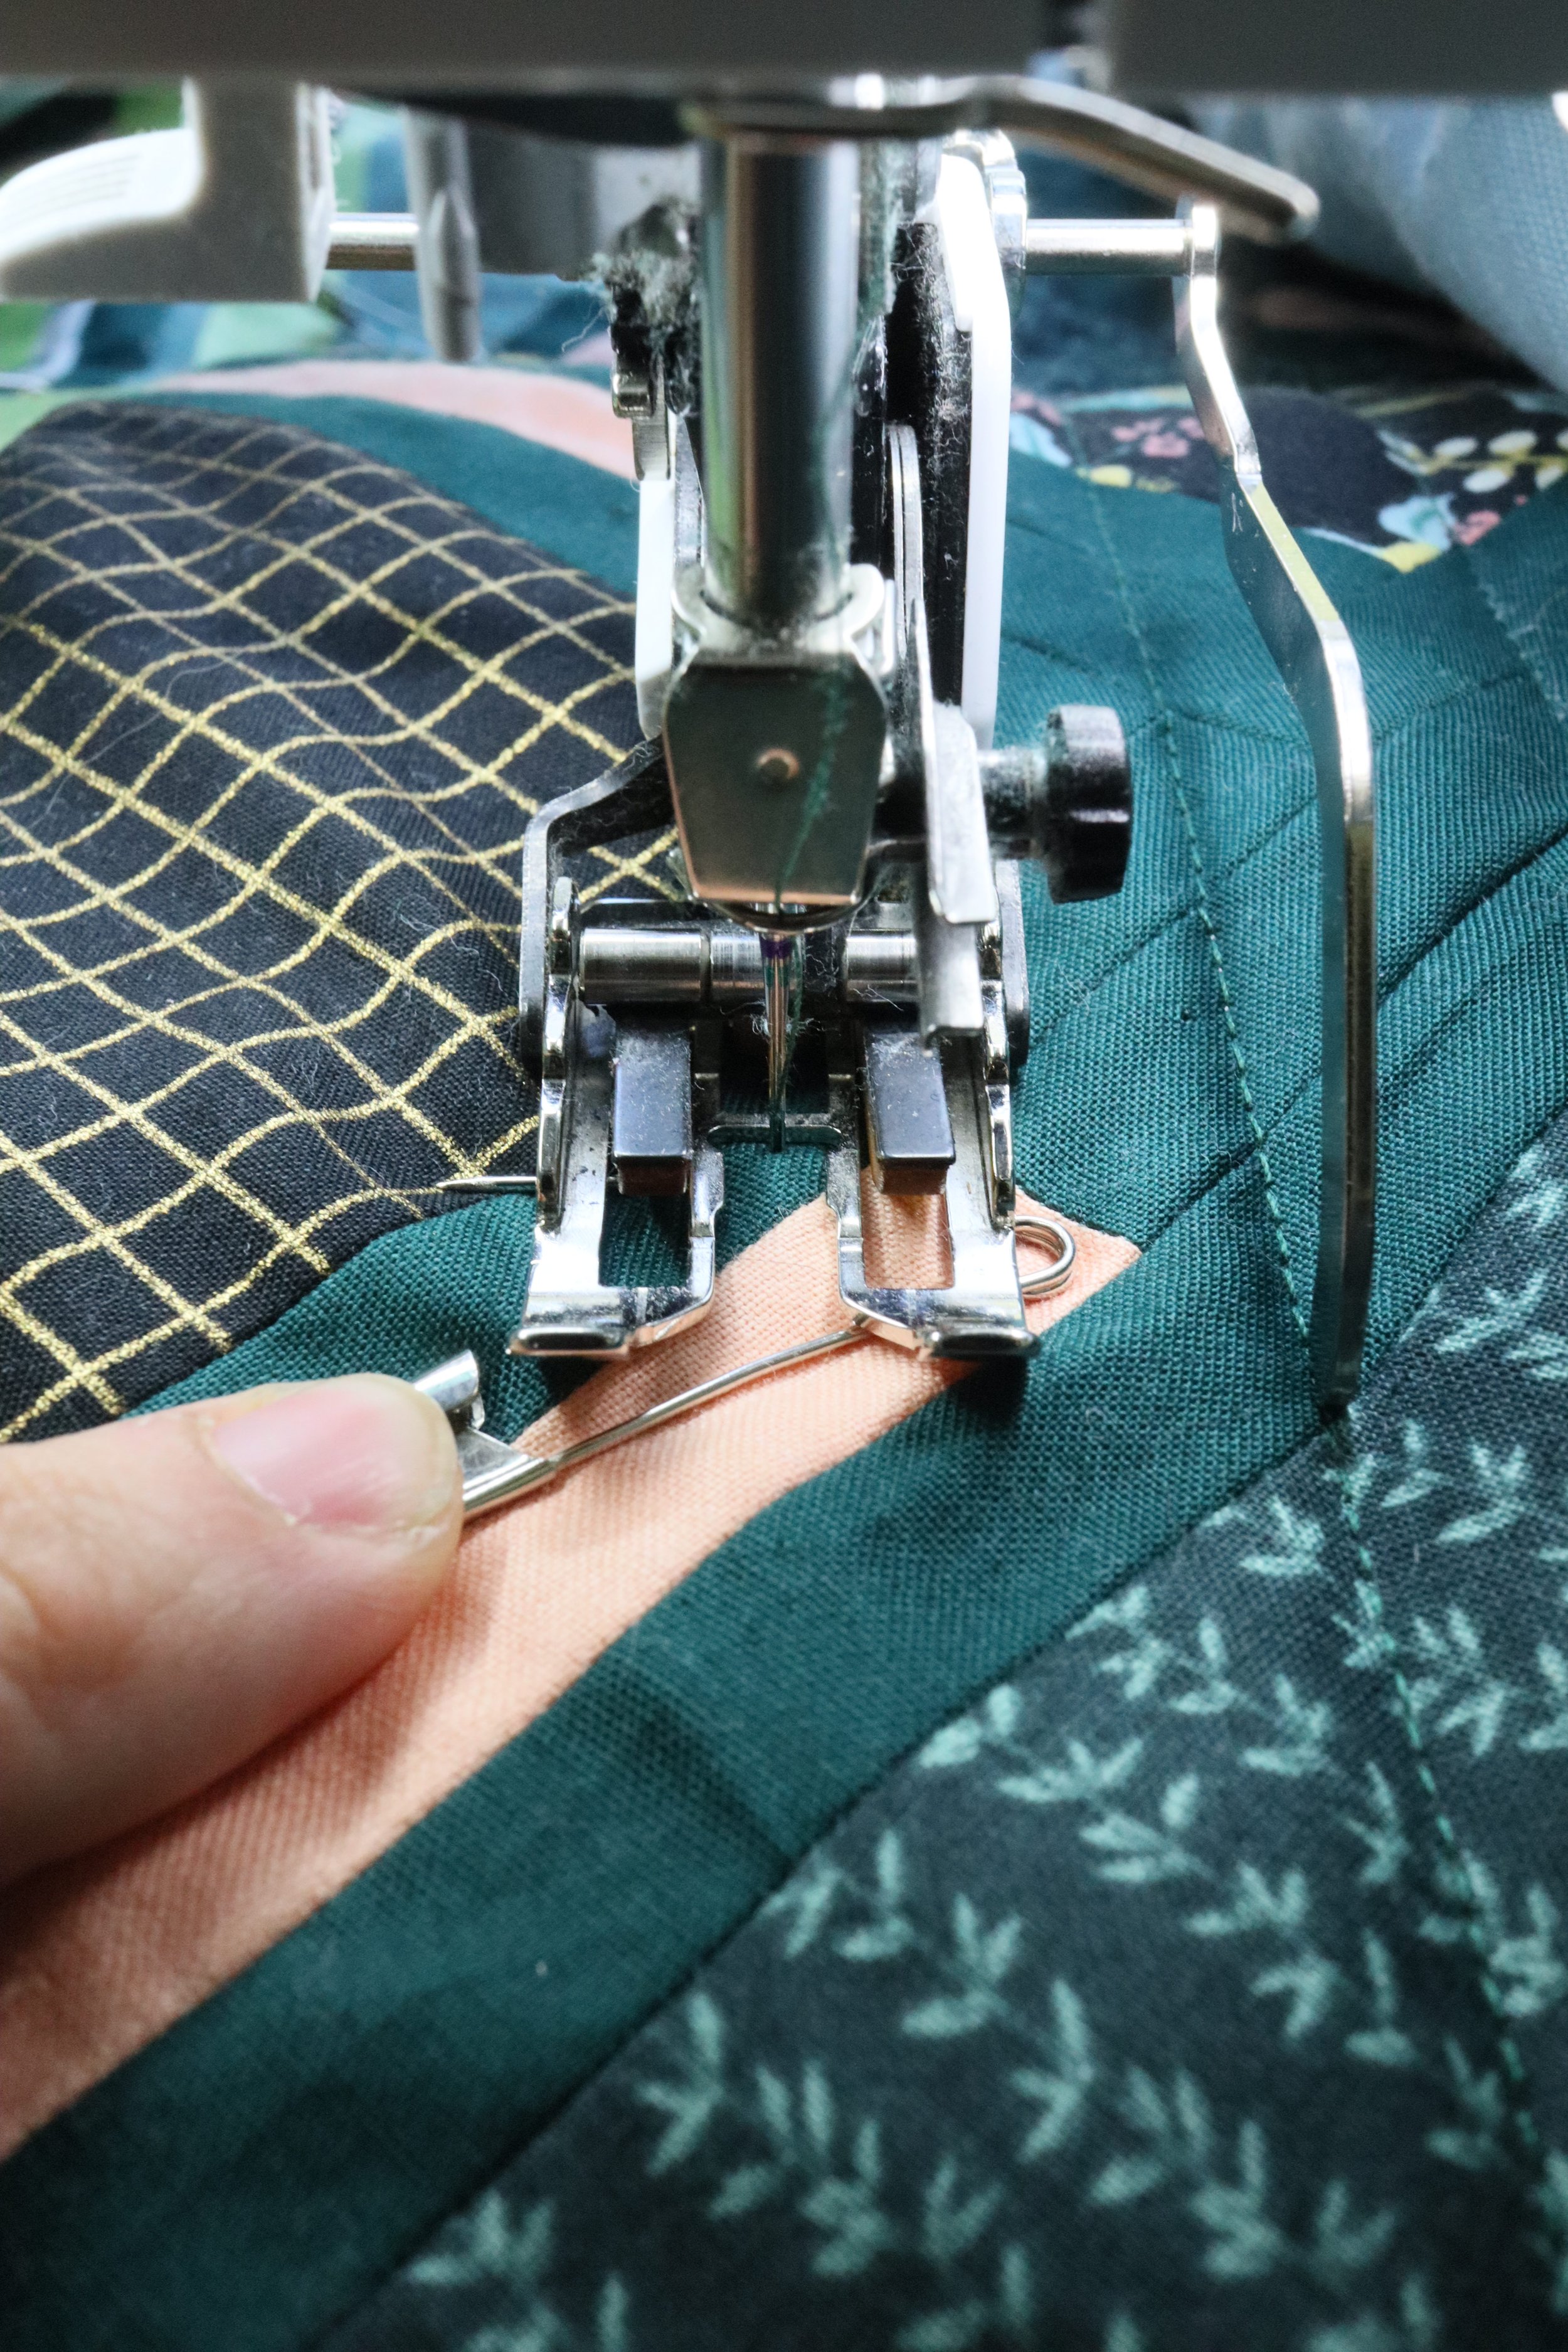
Because I use basting pins, I have to remove them as I sew. I always open the pins as I approach them (but before they get too close to the walking foot), sew as closely as possible to the pin before removing it. This ensures minimal shifting in the fabric. I also recommend holding the pin down as it approaches the walking foot to keep it from catching on the foot, which can really mess things up.
Using a Guide Bar
To use a guide bar when quilting, you’ll first want to attach it to your walking foot and then measure out your stitch width. My machine has measurements for every 8th inch out to 1 inch, but I still like to use a ruler to confirm that the bar is set at the correct place. I prefer to attach my guide bar so the tip of the bar is pointing down, I’ve found that it makes it really easy for me to know precisely where the bar is lining up with the previous stitch.
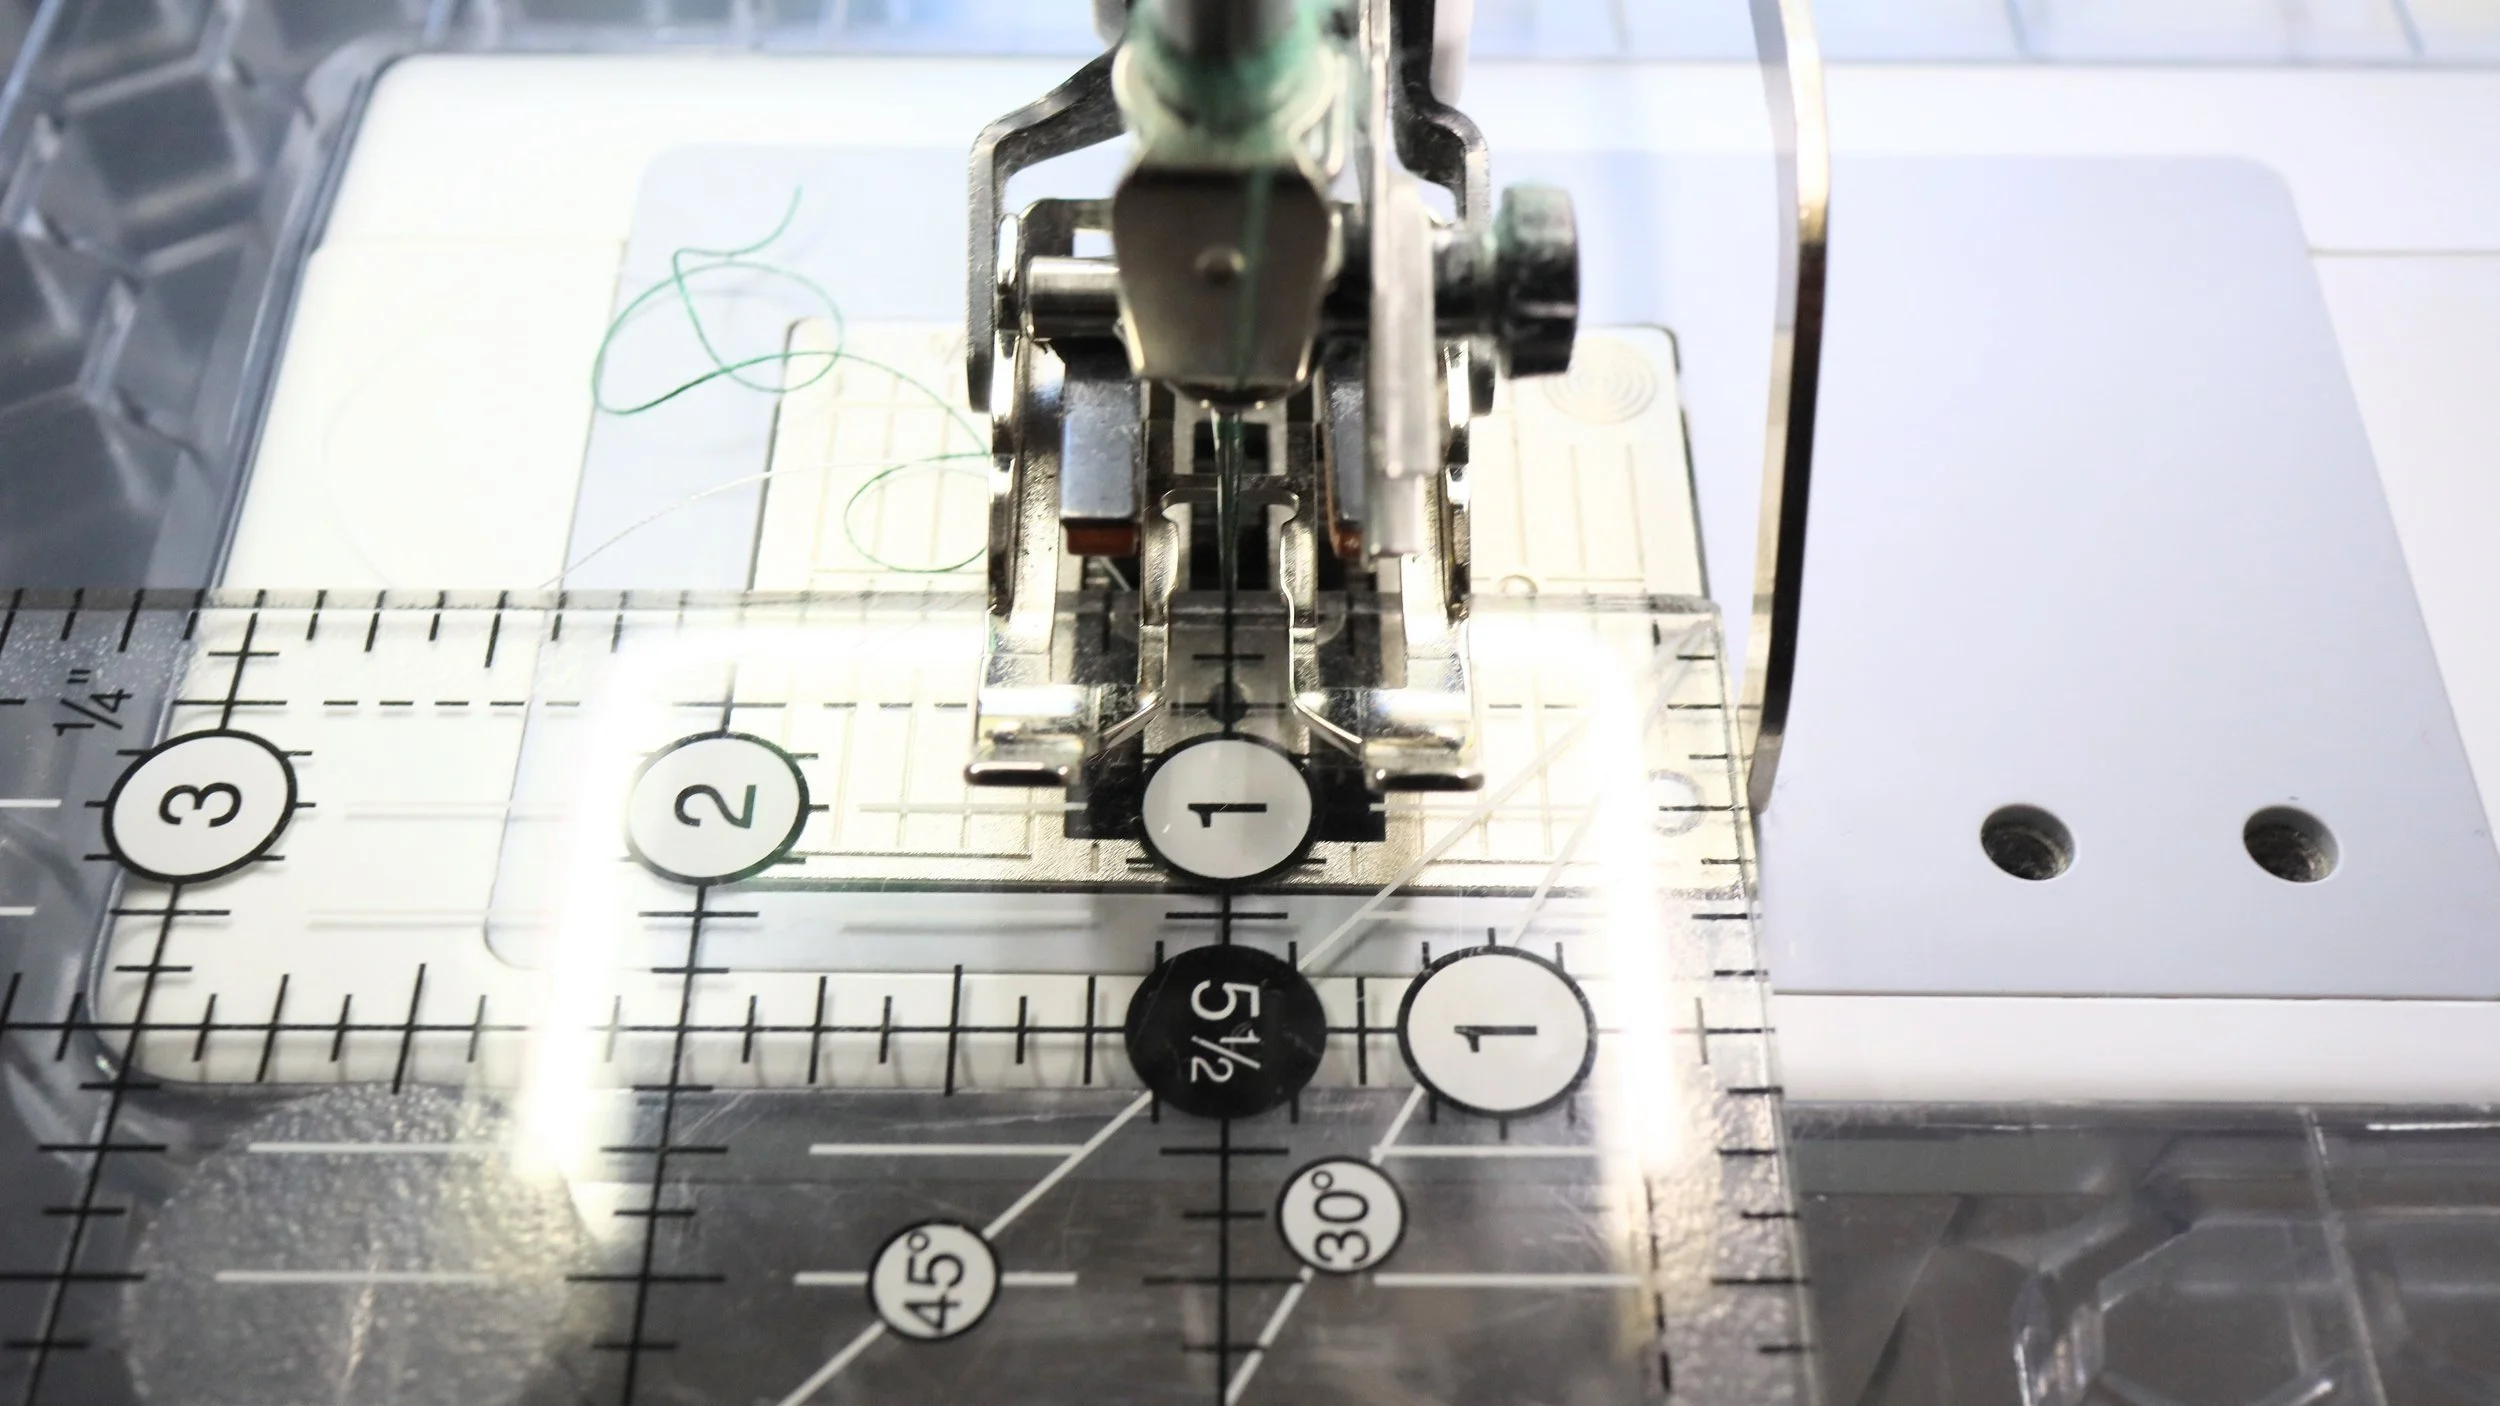
Before you use your guide bar to stitch, you’ll need to make an anchor stitch. This is where using my taping technique above comes in handy! Make your first stitch using tape or another marking tool and from there you’ll use the guide bar to make your next stitches. Just line up the guide bar with your previous stitch and sew away!
Burying Threads
If you’re doing an edge to edge design, just start a few stitches or more before the edge of your quilt top and keep sewing a few stitches or more after you reach the opposite edge. Easy peasy!
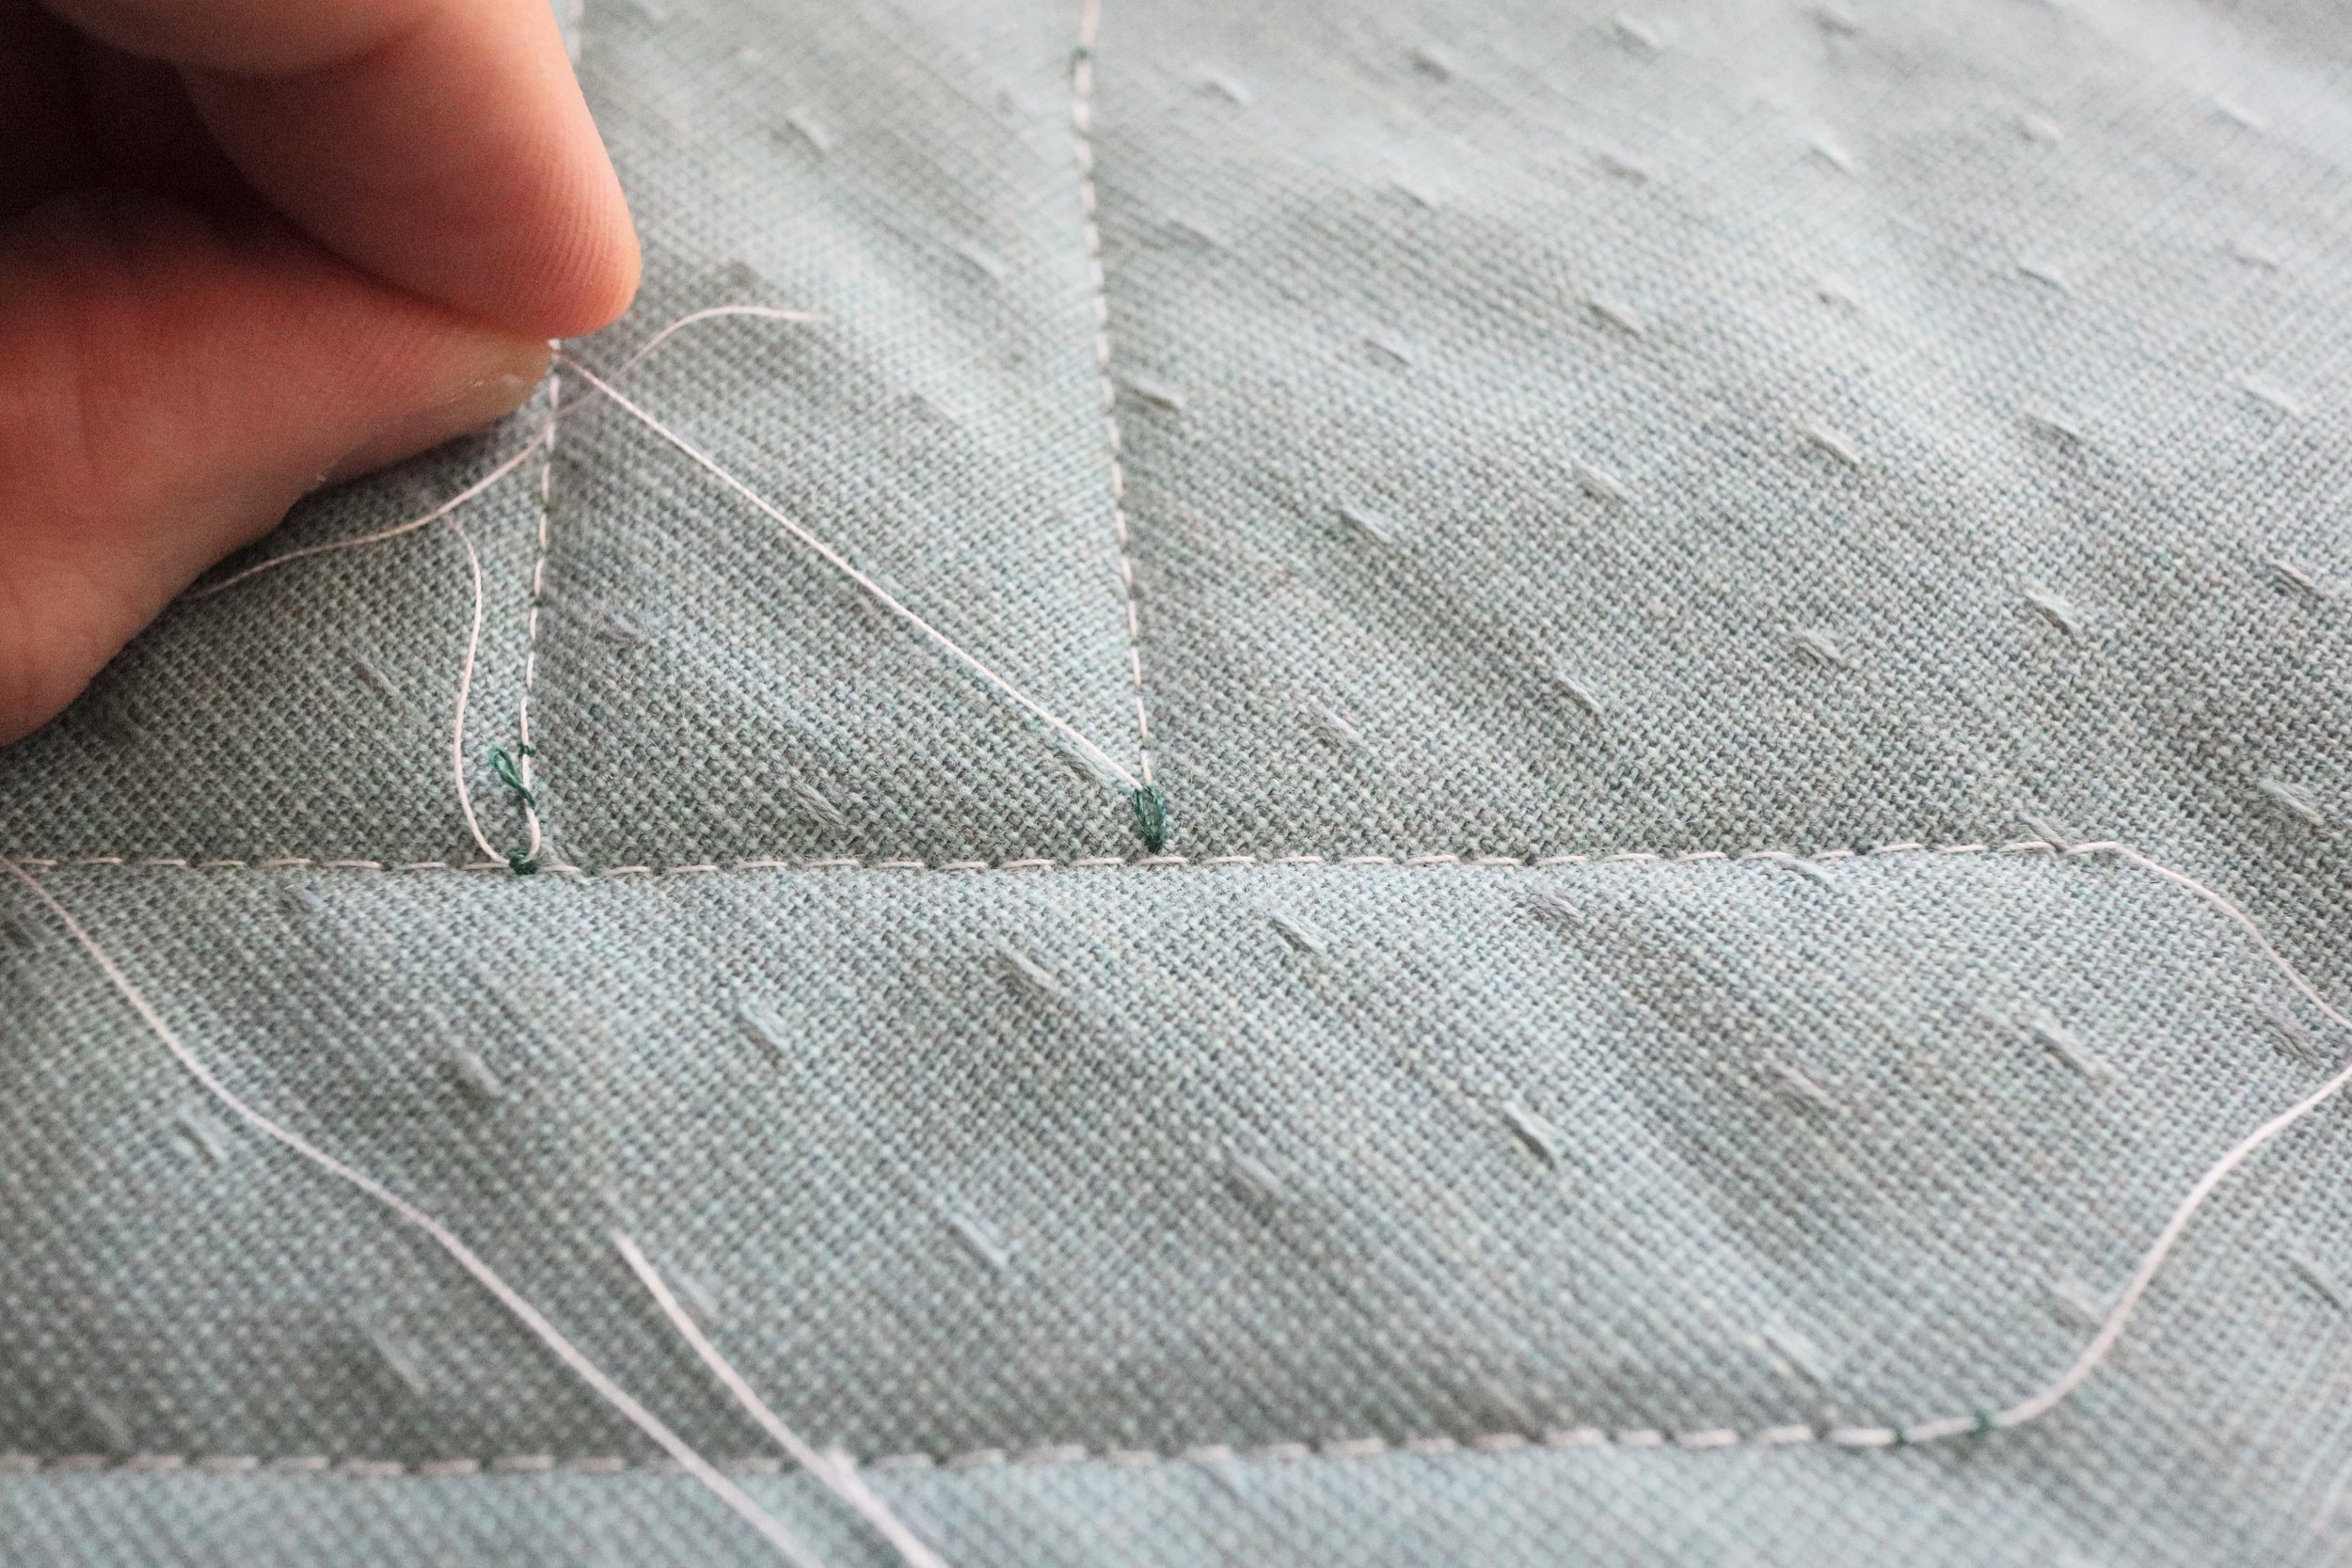
But if you’re starting and/or stopping in the middle of your quilt, like I did for this Adjourn, the best way to keep a clean line on your stitch is to tie off and bury your threads. This is a pretty straightforward process, but it does take quite a bit of time.
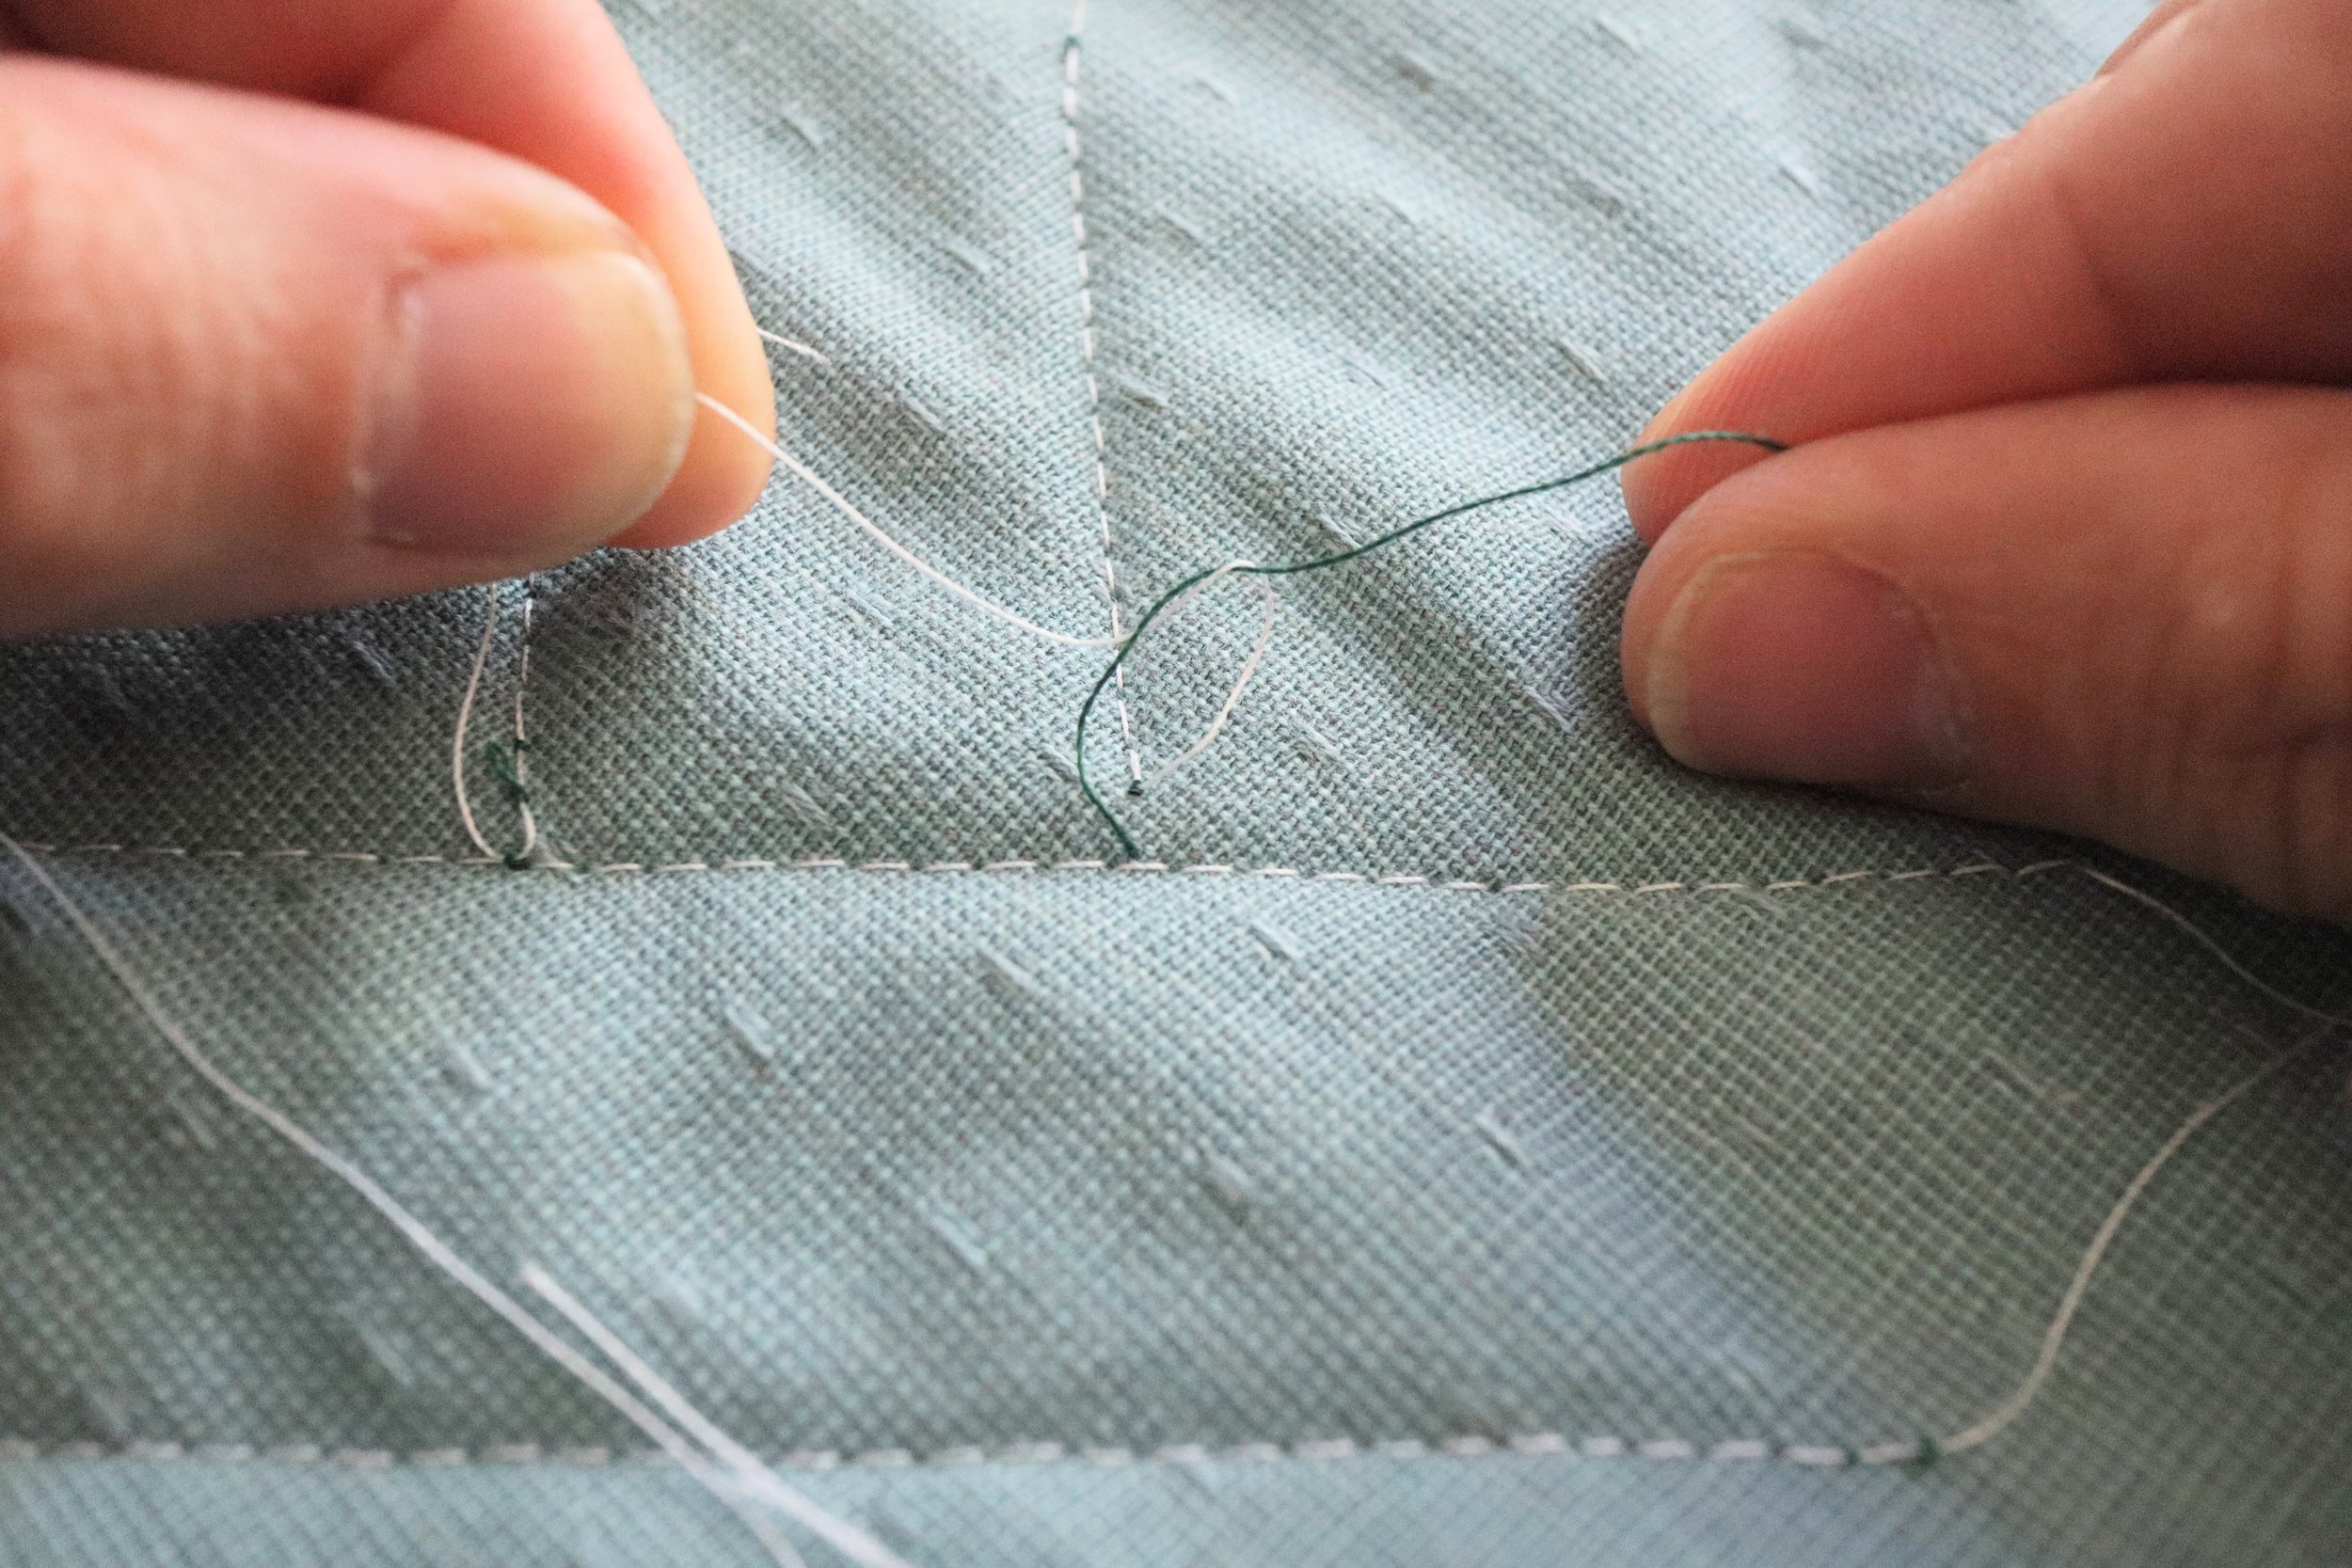
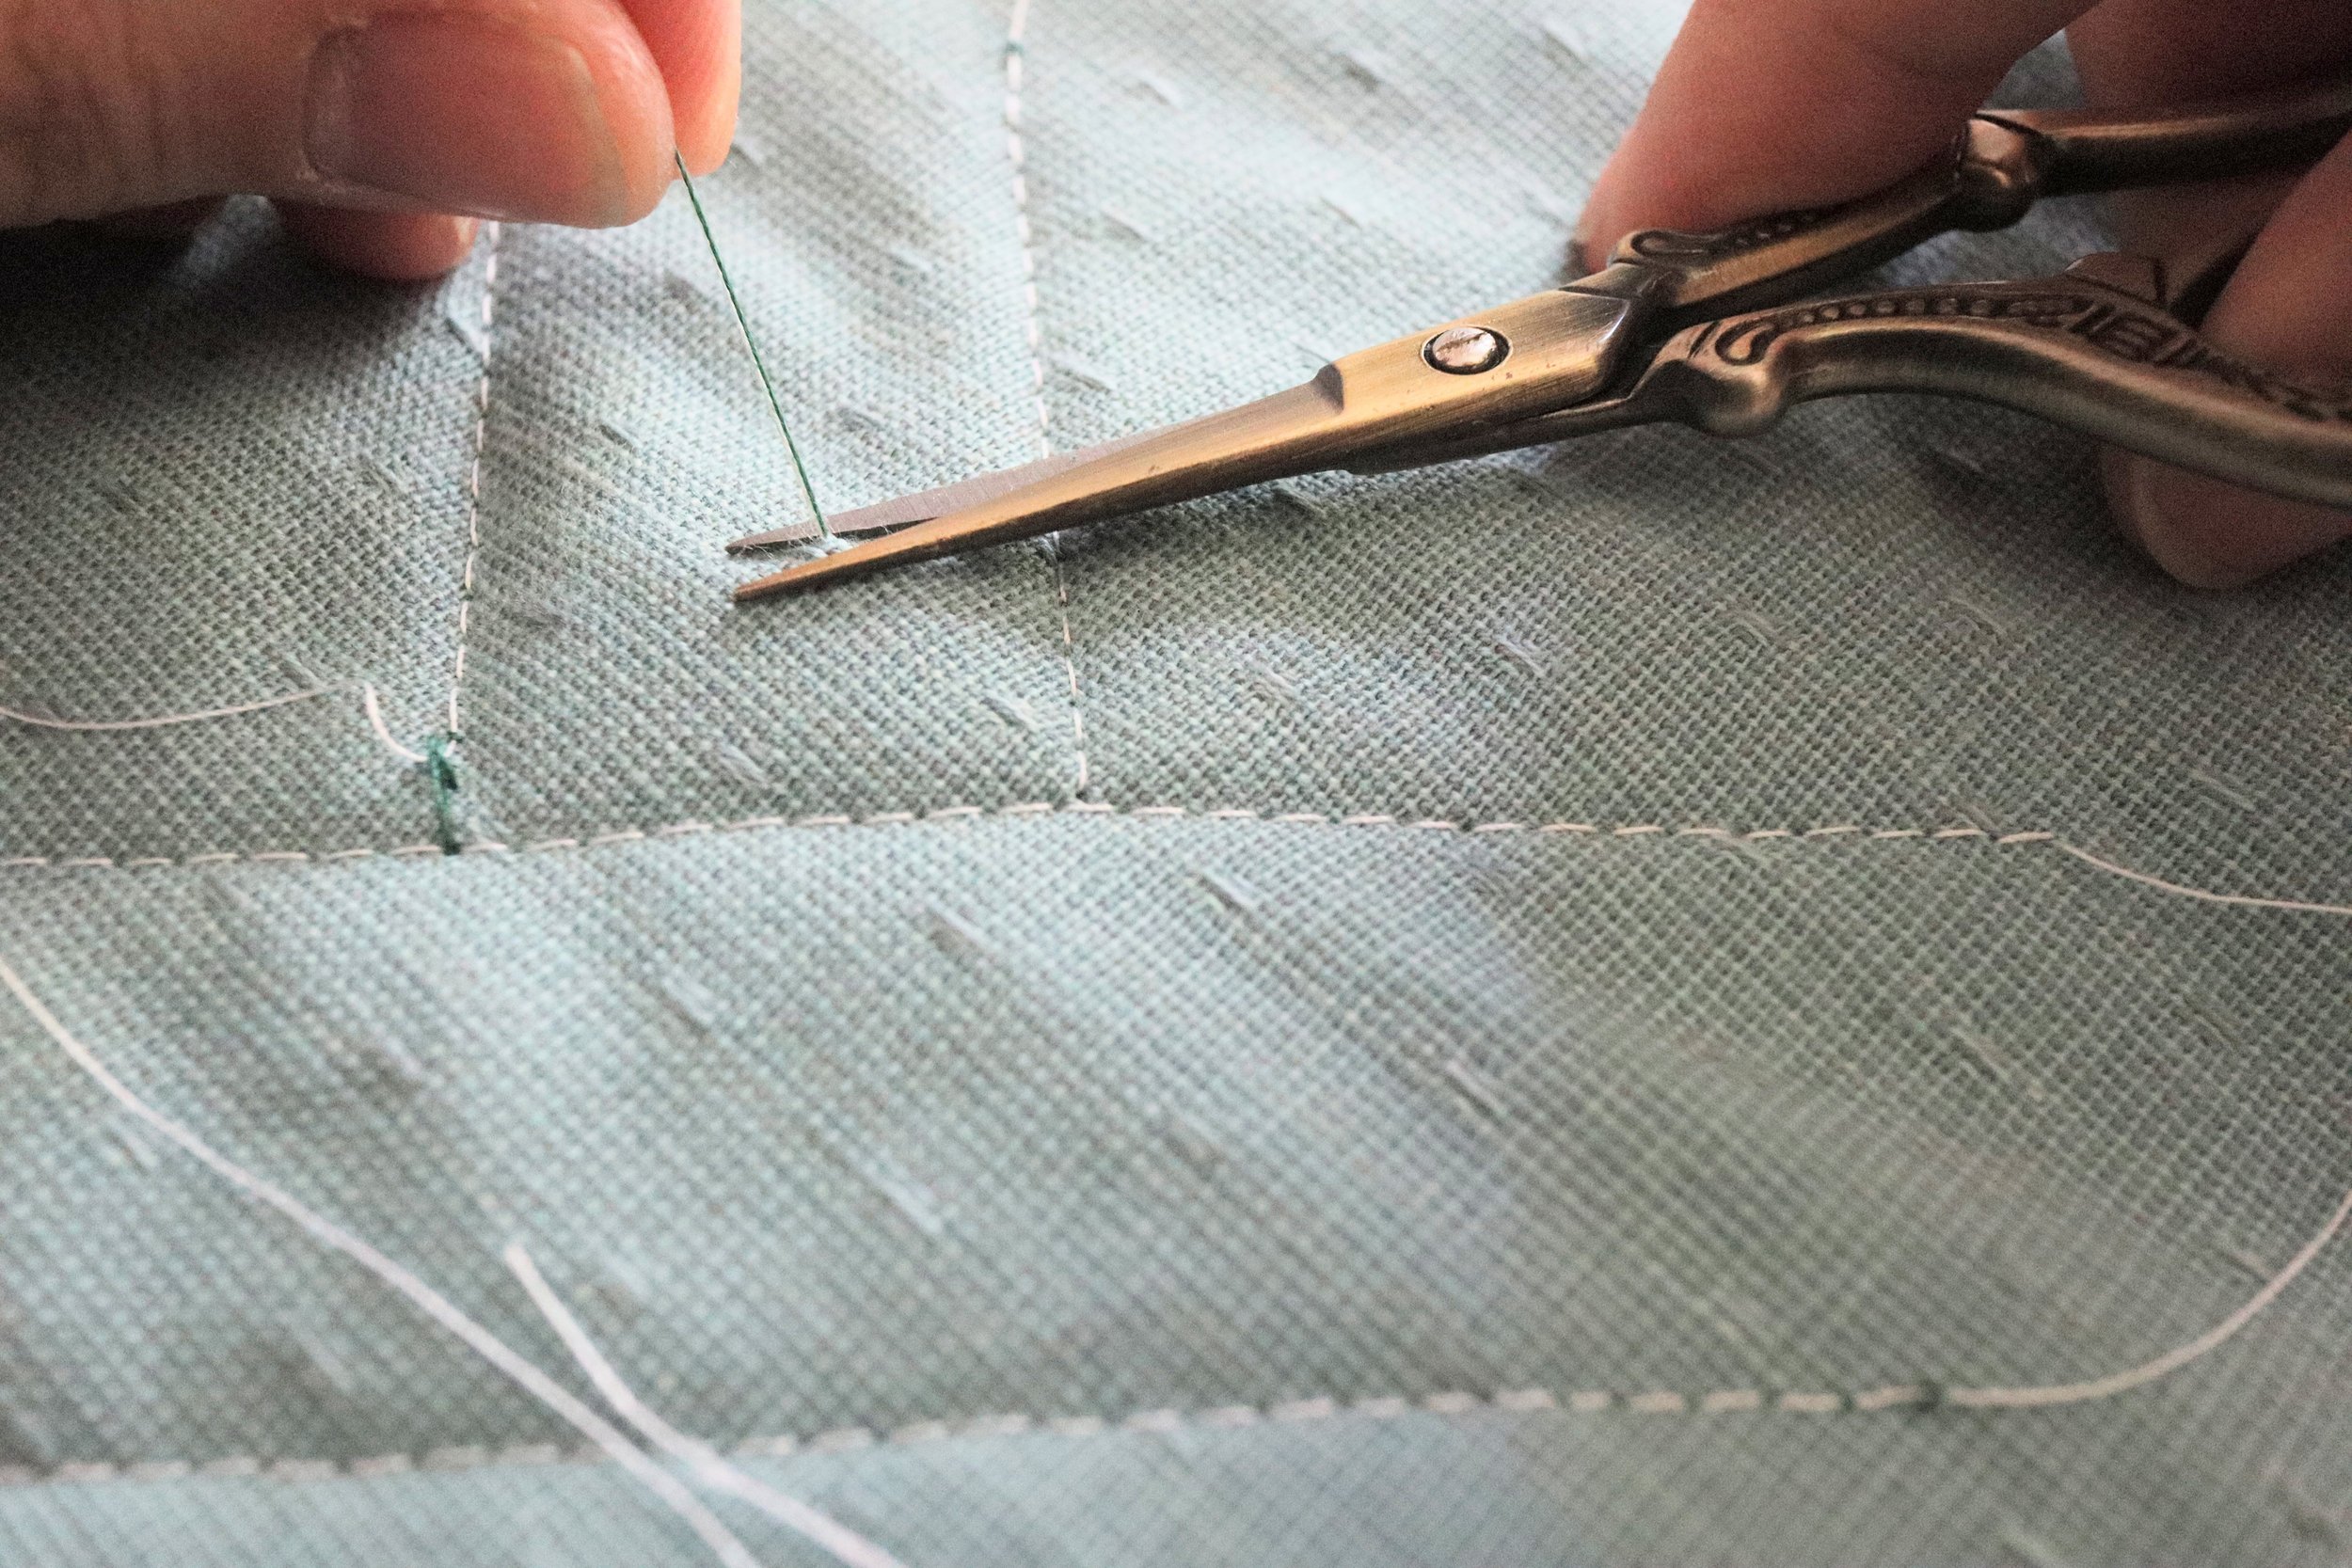
Quilt everything like normal, leaving loose the threads that are at least 4 inches long. To bury your threads, first pull the top thread until you see a small loop pop up. Pull that loop up from the back to the front using a needle or the rounded side of a seam ripper, then tie both threads into a knot.
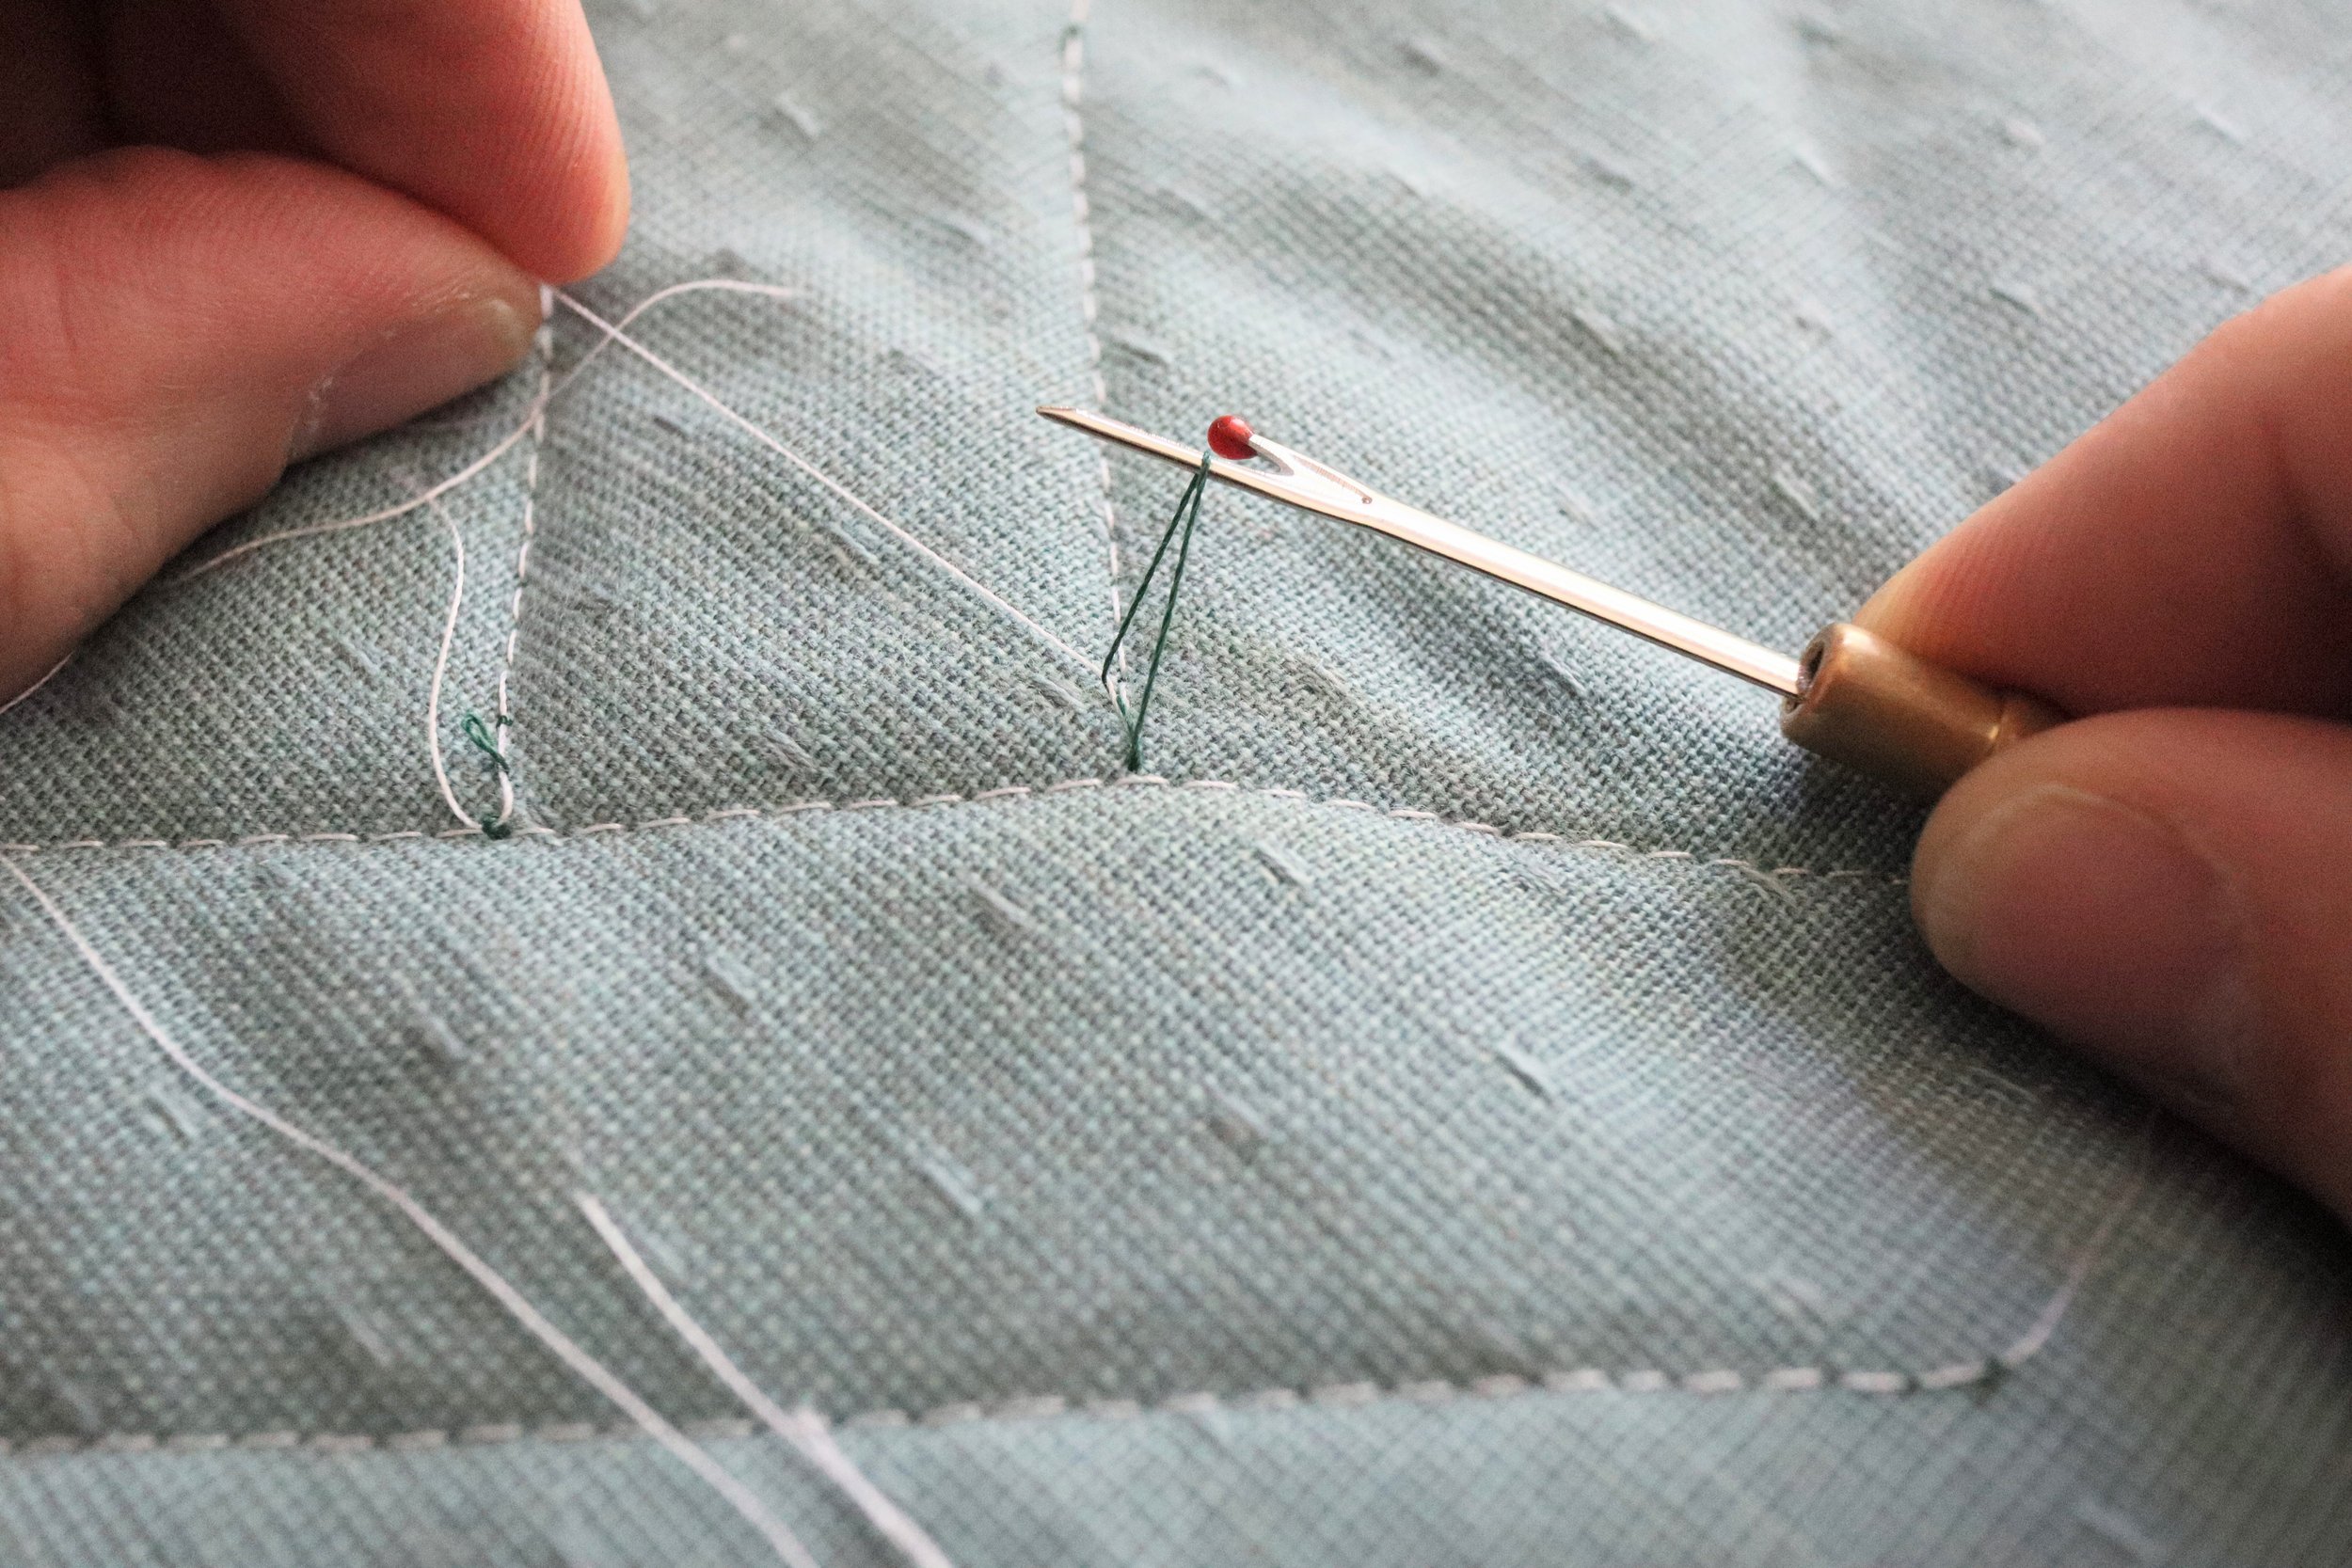

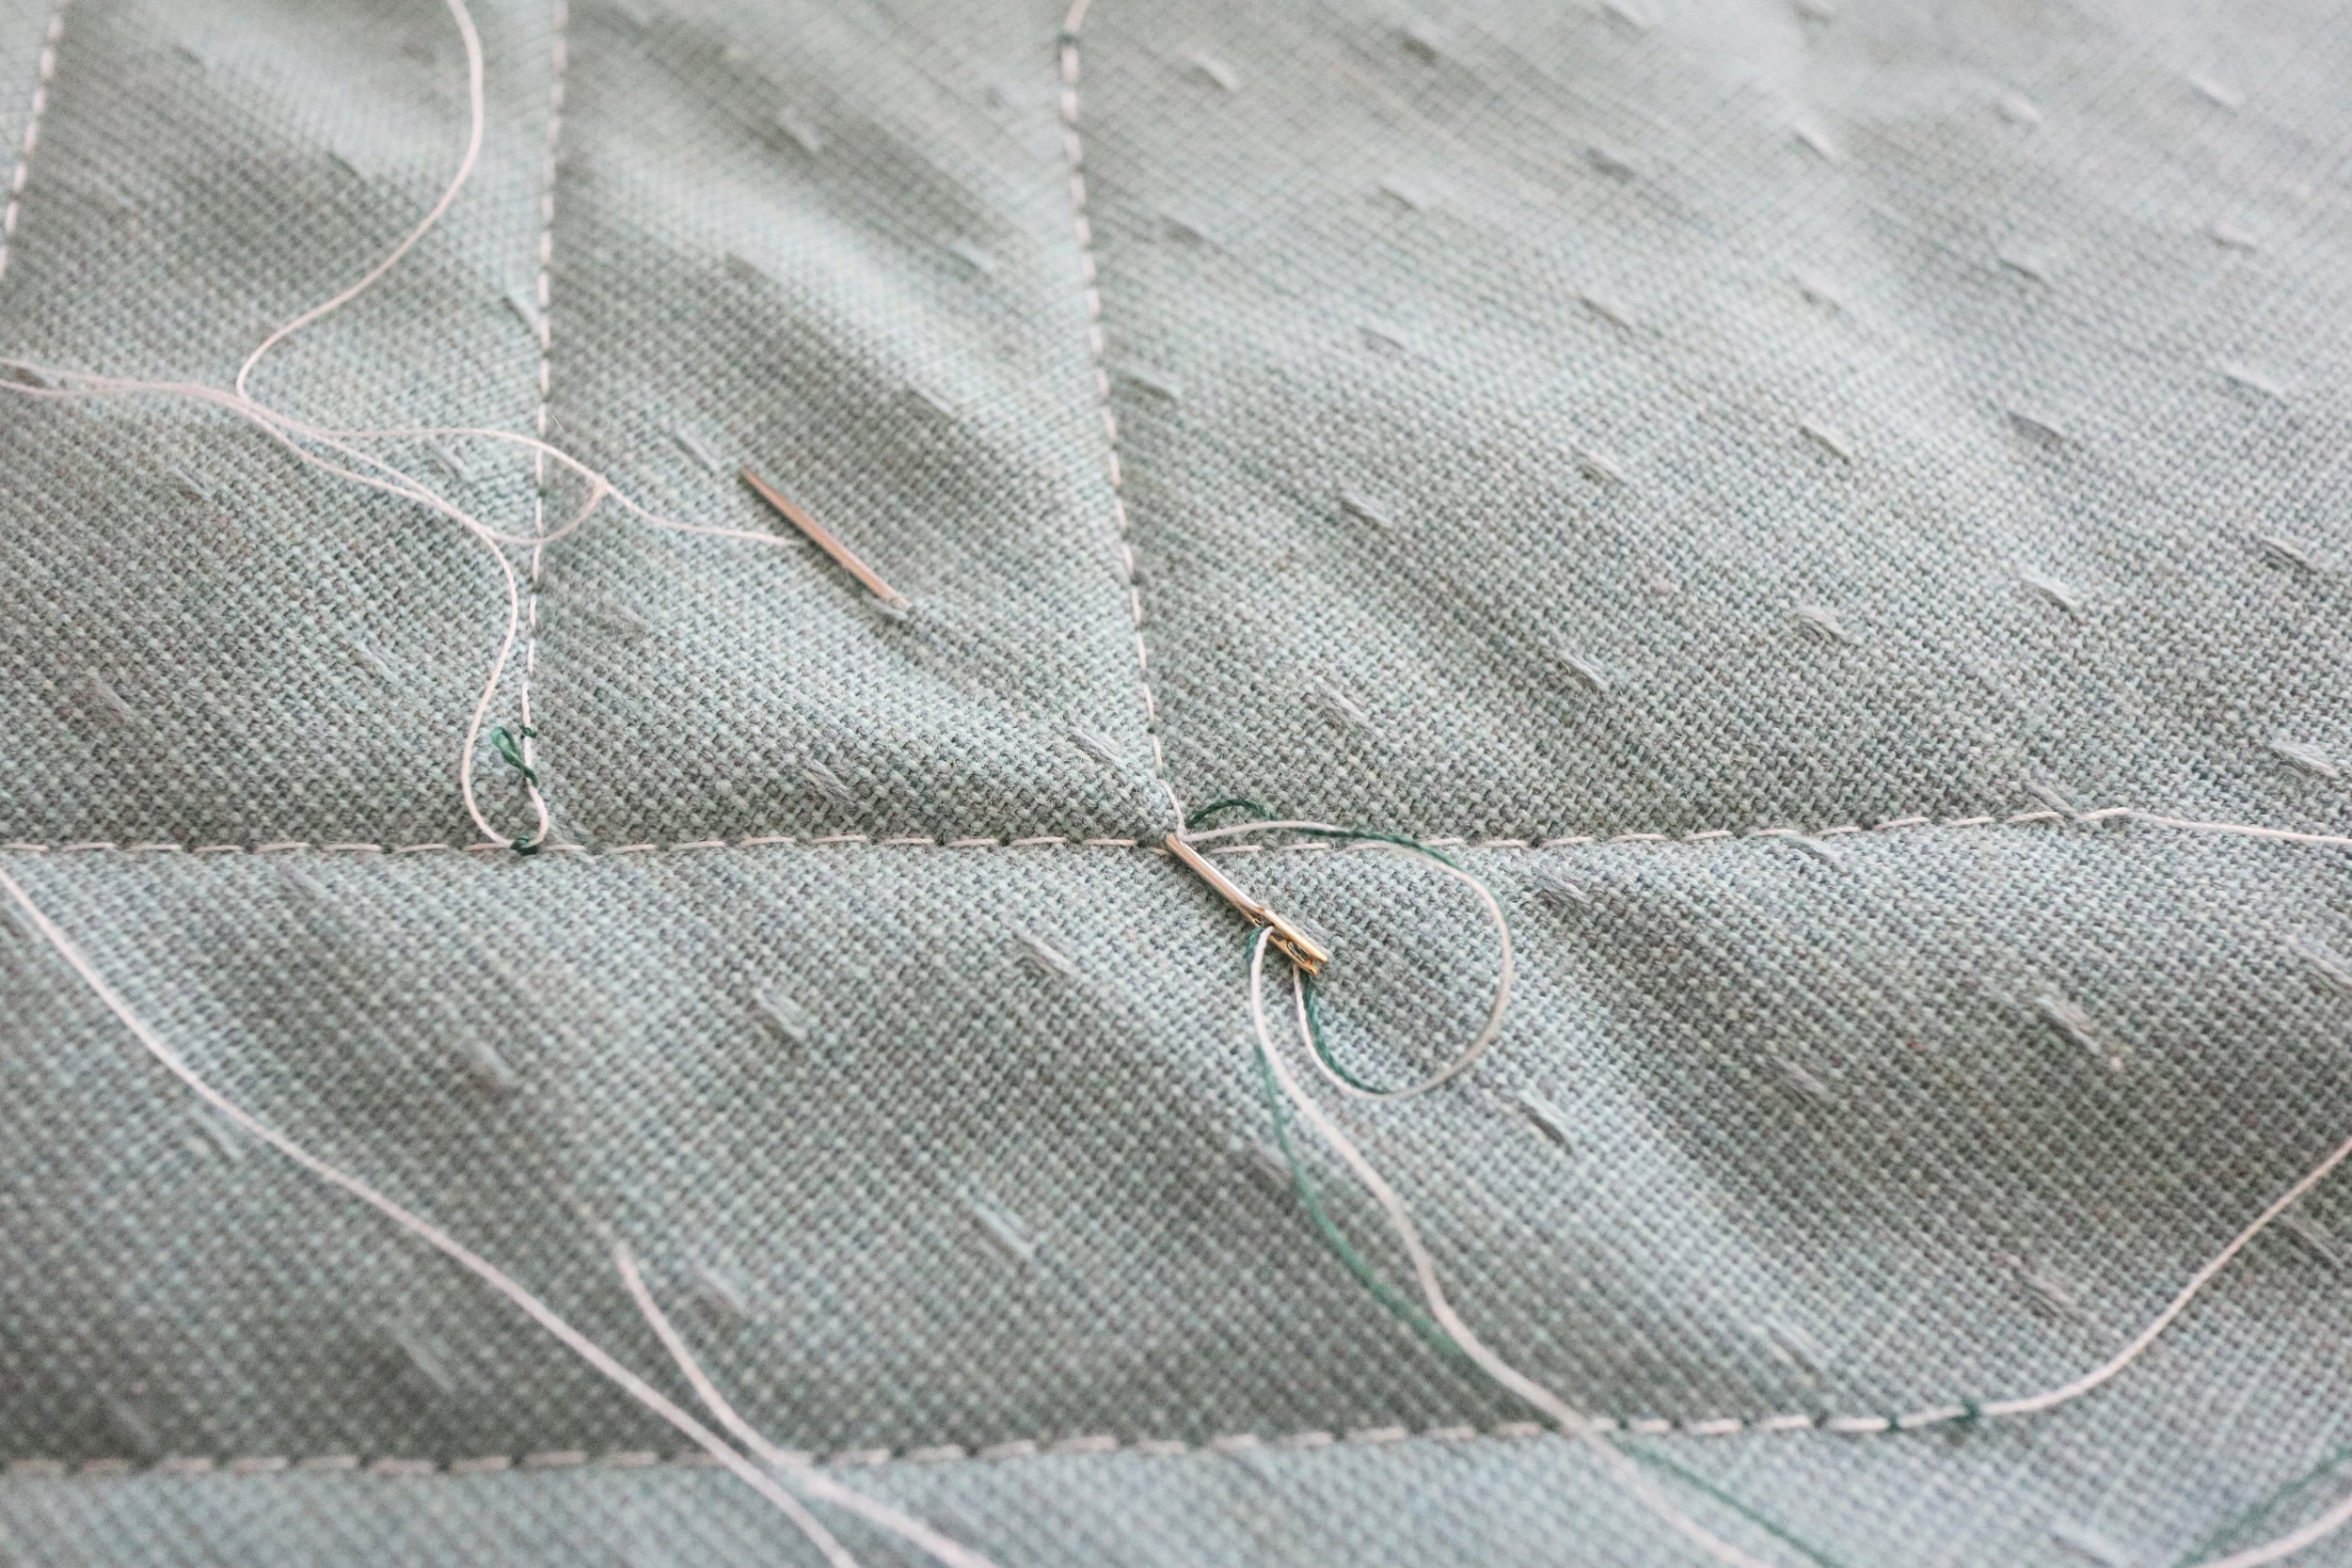
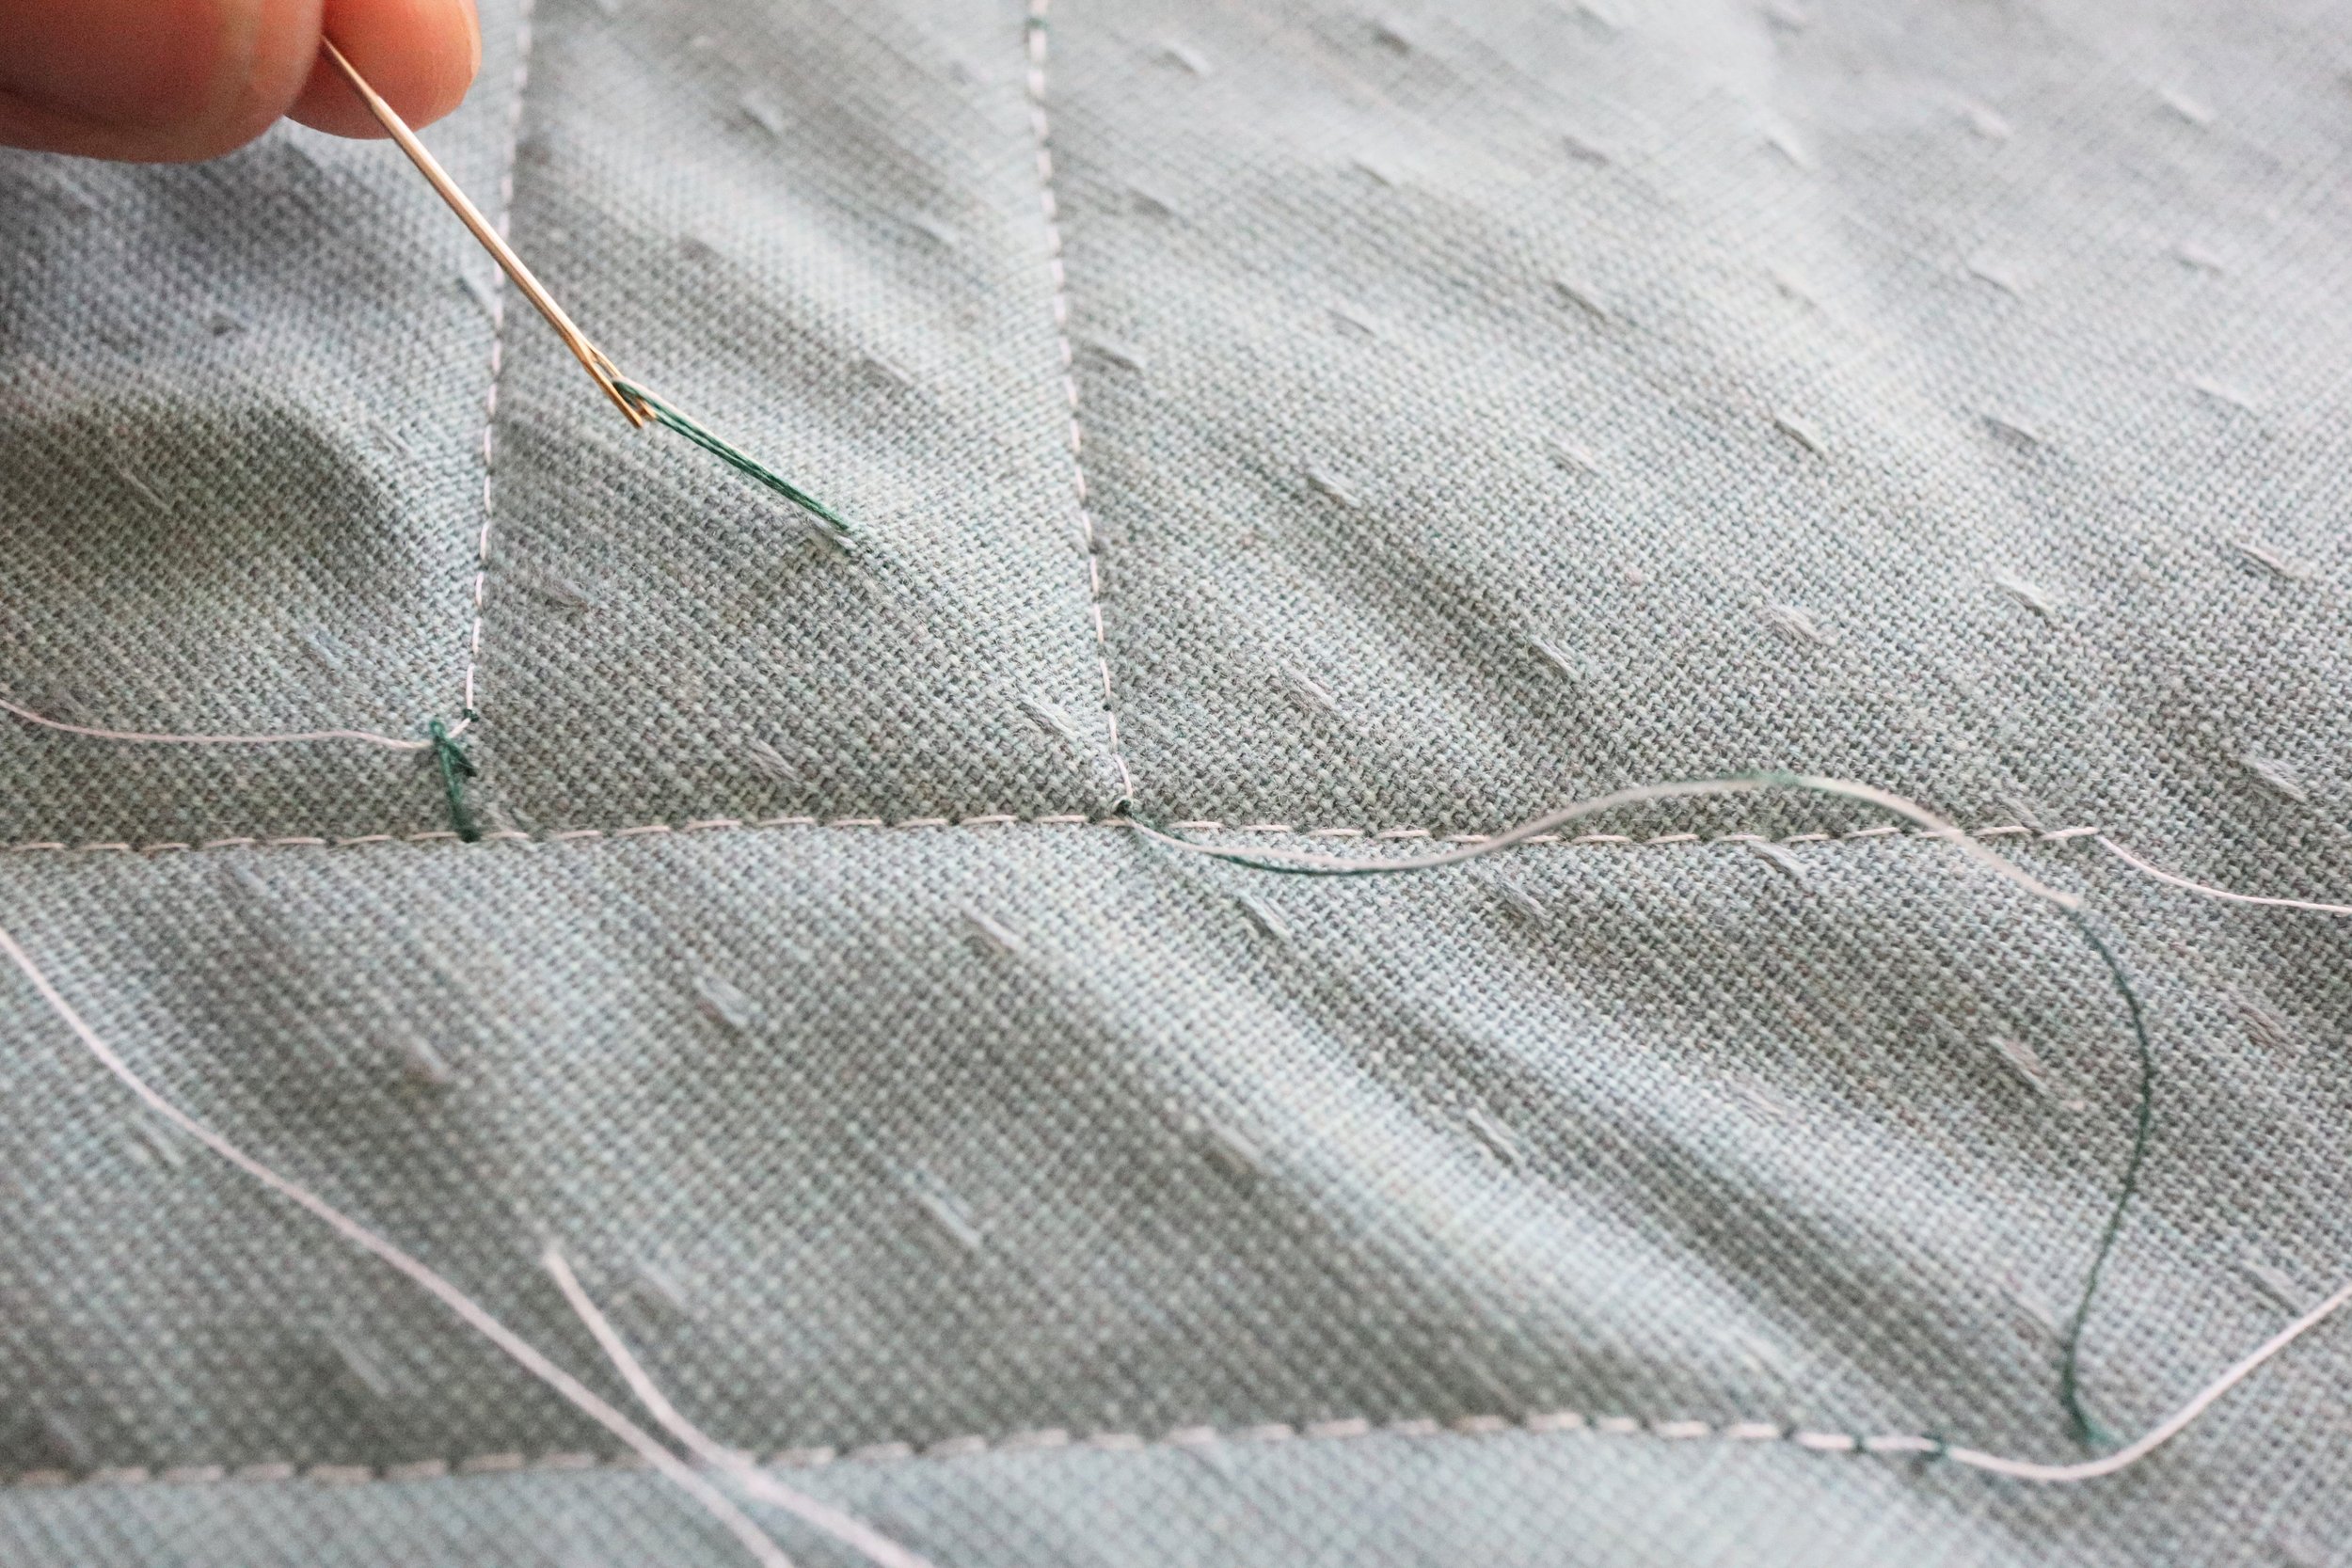
Thread both threads through a needle and bring the needle through the end of your stitching line where you pulled the bottom thread up. Let the needle travel between the layers of your quilt for a couple inches, making sure it doesn’t show through the front or back, before pulling it back through the top.
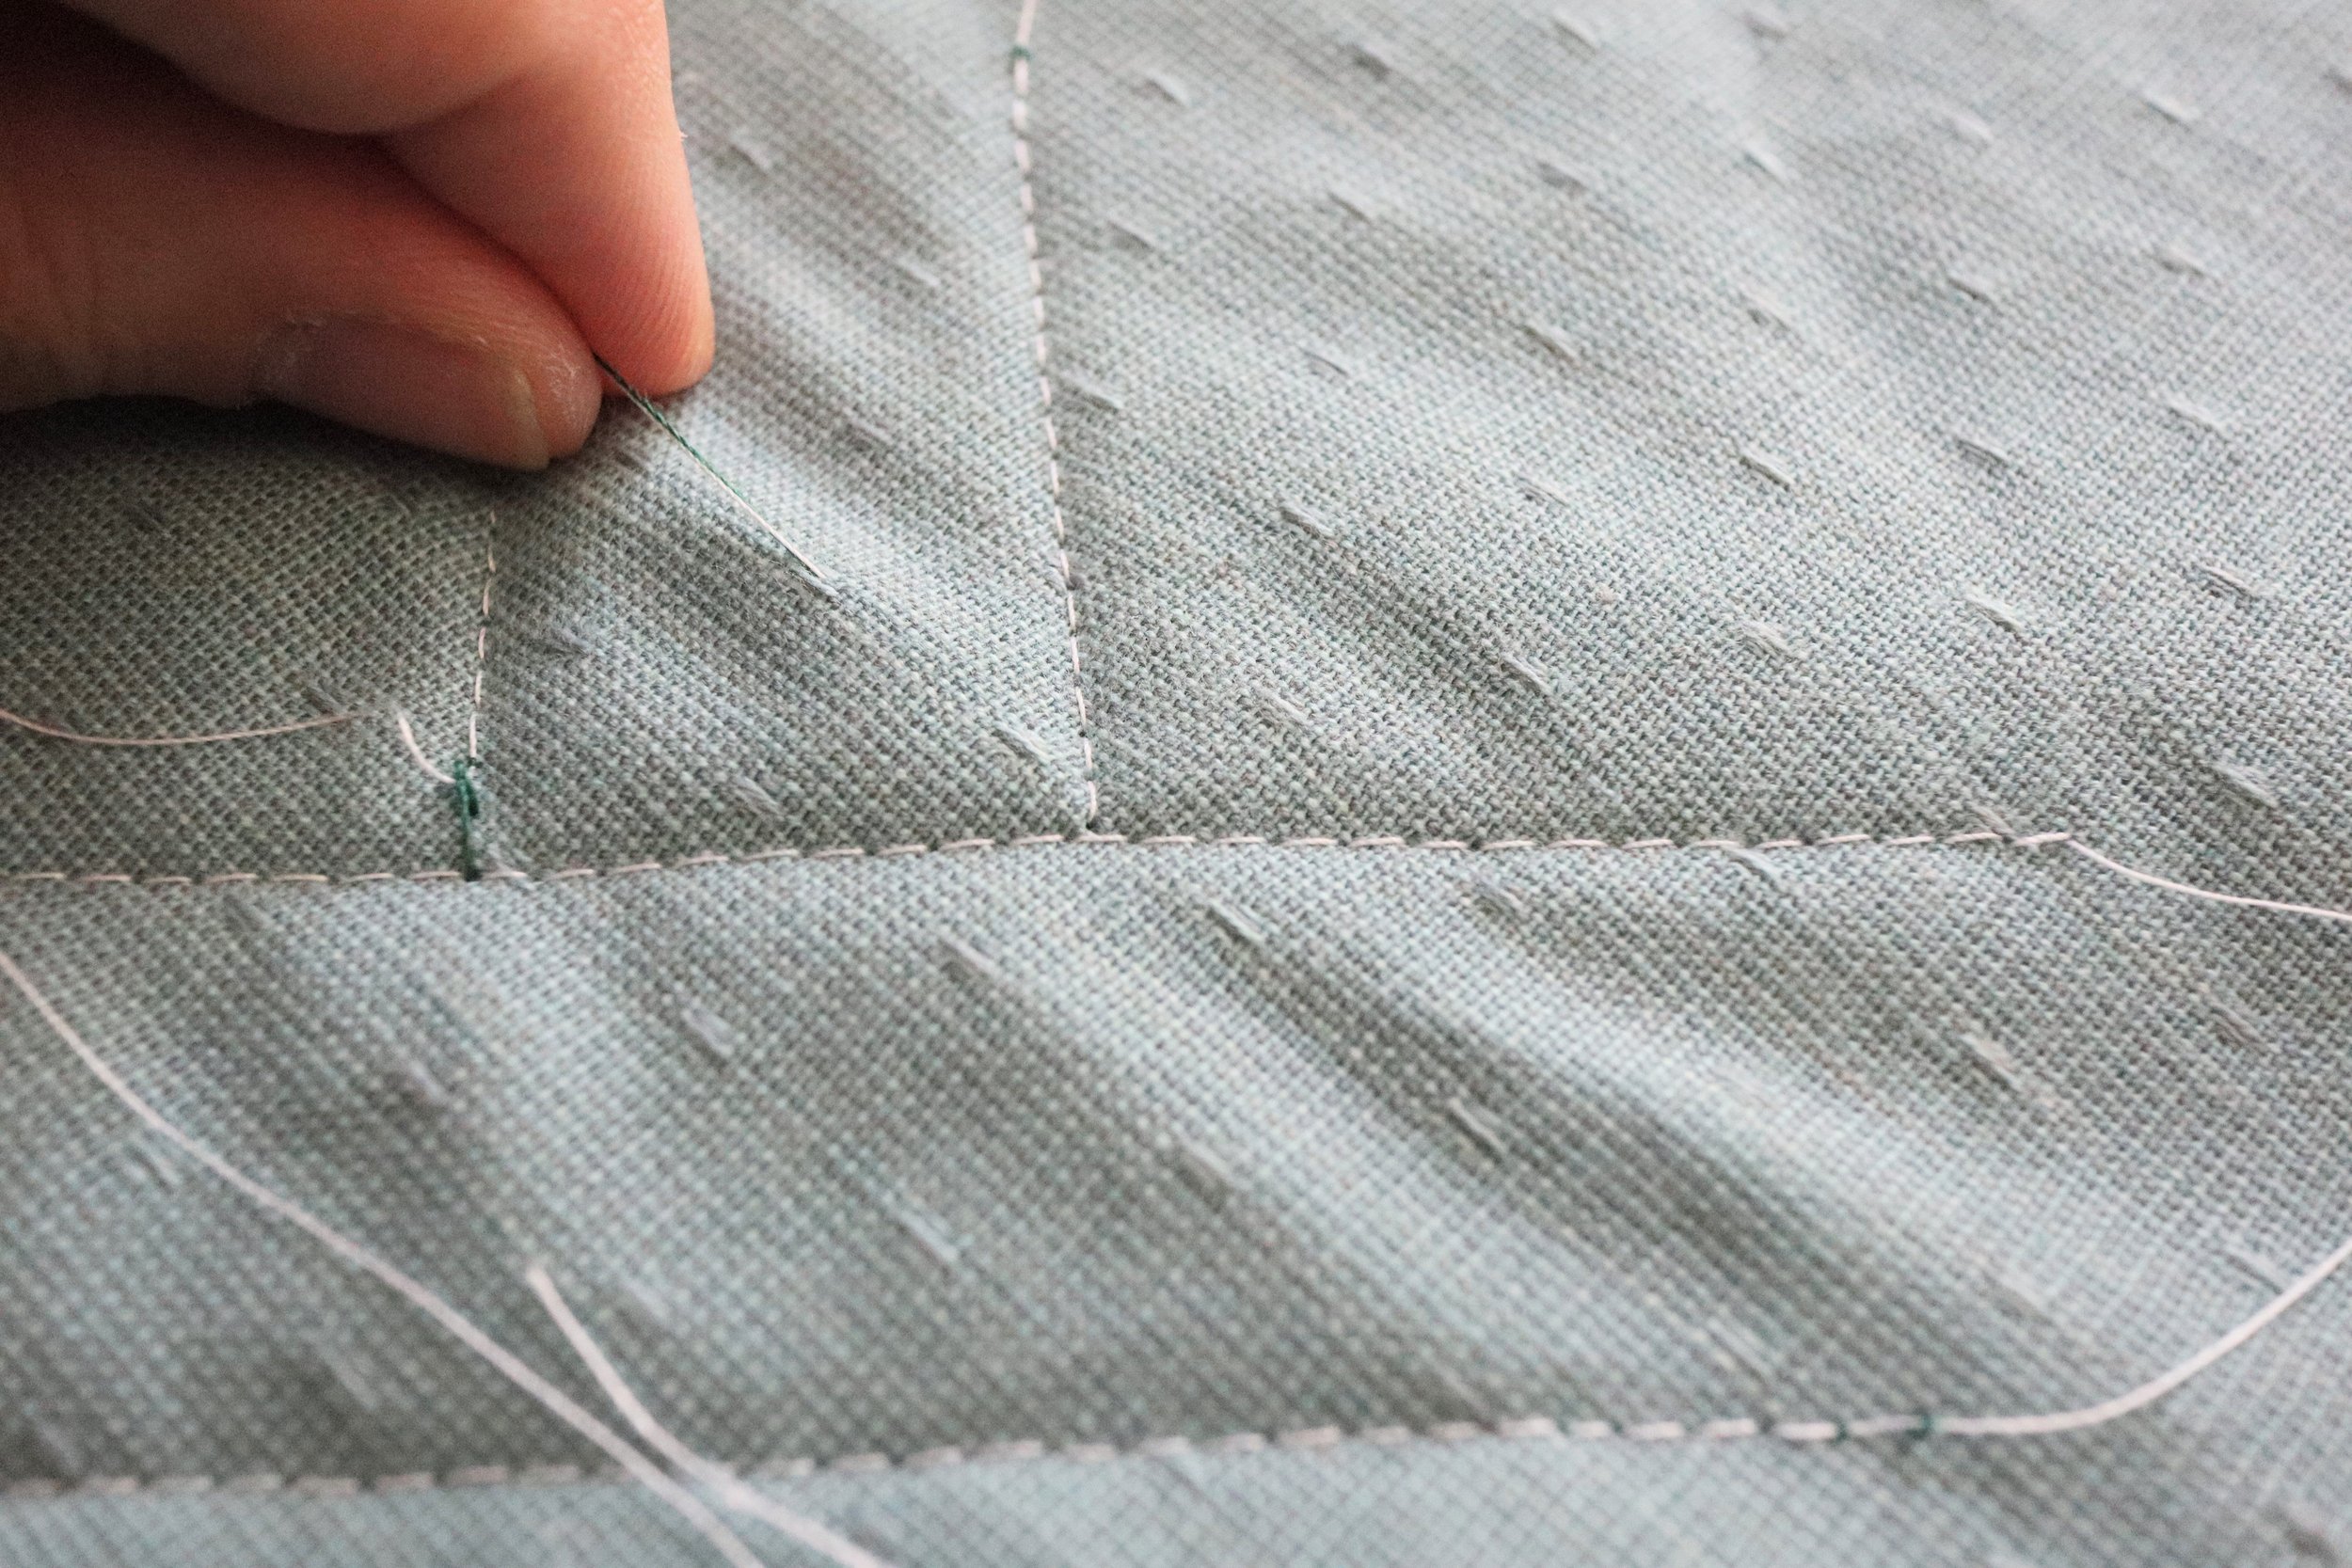
Pull the threads lightly so the knot pops in between the quilt layers. Then trim the threads and you’re done!
Questions?
That’s it! My guide to straight line quilting. Let me know in the comments below if you have any questions or anything you’d like to see on my blog in the future!

Note: This post may contain affiliate links and I may earn a small commission when you click on the links, at no additional cost to you. As an Amazon Affiliate, I earn from qualifying purchases.