
Modern Scrappy Strip Quilt
I don’t know about you, but I tend to buy more fabric than I need for any given pattern to account for changes, mistakes, or simply because I haven’t yet decided which fabric I’m using for a binding. Because of this, at the end of making a quilt top, especially for those fabric bundles I just adore, I tend to have fabric leftover that’s not quite enough to use for another full quilt, but more than I want to toss into the scrap bin.
As the result of one of these quilting endeavors, I created a simple way to reuse those scraps as a fun and modern strip quilt, either to use as a backing on your original quilt top or to make into a quilt all its own! All you need is extra background fabric for the border (or leave it border-less if you wish and play around with sizing, or add in extra scraps as desired)!
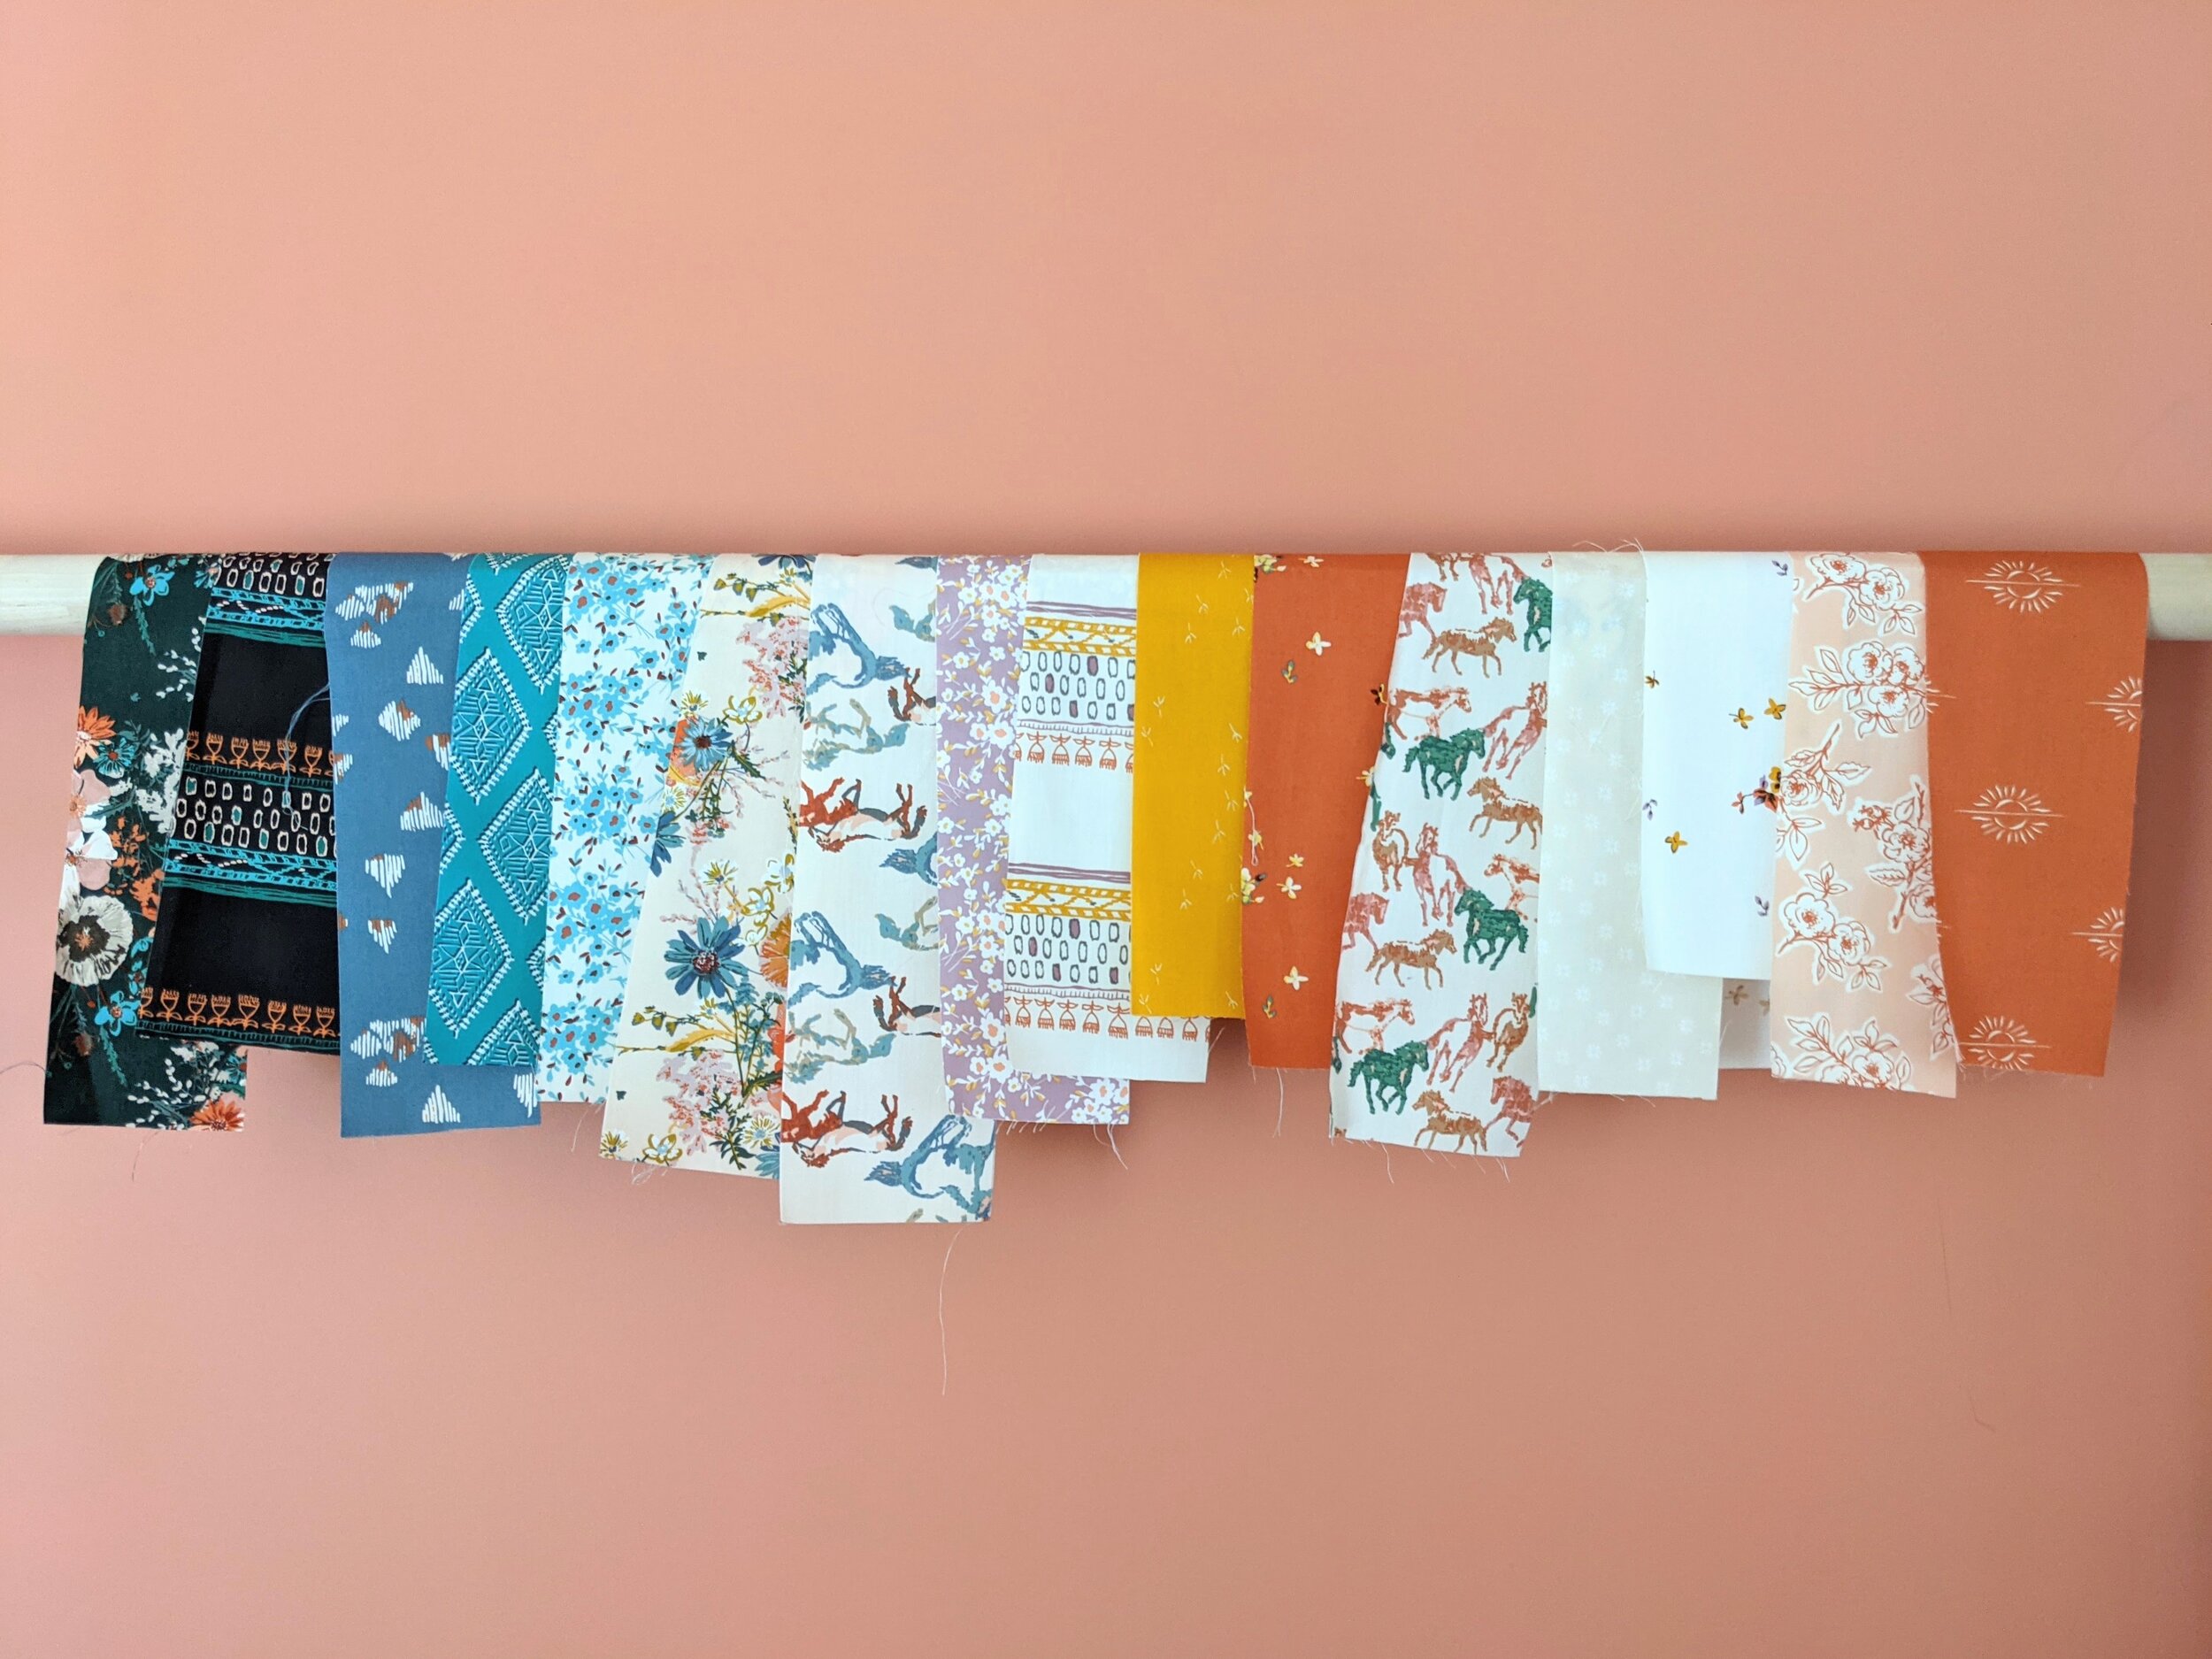
First, I used my design board (but you could use your floor or large table) to lay out all my leftover fabric into strips. I didn’t expect these strips to fill the whole quilt, but this allowed me to see what I had to work with. I also had a pile of smaller pieces that gave me some different options.
If you have strips that are too short - either slice them lengthwise to make a skinnier, longer strip, or improv piece them together with other small pieces to make a scrappy strip. You also want to think about strip height. Do you want your strips to all be the same height? Or do you want them to be different? Will you lay them out in a predictable pattern, like going from lightest to darkest, or will you lay them out randomly?
I tend to take a very organic approach to this. If my pieces are all the same size, I may decide to keep them as is, but if my pieces are all different lengths and widths, I may want to slice and piece them to fit together more easily. For this project, my leftover fabric strips were all approximately the same height and width, so I decided to line them up, as they were, into a column of equally sized strips, then add a large border of background fabric. I tried out adding small pieces of fabric to piece in for a more scrappy look, as seen below, but in the end, decided to keep it simple and stick with the solid rows of fabric.


Once you have all your strips planned out, get piecing! Piece any scrappy strips first and trim these down so they are straight on the top and bottom. You can use a uniform strip height for a more minimalist look, or you can improv cut them so they are skinnier on one end and thicker on the other, making for a more fun and funky look! I decided to keep mine straight, and since they were all relatively the same size, I trimmed all the strips down to 3.25” so they would be uniform.
Because my strips were taller (3.25”), I didn’t press in between each seam as I pieced, but you might want to do this if you’re working with smaller strips that might be more finicky. Piece these strips together in the order you planned previously, making sure to press your seams either open (my preference) or to the dark side.


Once your strips are pieced, trim them into a rectangle, making sure each corner is square and the width of the strip unit is the same on the top and bottom (unless you’re going for a more improv look, then do whatever your heart desires!). And just like that, you have your center strip!

Now comes the math! After all my strips were pieced together, I needed to add the border pieces. If you’re using a background fabric as a border like I am, check to make sure you have enough fabric to make strips on all sides of your fabric. This takes a little math, so I usually like to draw it out on dotted notebook paper or create a digital mock-up. As you can see from my digital mock-up, I decided to make mine a simple, small throw or baby sized quilt top with a finished measurement of 39” x 53” as seen here:
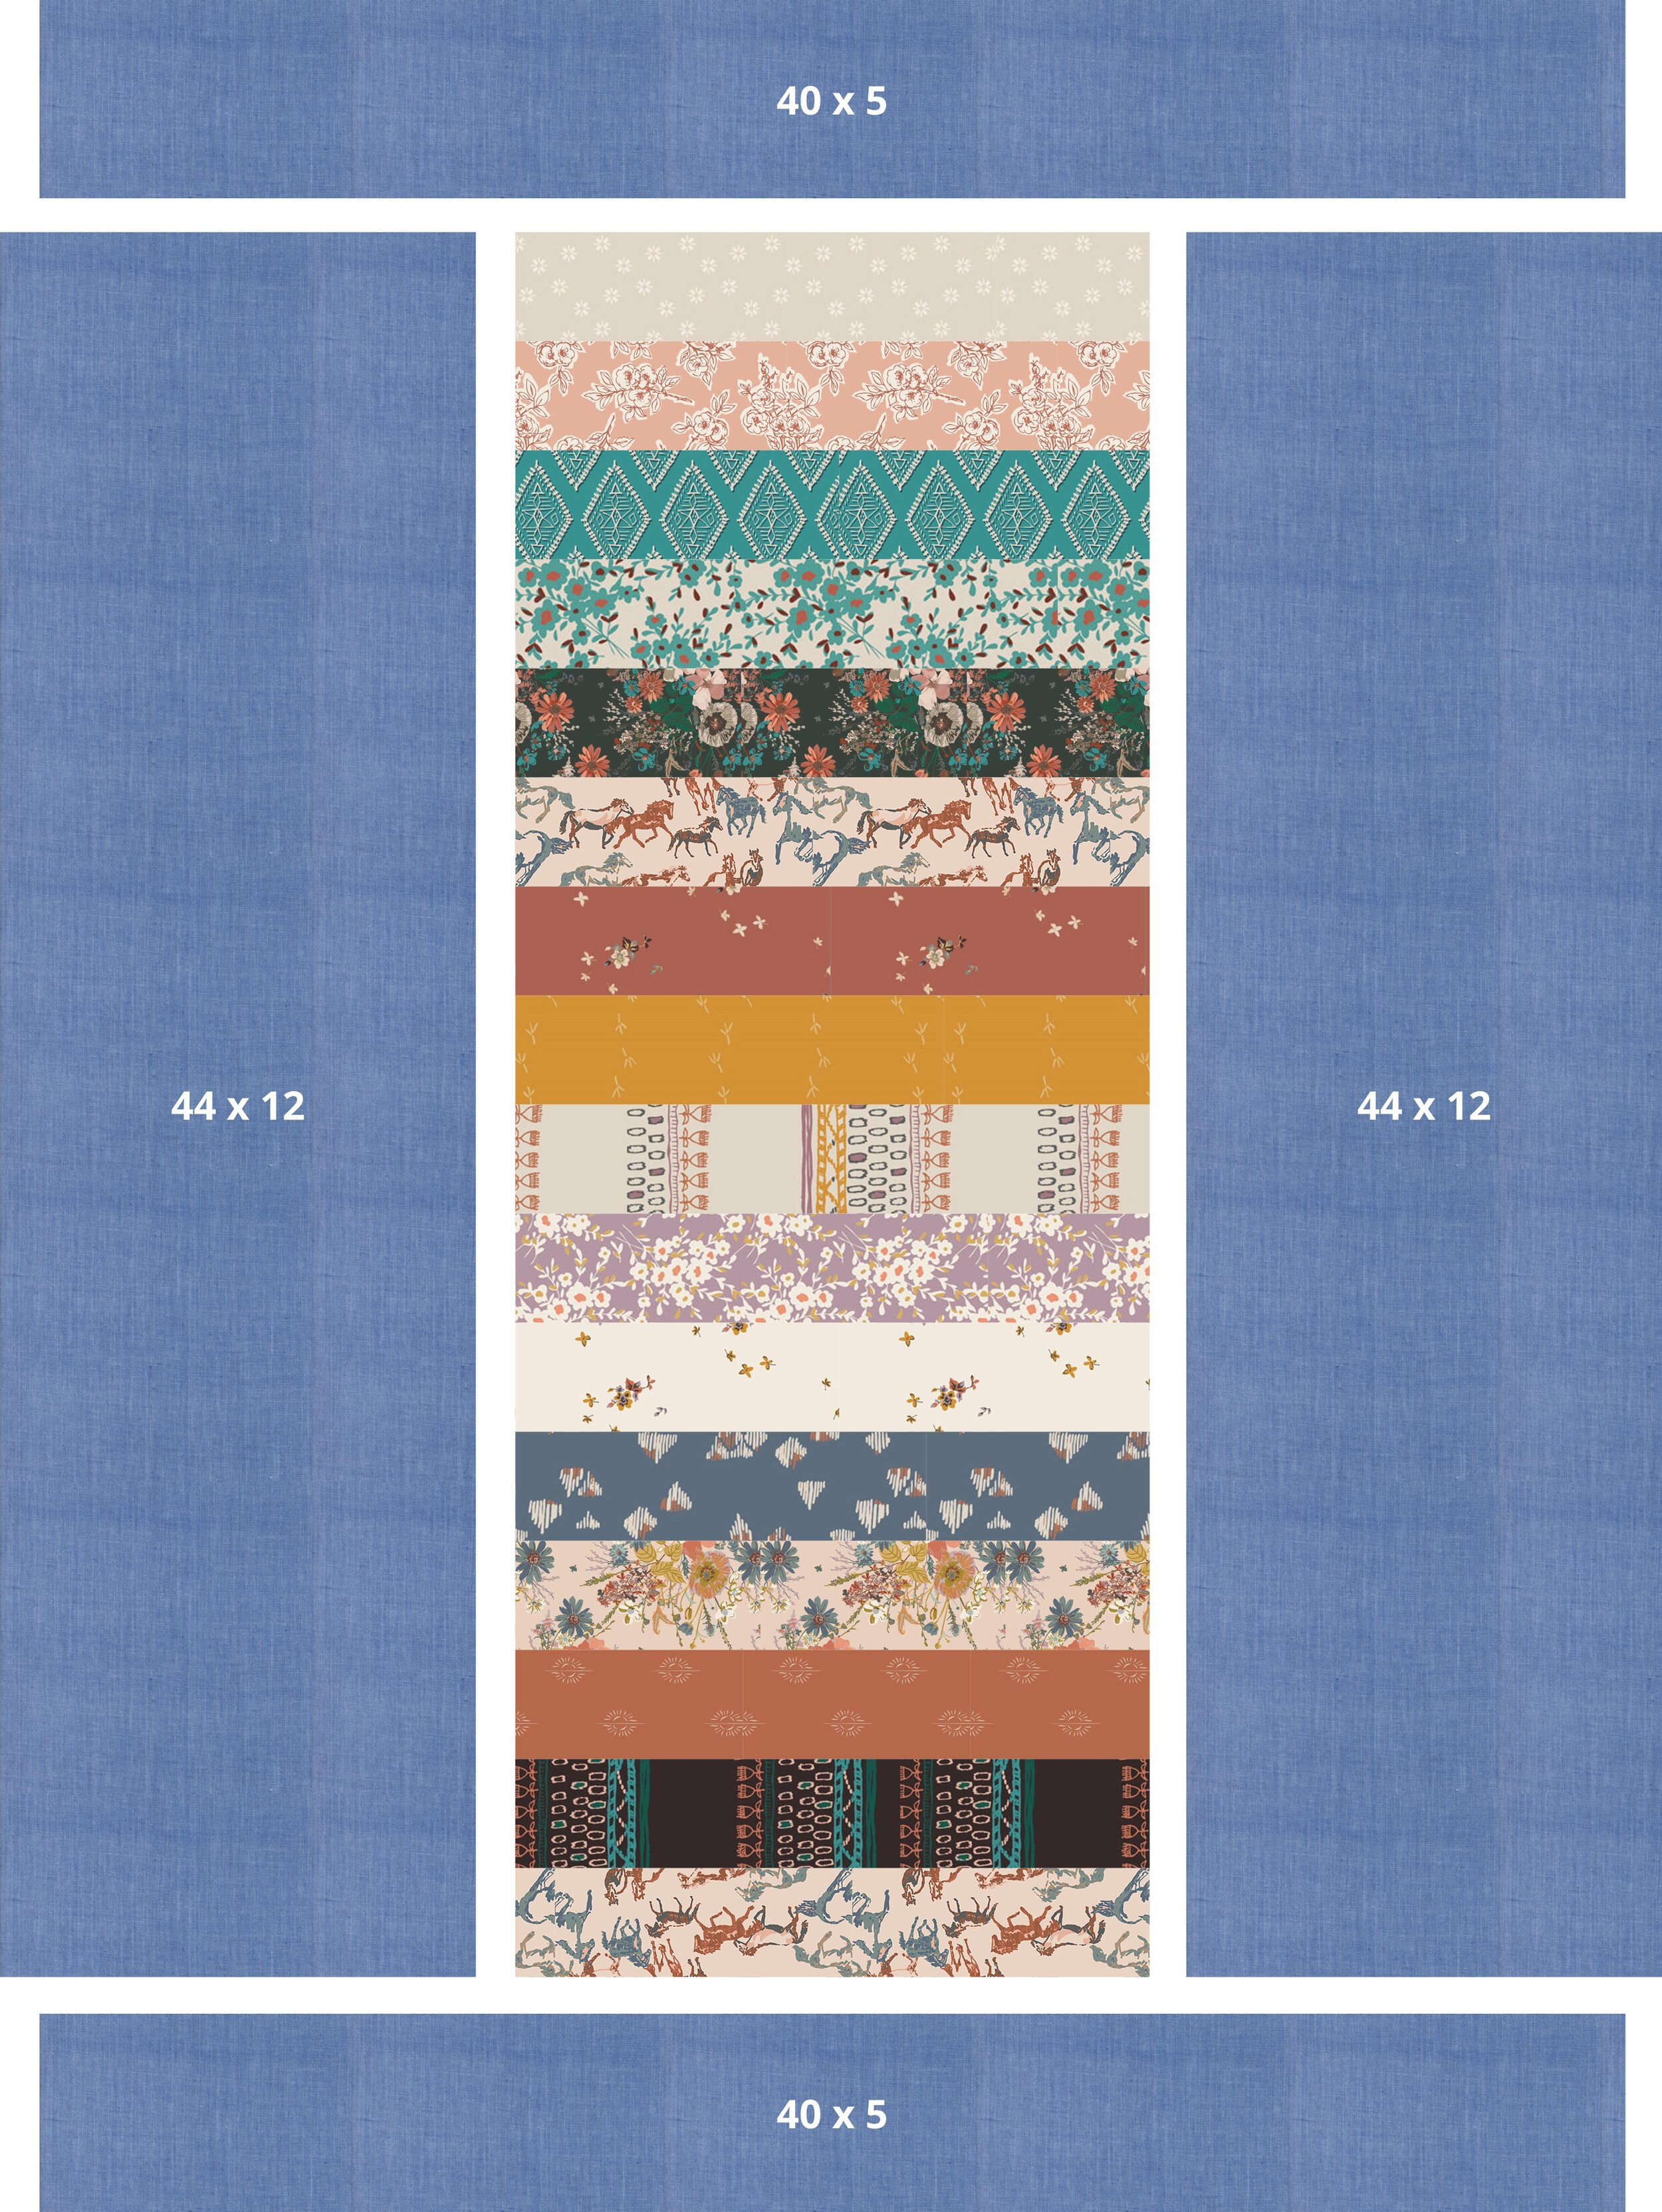

My strip-pieced rectangle was 16” x 44”, so in order to make this the size I wanted, I added 12” inch borders on the left and right, and 5” inch borders on the top and bottom. This gave me border piece dimensions of 12” x 44” and 5” x 40” (giving myself a tad extra fabric on the top/bottom borders to trim).
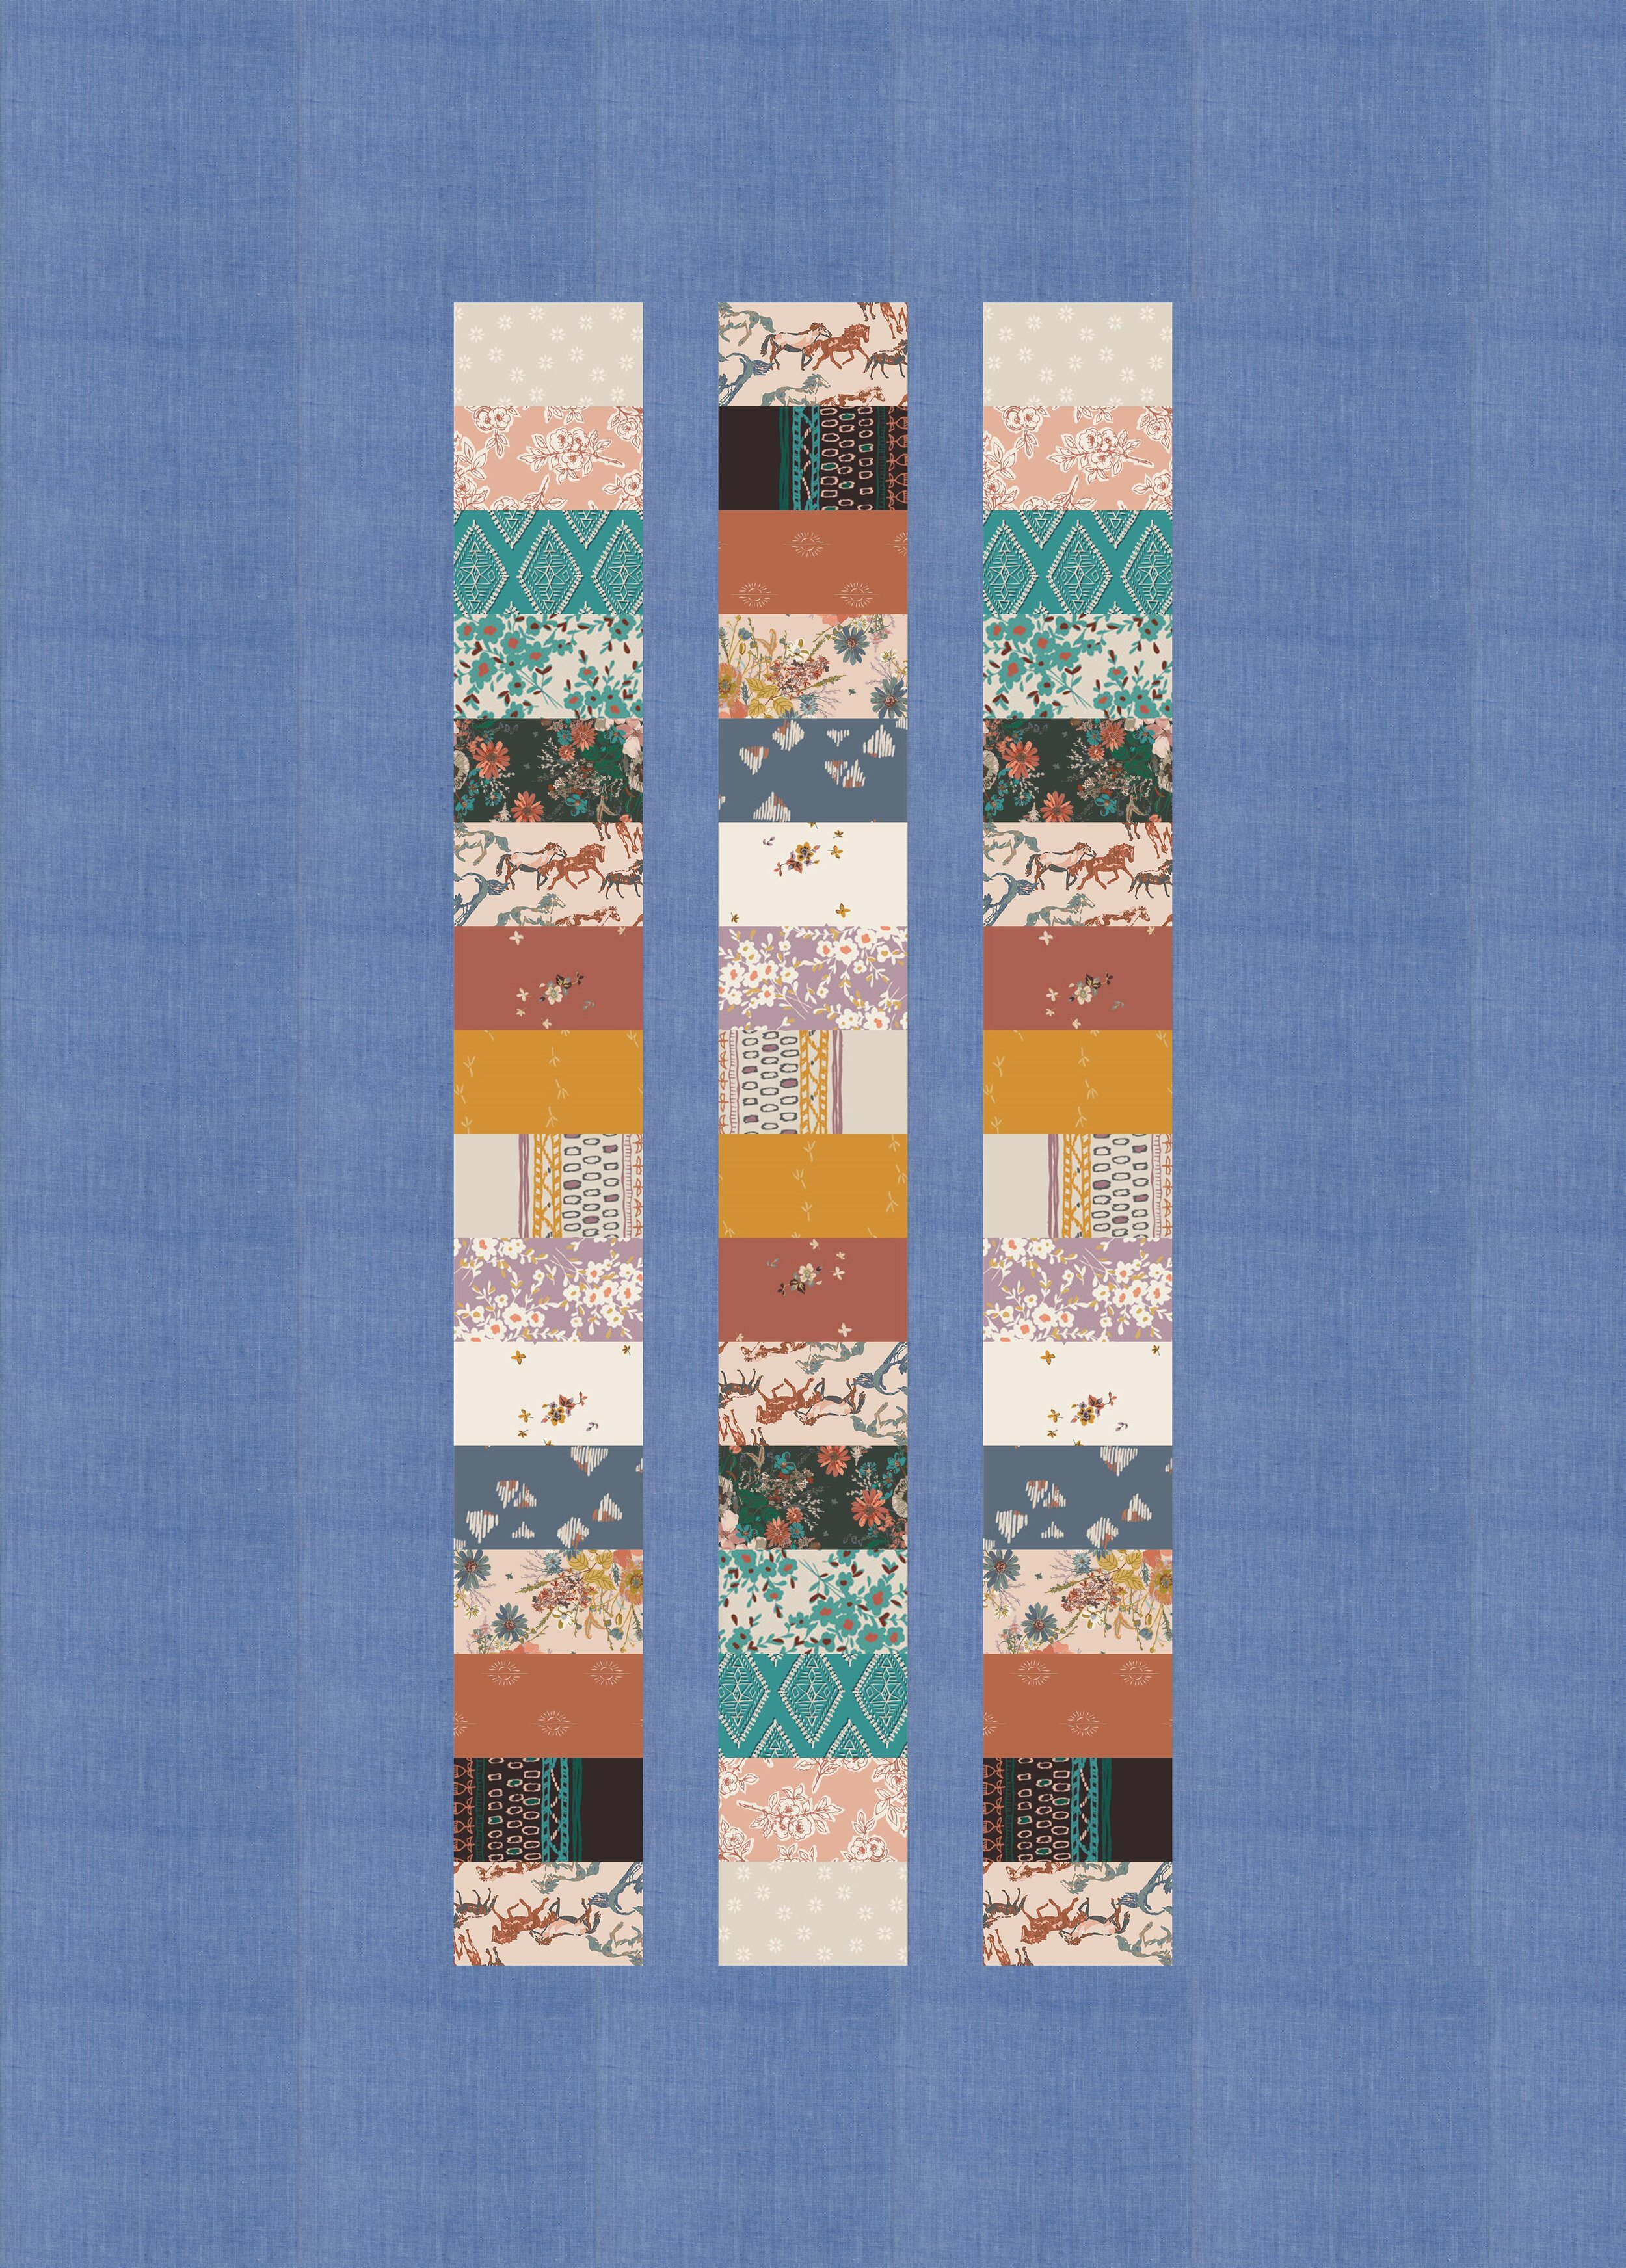
This is a great opportunity for creativity. You don’t have to follow my lead, there are so many unique ways to add borders! You can place your rectangle strip off center, slice it up to make a couple different columns, turn it sideways to run horizontally, or so many other combinations! I’ve put together a few of my ideas here that would work with my strip set:


Cut border strips to the length and width you planned out previously, then add them to your strip-pieced block. I like to make these border strips just slightly longer than necessary (1-2”) to stay on the safe side. To make measuring and cutting large border pieces easier, I prefer to tear along the grain of the fabric. To do this, measure how long your piece needs to be, snip about a 1/2 inch into the fabric and then tear the two pieces apart. With woven fabric, this tear will go directly down the grain and ensure a perfectly straight strip!


I pieced my side strips first and trimmed at the top and bottom. Next, I added the top and bottom strips. Once your border pieces are attached, trim to square up your quilt top and you’re finished!

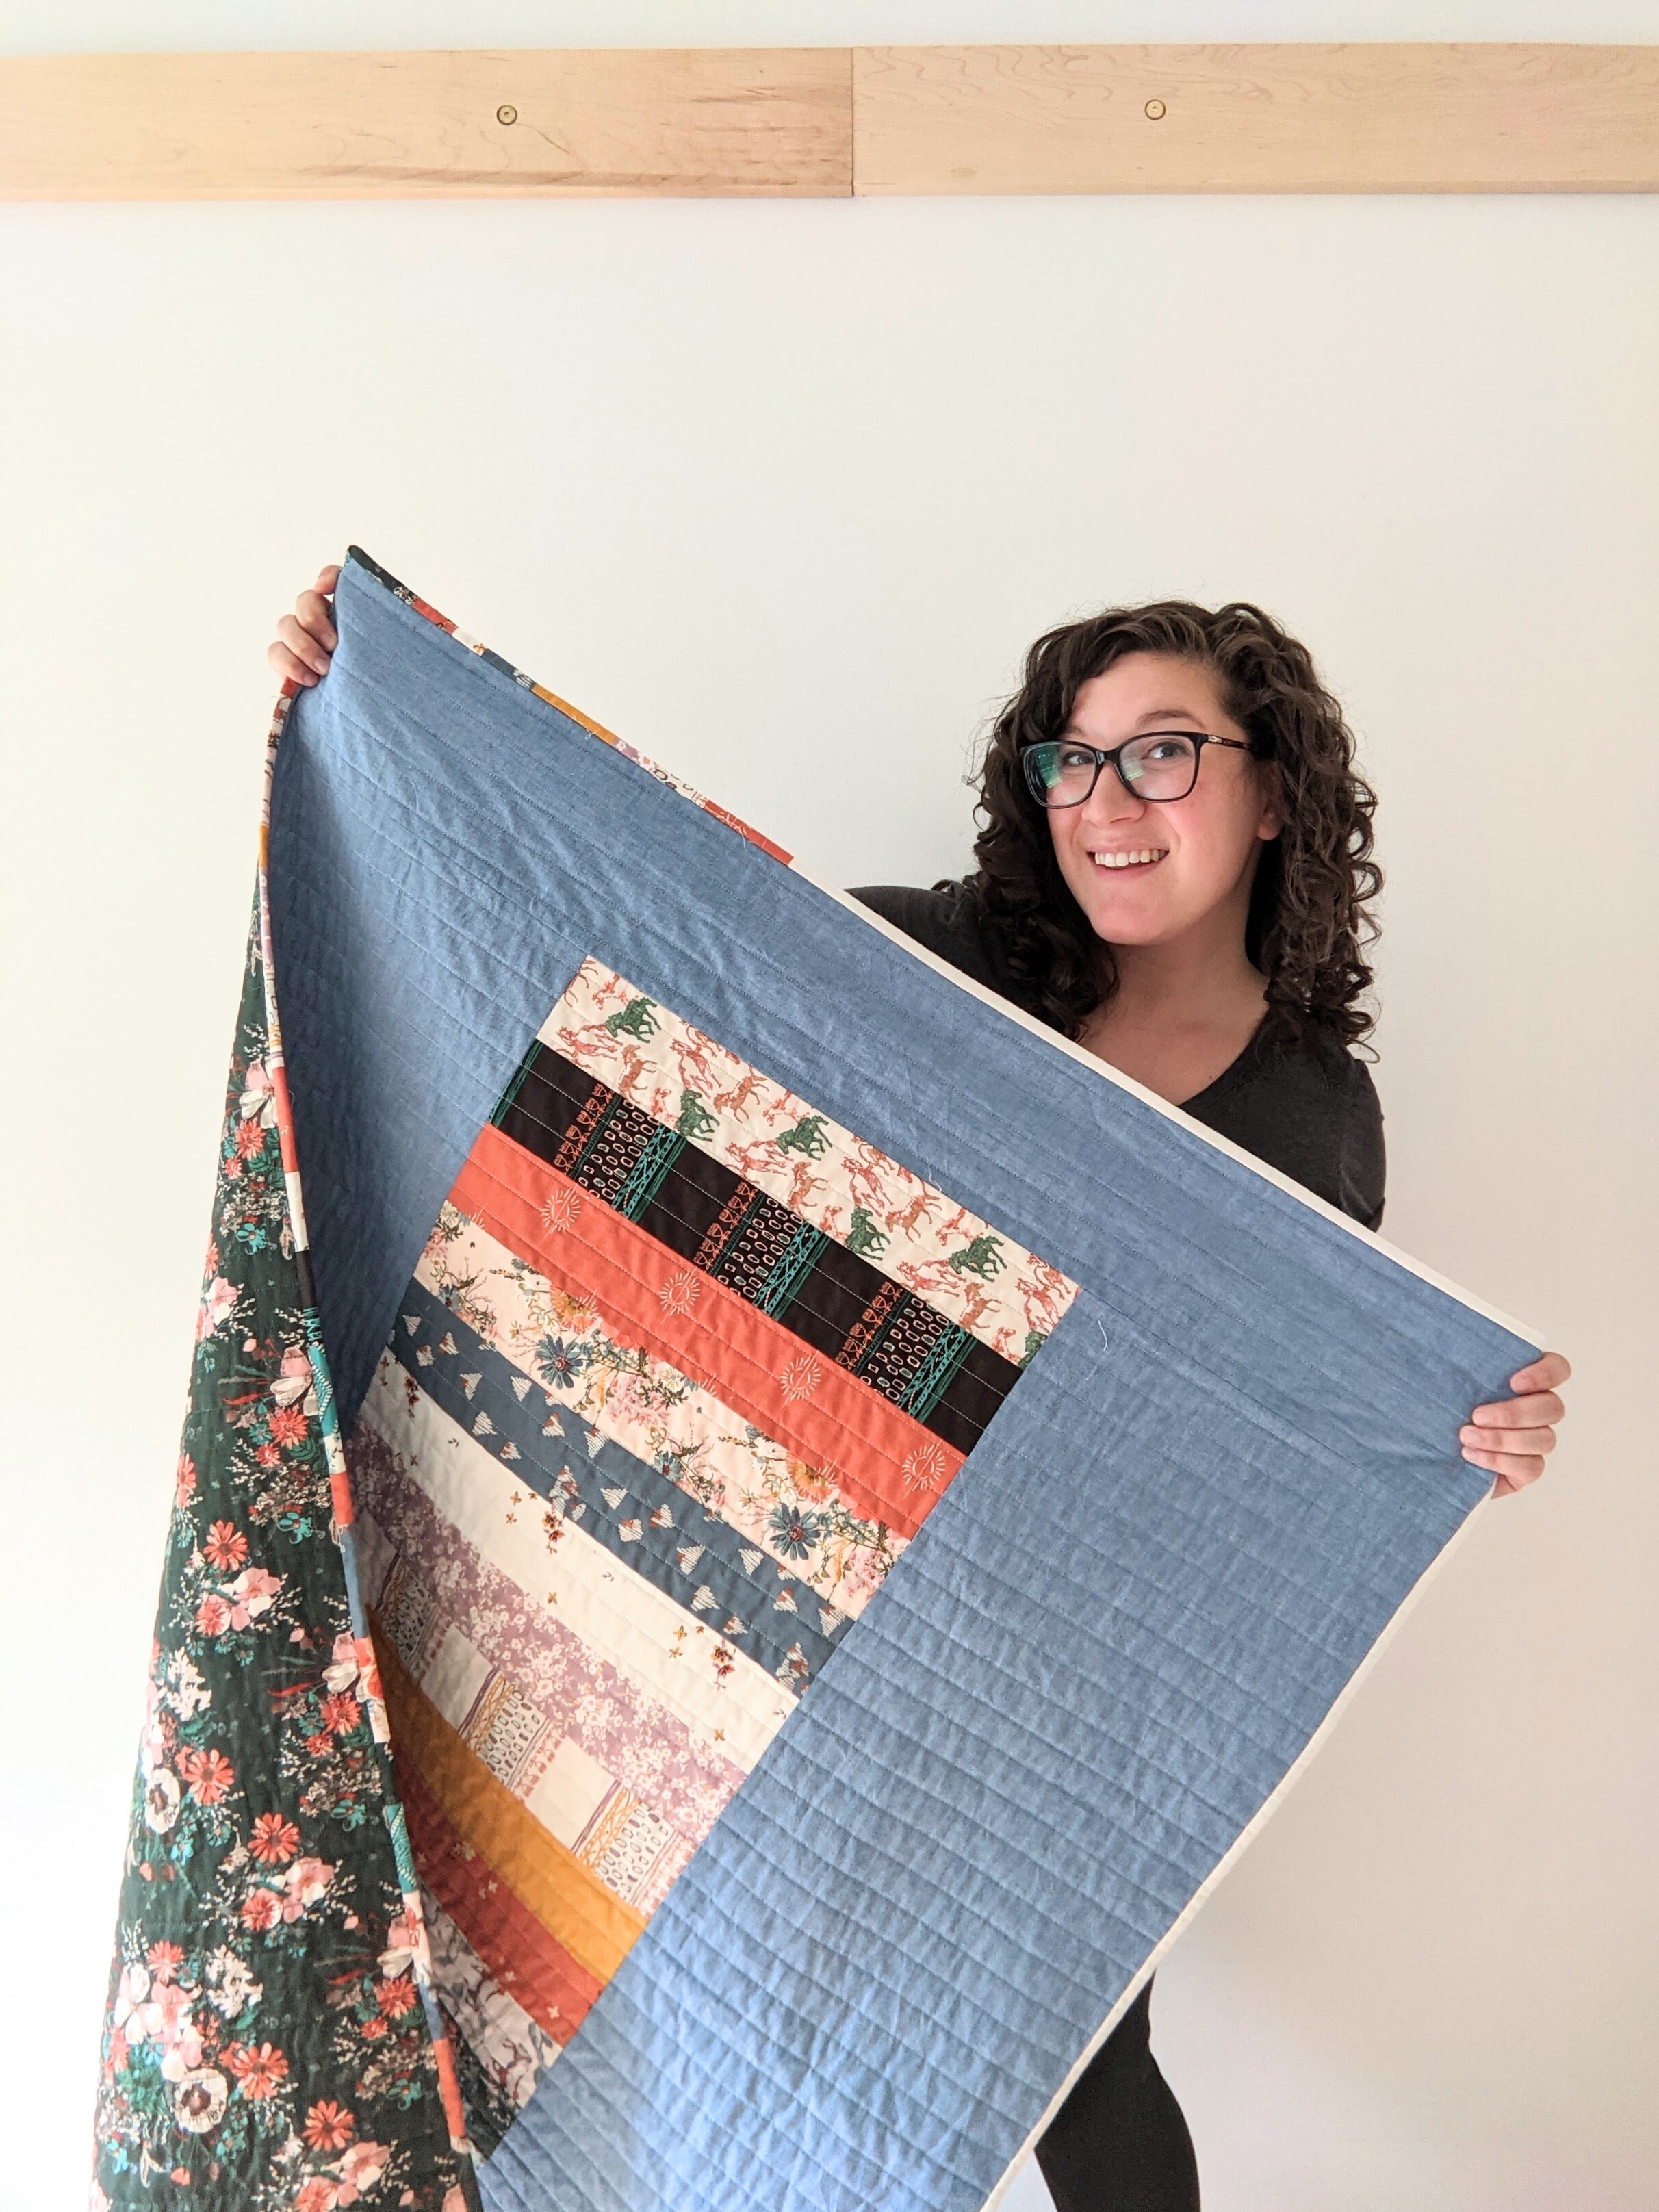
I decided to keep with the simple design of this quilt top, using straight, horizontal lines about 1 inch apart when quilting. And of course, I kept with the scrappy theme and made a scrappy binding with all the leftover fabric pieces, using up even more of my scraps! In the end, I used every piece of fabric left over from a previous quilting project. Hooray for no-waste quilting!
If you’ve been around here for a while, you may recognize this quilt pattern layout from the back of my original Asymmetrical Mountains Quilt. That was where I initially created this idea! If you want to recreate my original strip-pieced backing, sign up for my newsletter for the free pattern with all the math done for you!
Whether using the pattern or this guide to simple, scrappy piecing, make sure to post your finished quilt on Instagram with the hashtag #ModernStripQuilt.
I can’t wait to see what you make!