Minimalist Christmas Tree Stocking

So, let’s get something out of the way… this is NOT a stocking tutorial! There are so many great ones out there, I didn’t feel it was needed. This is just how to customize a stocking pattern to make a minimalist Christmas tree version. You could also use this as a quilt block or make it into a wall hanging, the possibilities are endless!
For my stocking, I will be using a free pattern by Suzy Quilts, found here:
Here are a few more I recommend, each with their own size, shape, and style:
Patchwork and Poodles: Christmas Stockings in Two Sizes
Diary of a Quilter: Easy Quilted Christmas Stocking Tutorial
Sarah Maker: Quilted Christmas Stocking
Heather Handmade: Quilted Christmas Stocking Pattern
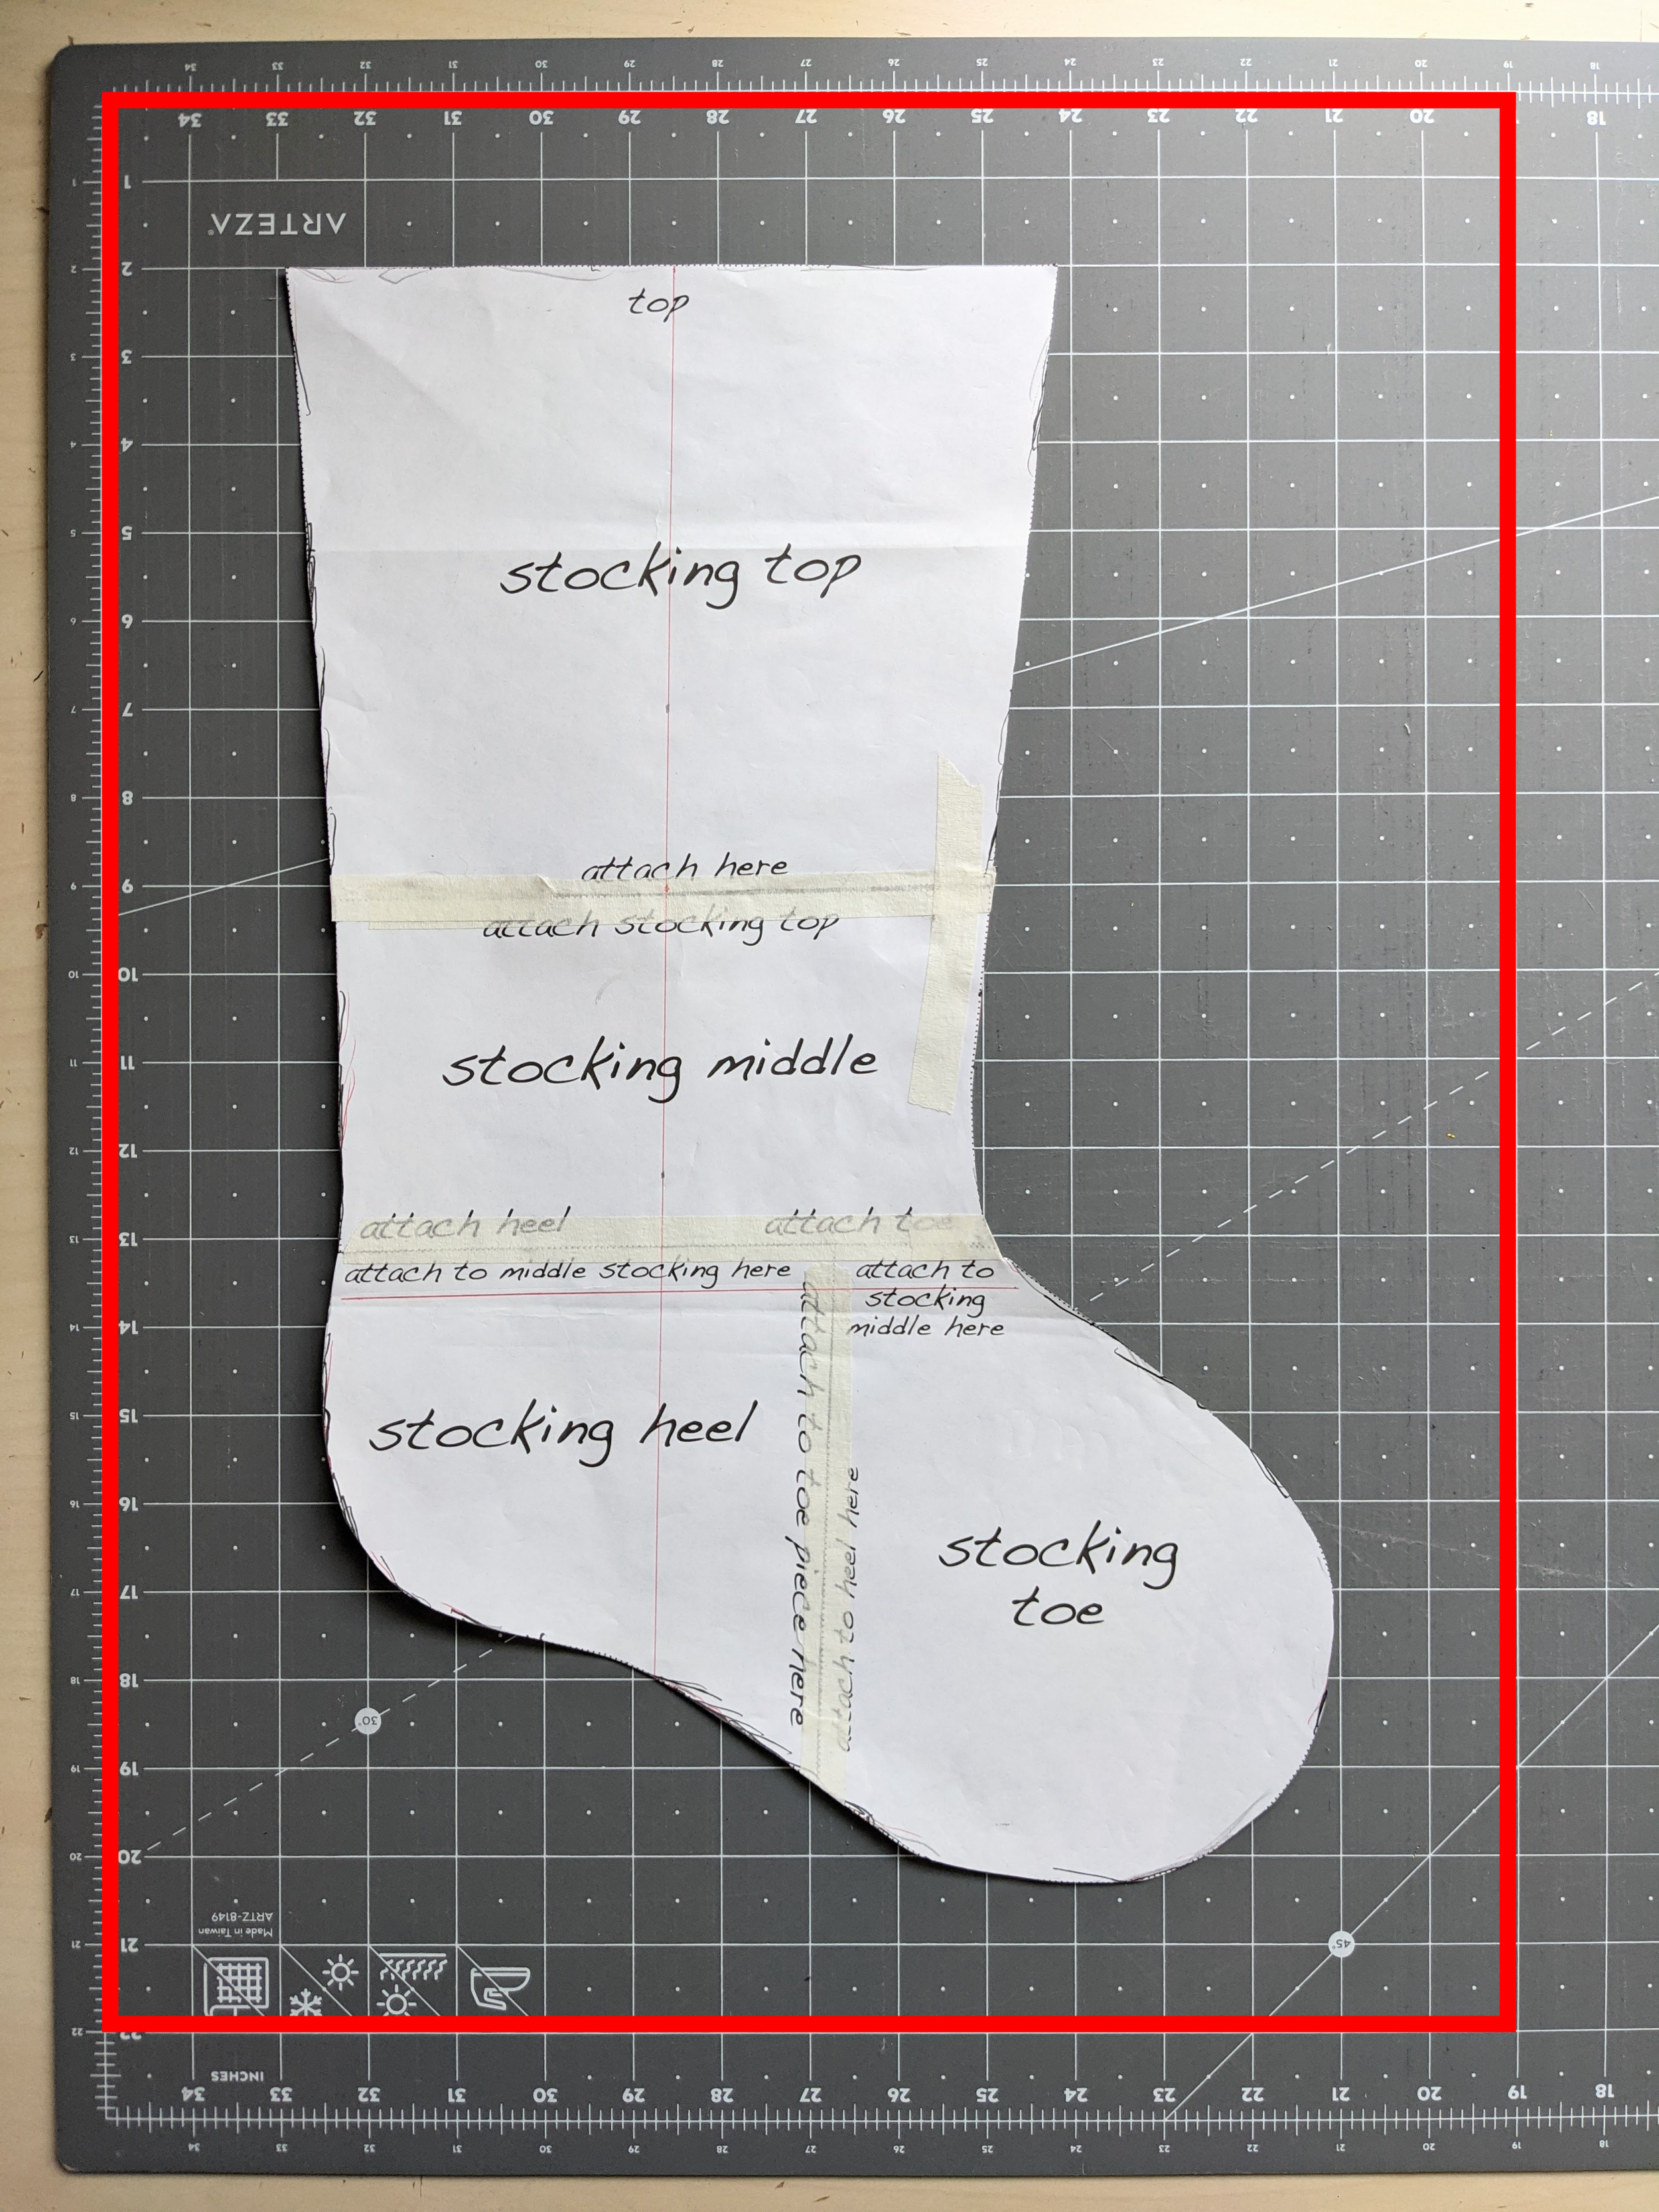
Use one of these or find your favorite pattern and figure out what size your stocking needs to be. I did this by placing my stocking template on my cutting mat with the top lined up on the 2-inch horizontal line. Cut a block of background fabric 2 inches larger than the stocking (marked in red). This gives you some wiggle room when using the stocking template after piecing. I needed a 21” x 23” piece of fabric for mine.
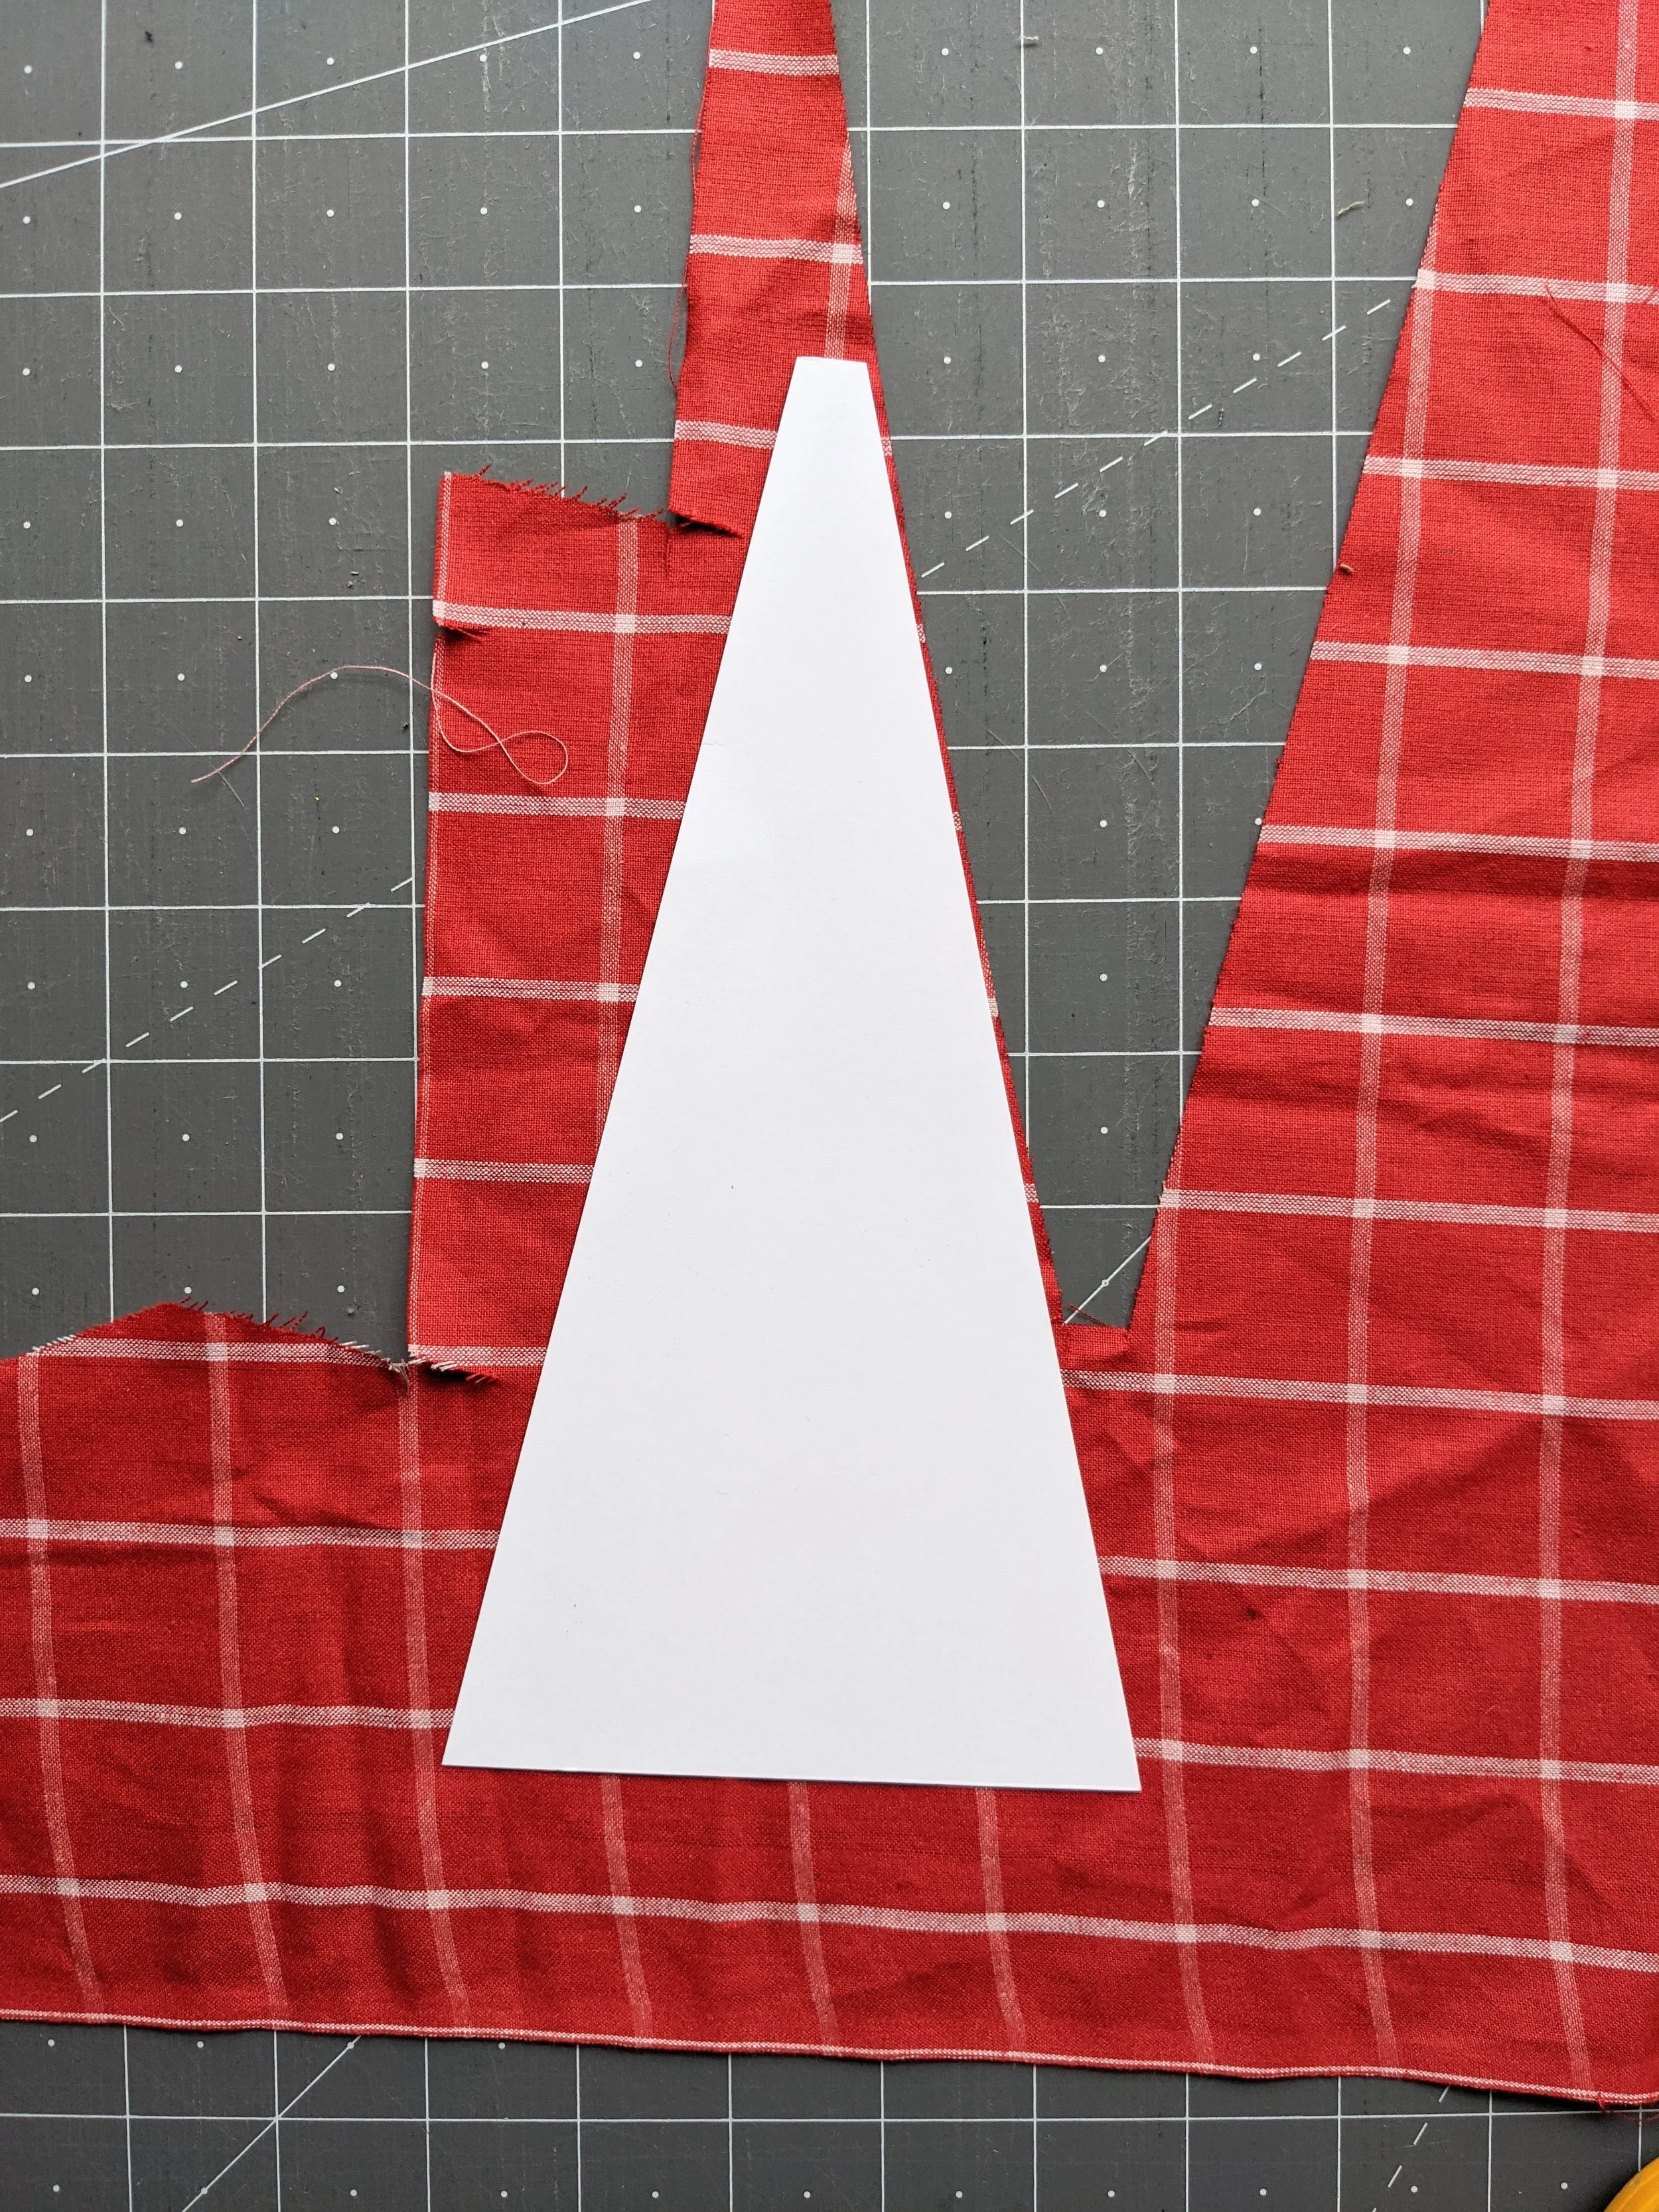
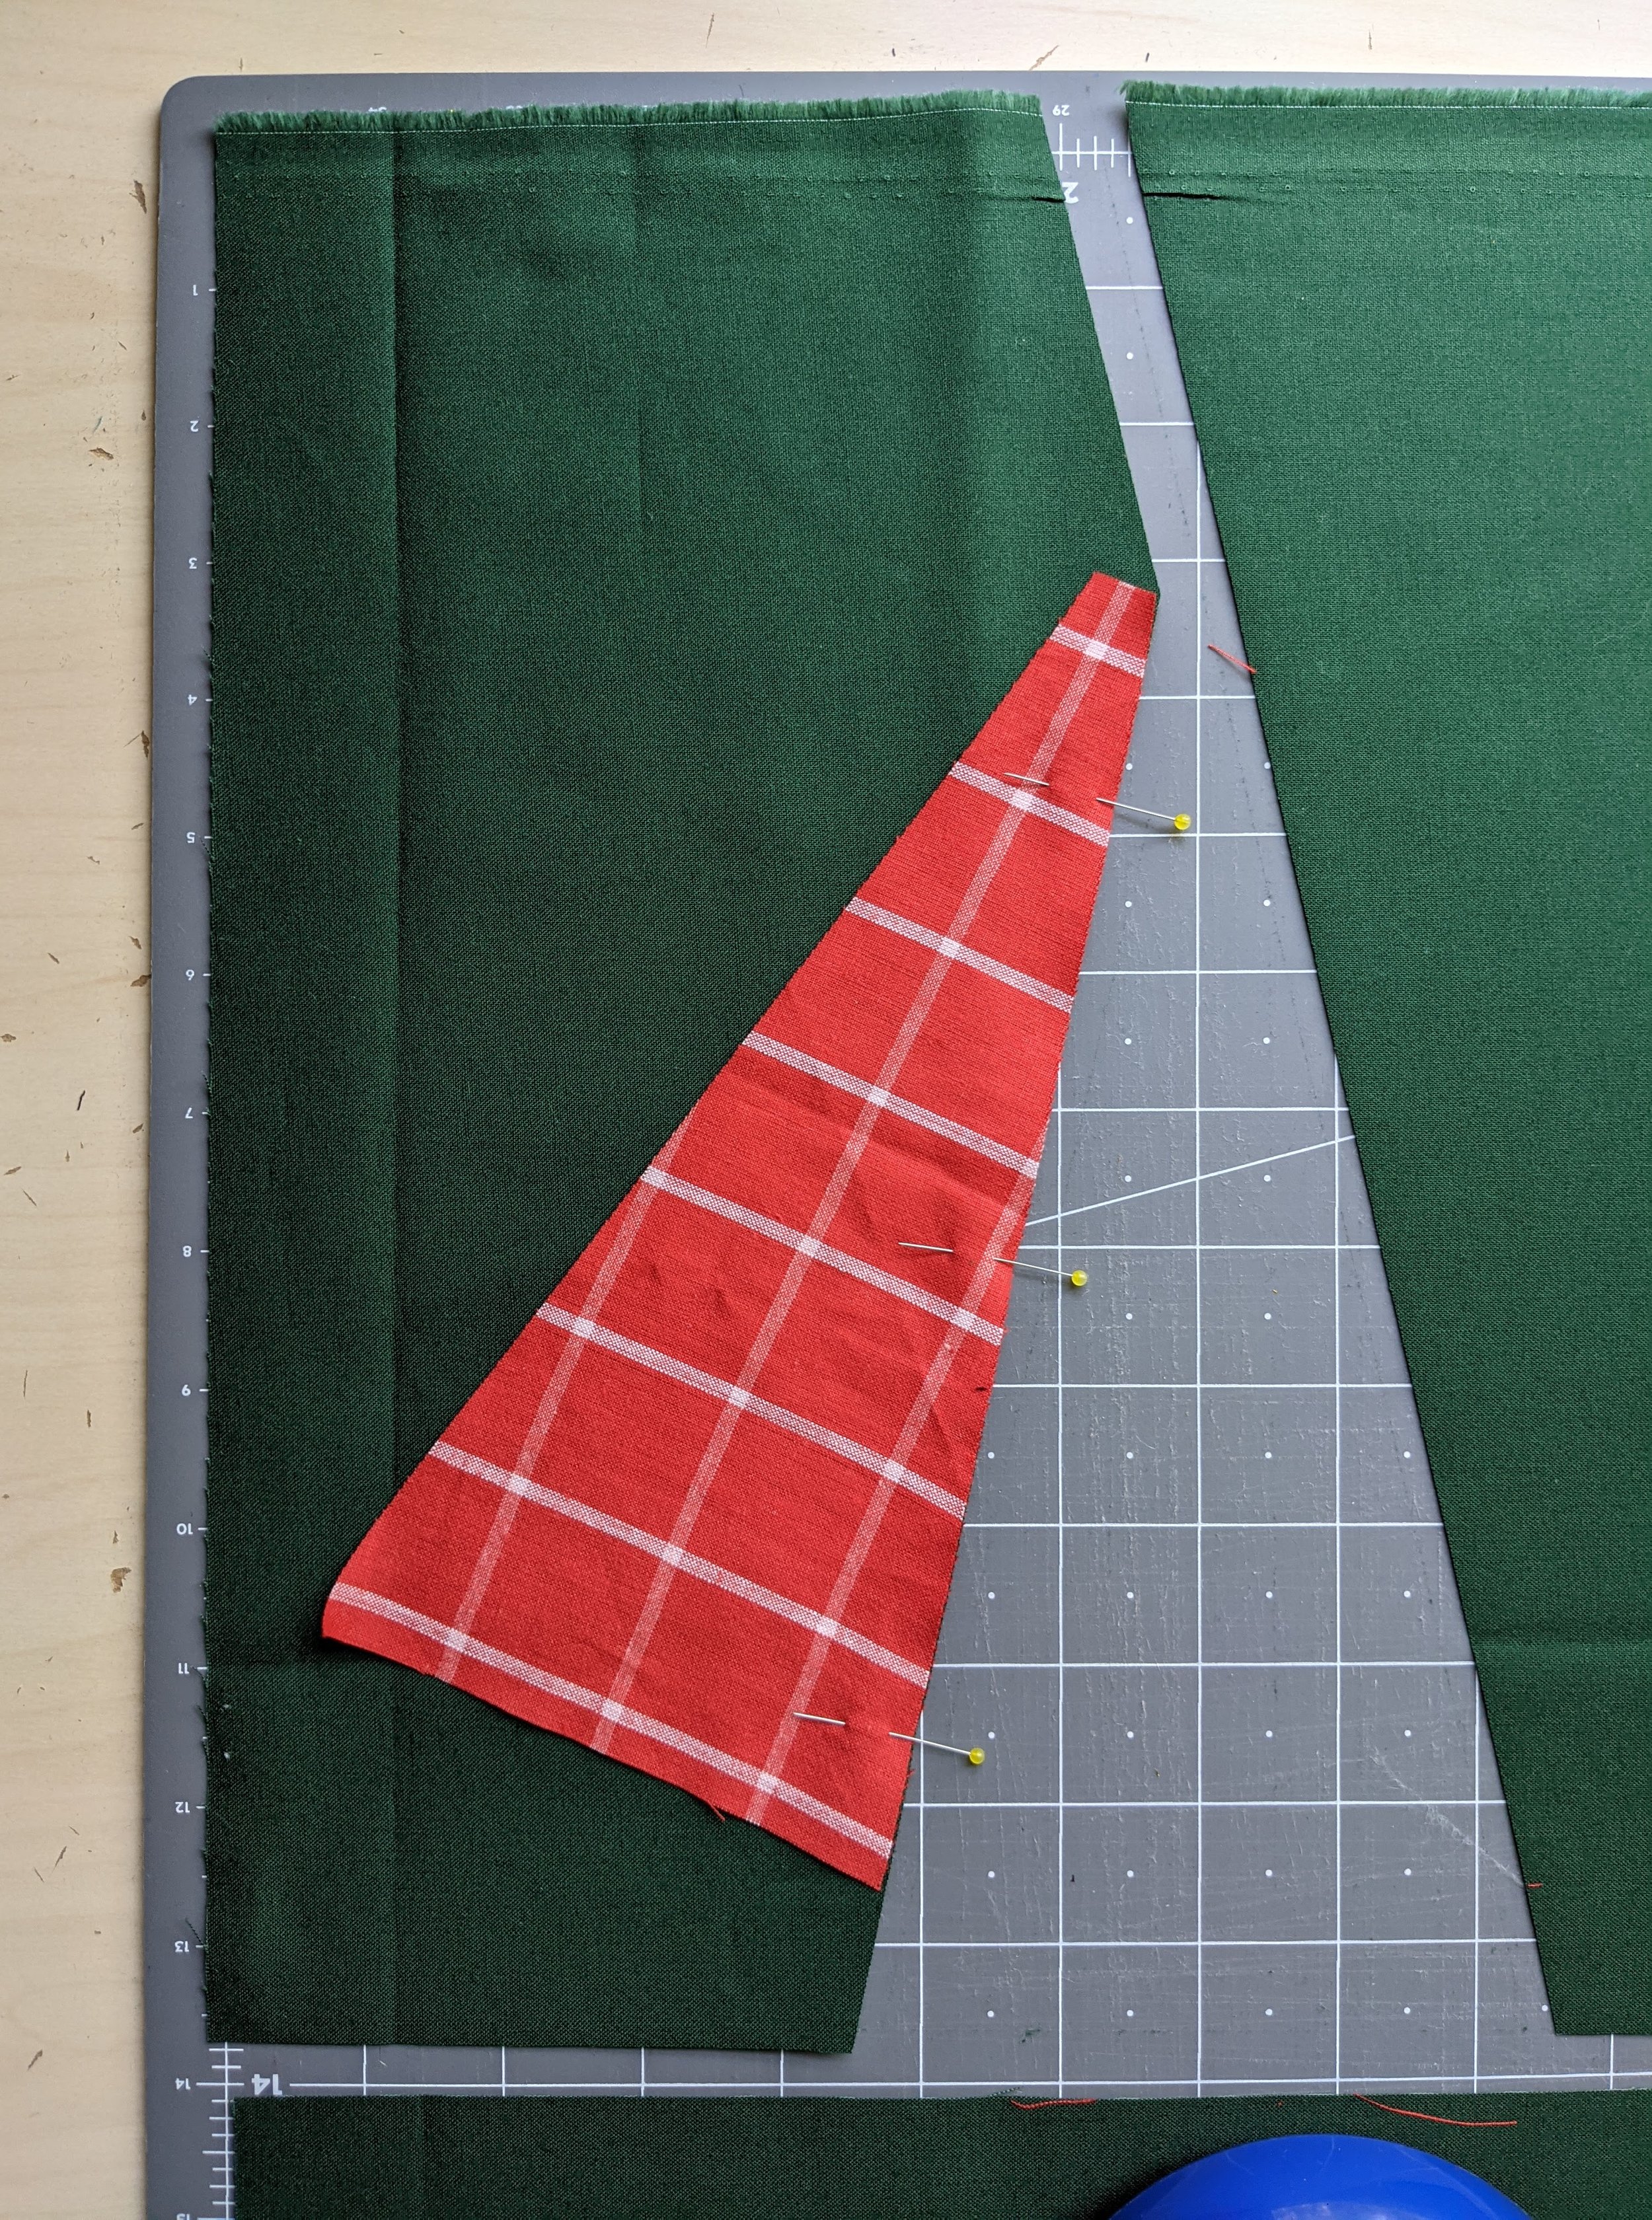
Cut any size triangle you want out of your accent fabric, keeping in mind the size of your stocking. For mine, I used my own template from another Christmas quilt to cut a triangle from some scrap fabric. I’ve created a printable template here if you’d like to make yours the same size.
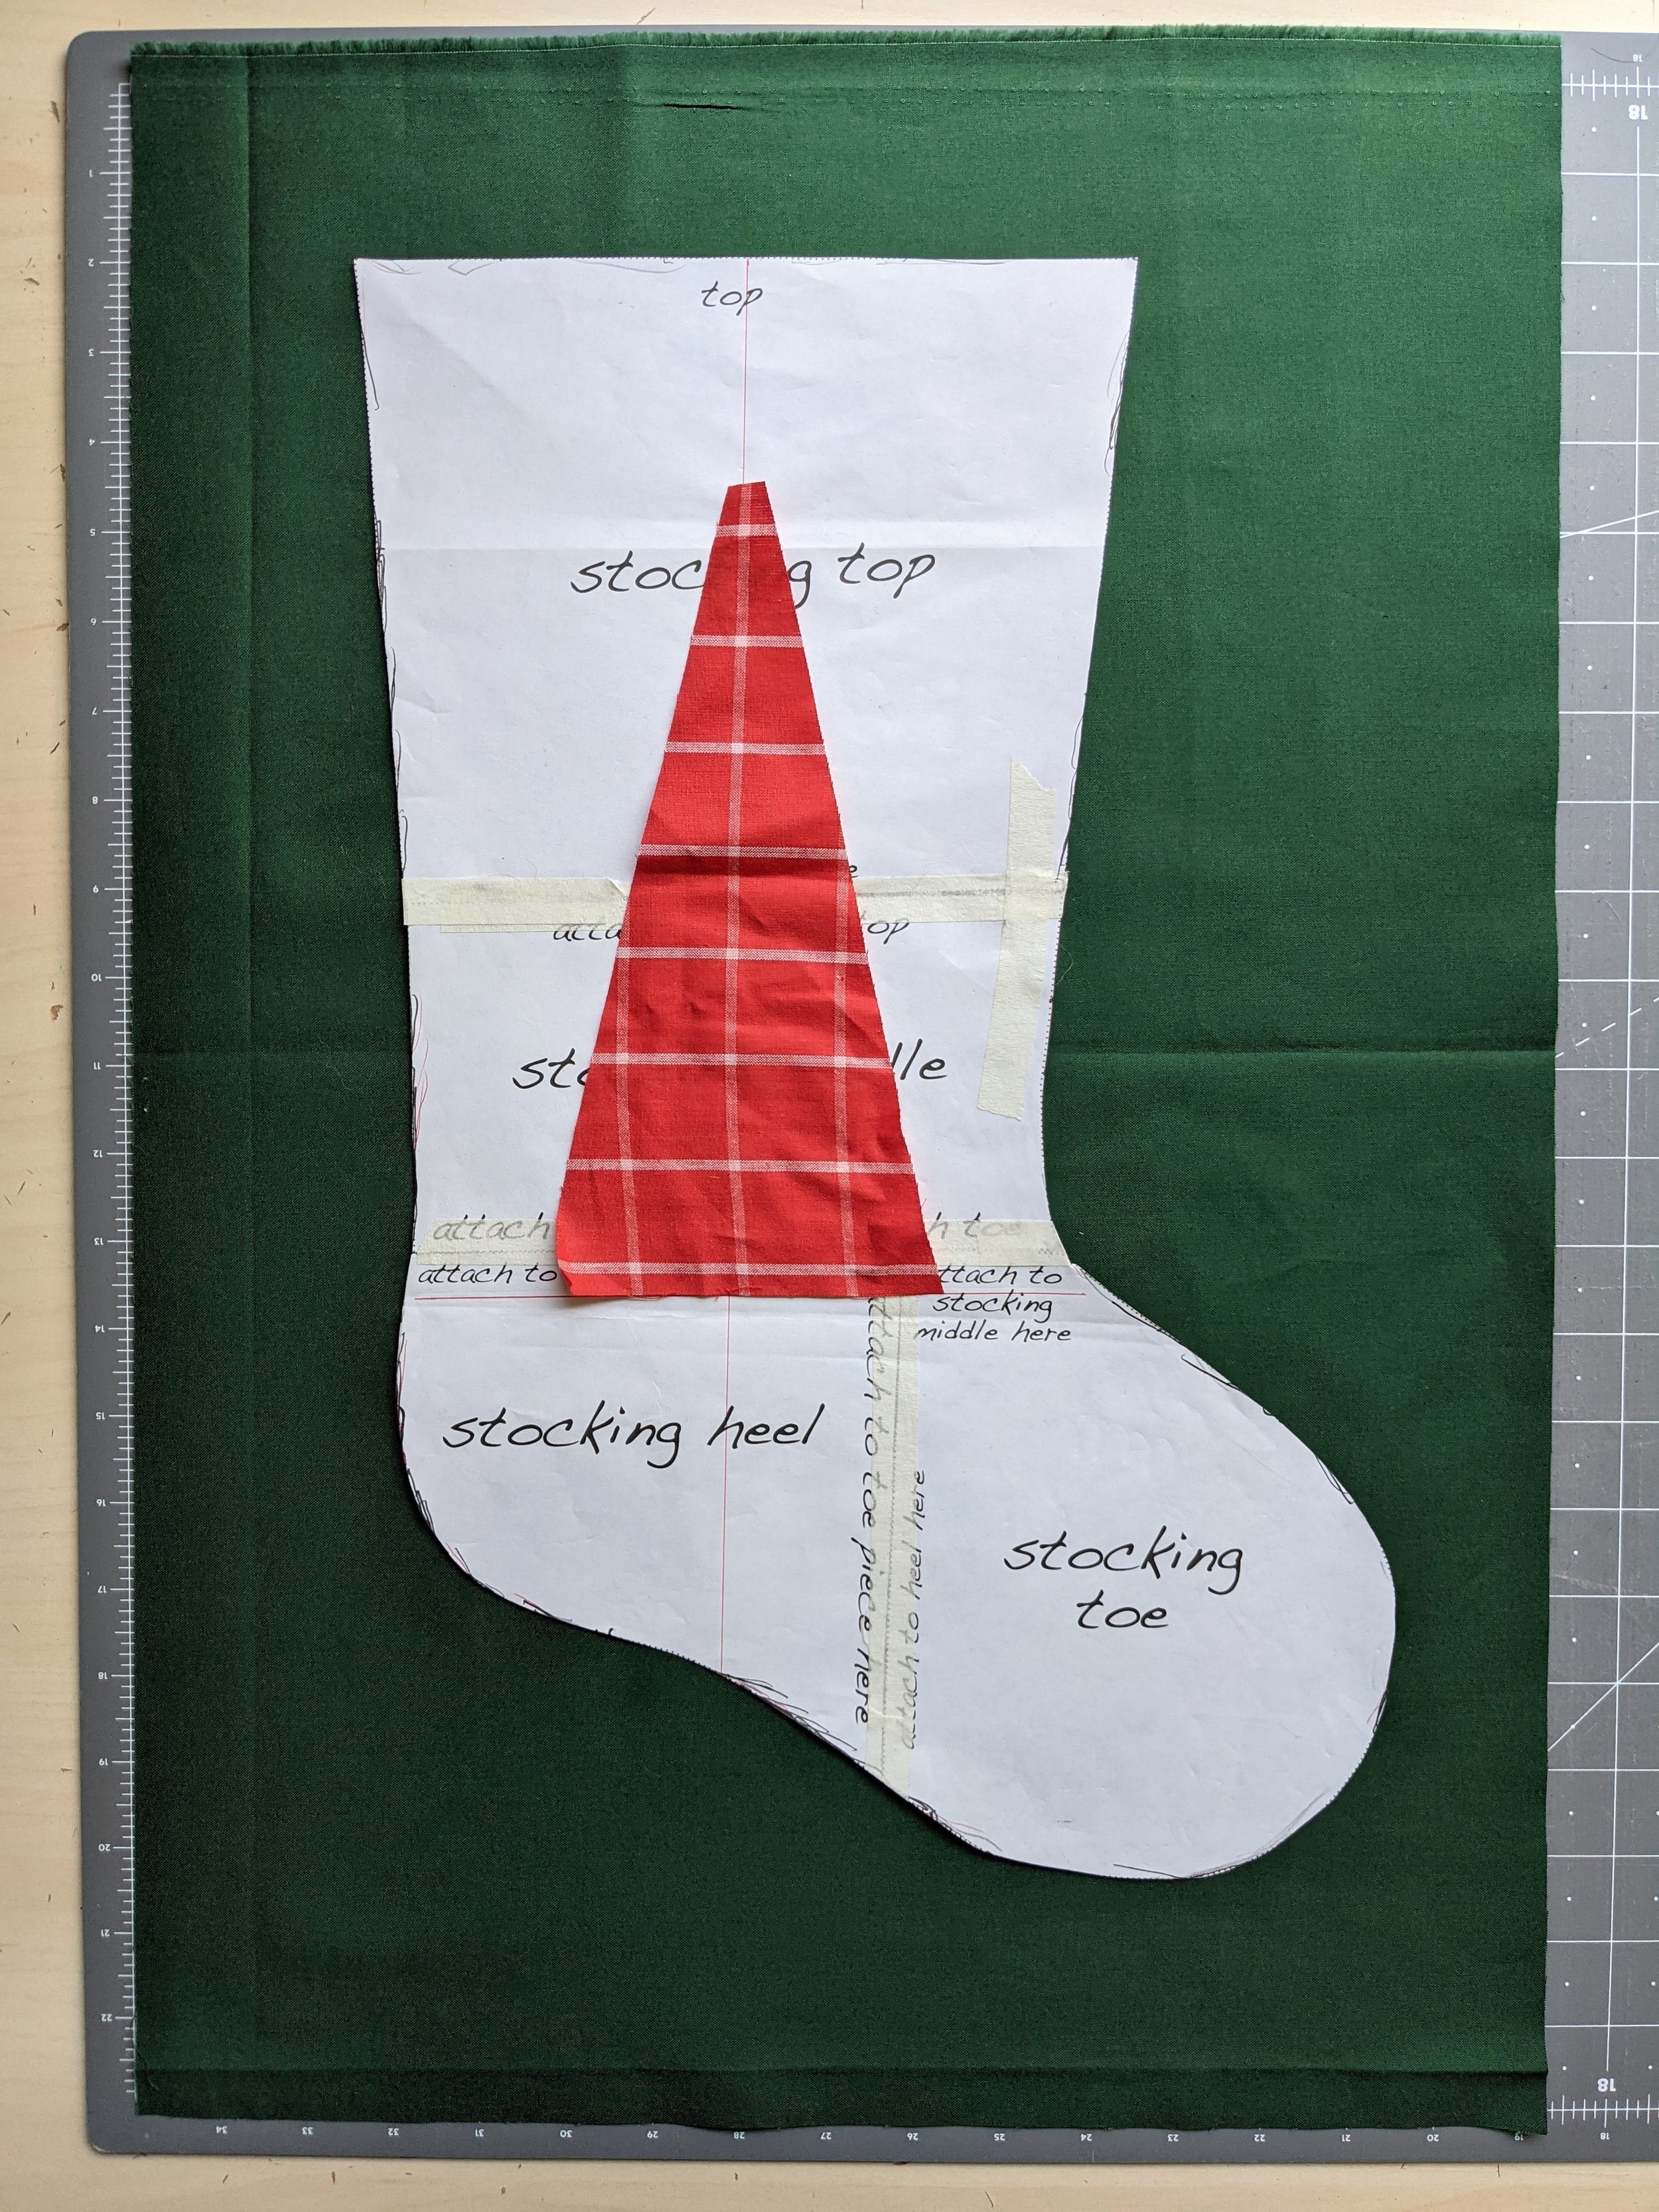
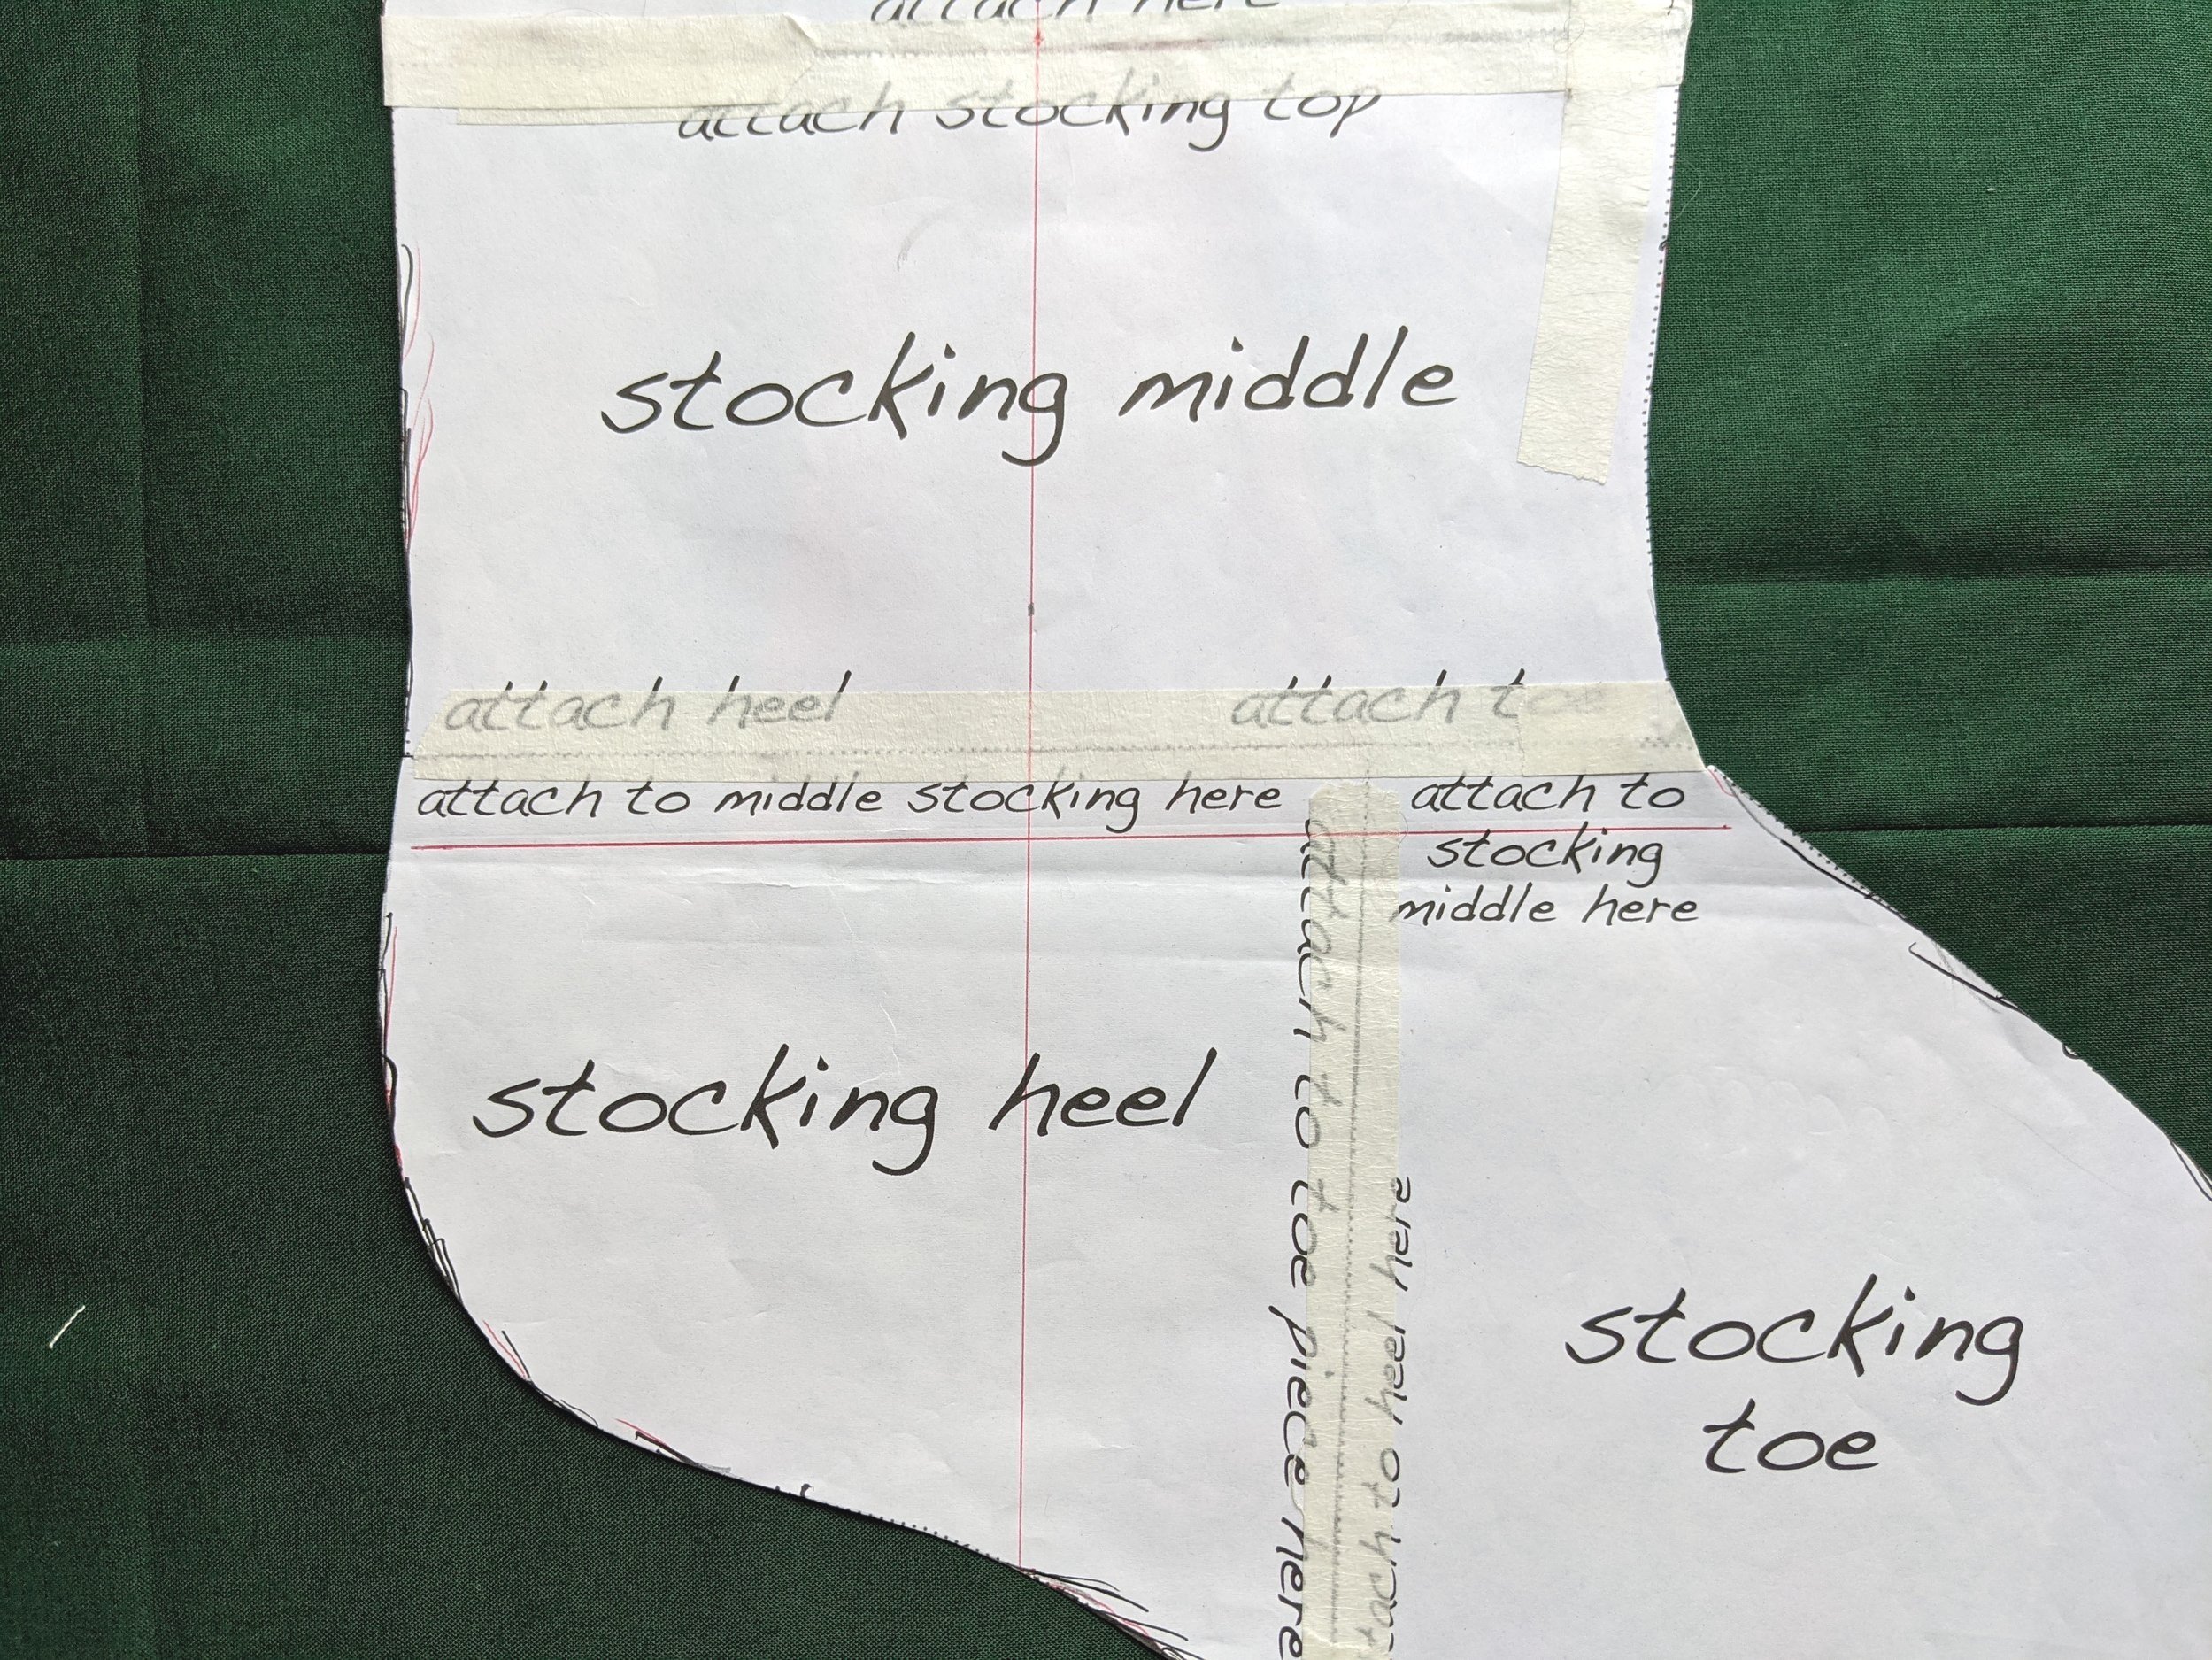
Place your tree in approximately the place you’d like it to go, using your stocking template as a guide, making sure there’s excess room above, to the sides, and below your tree. You want enough excess to trace your stocking template and give you some wiggle room for tree placement. If you’re using a pattern with a cuff, keep that in mind when placing your tree. I also made marks (in red pen) on the template along the bottom of where I wanted my tree and through the middle of the template to help me with placement at the end. Do NOT simply center your tree on the background fabric. Because of the stocking toe it needs to be off center, this is why I like to use the stocking template as a guide.
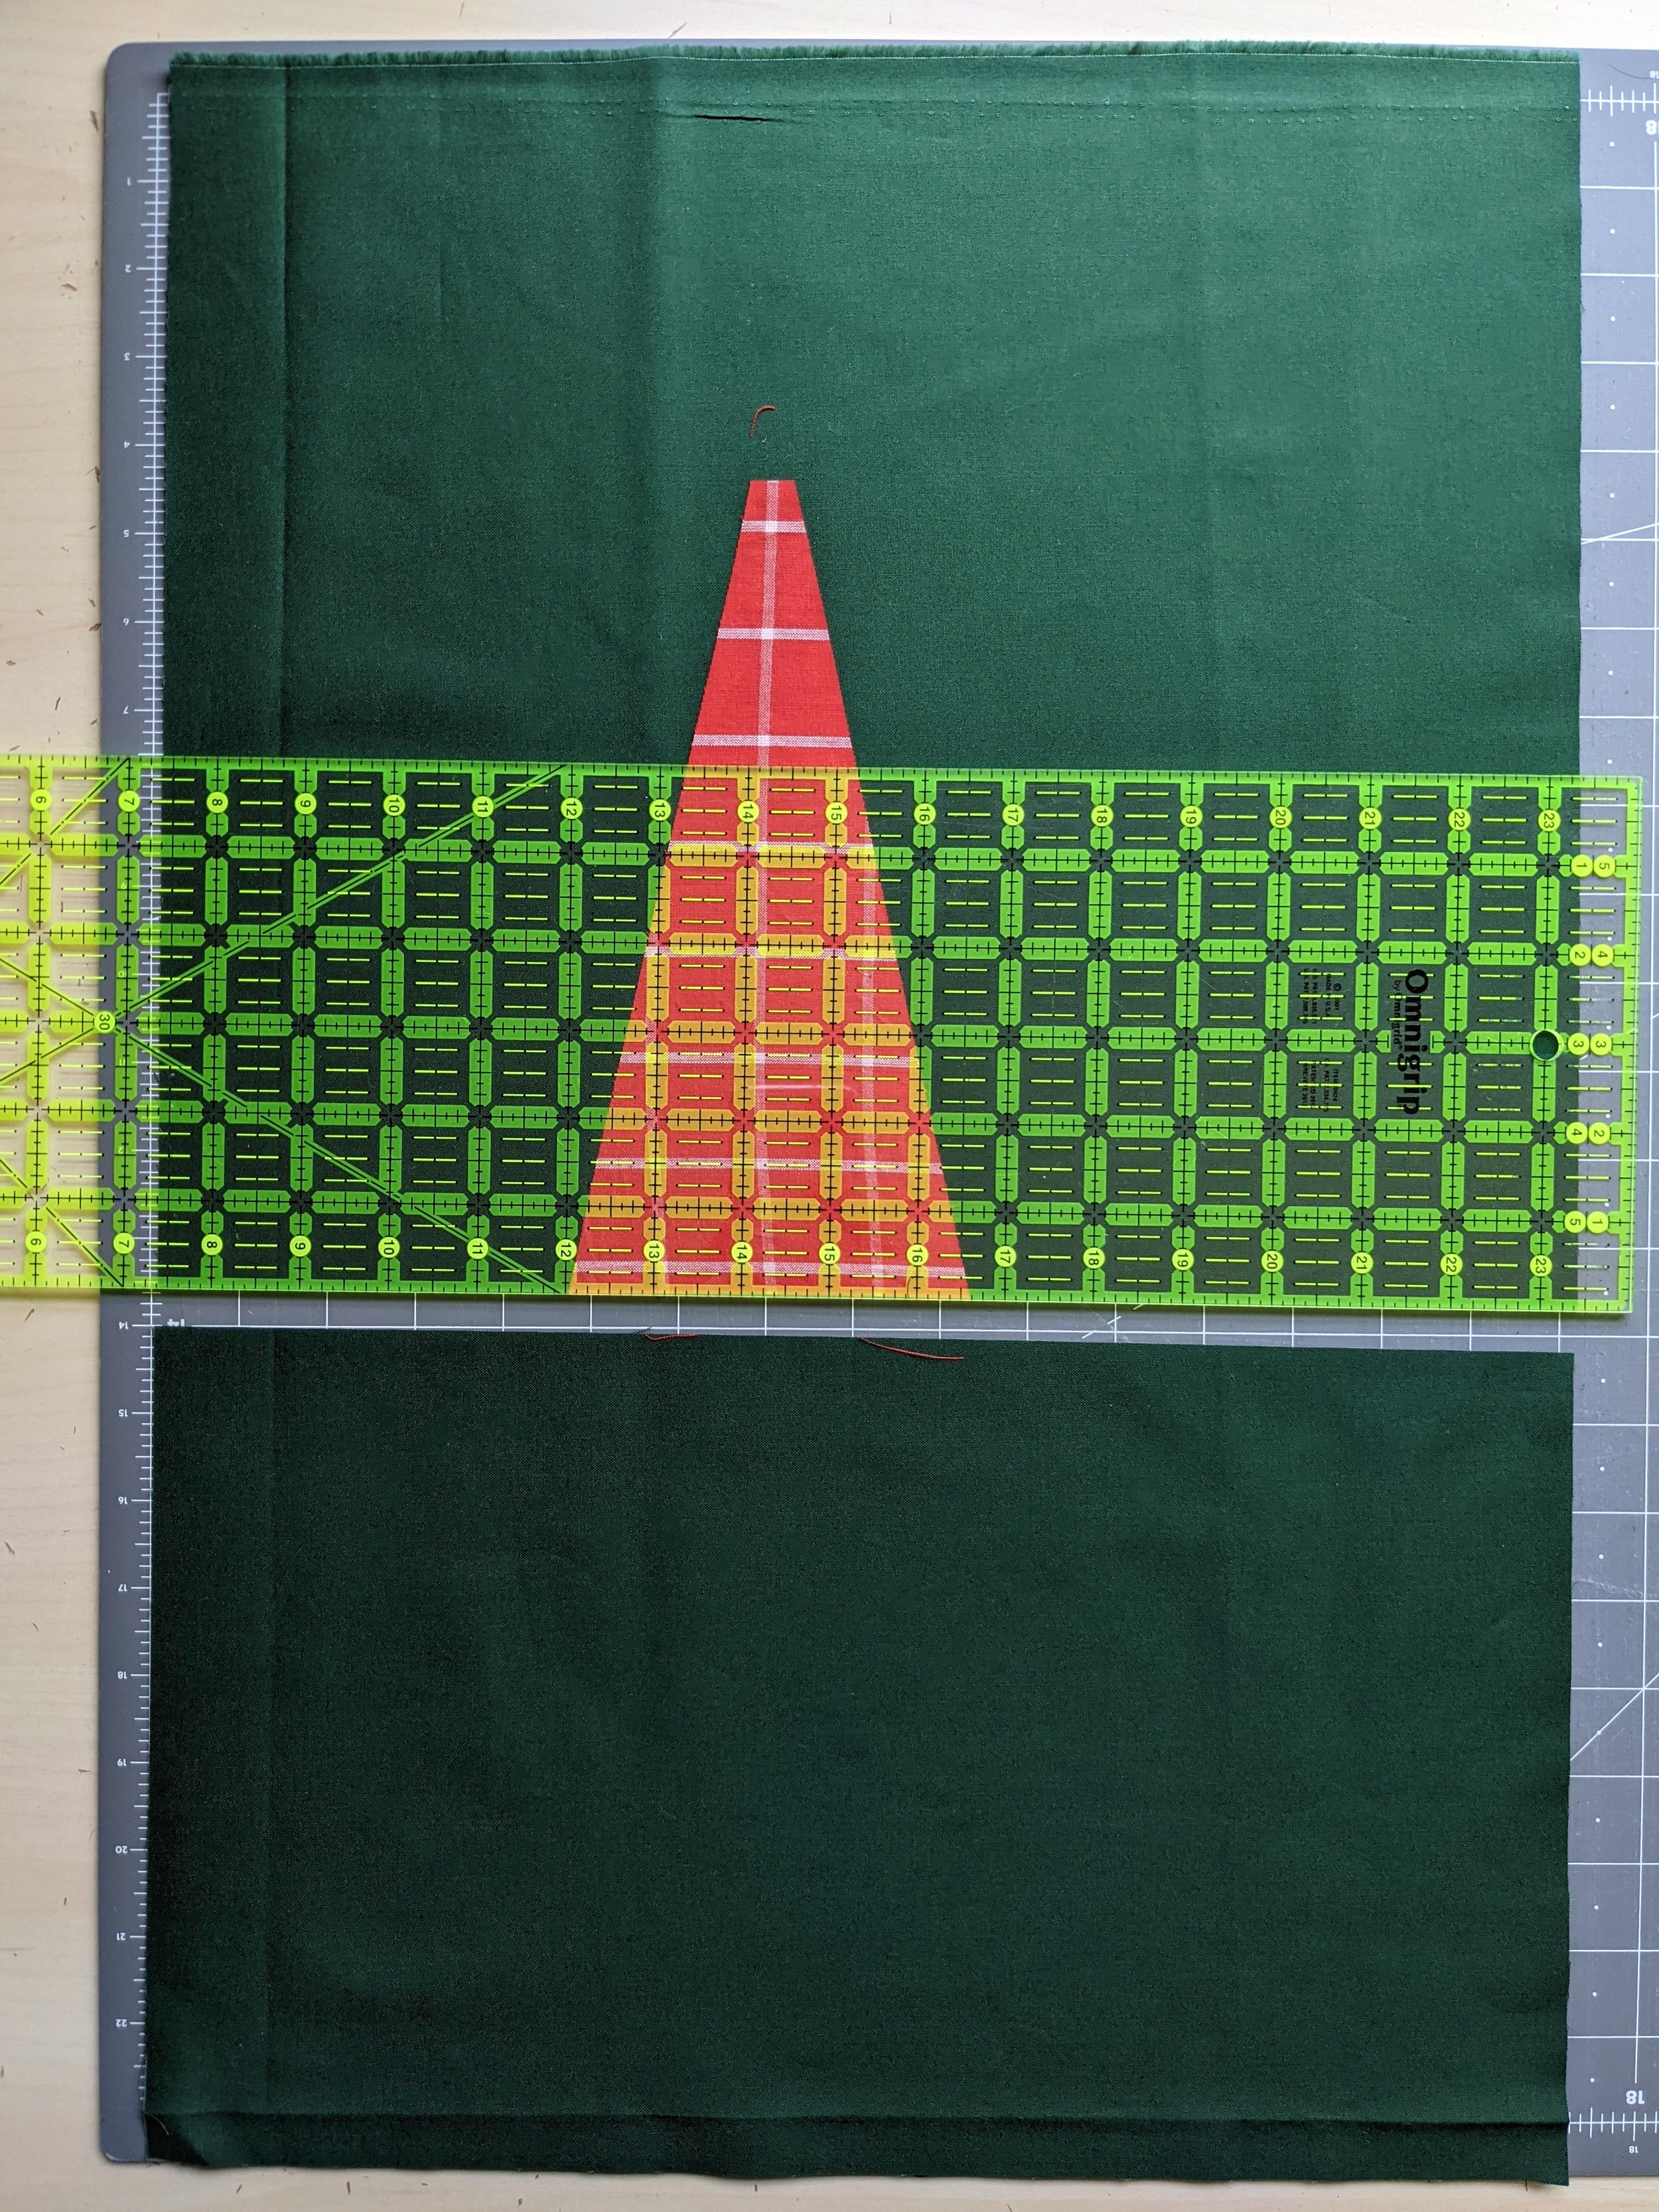
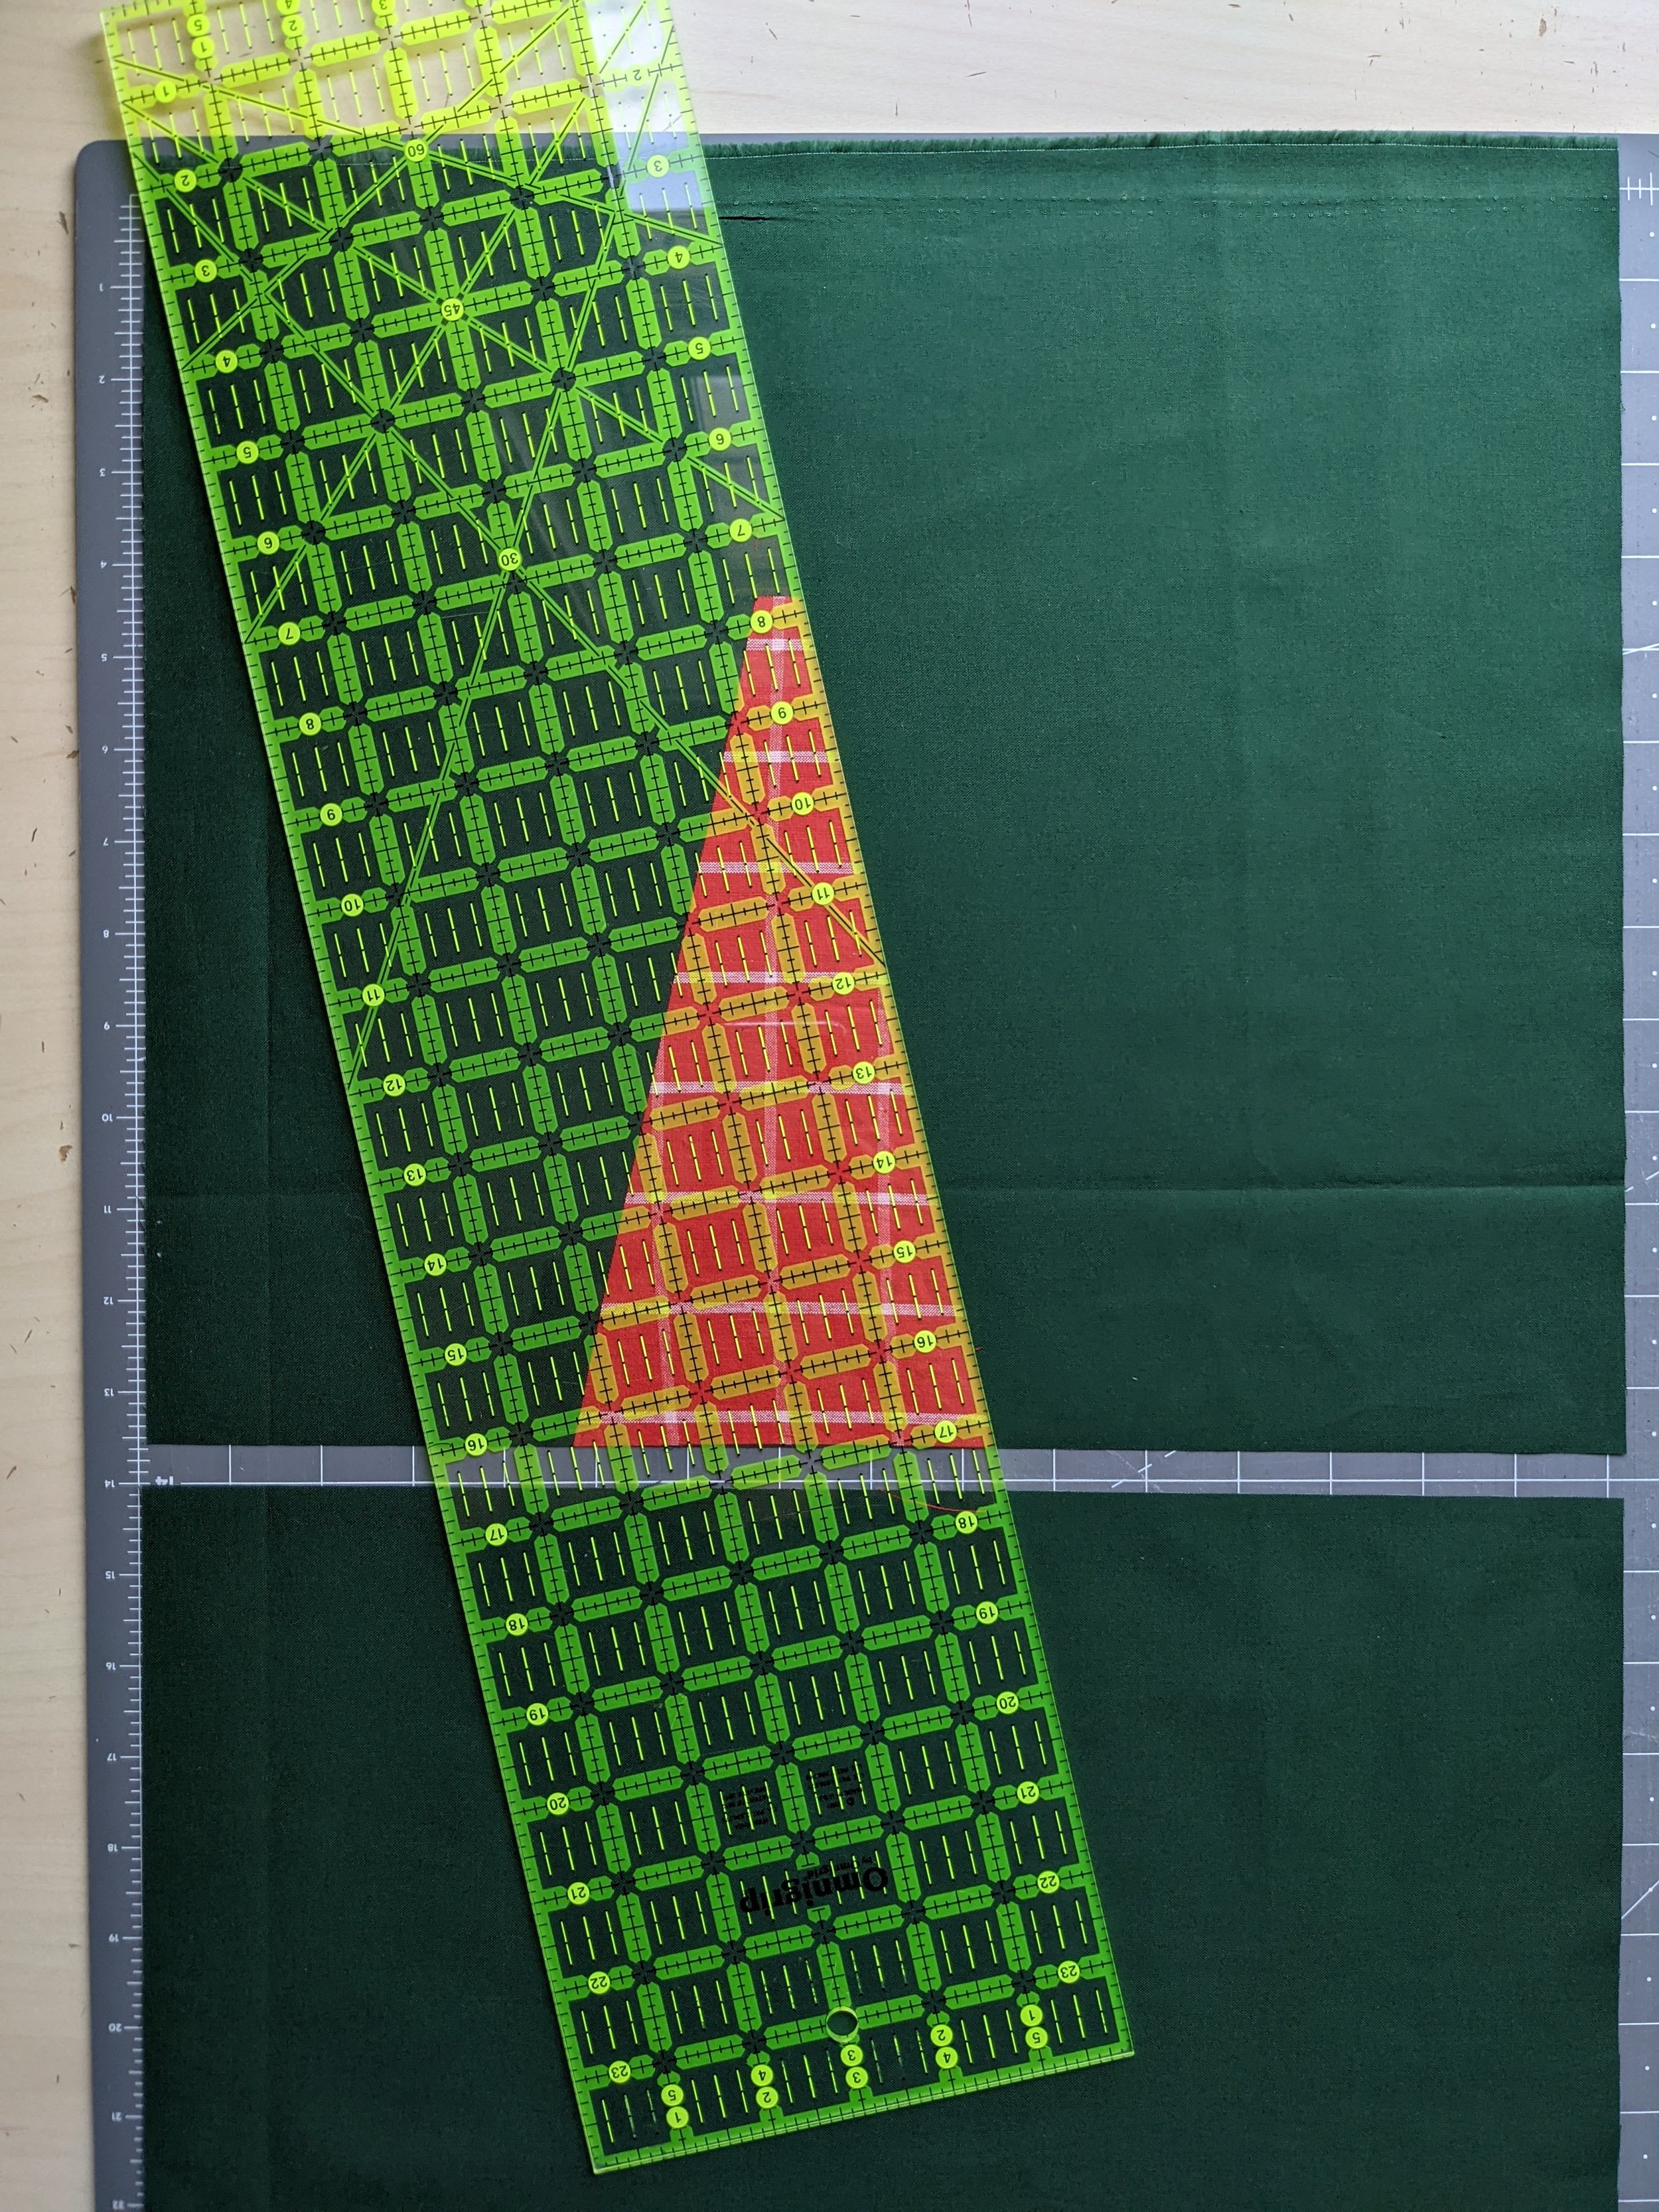
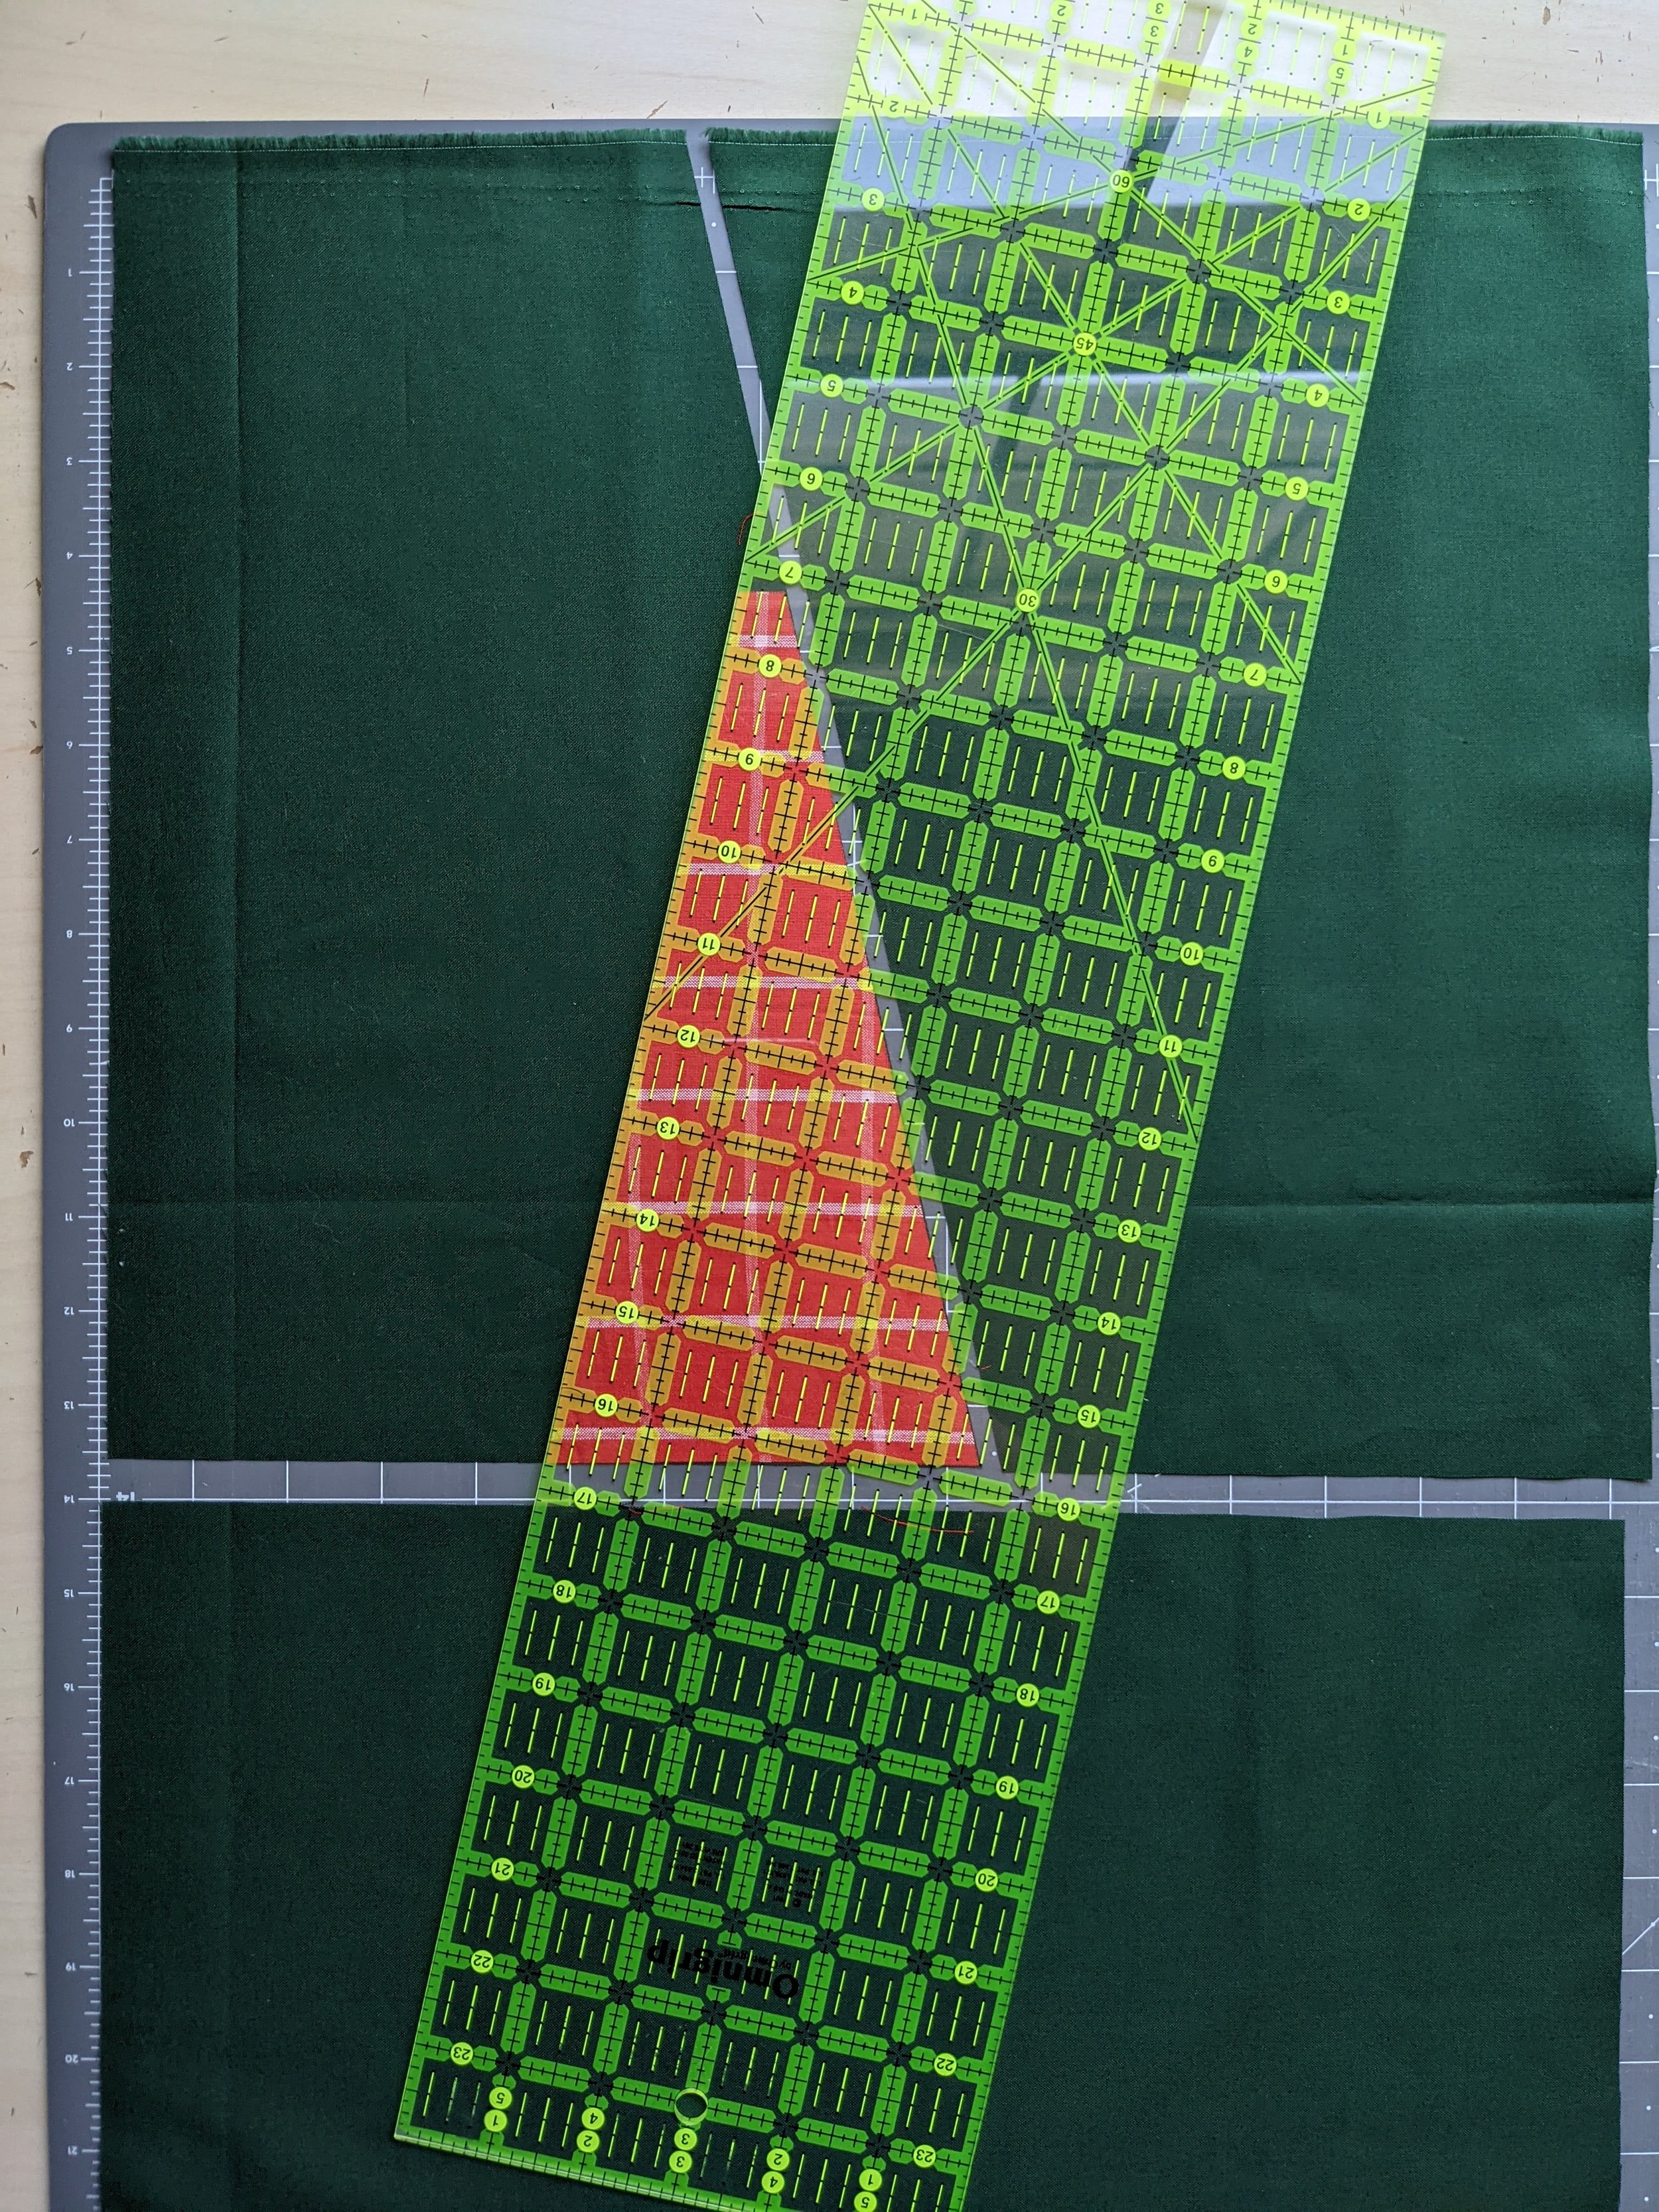
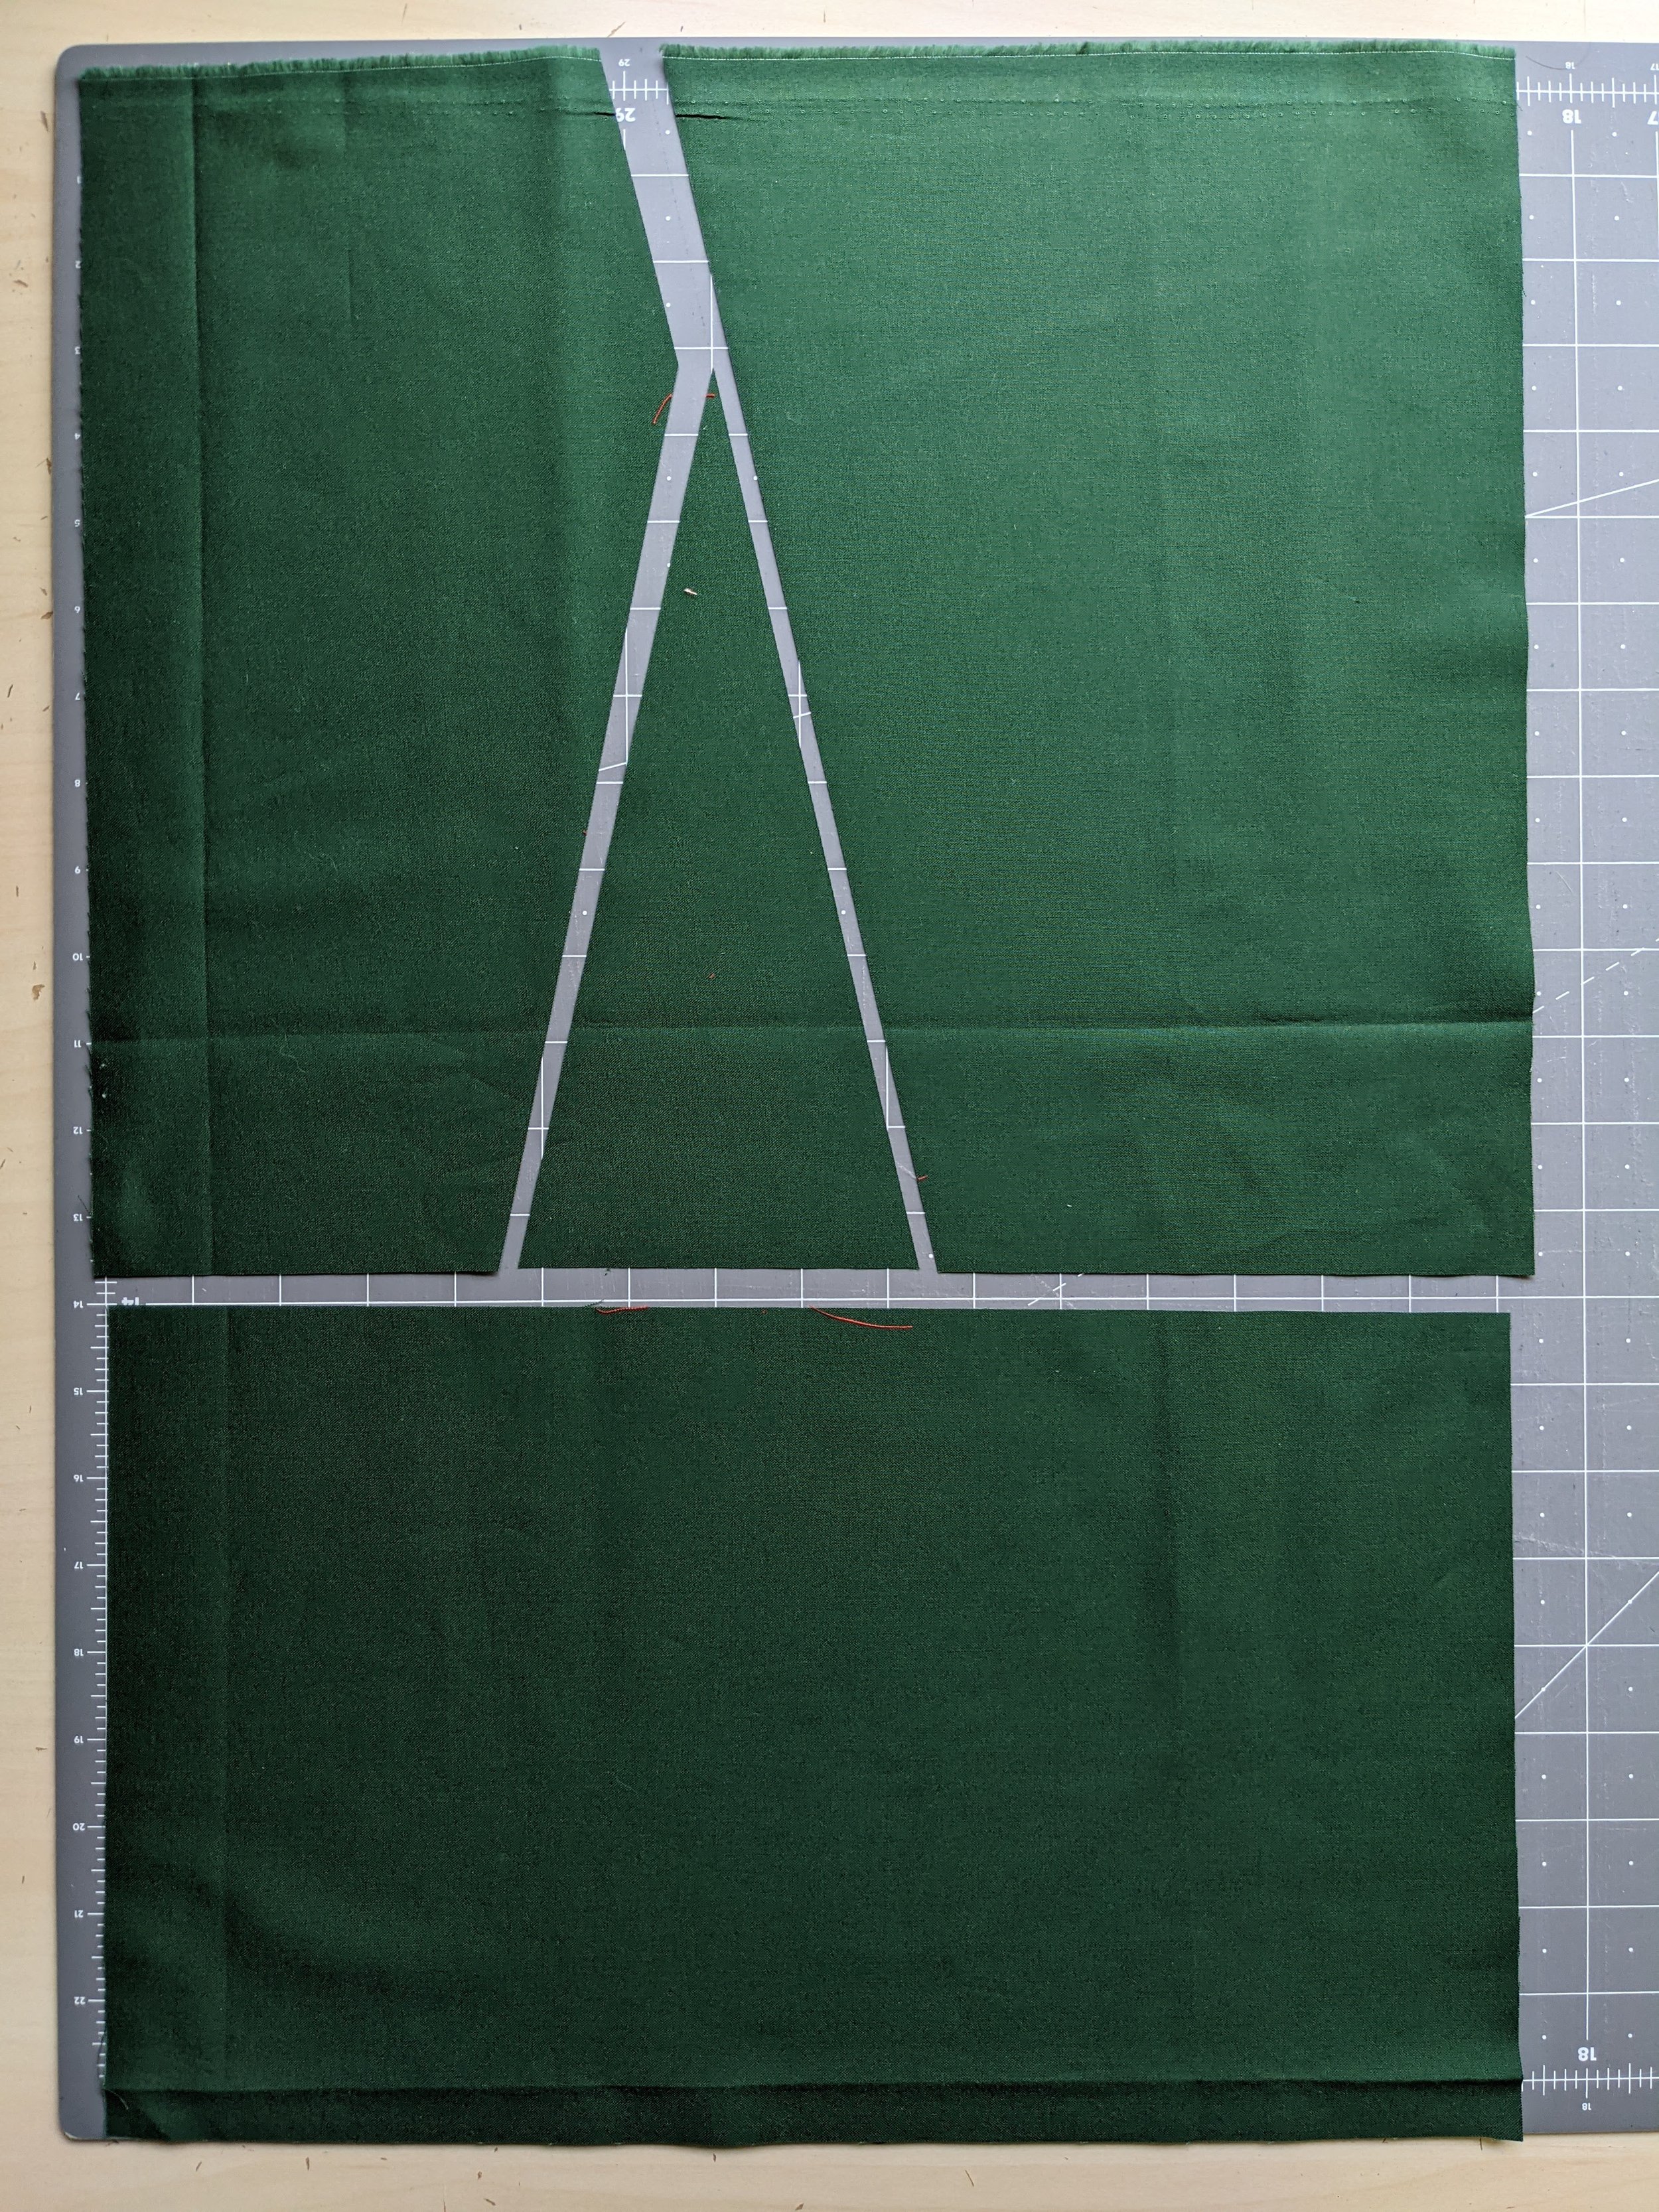
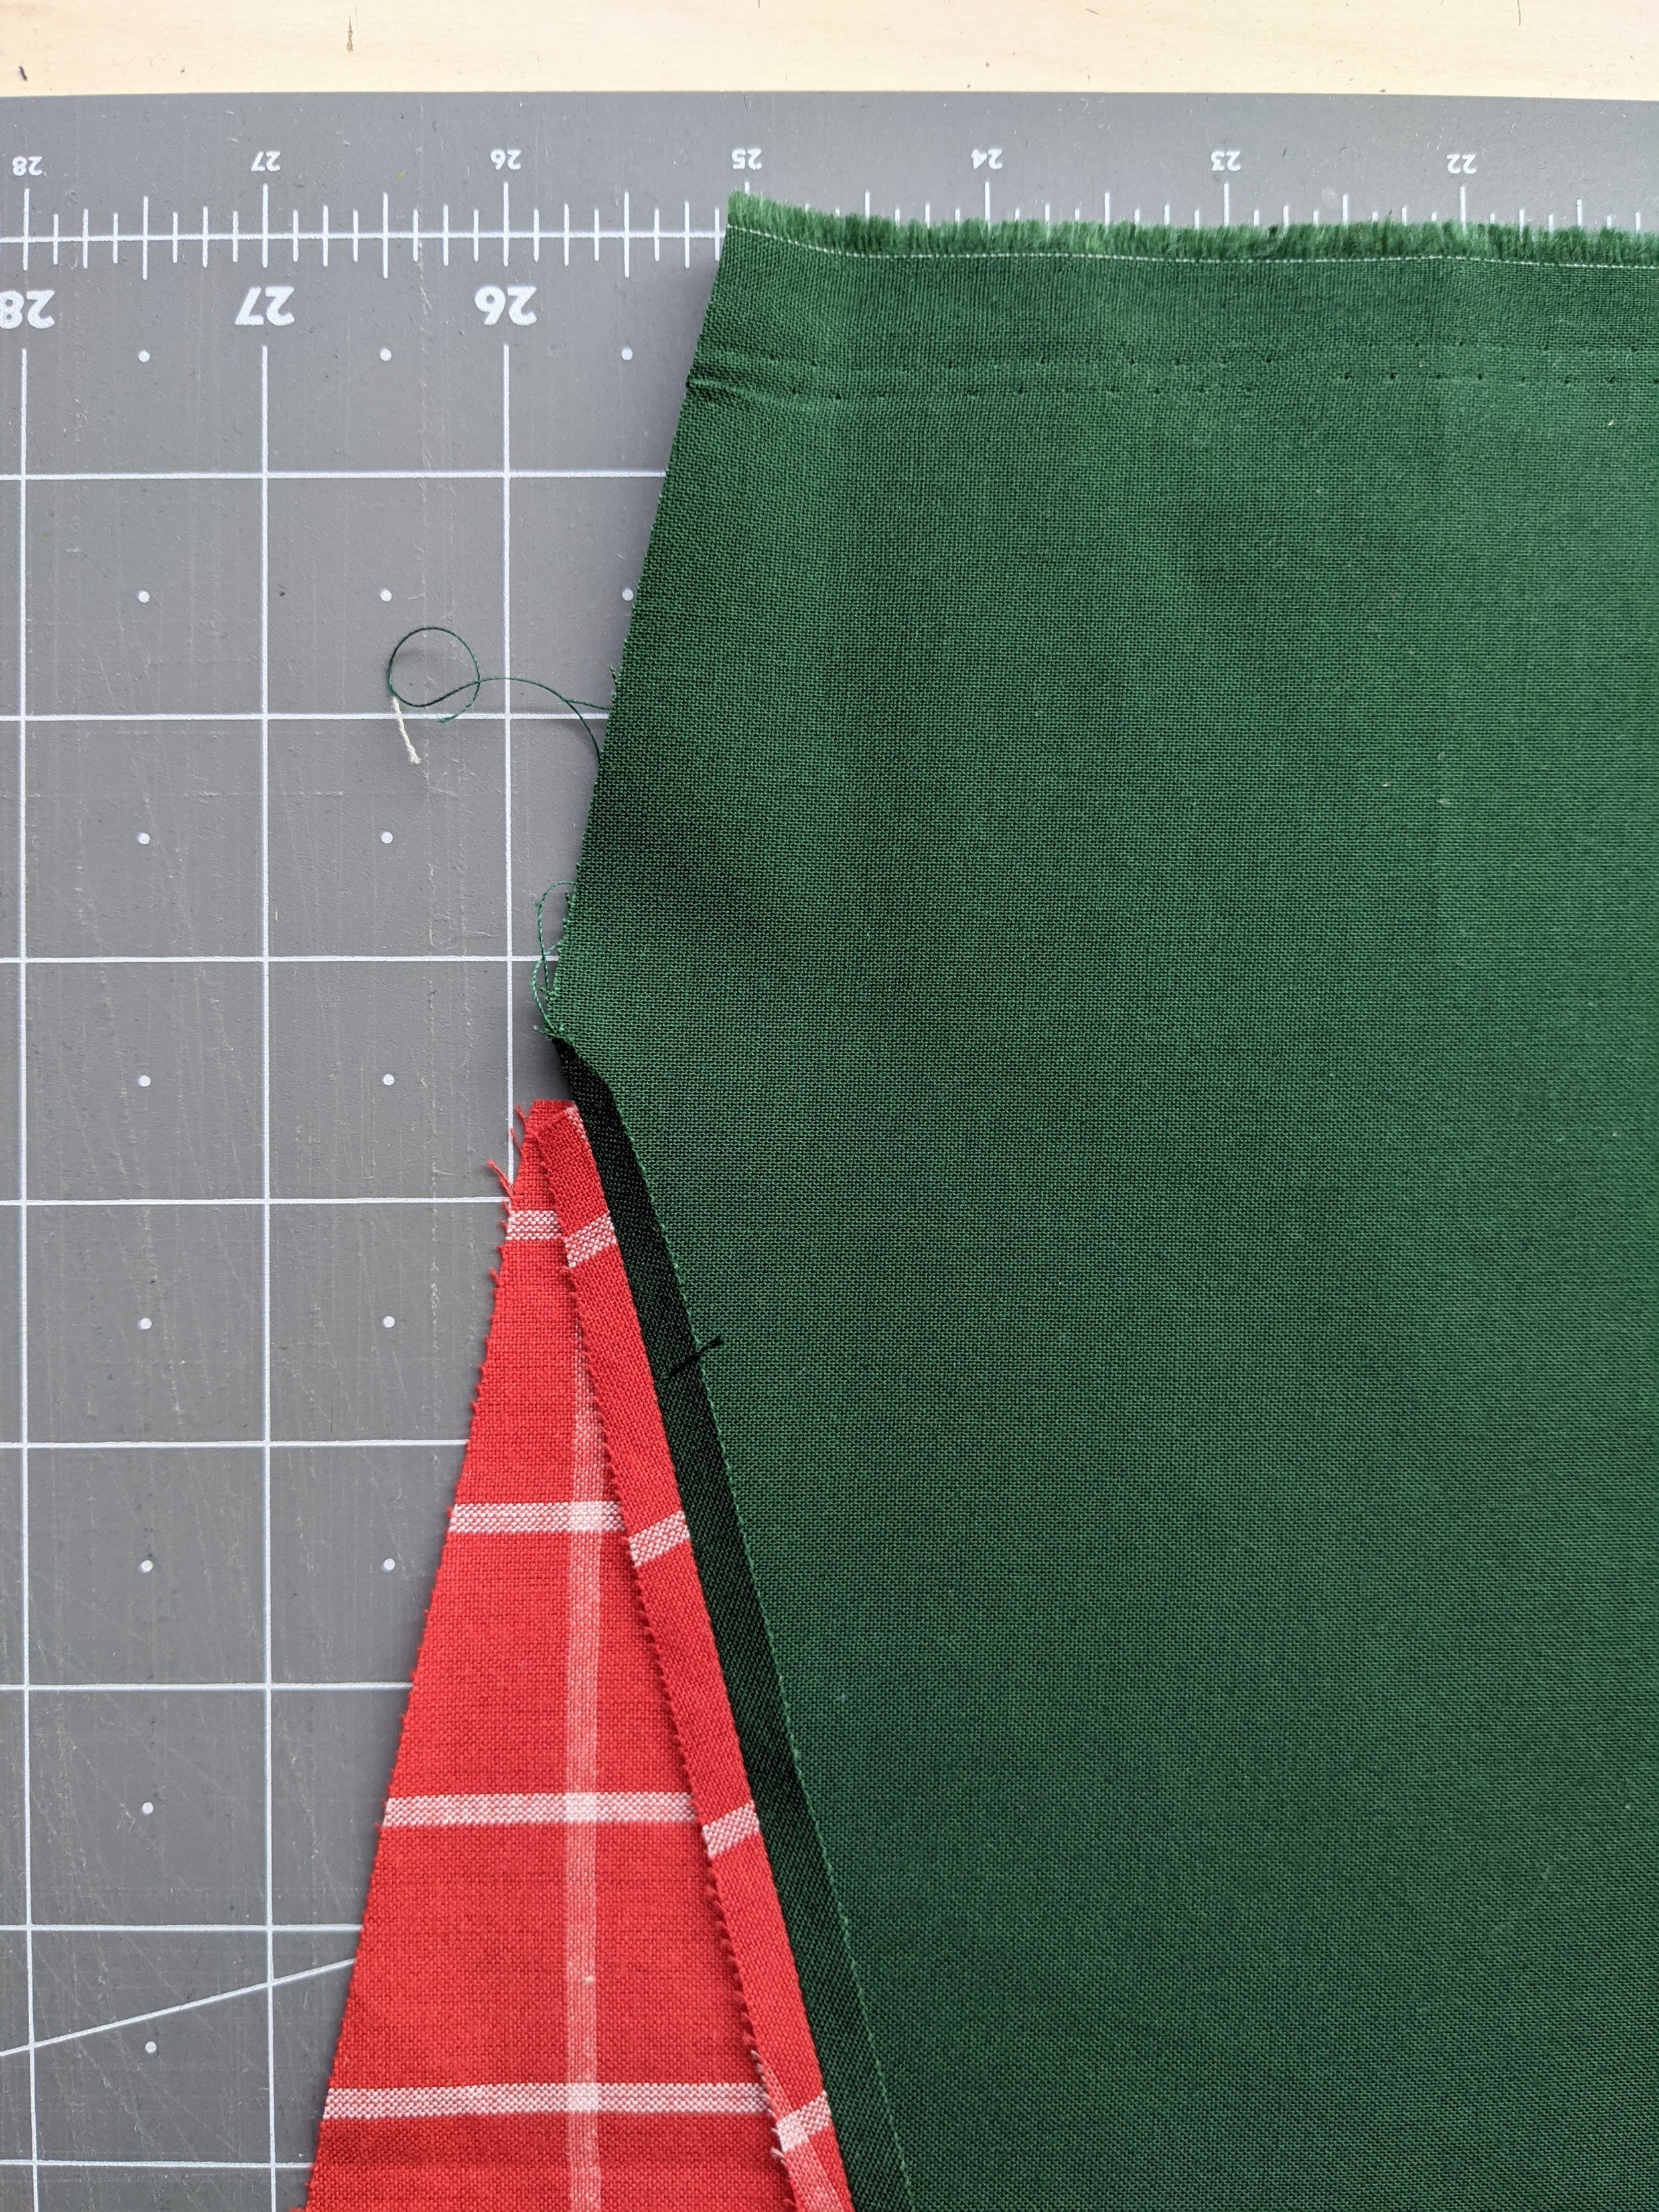
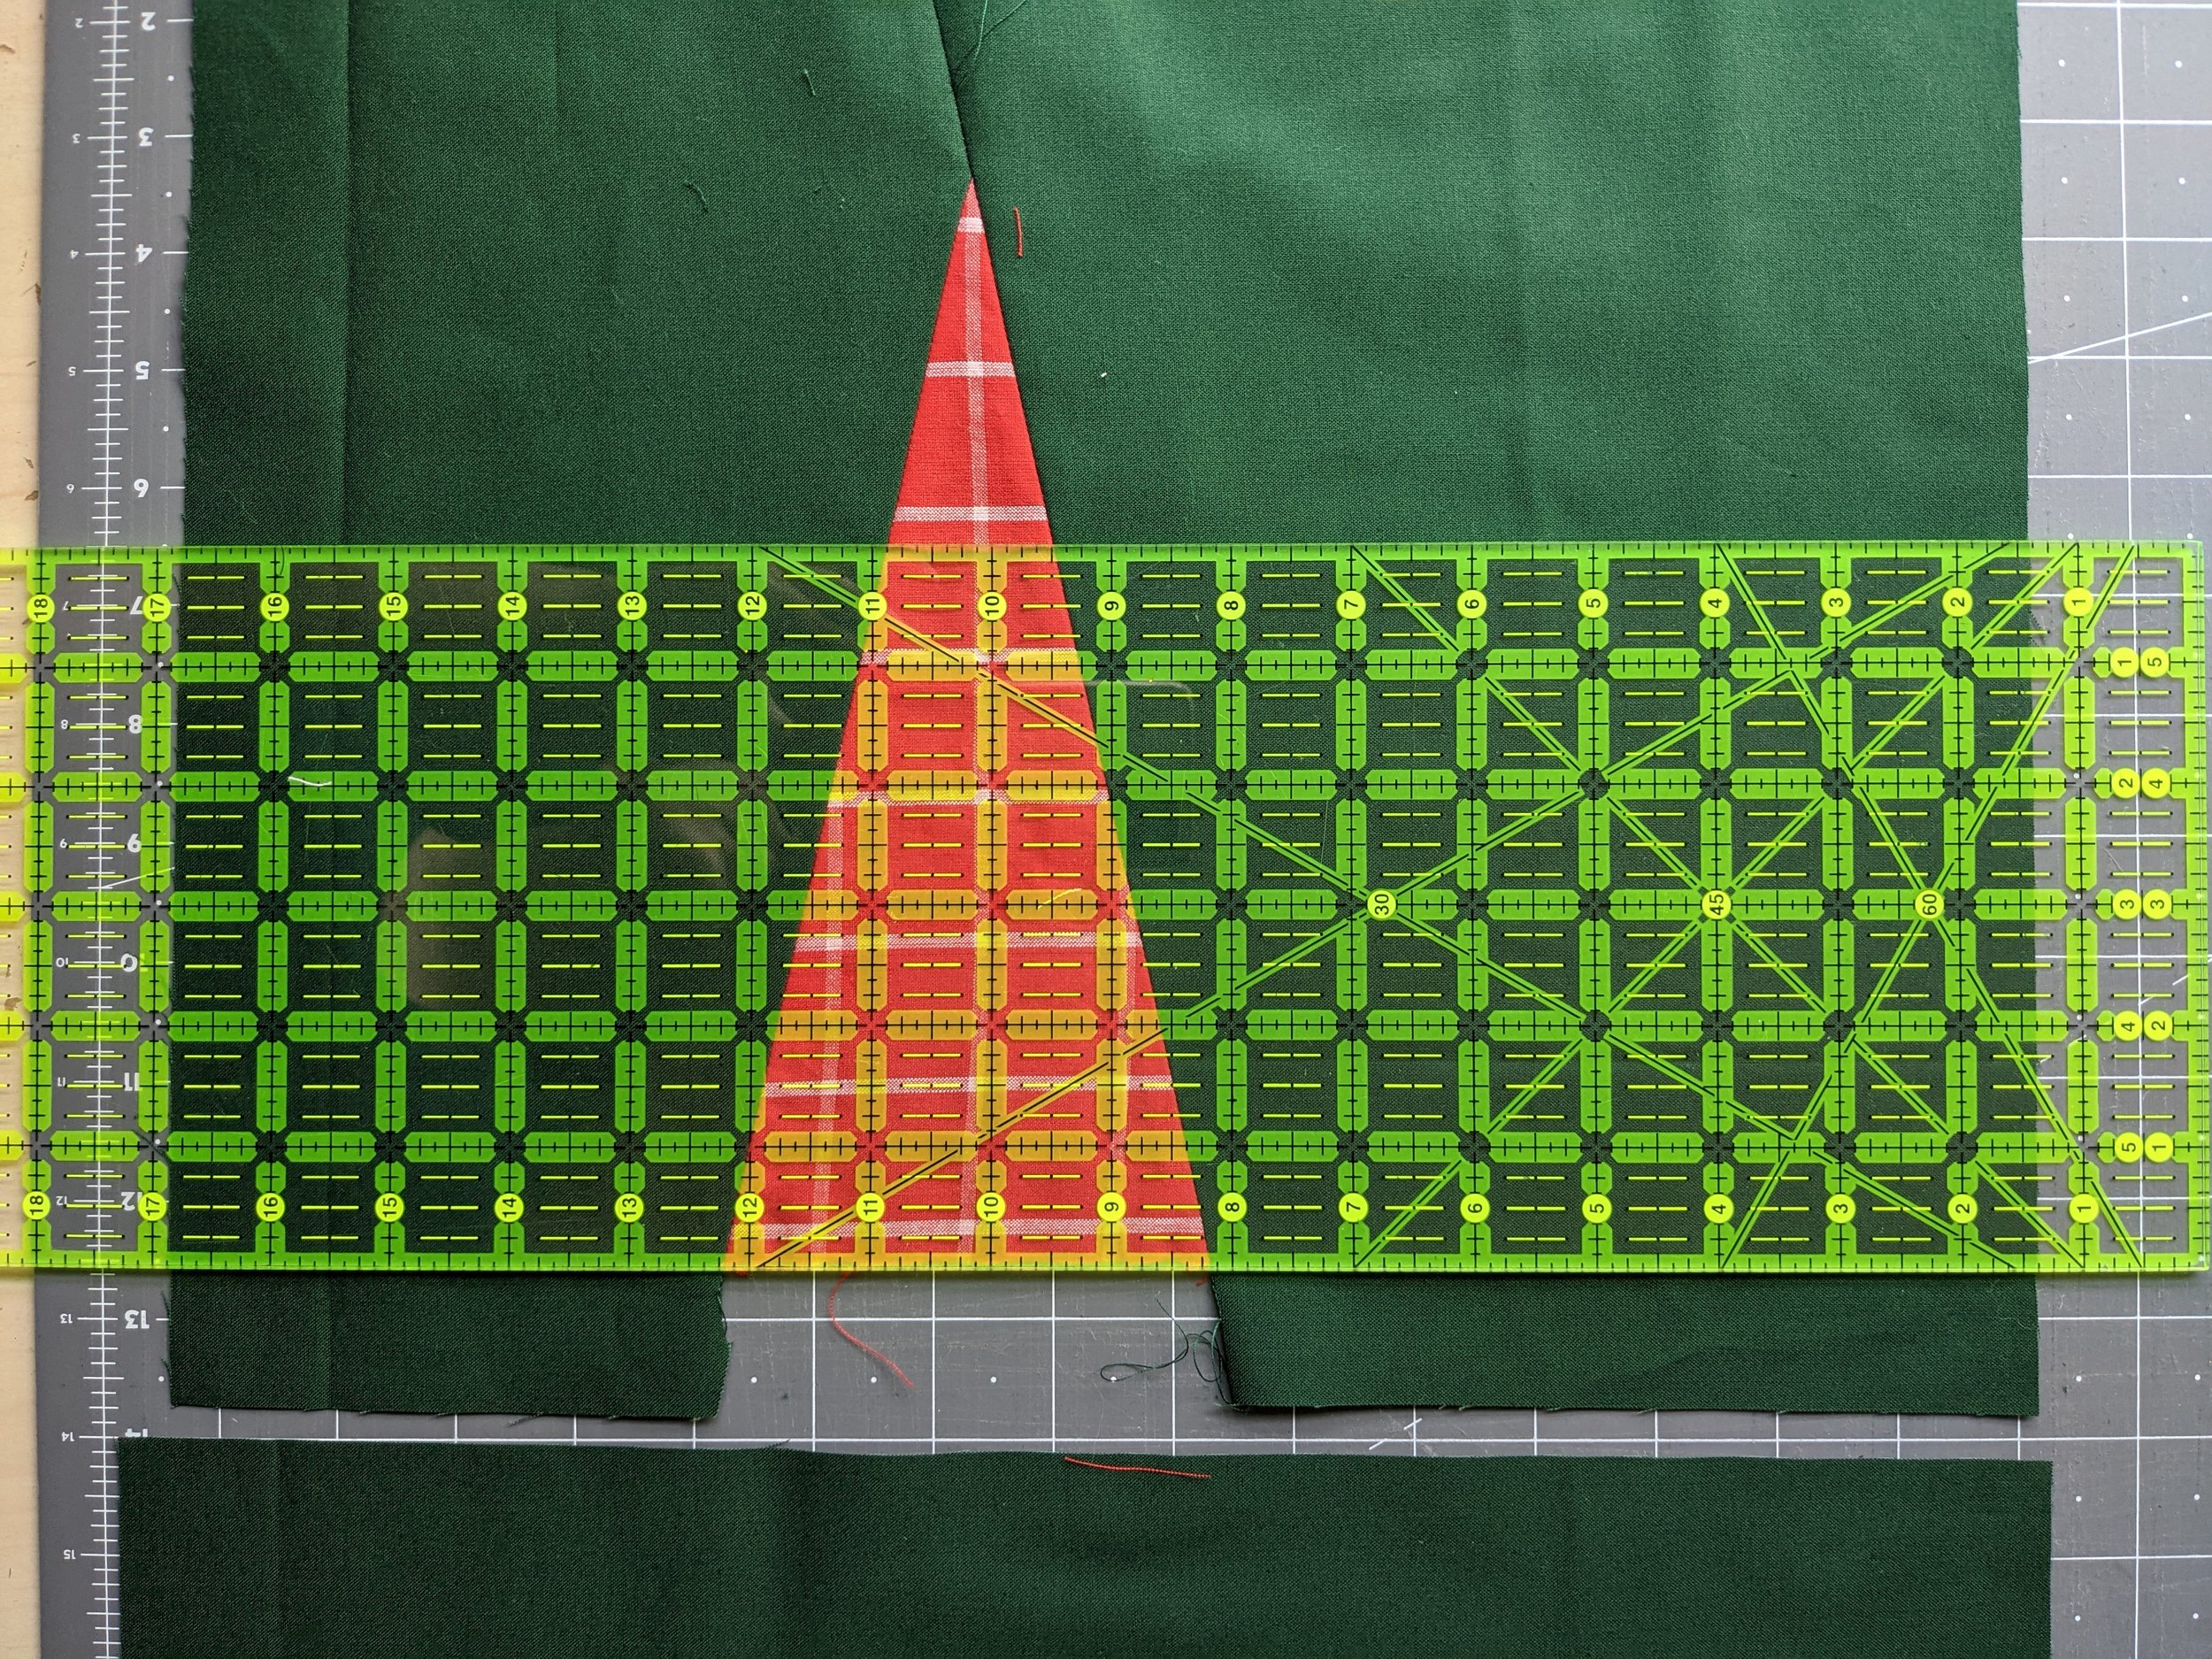
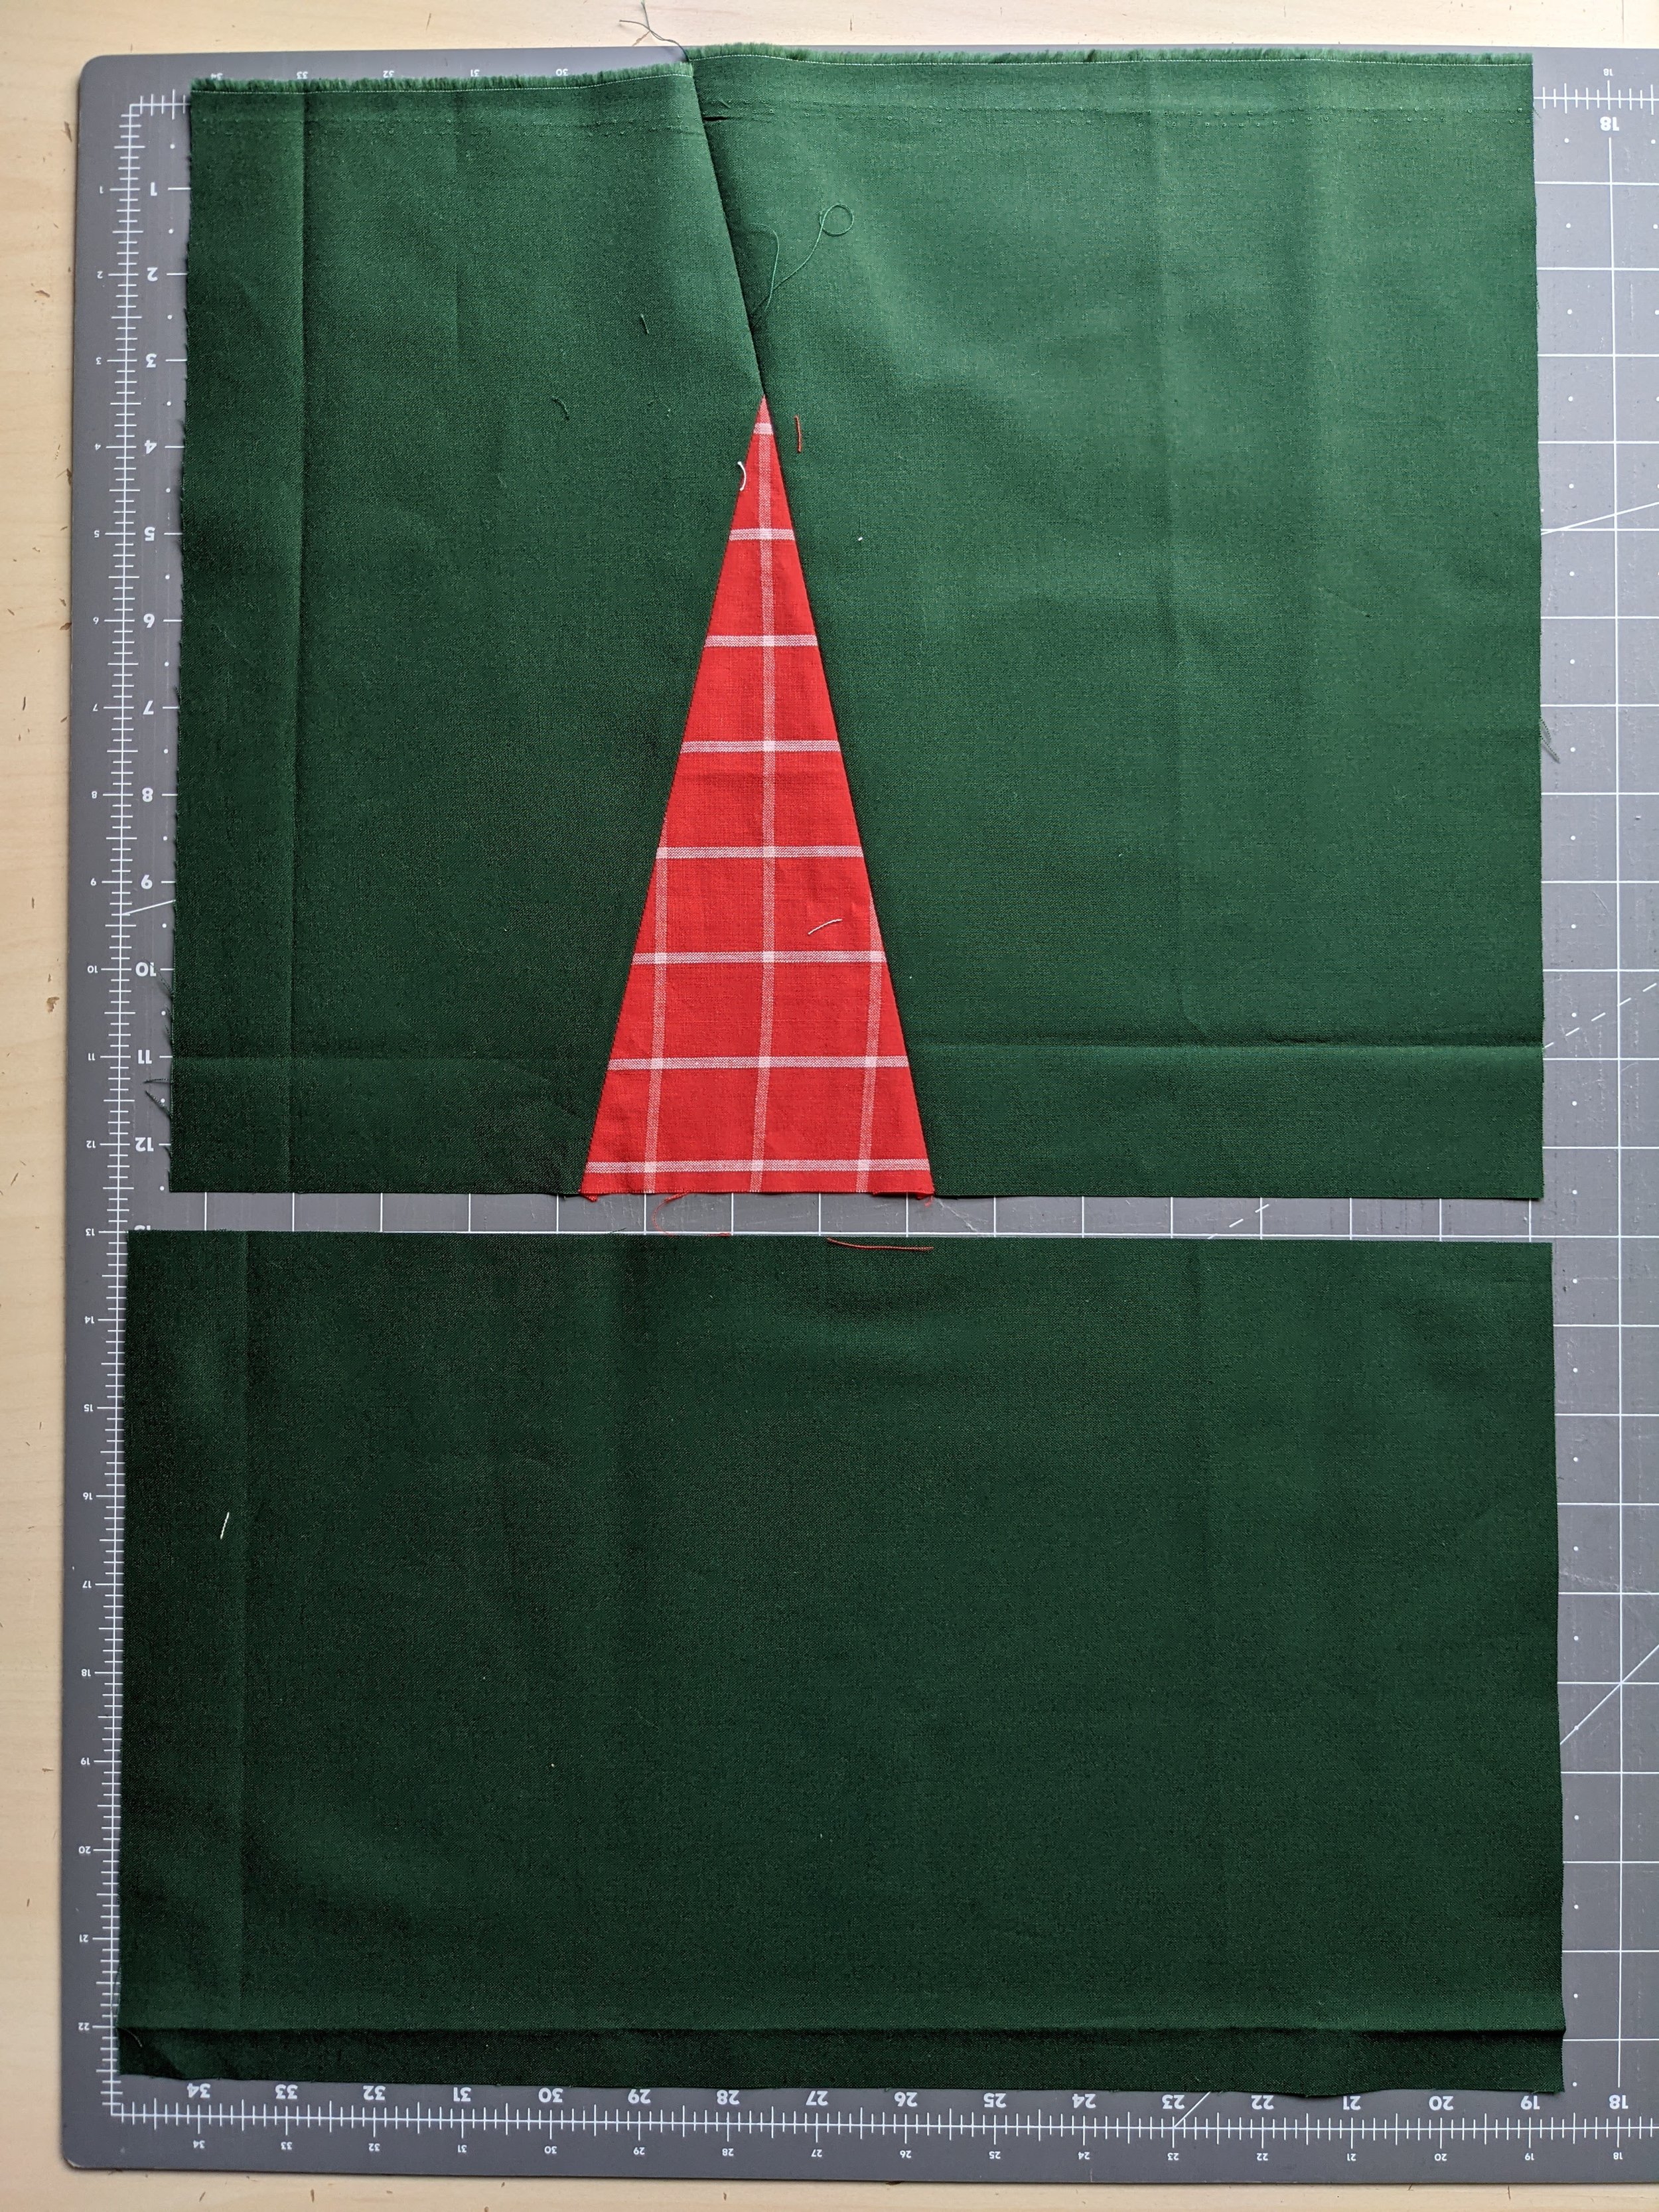
Place a large ruler (I’m using a 6x24” ruler) along the bottom of the triangle as a guide to cut a rectangular block of fabric for the bottom. Then, without moving the triangle, place the ruler along one side of the triangle as a guide to cut a side block, cutting all the way from the bottom to the top of the triangle. This will help give you the correct angle to match whatever tree size you decided to use. Without moving the triangle, place the ruler along the other side of the triangle as a guide to cut the final side block. You should have three pieces that look approximately like this (with a bonus triangle piece in the middle!):
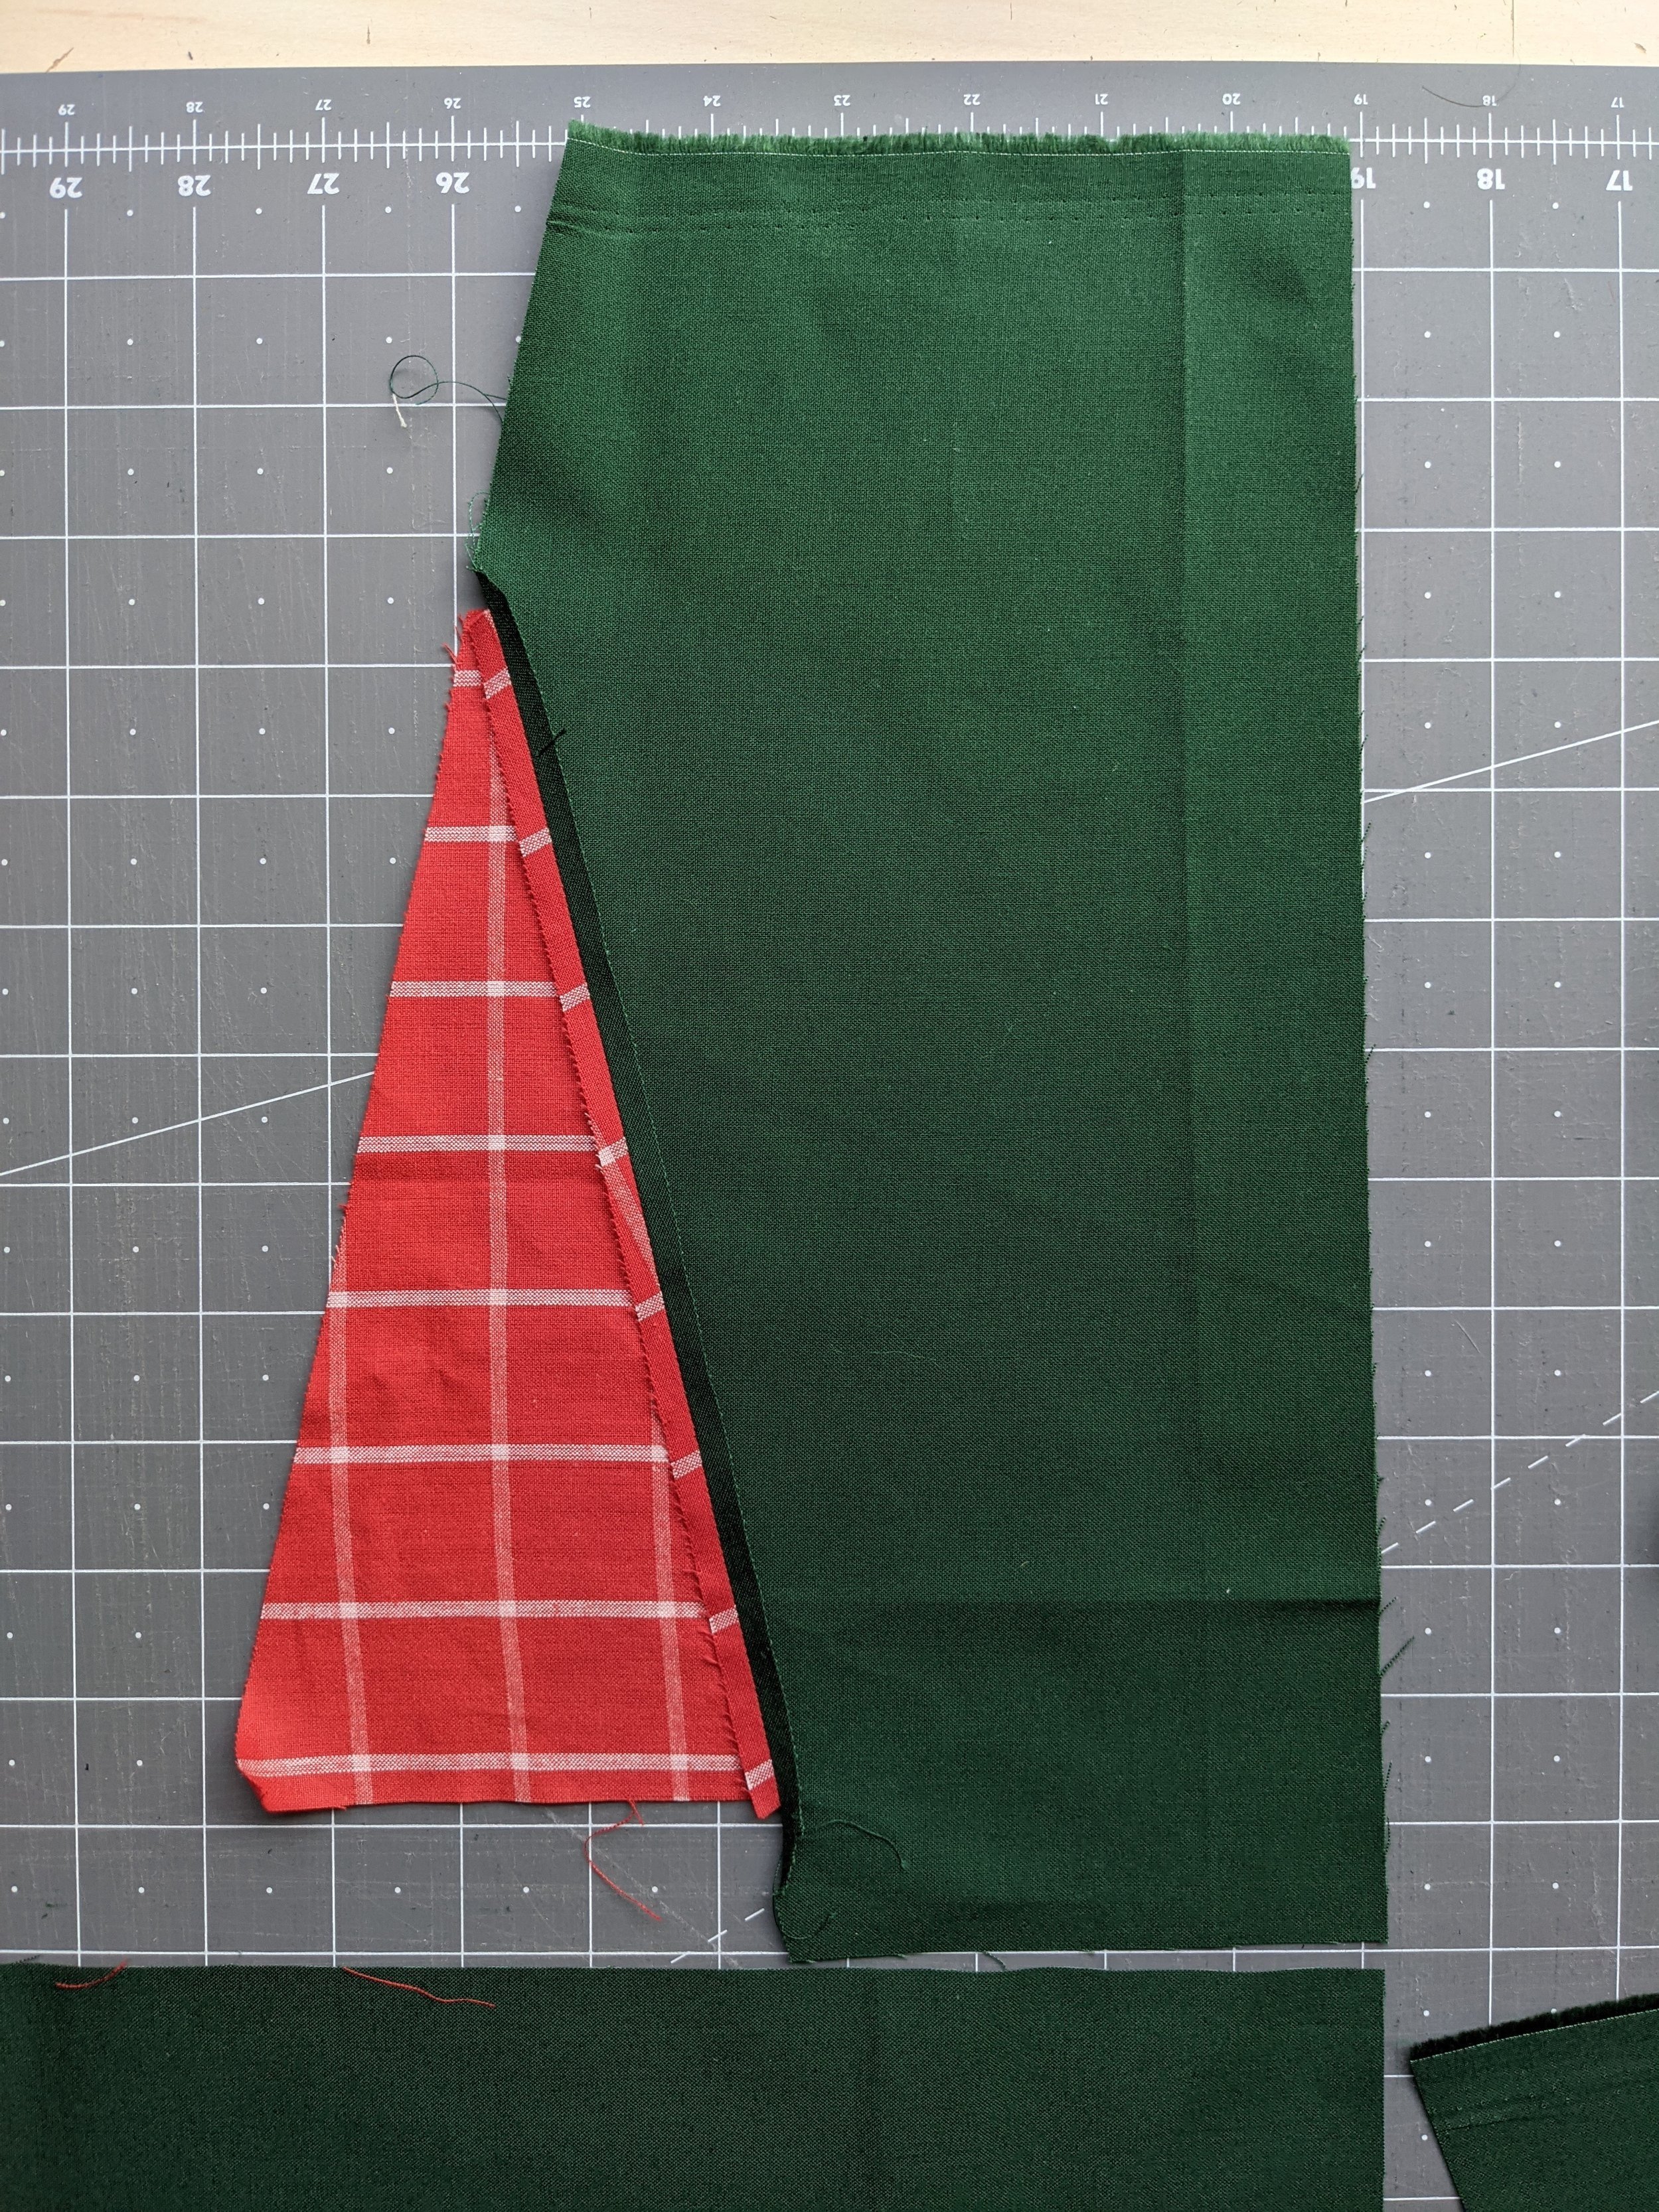
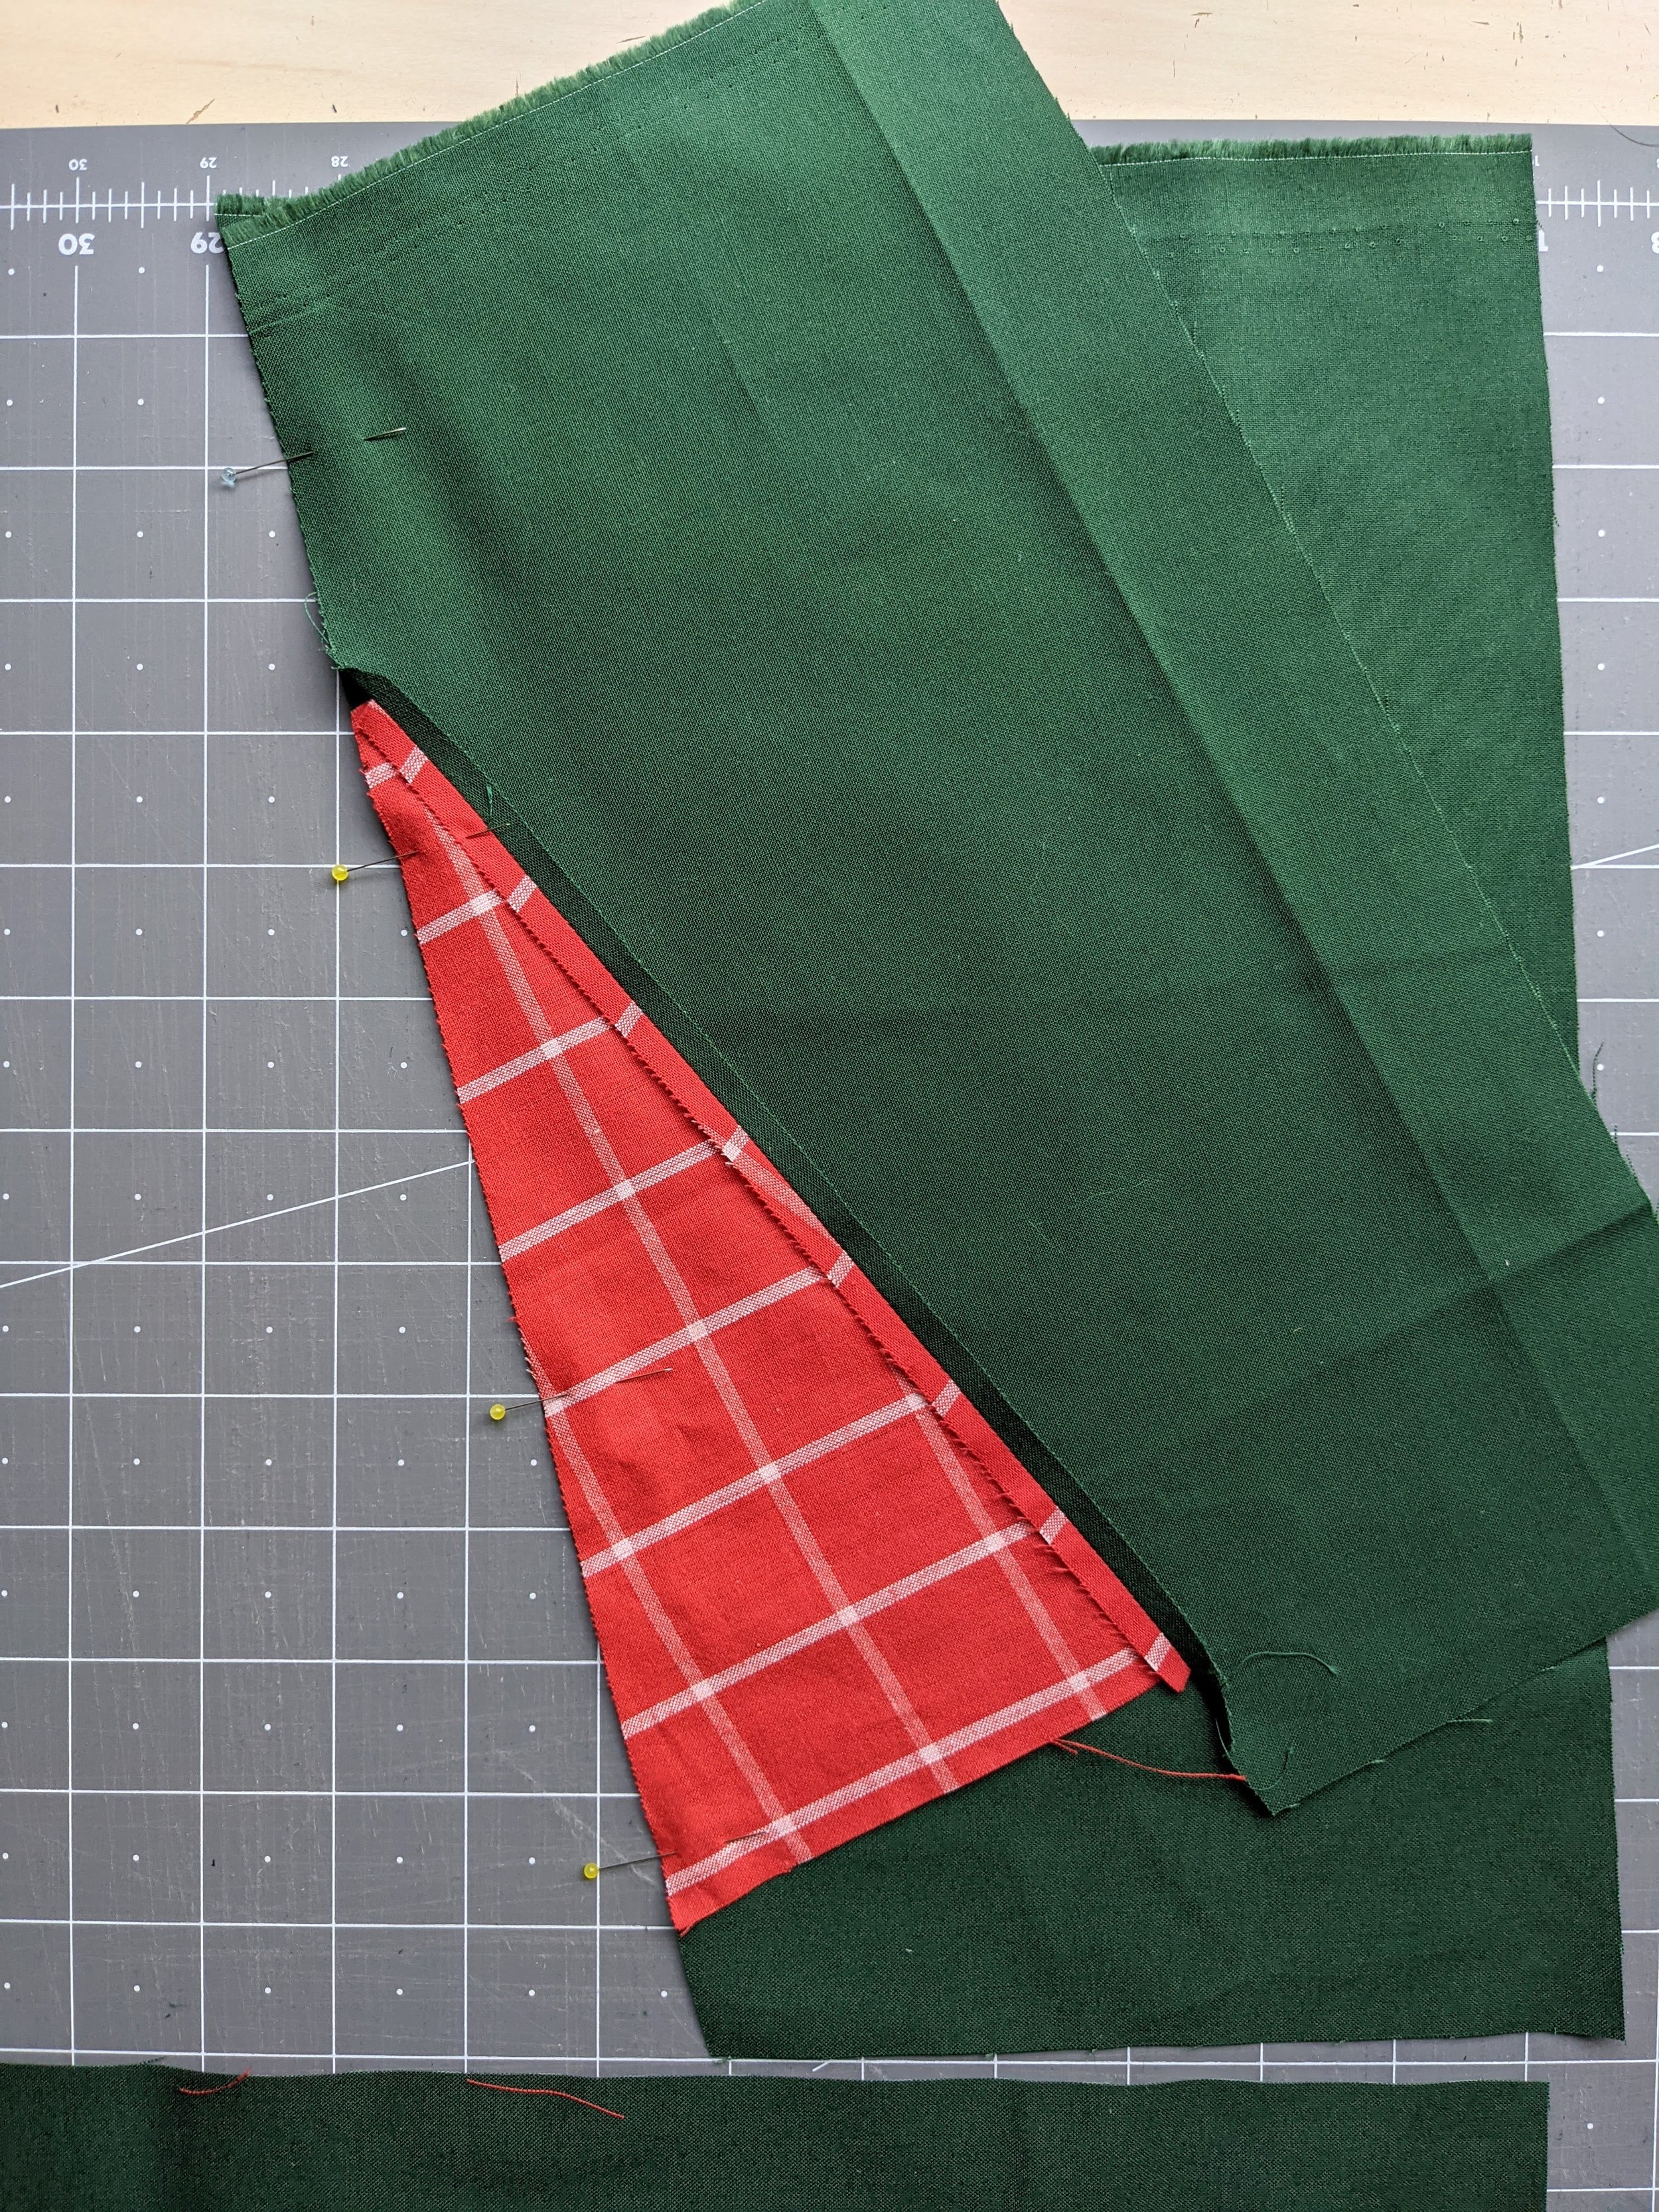
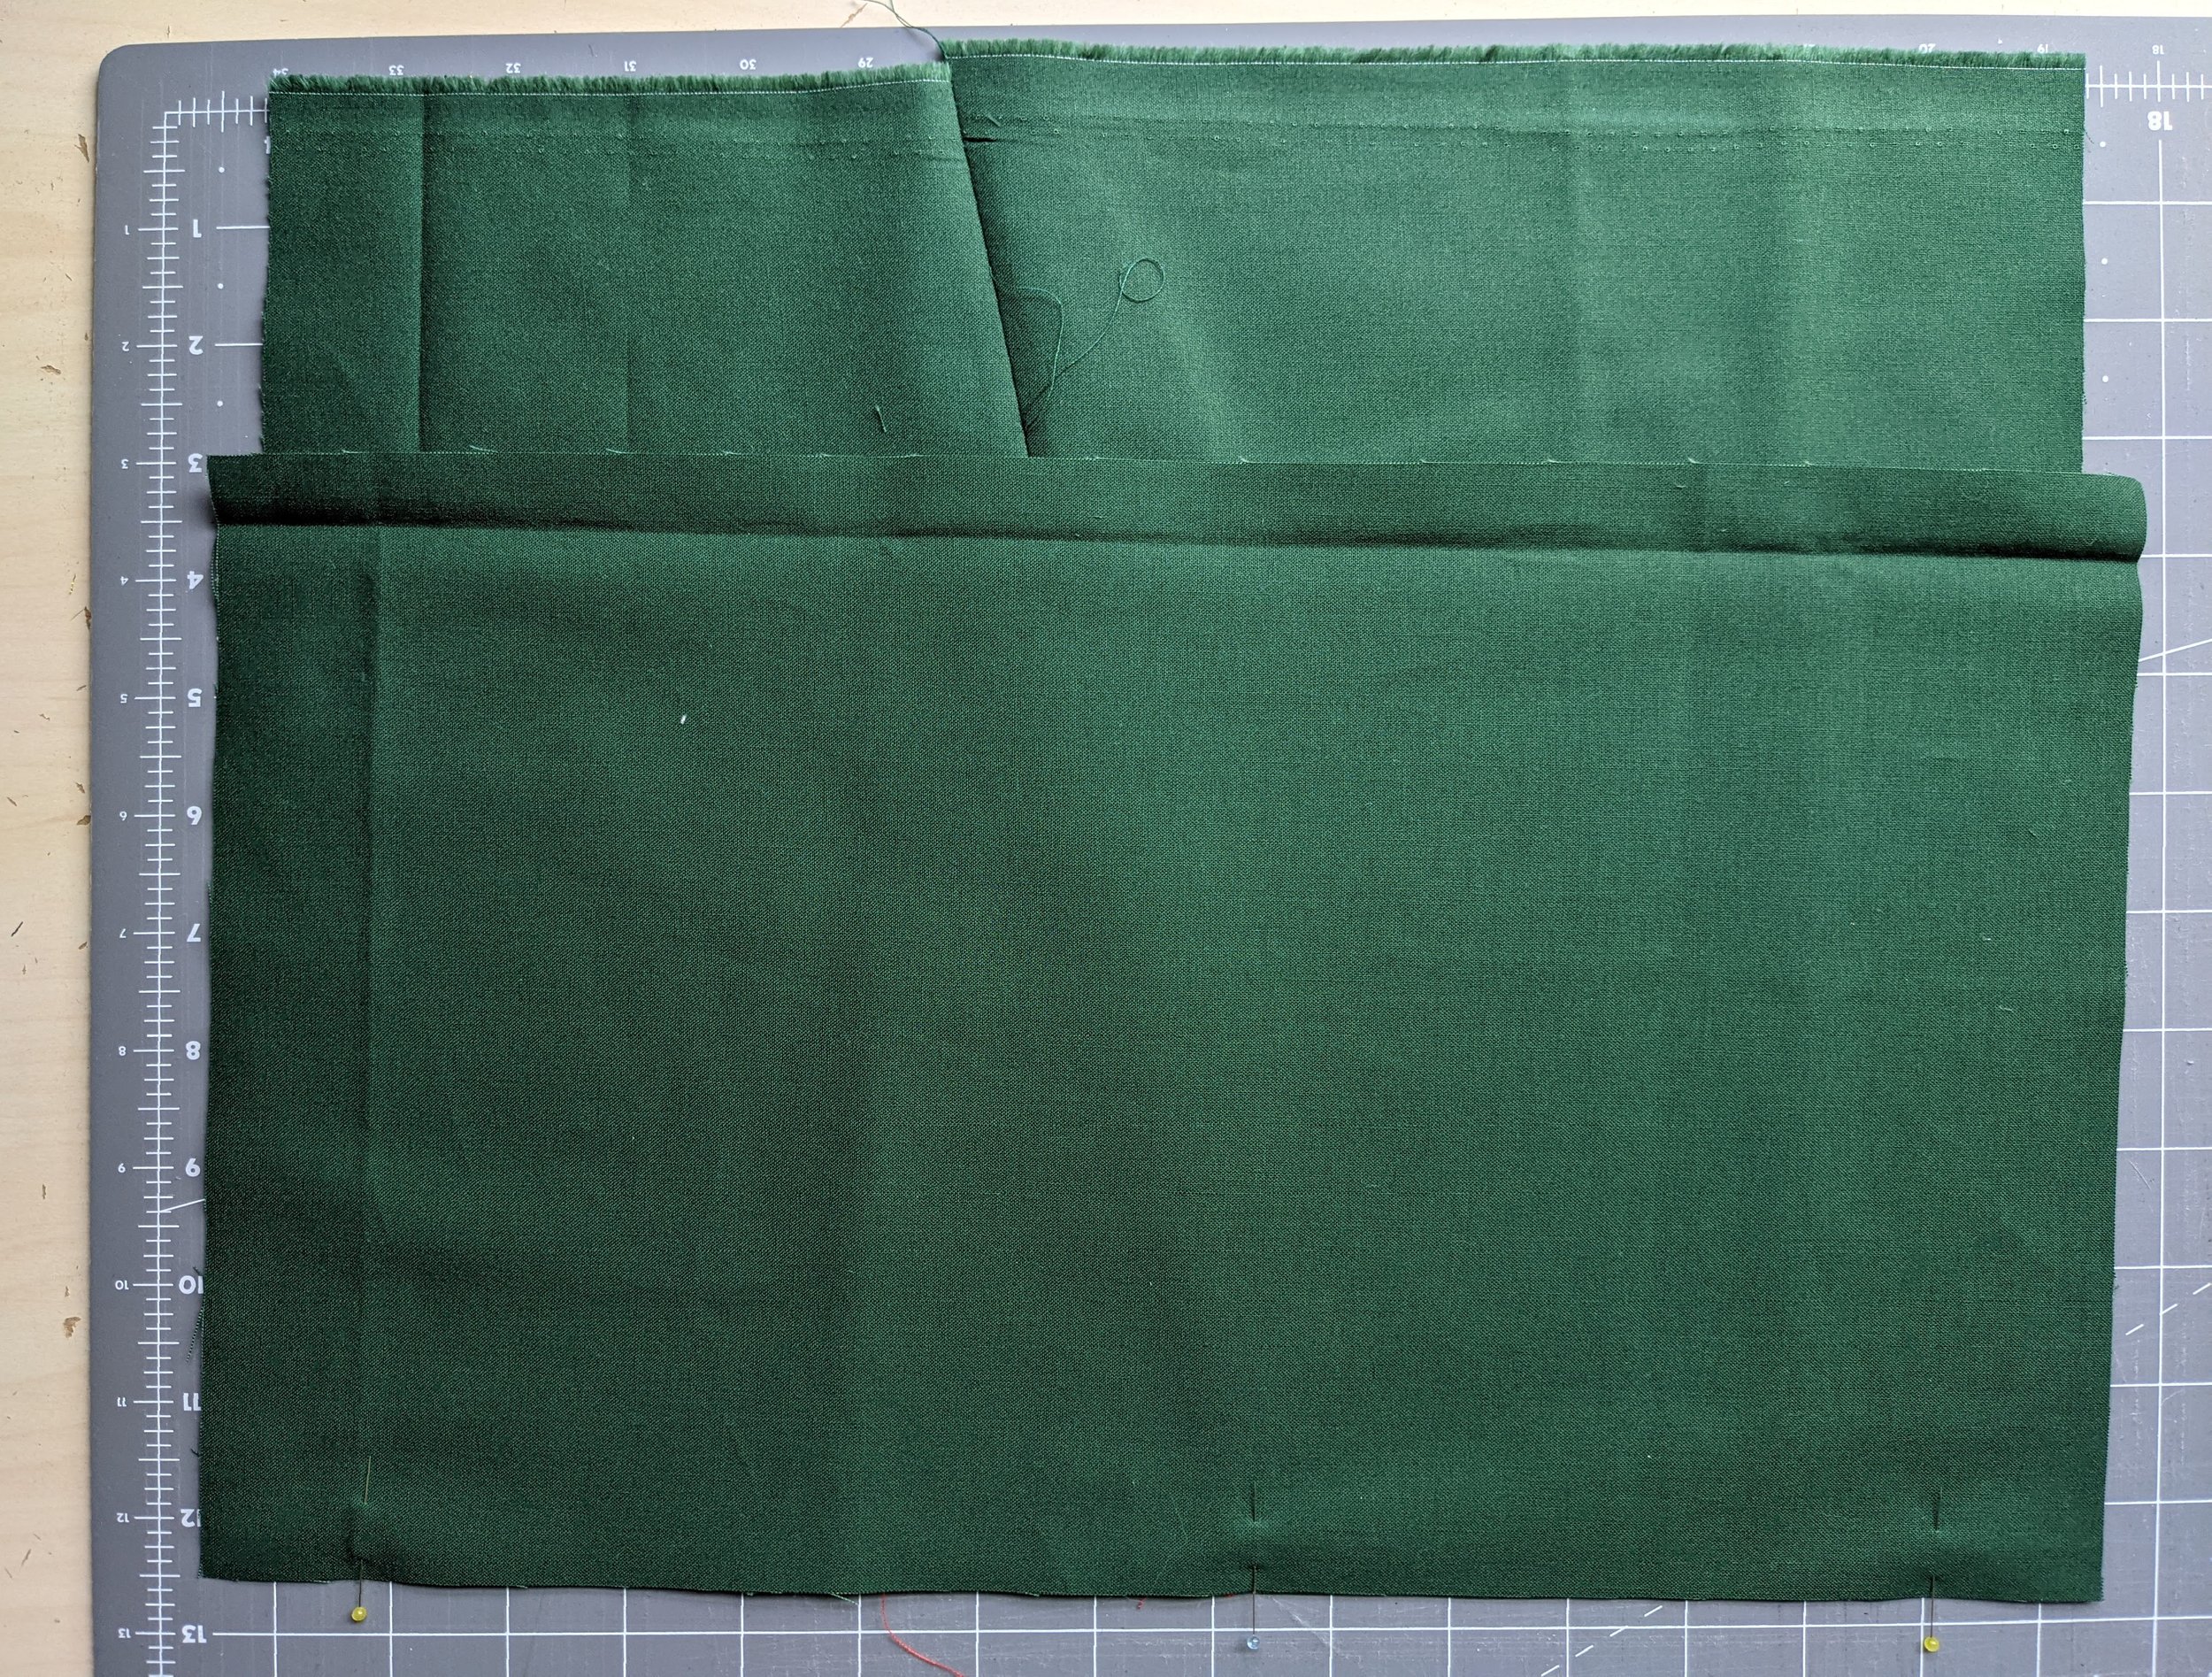
To piece, attach the triangle to the 5-sided block of background fabric first using a quarter inch seam. If you used a triangle ruler or my template, with the tip cut off, place your triangle along the matching side with right sides together, as seen below, with the corner of your triangle touching the corner of the background fabric. If you have a point on your triangle, make sure it overlaps so you start sewing where they merge. Press your seams as desired. I prefer pressing my seams open to make all my seams flush, but you can also press to the side with this project if you prefer. If sewing without a point, there will be a slight notch between the tip of the triangle and the background fabric, just make sure that your background fabric and accent triangle line up along their unfinished diagonal side.
Next, attach your pieced block to the 4-sided block of background fabric by matching the diagonal side with the open side of the triangle, placing right sides together and lining up to the top edges so that they overlap about a quarter inch (where you would start sewing). Press your seams as desired.
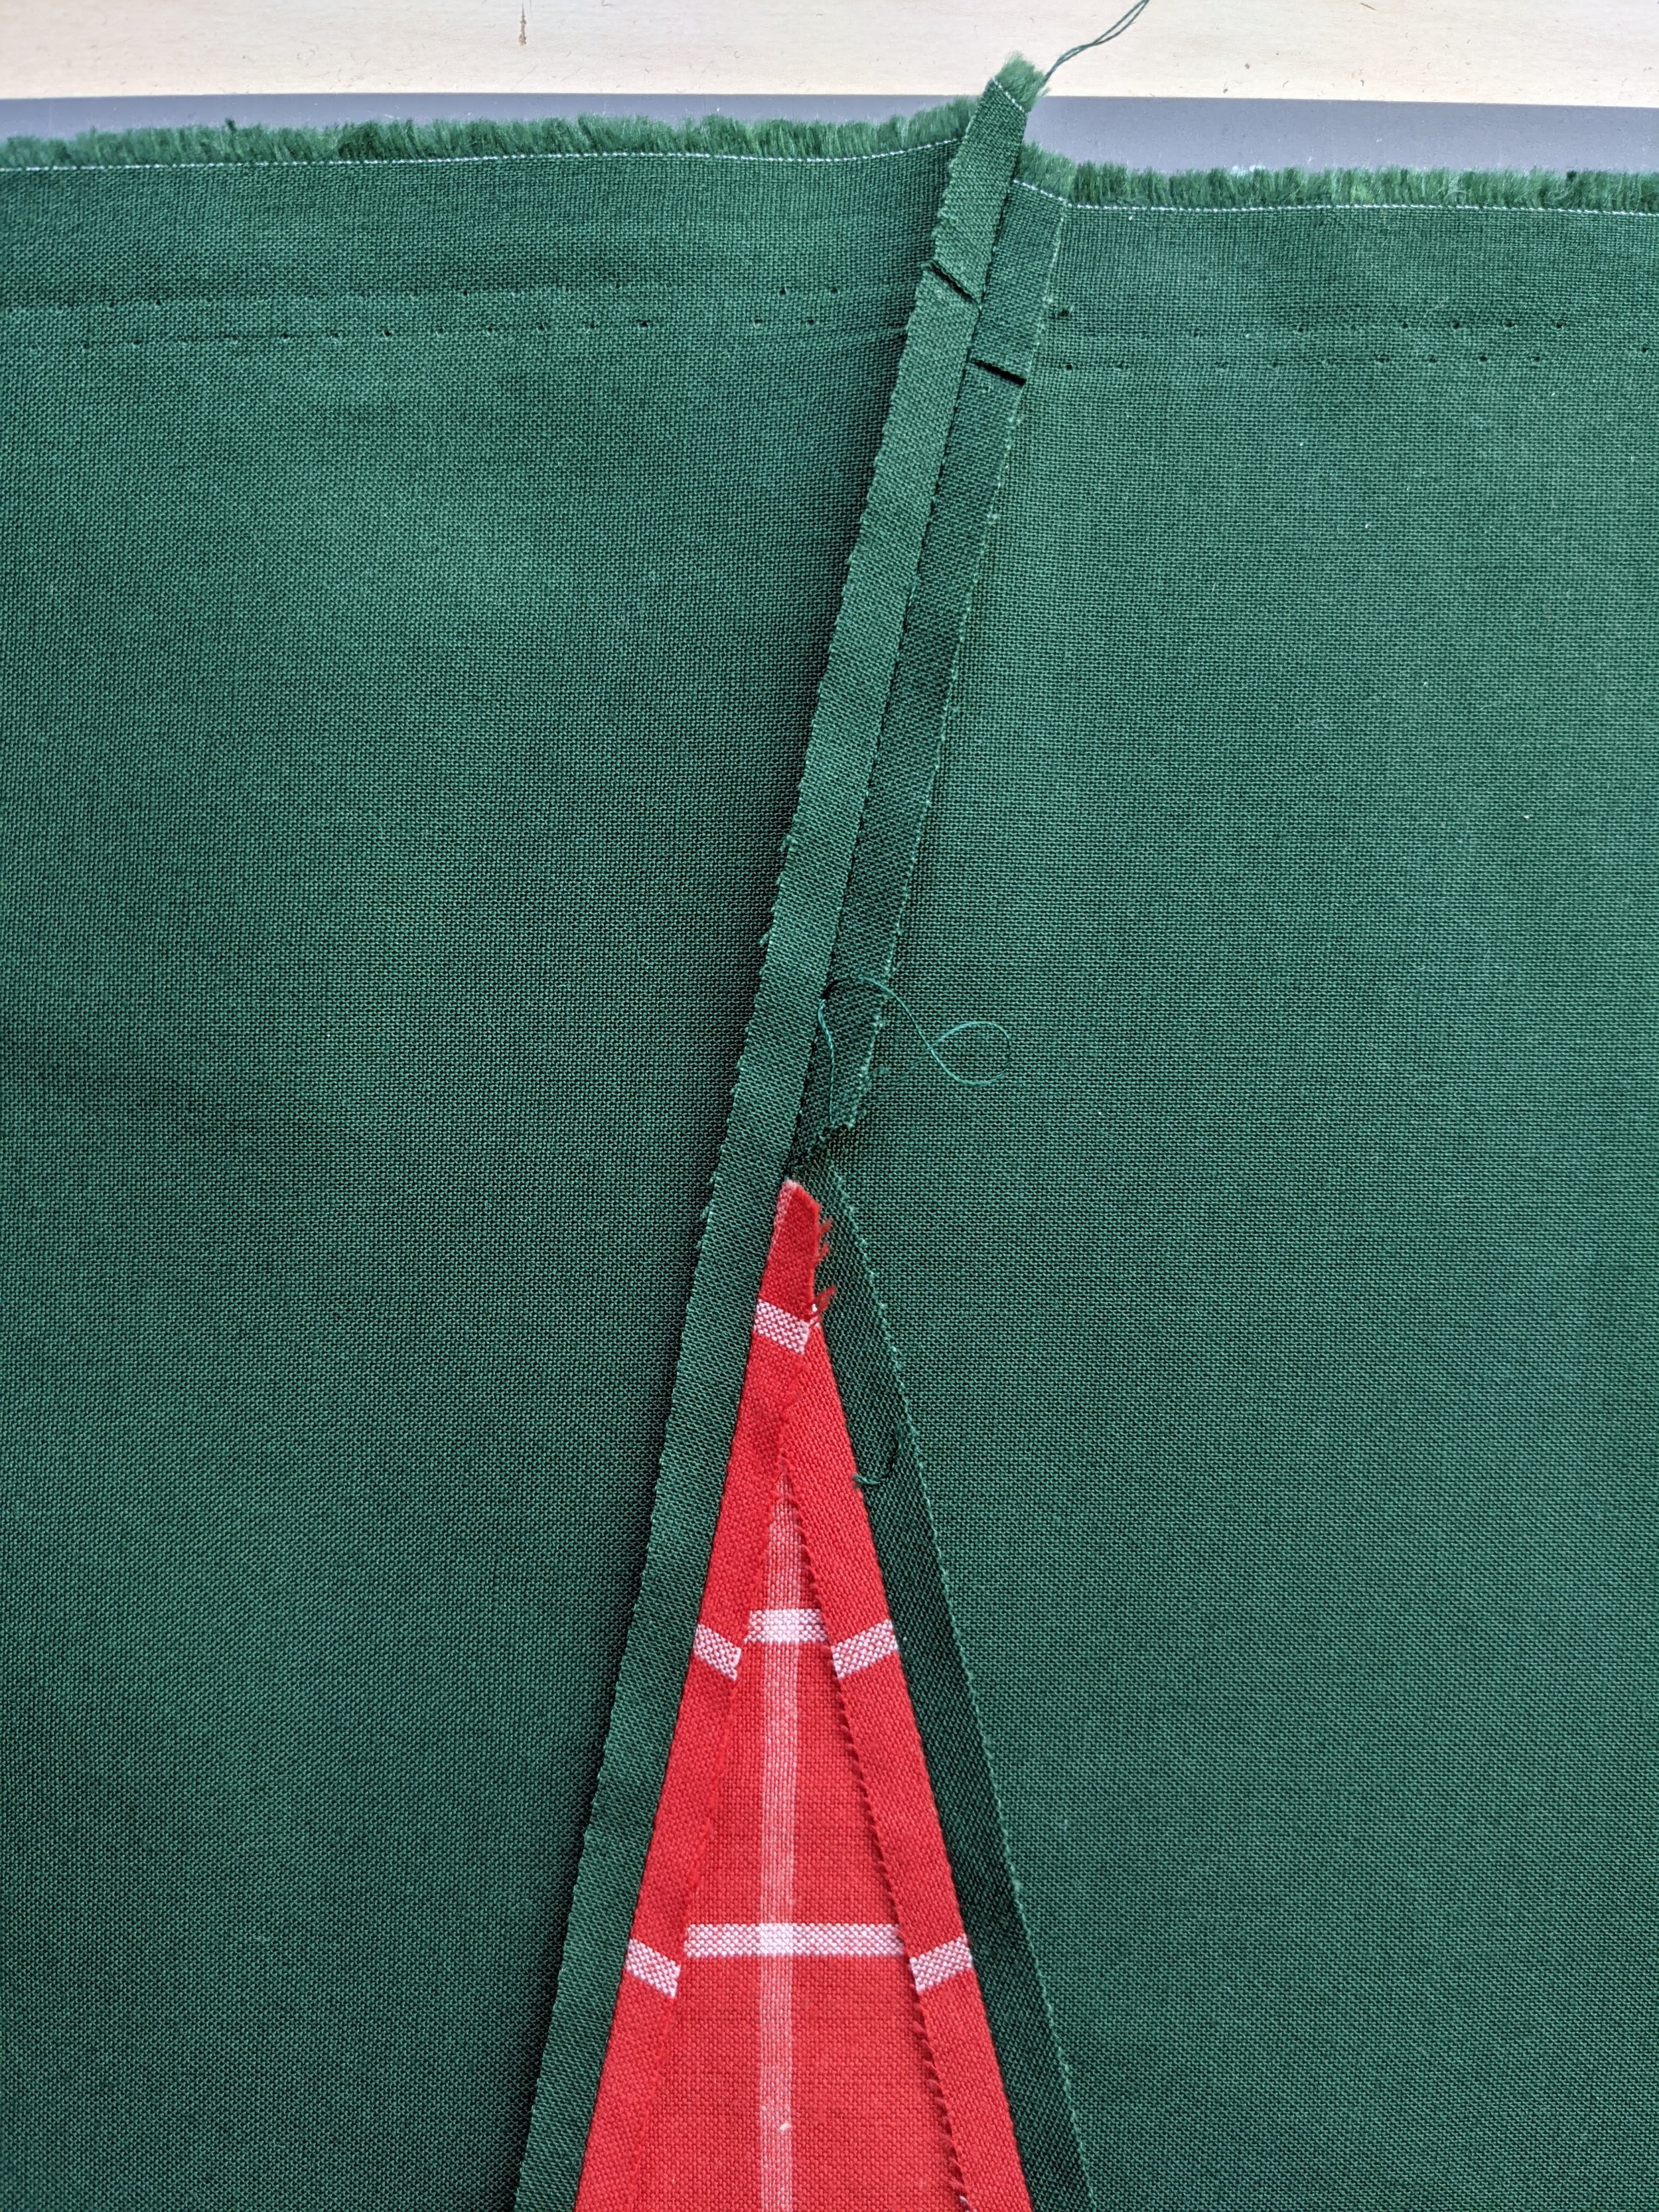
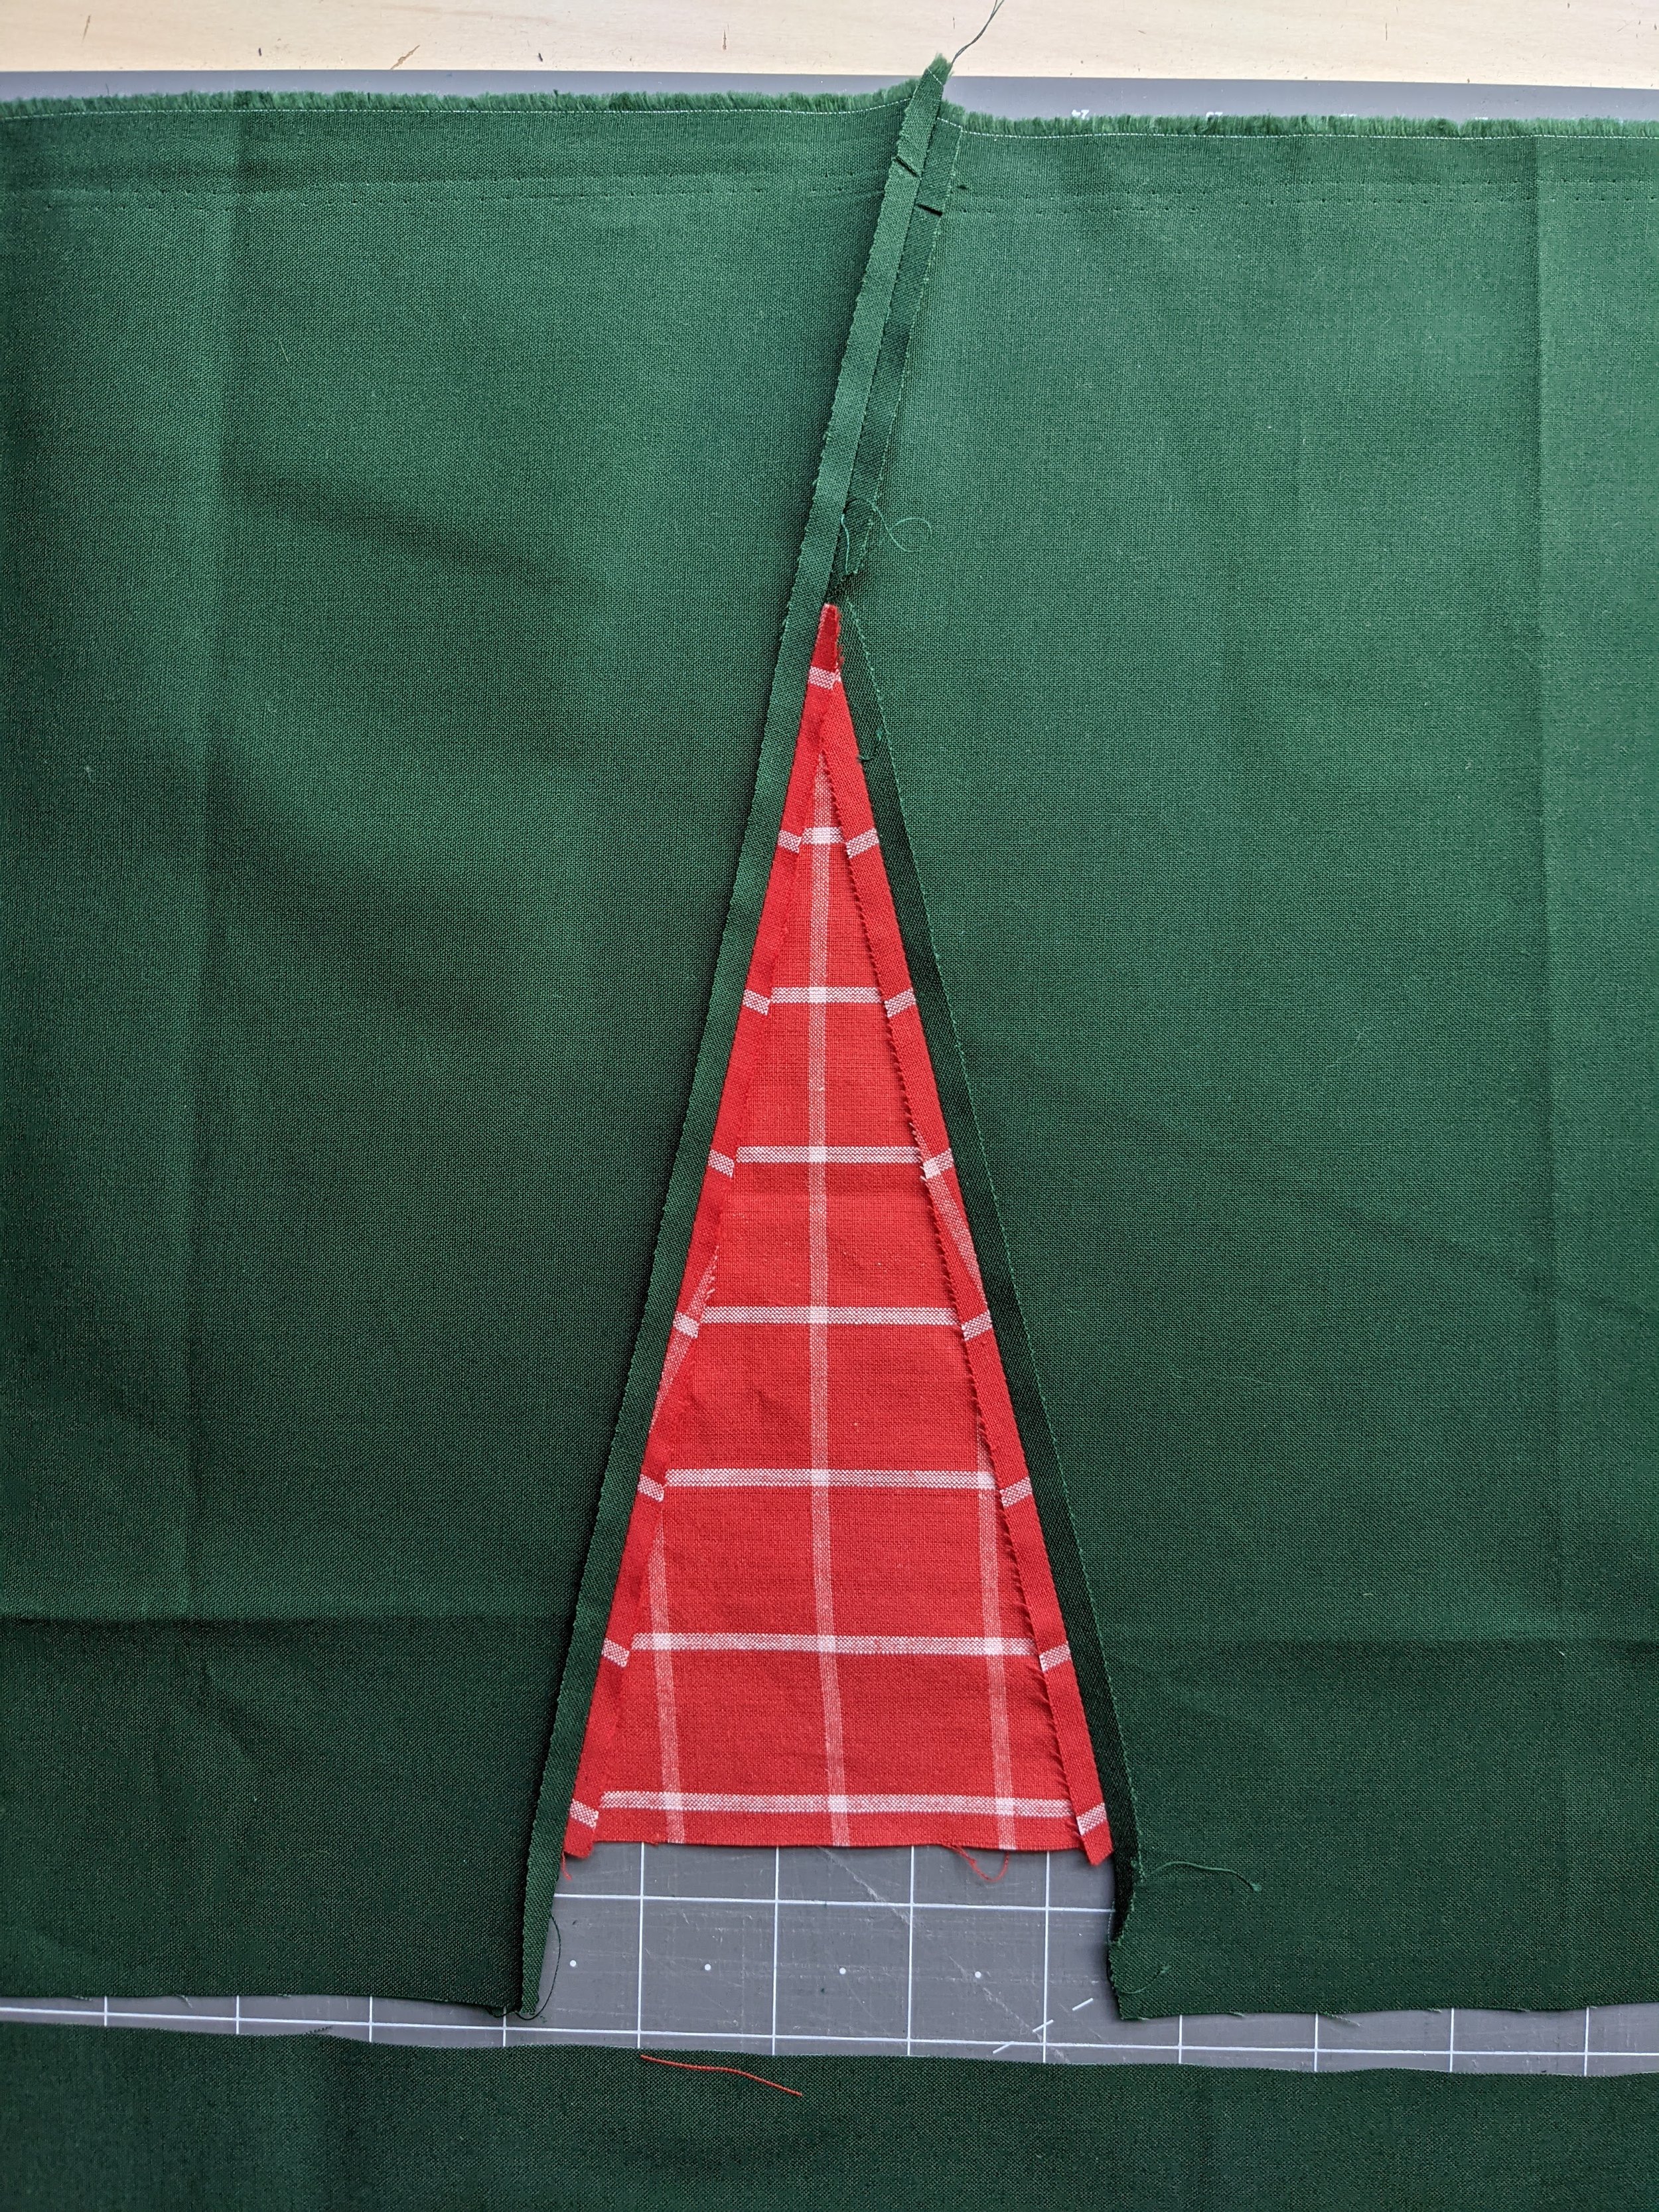
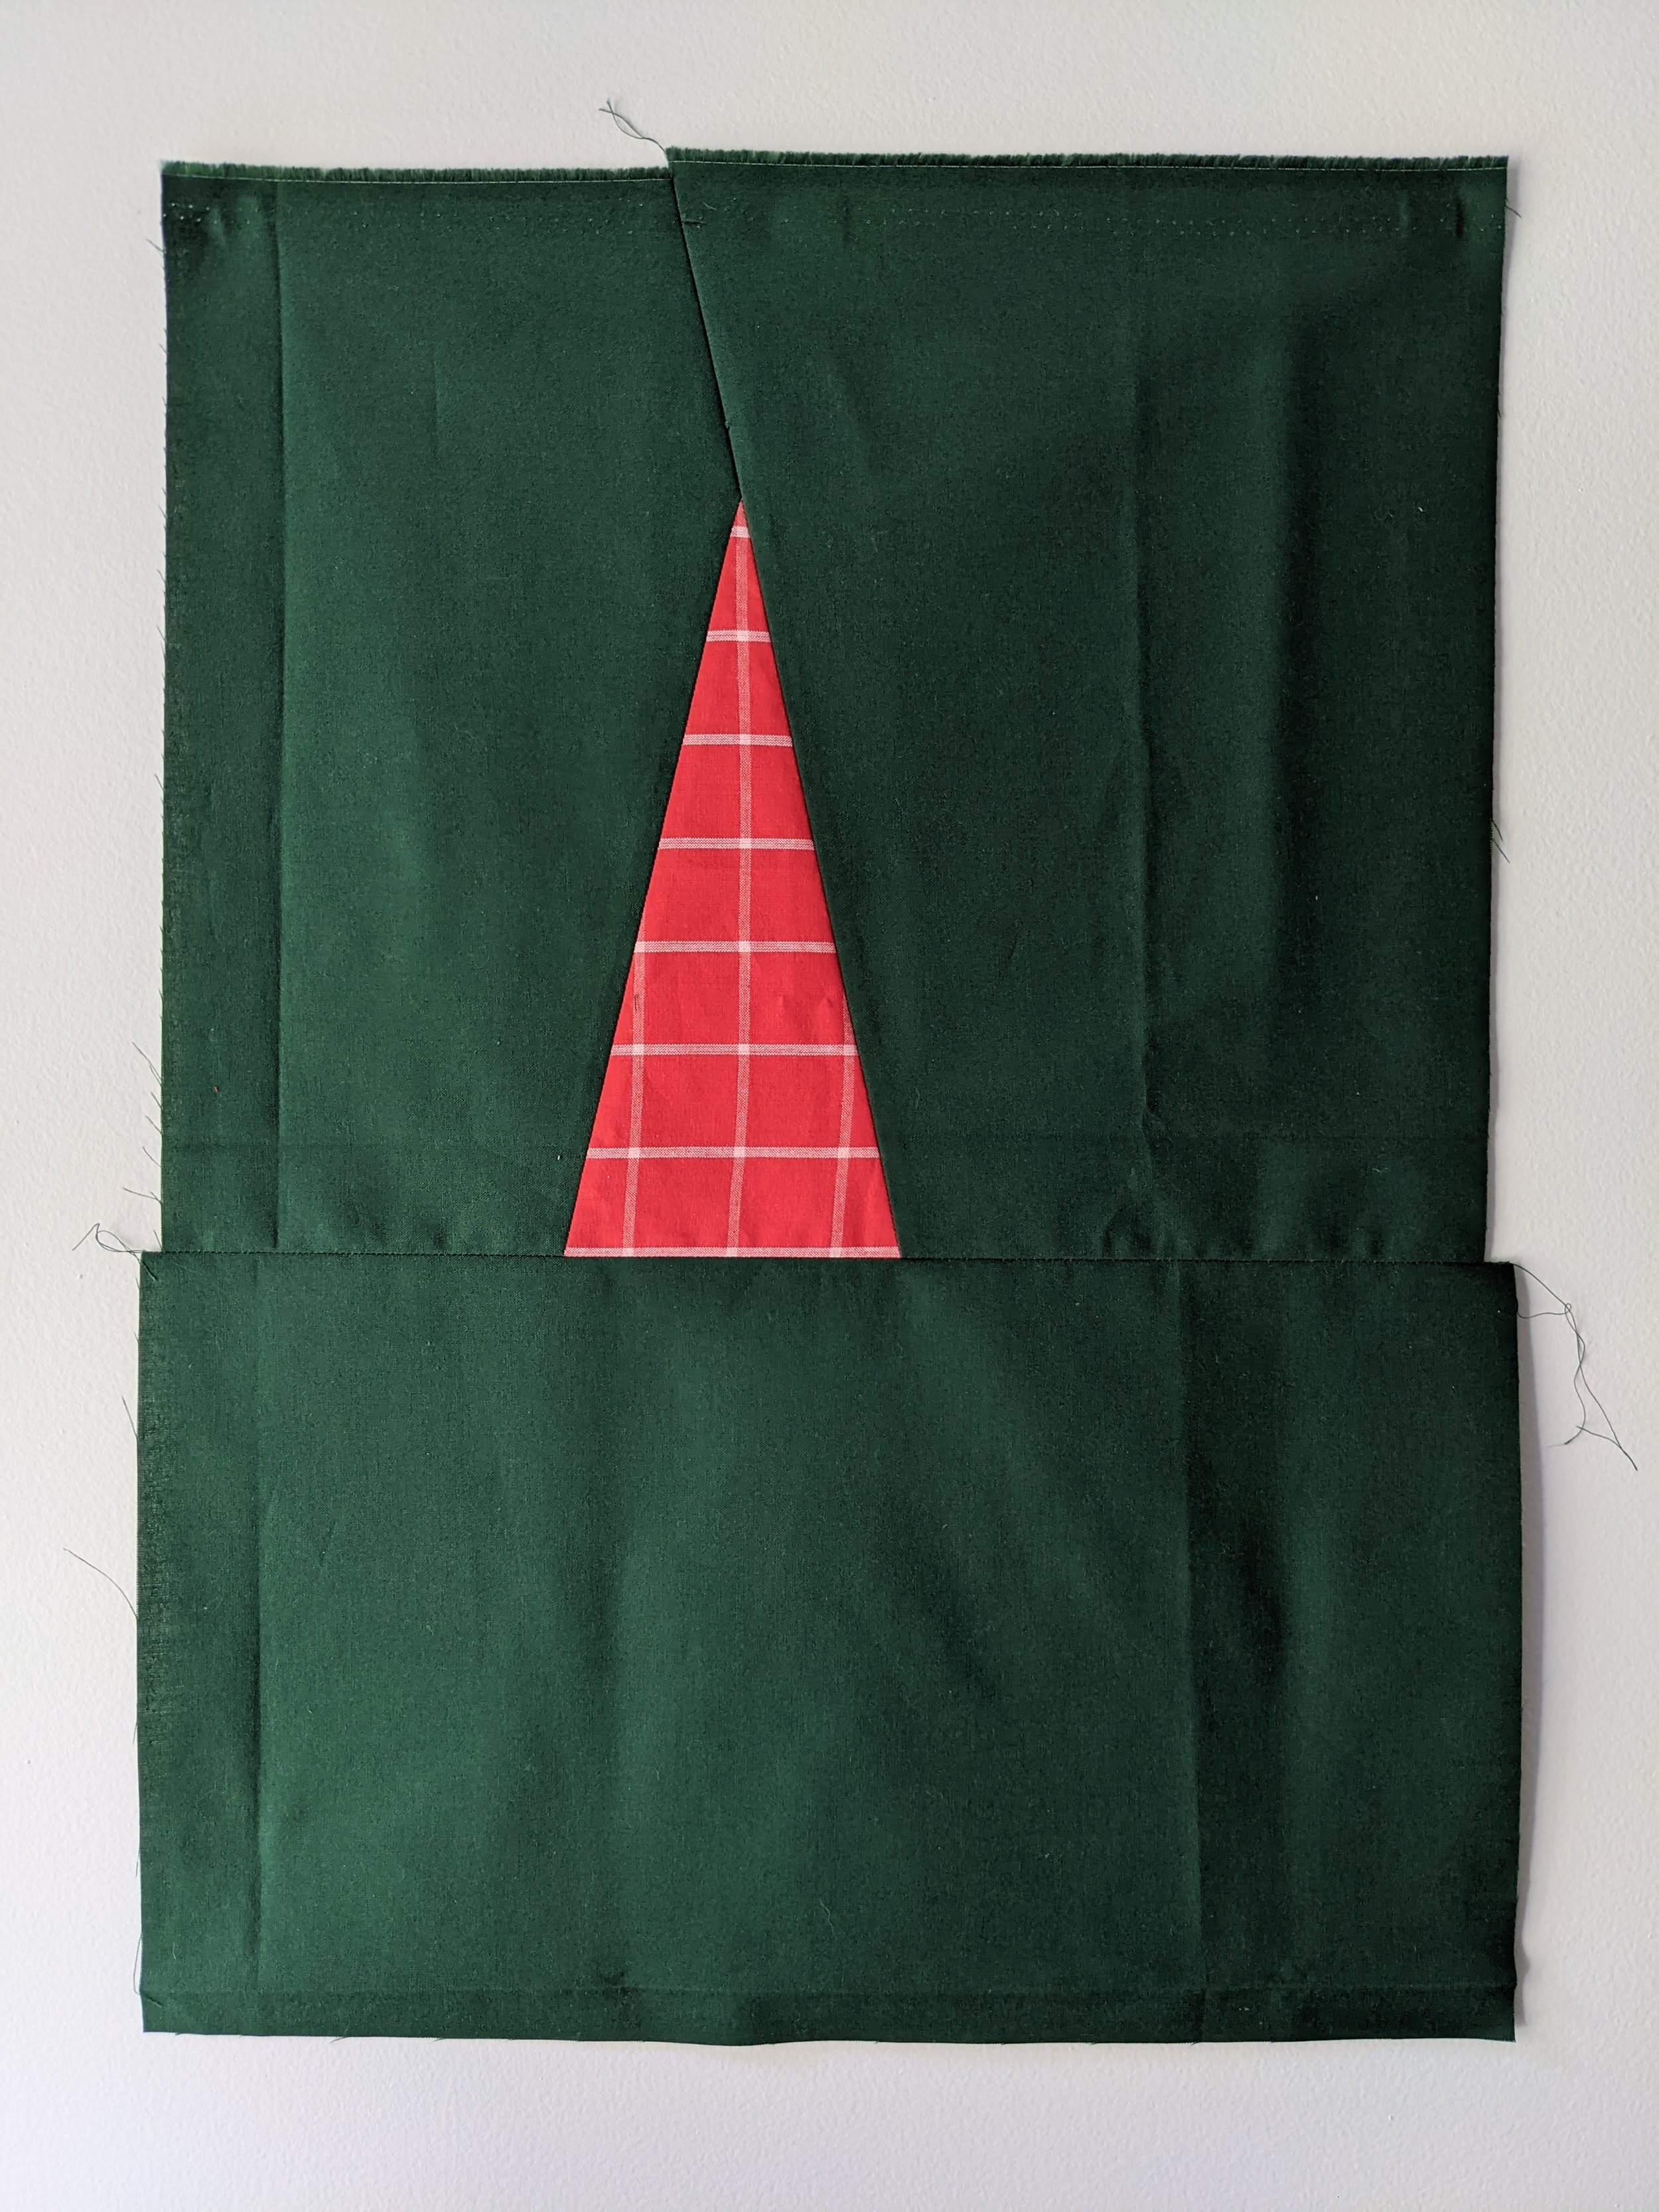
Before attaching the bottom, we need to trim the excess fabric, so line up your ruler along the bottom of the triangle and cut the extra fabric. Then pin your bottom rectangle of background fabric to the bottom of your block, right sides together, and sew. Press seams as desired.
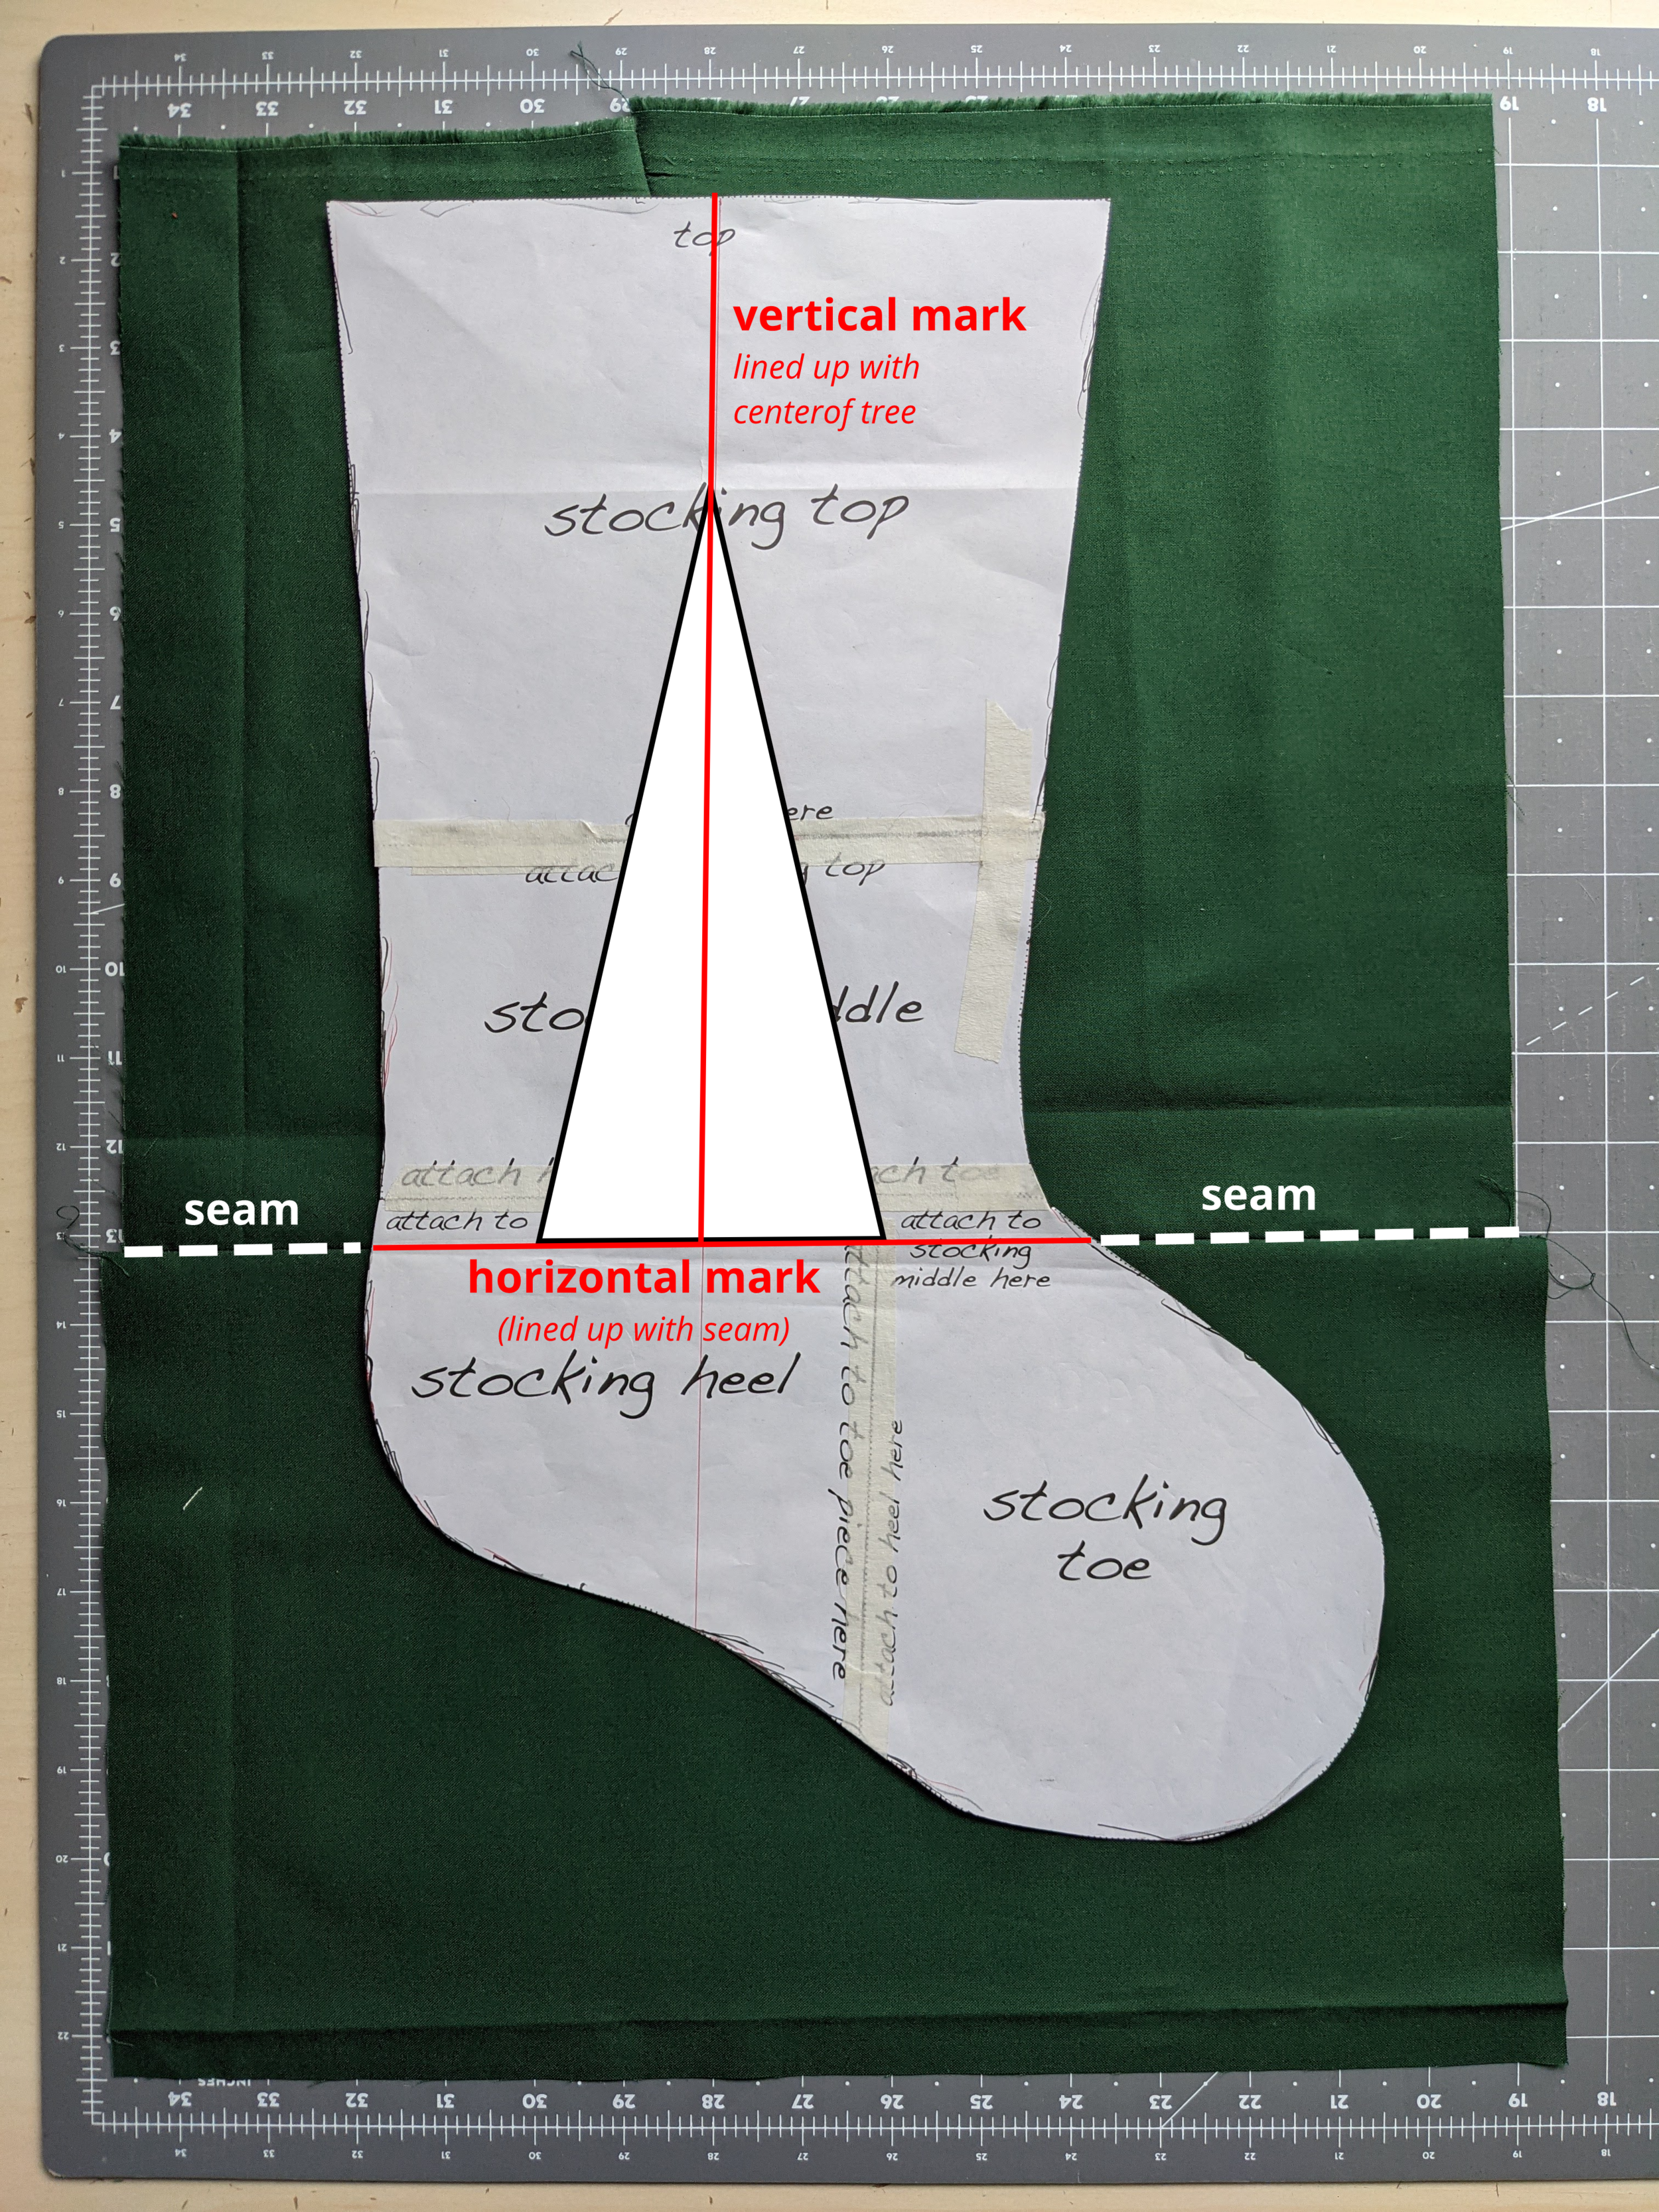
And just like that, you’ve got a simple little pieced christmas tree all ready to be cut into your favorite stocking pattern! If you marked on your stocking template, line up the horizontal line with the horizontal seam at the bottom of your tree. Line up the center vertical line with the tip of your triangle. Trace and trim! Follow the rest of the instructions from your preferred pattern to finish up your stocking.
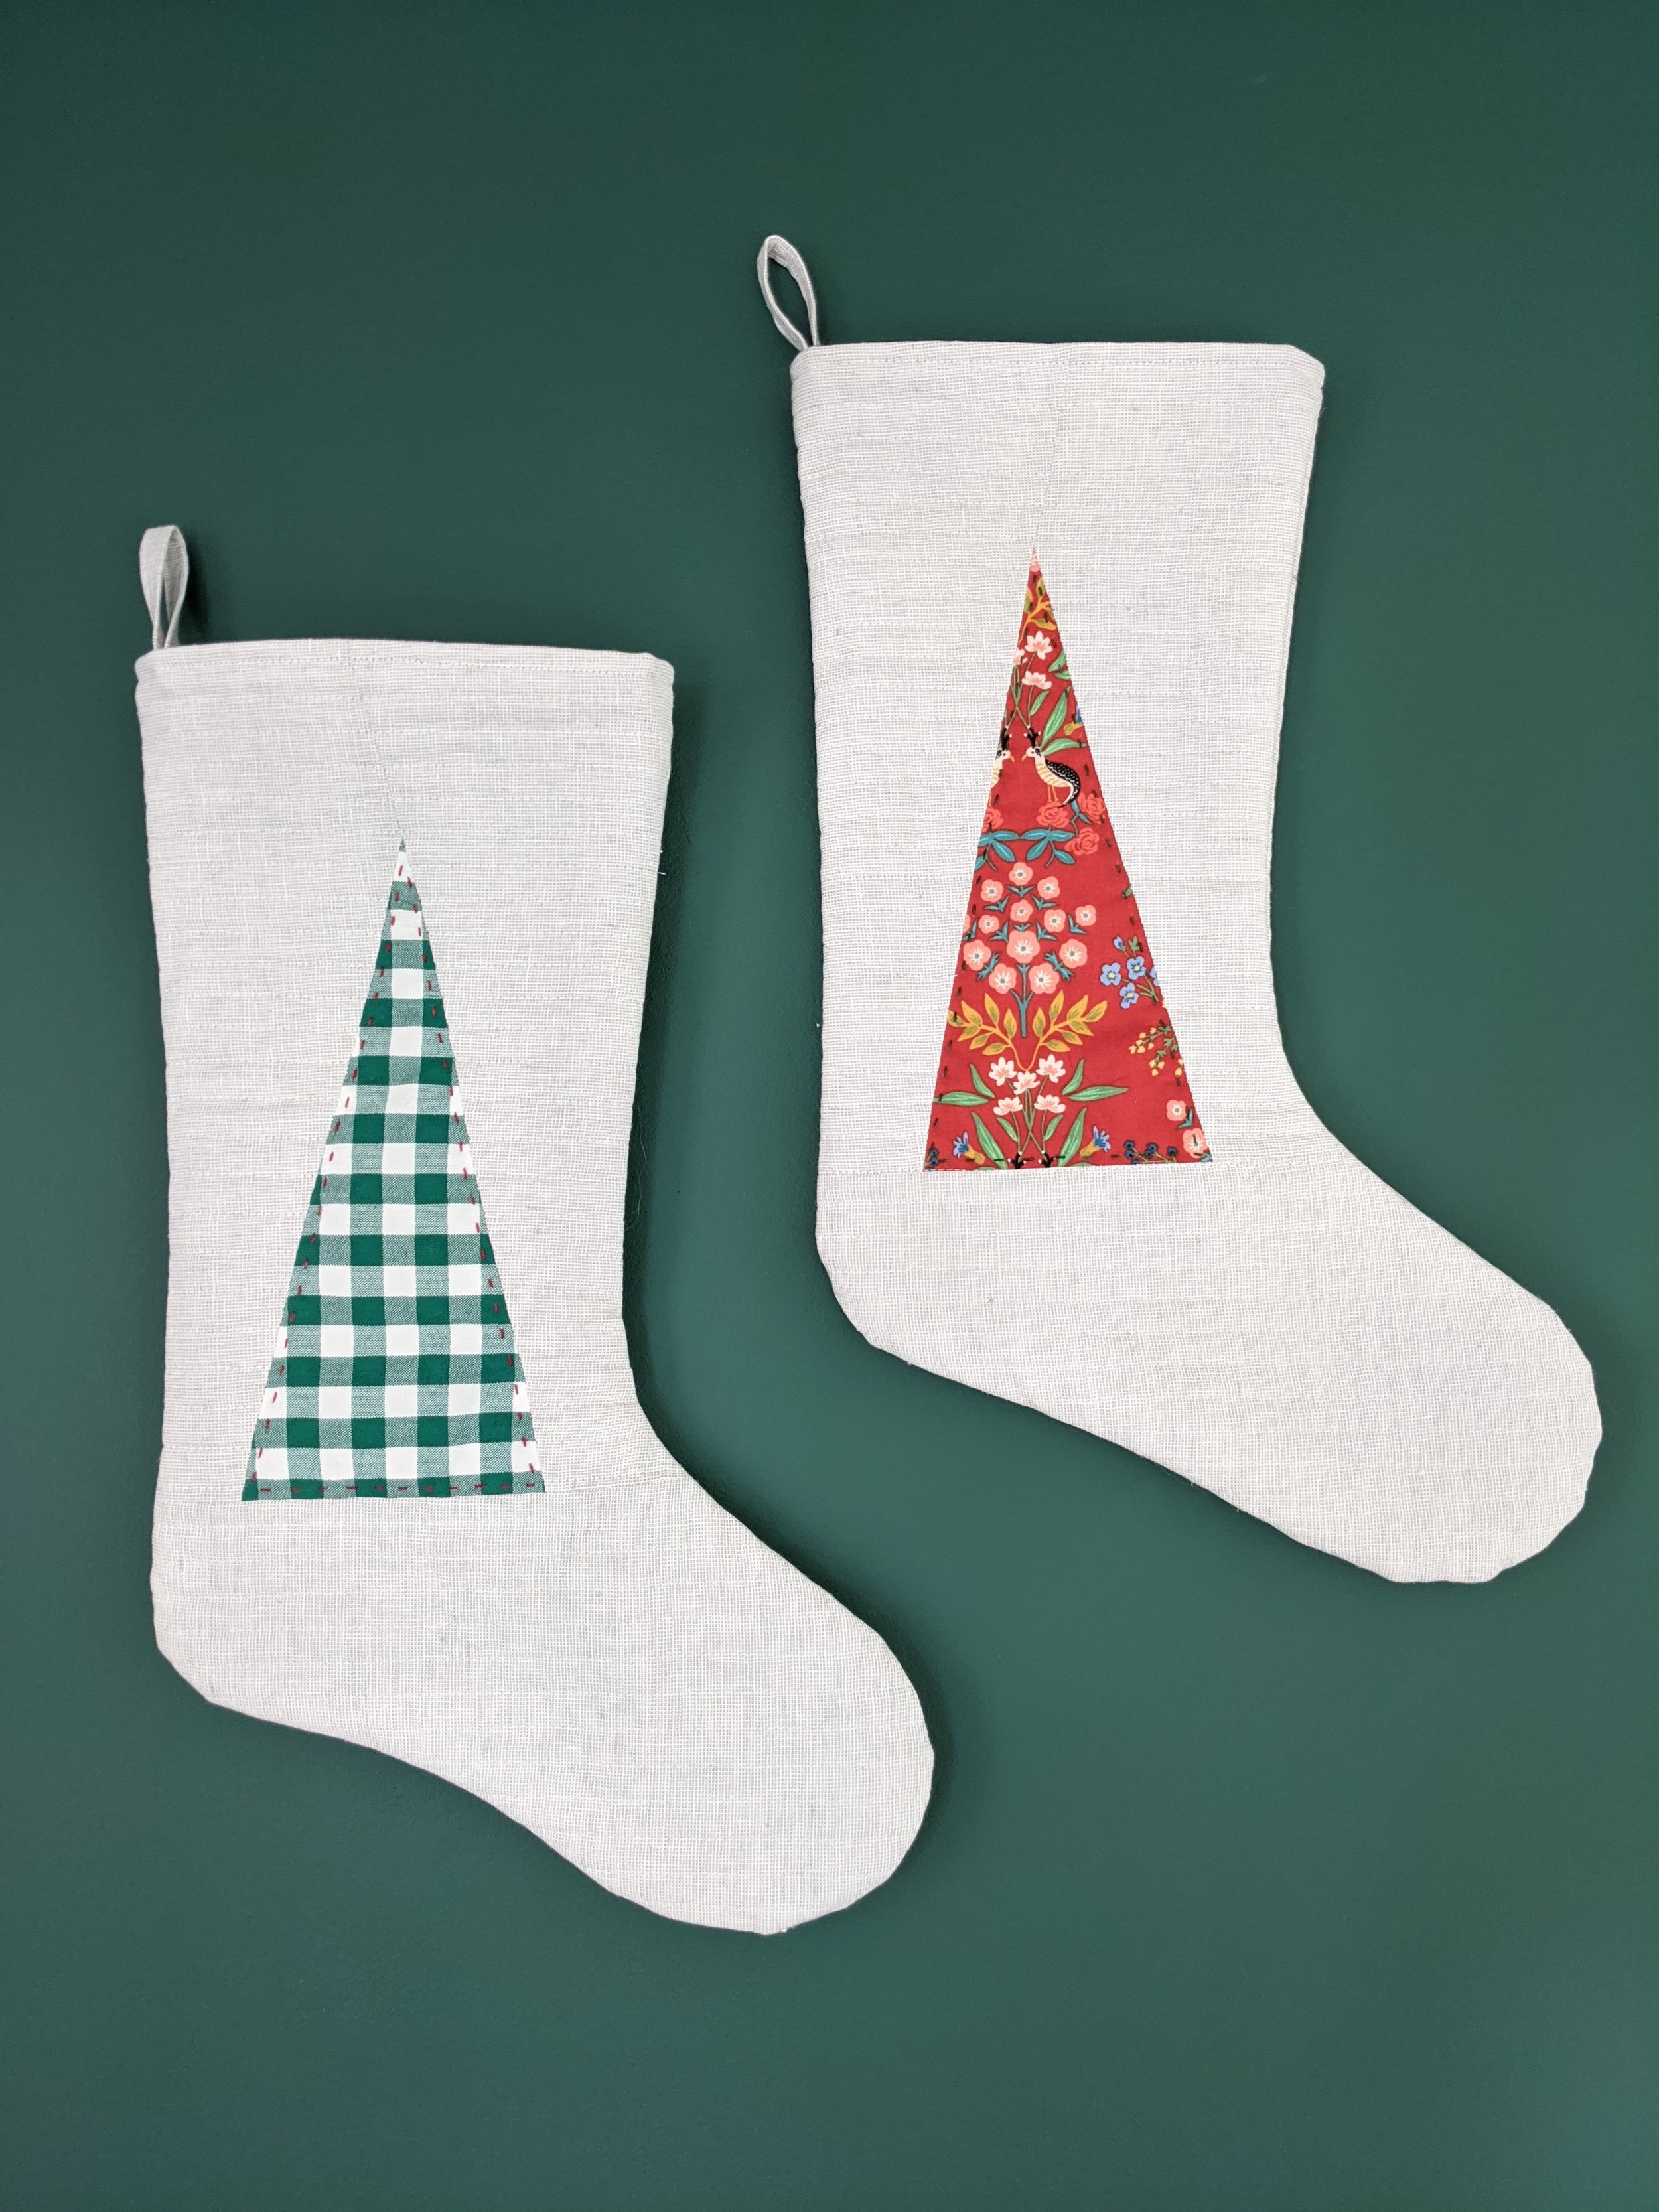
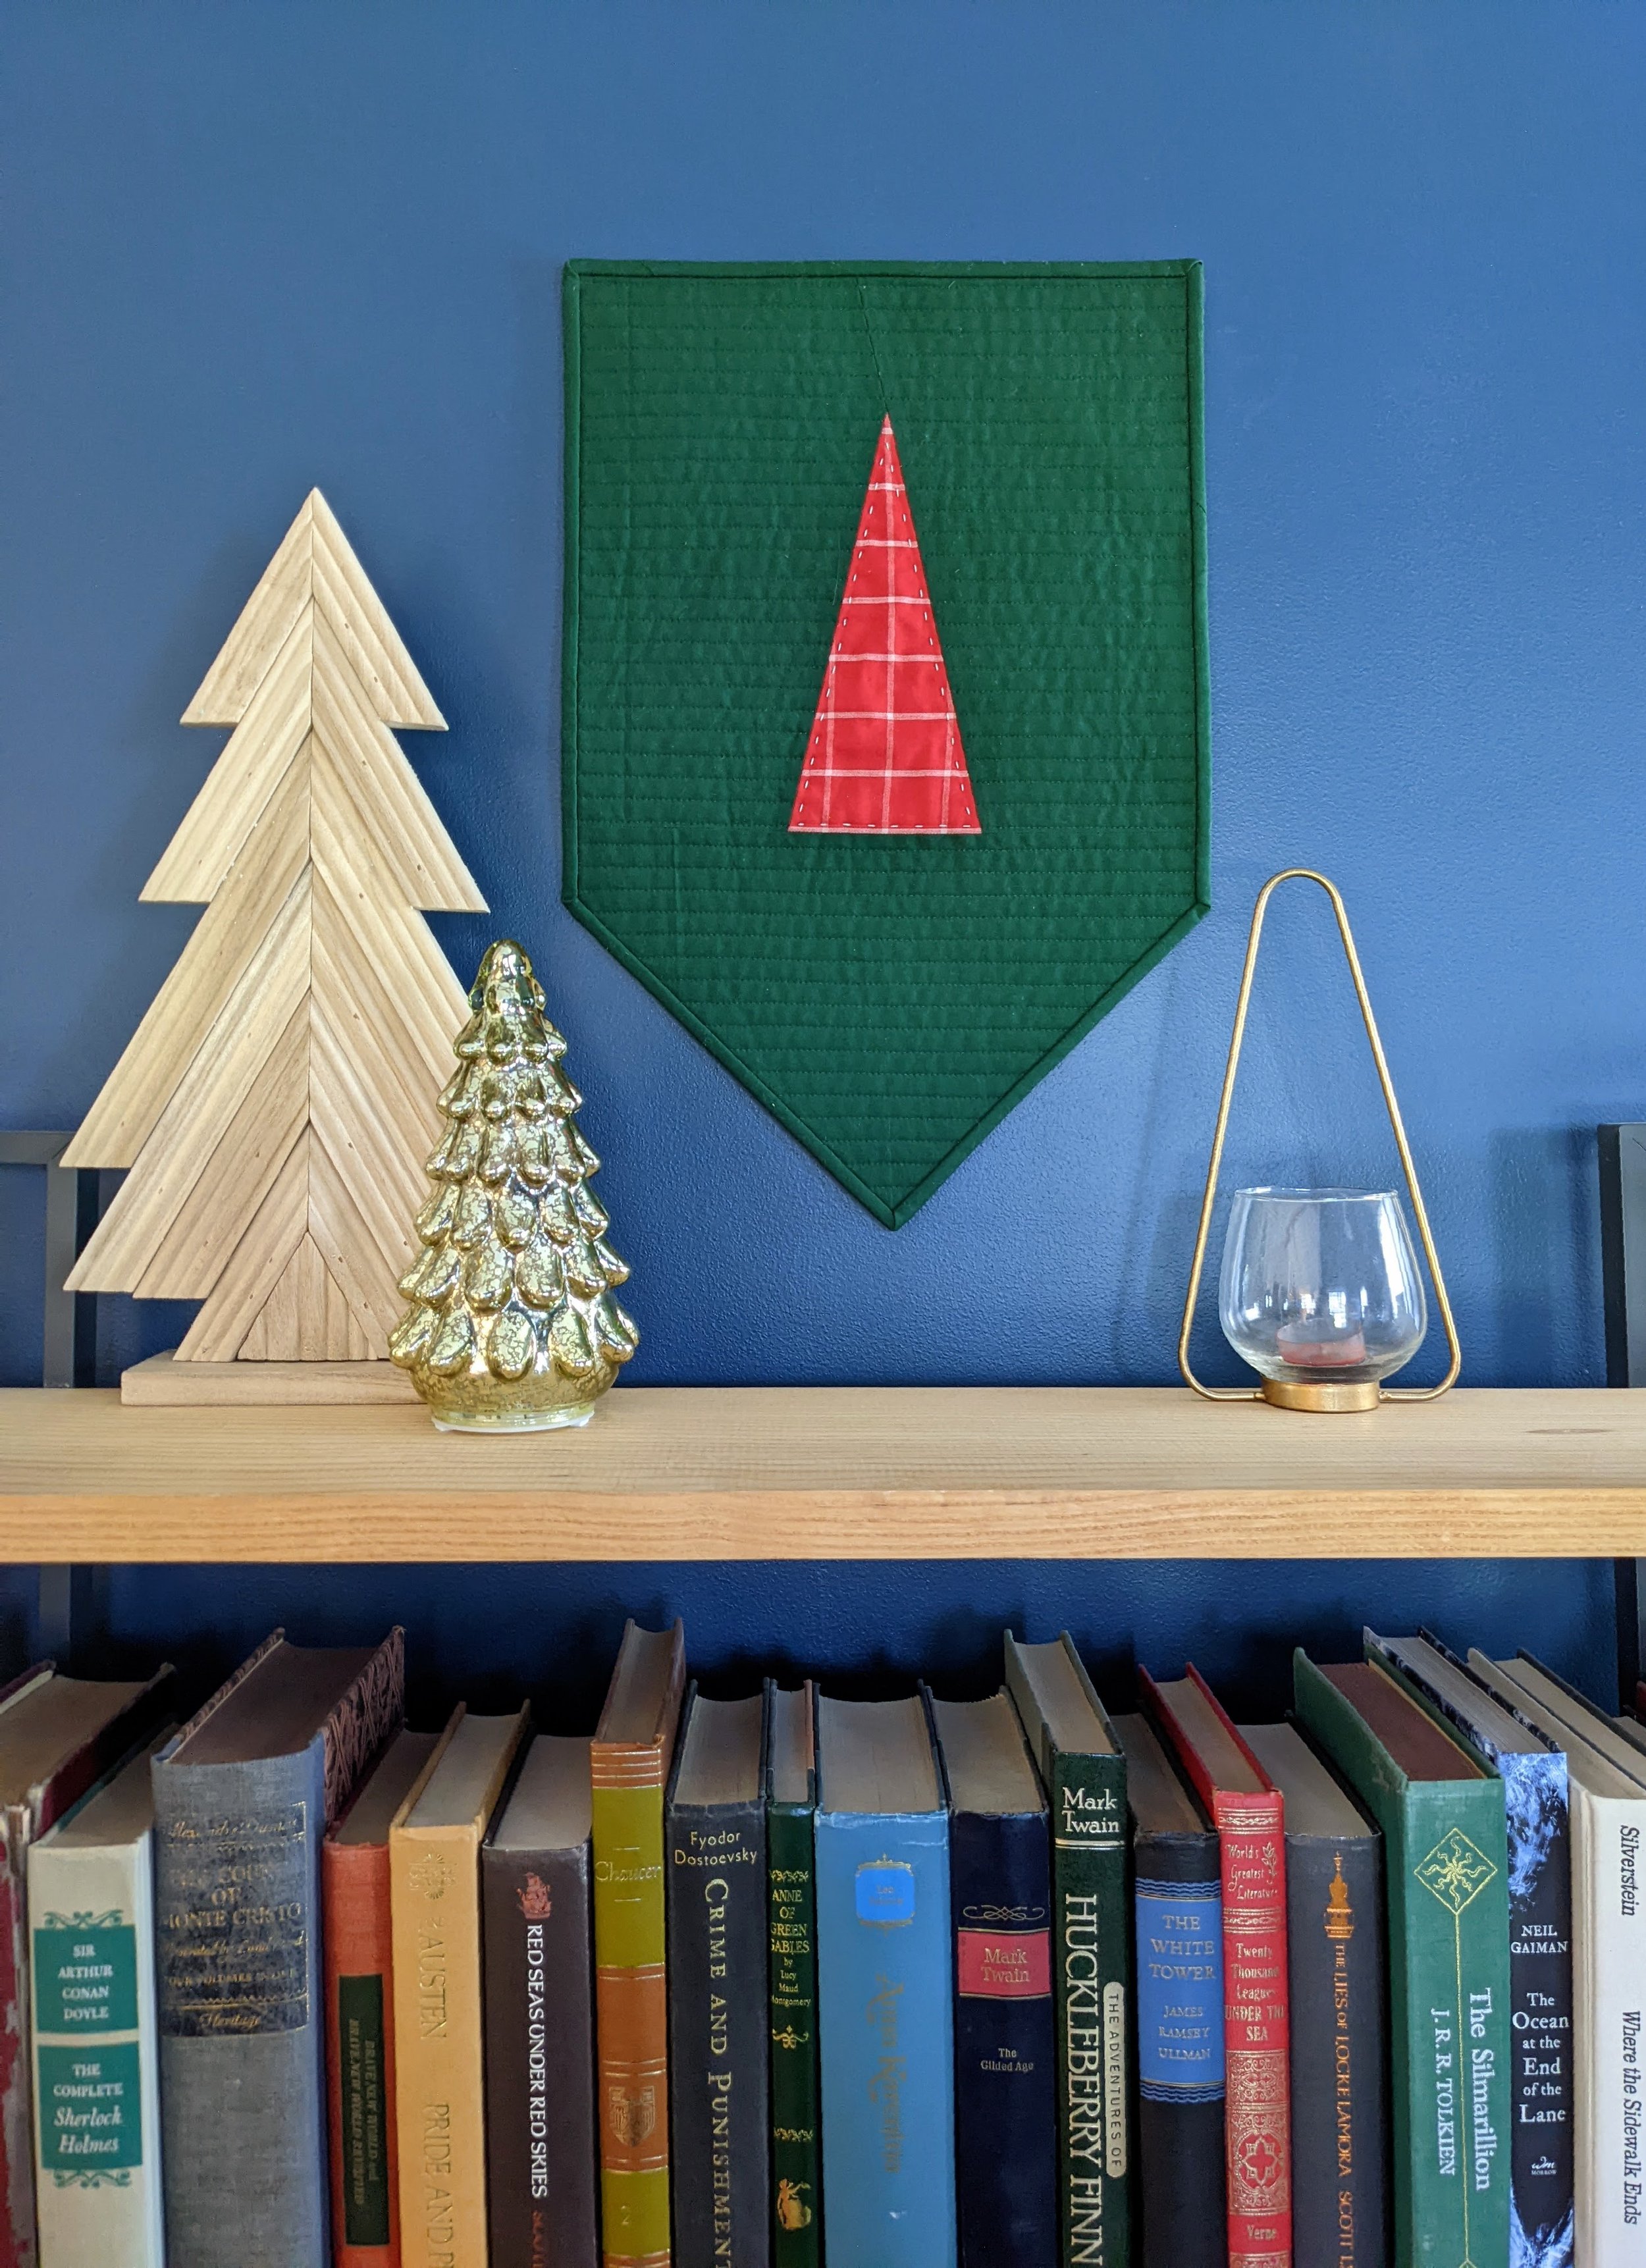
Since I already finished my family’s stockings, I actually decided to turn this one into a wall hanging to match my Christmas quilt and the quilted stockings hanging over our piano (in lieu of a fireplace, because, why not?). Check out my original 2 stockings plus this new wall hanging below! I have a quick guide for measurements and ideas for both a wall hanging version (here) as well as a quilt block (here). What will you make with yours?
Once you finish your project, don’t forget to post to Instagram and use the tags #QuiltedMinimalistChristmasTree and #JuniperusPatterns to share!