
Hand Quilting Basics
The Tools
This post may contain affiliate links and I may earn a small commission when you click on the links, at no additional cost to you. As an Amazon Affiliate, I earn from qualifying purchases.
If you’ve been following along with my work for very long, you know that I love hand quilting. I love the textured, cozy look it gives a quilt. I love the slow process of working through a quilt stitch by stitch. I love everything about it. But I didn’t always. Before I dove into hand quilting, I was a machine quilting purist, not because I didn’t like hand quilting, but because I was too scared to try hand quilting! I didn’t know where to start or what tools to get. But once I did, I never looked back! I still use machine quilting and hand quilting fairly evenly, but I’m always tempted to add at least a touch of hand quilting to every project I work on, it’s just that satisfying!
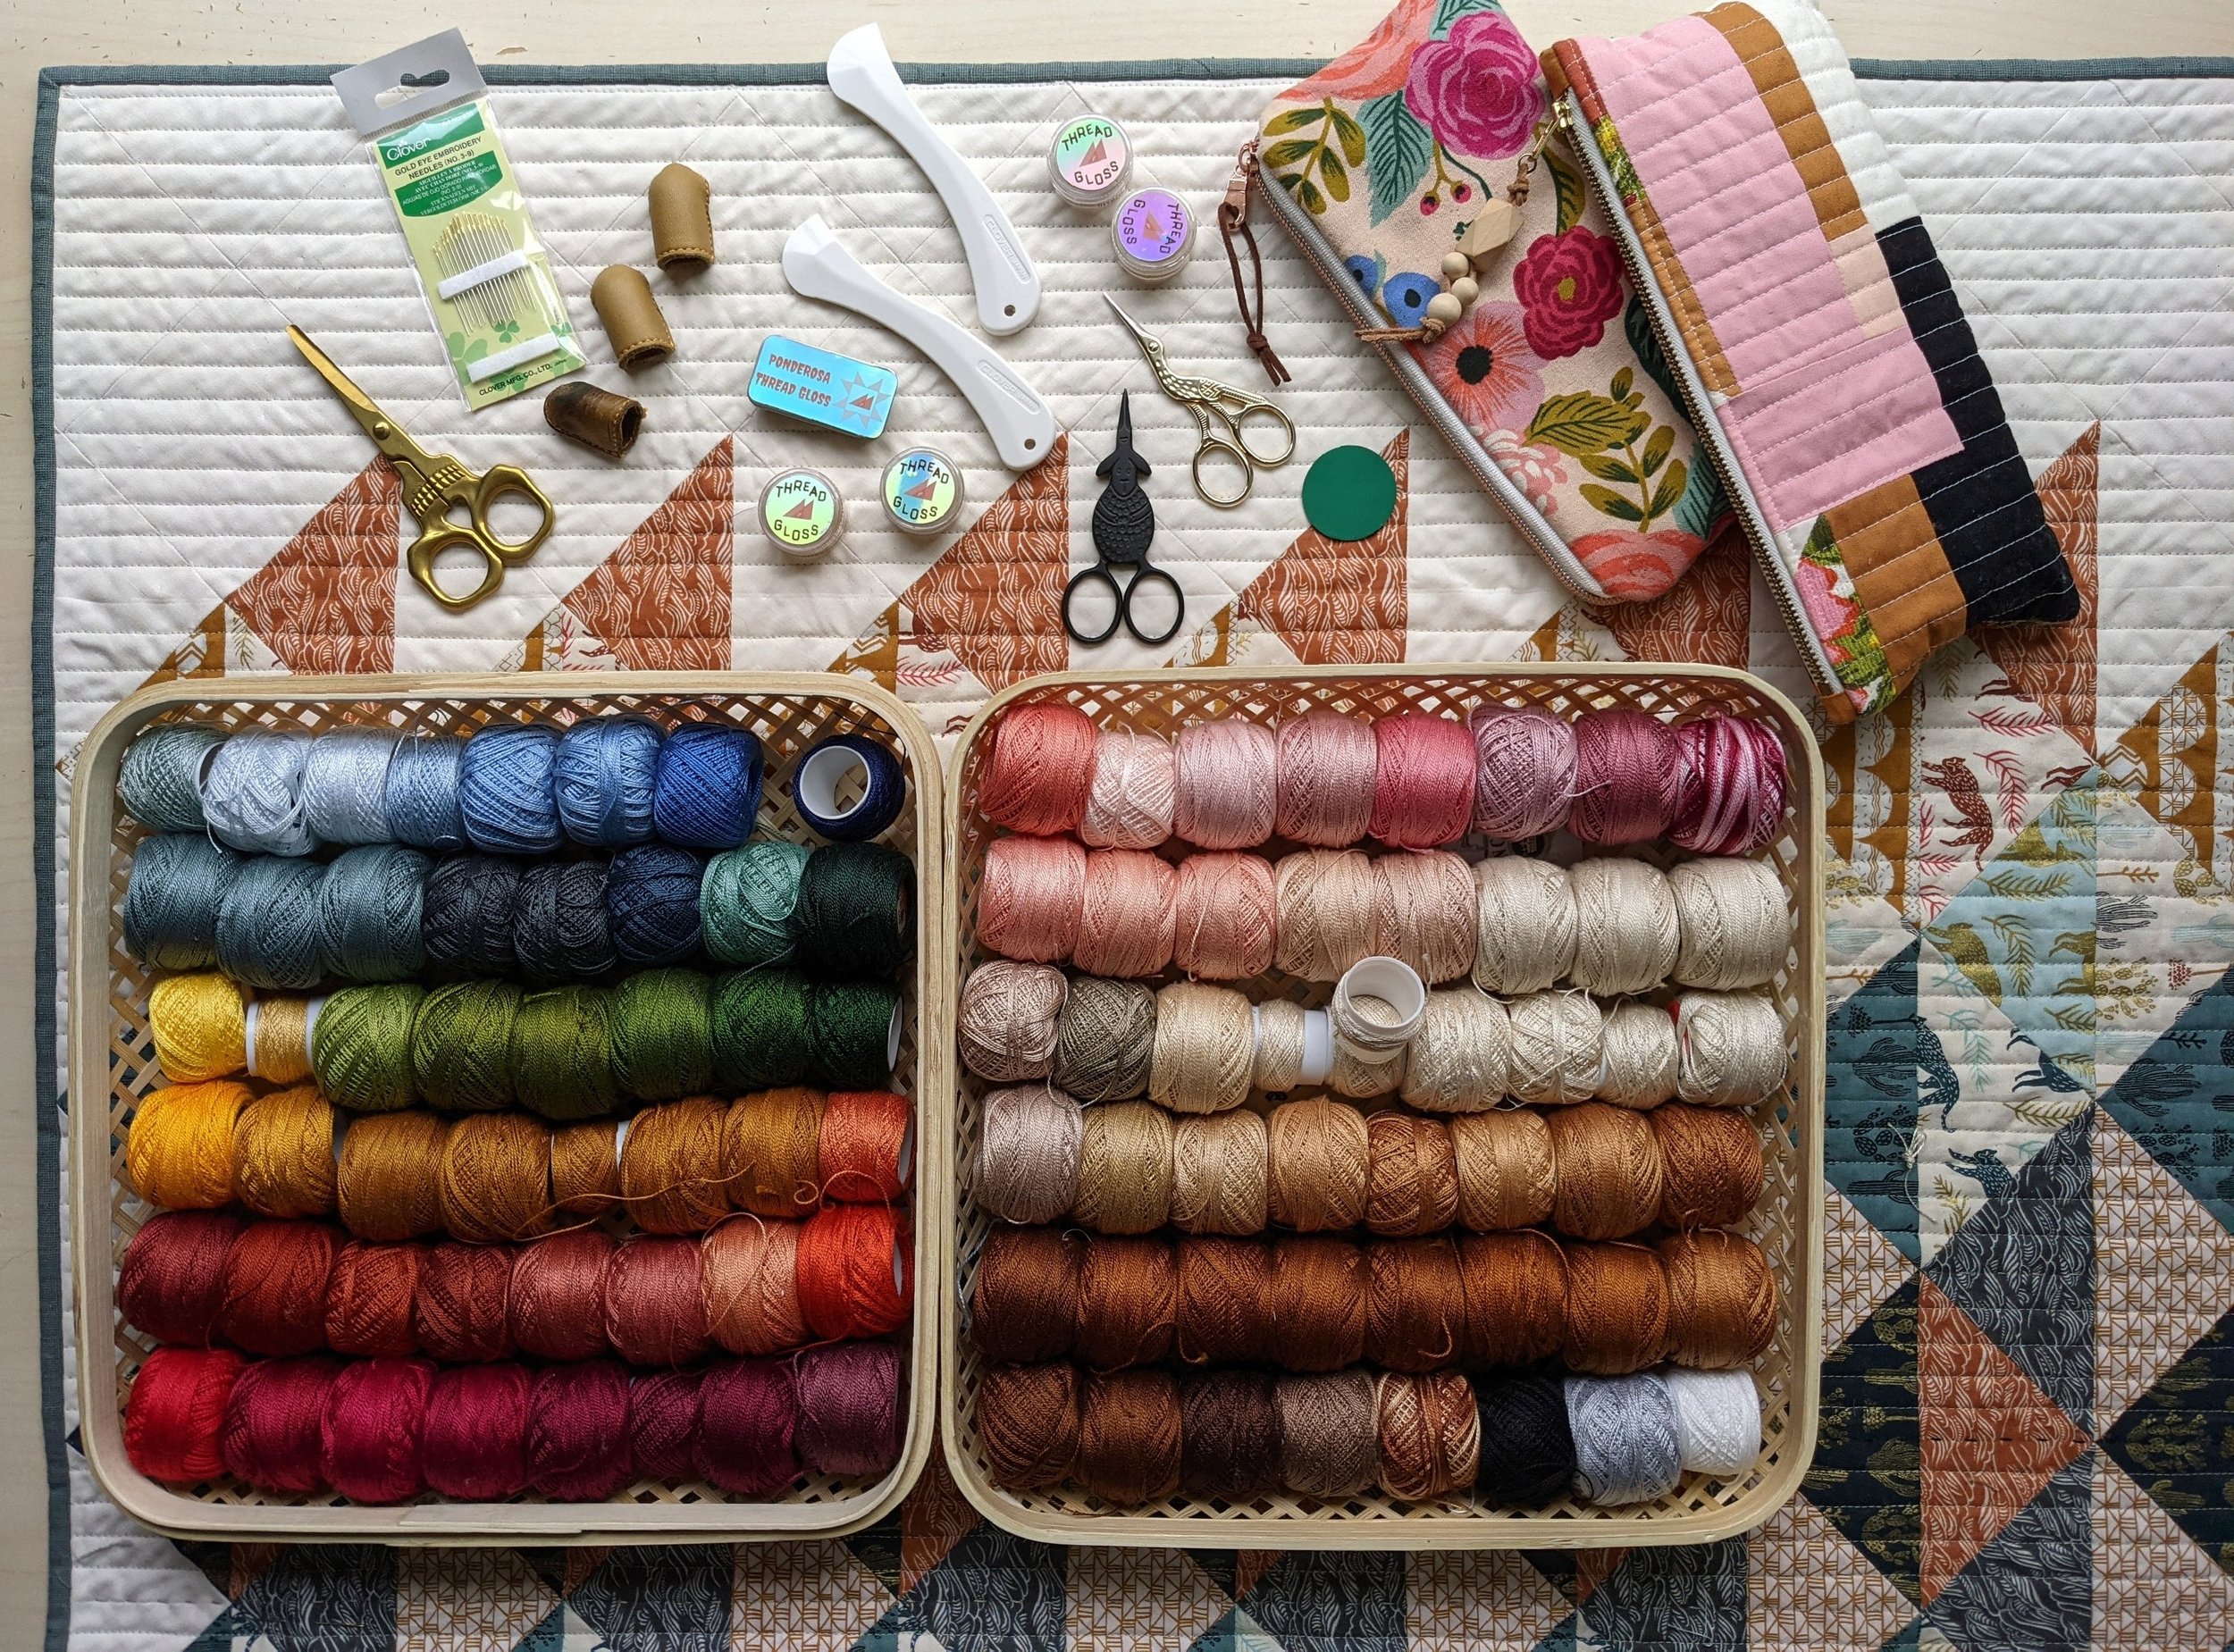
So, if you want to try out hand quilting, but you’re not sure where to start, this series is for you! In this article, I’ll start by introducing all of my favorite tools, from the foundational needles and thread to the extravagant thread gloss and unique embroidery scissors. So let’s get going!
What Tools Do I Need?
I’m going to start by saying that hand quilting tools are very subjective and highly based on preference. I spent quite a bit of time experimenting with various threads and needles, thimbles and stitch lengths. So don’t get too caught up in having all the “right” tools, just get out there and try some! But this list will at least give you a place to start...
THREAD
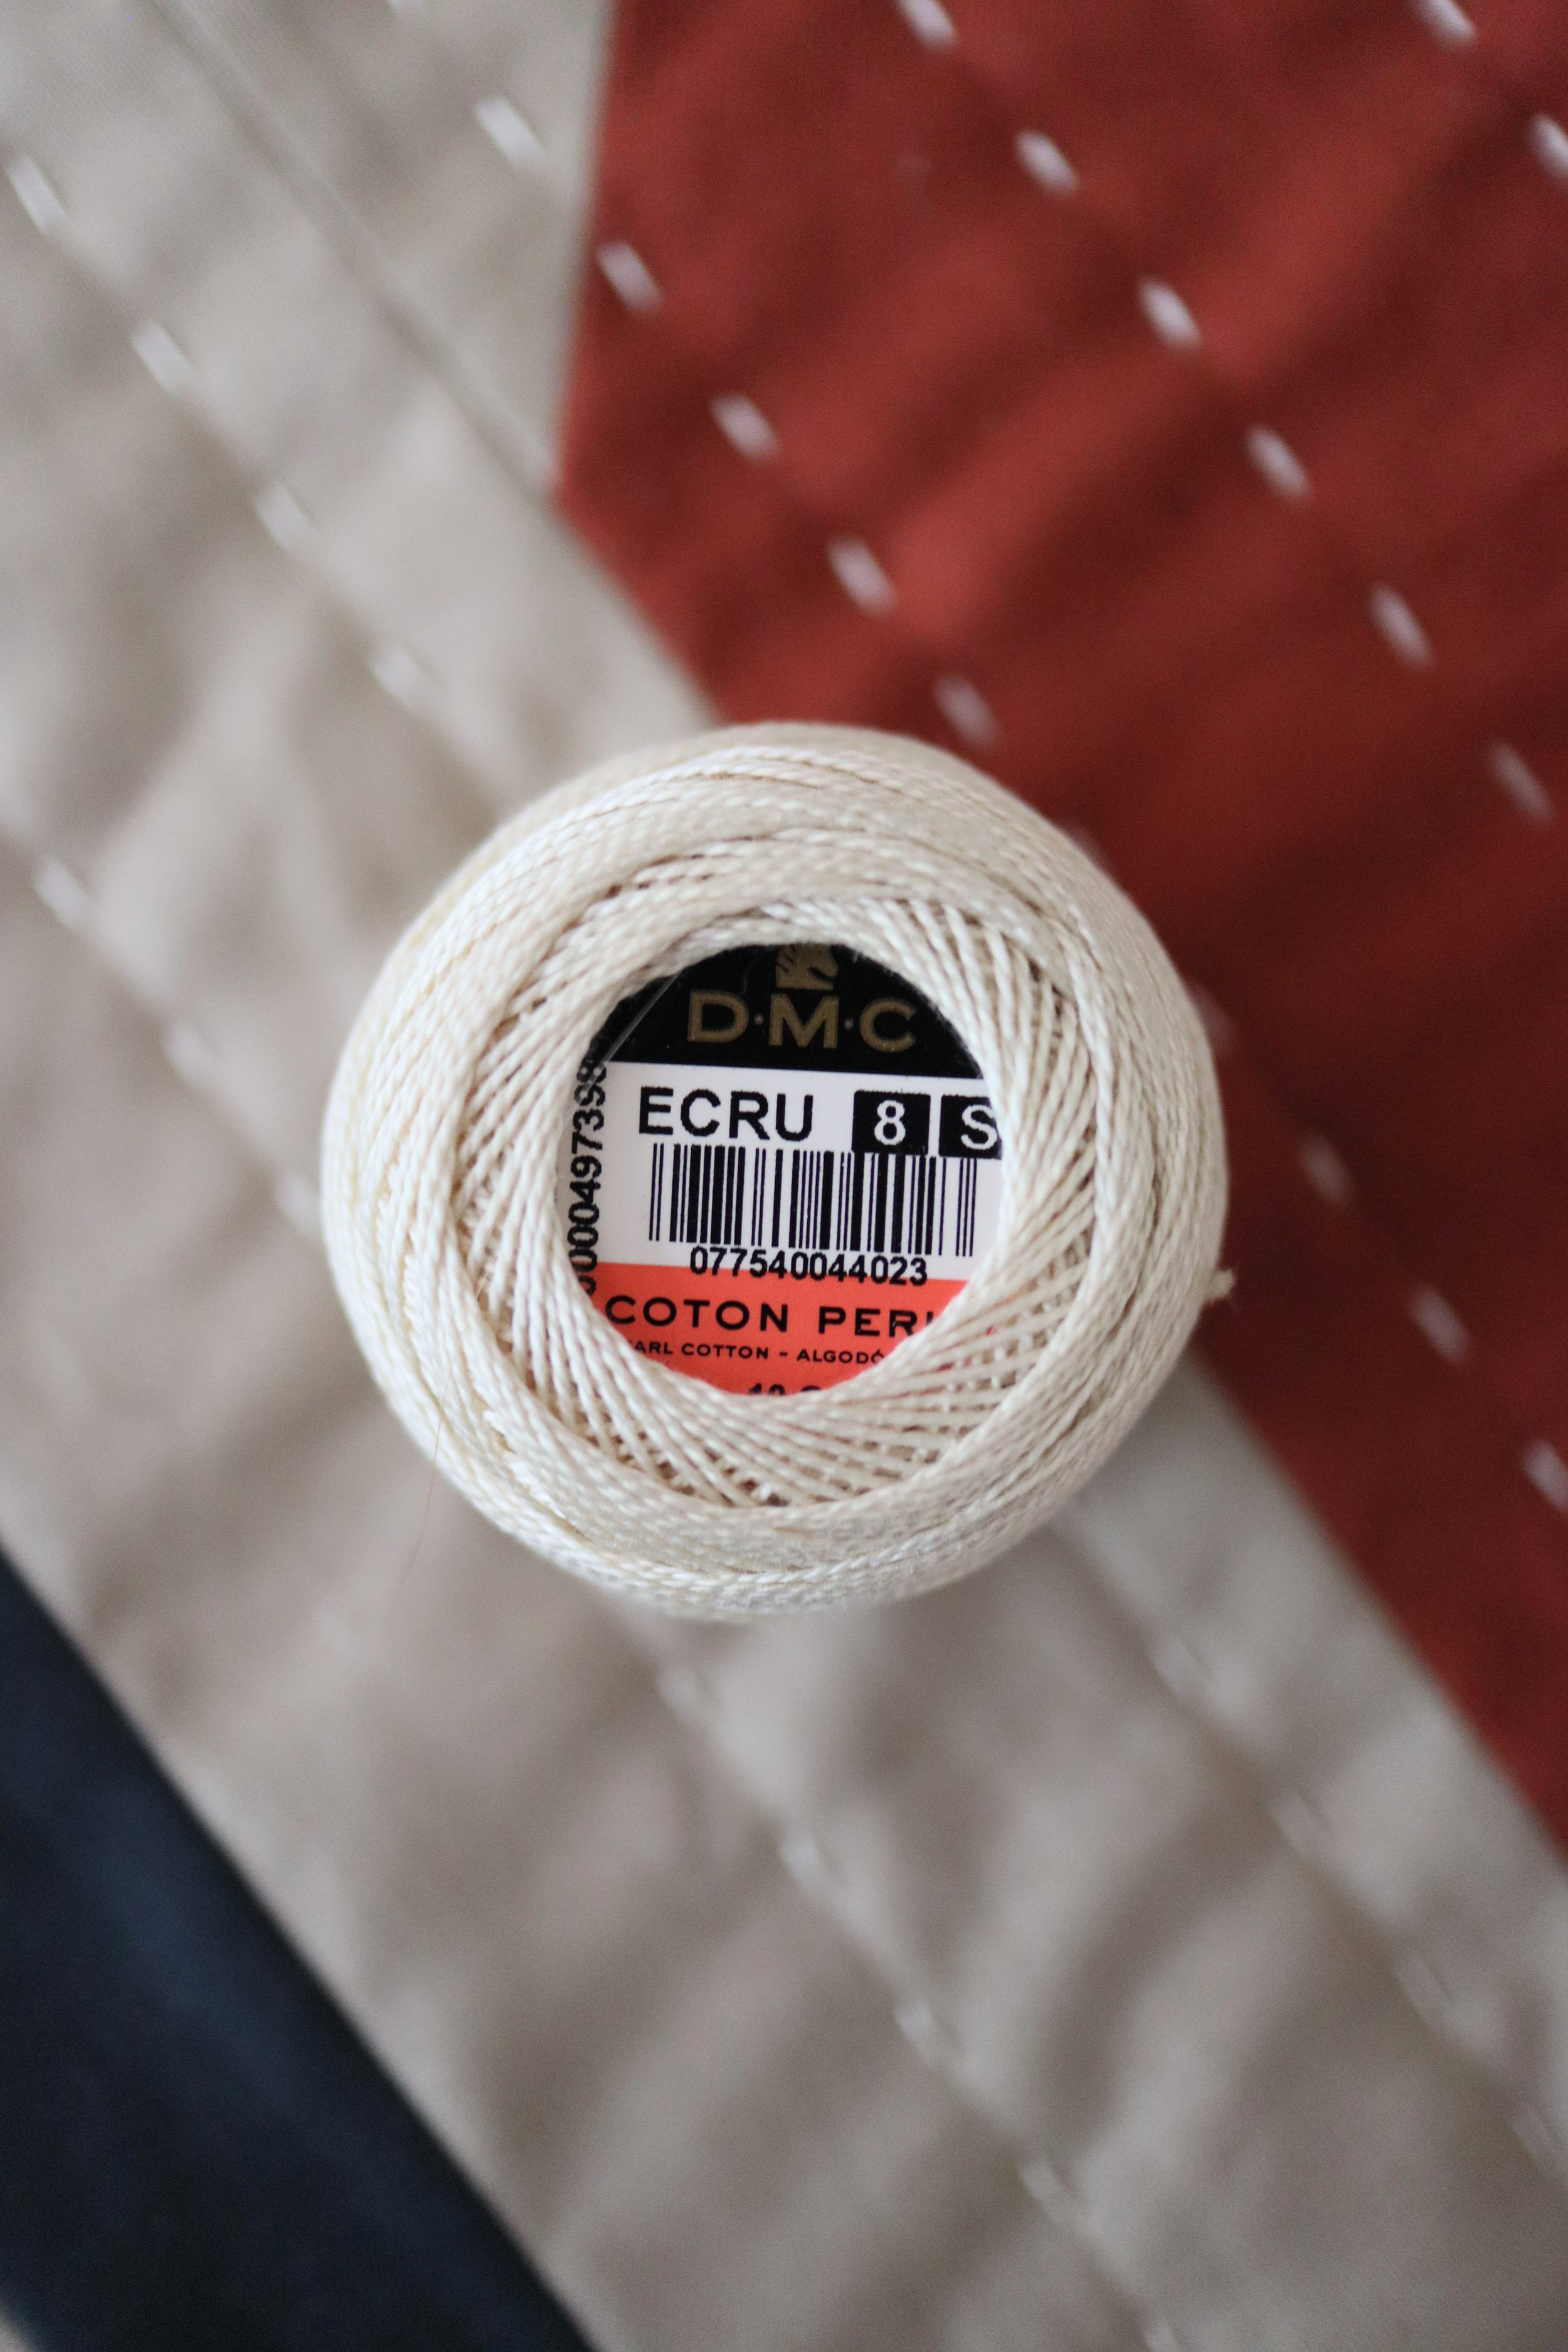
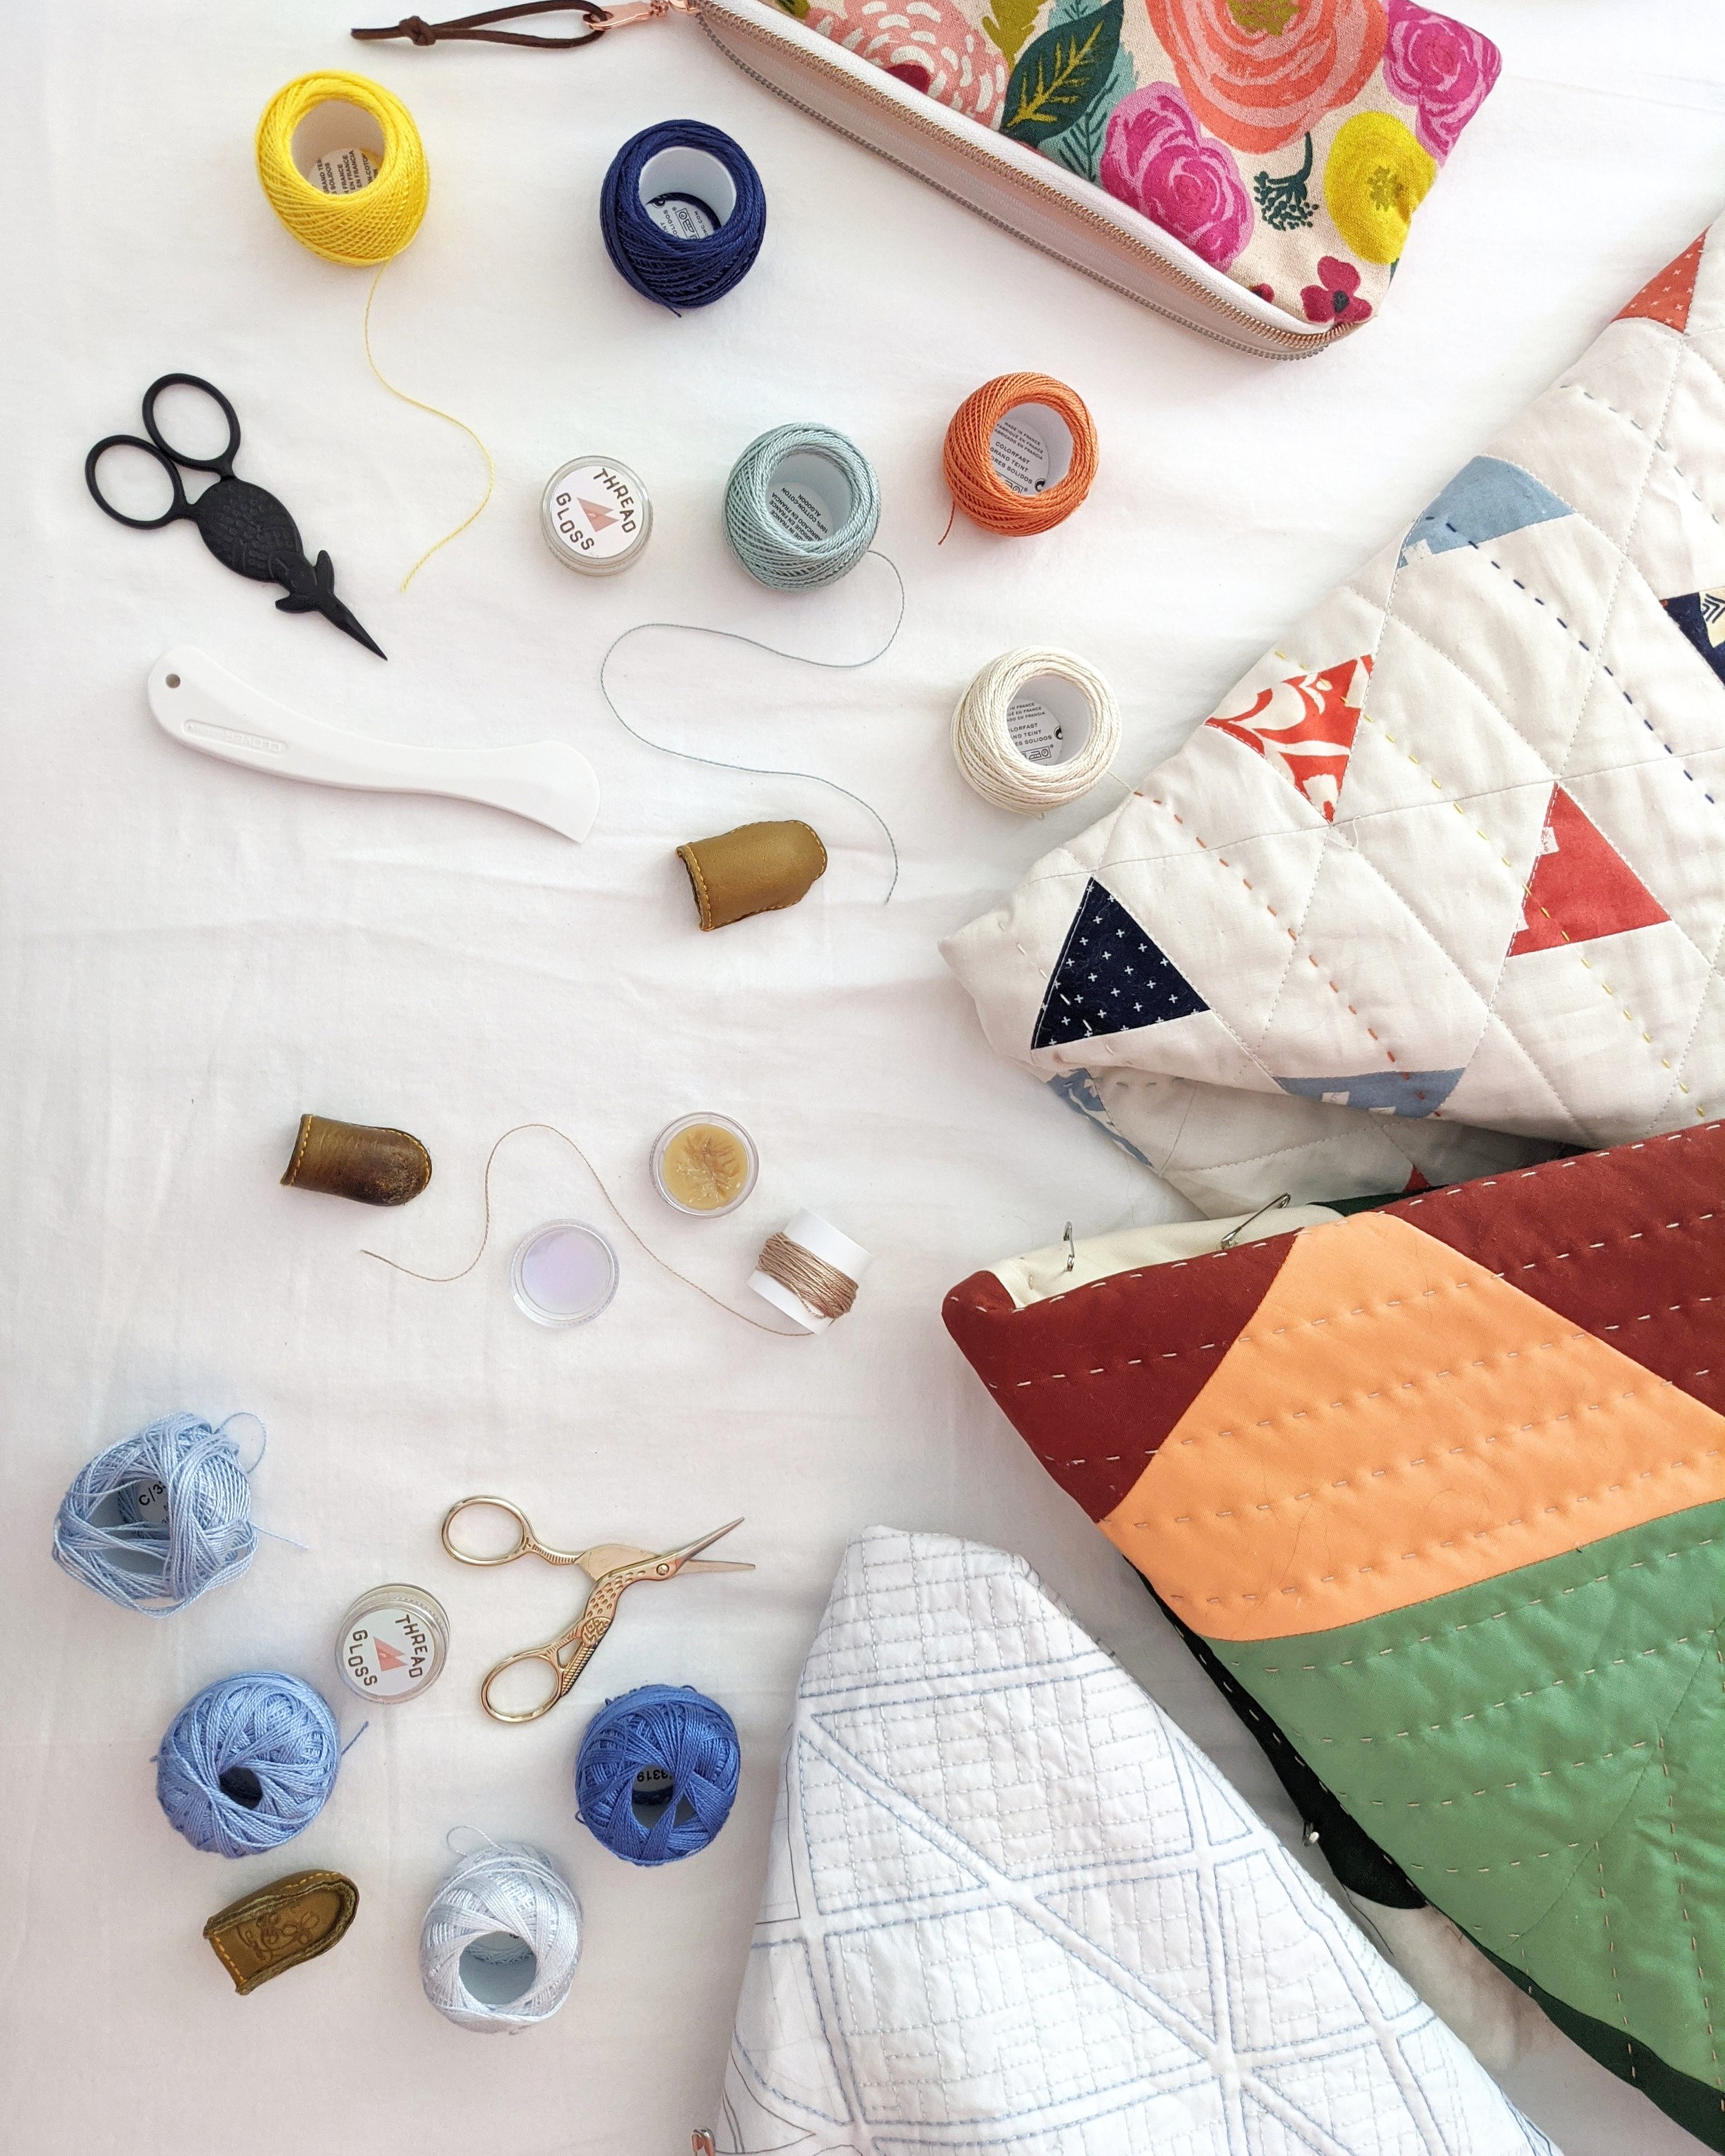
I love big stitch hand quilting, I like the way it really pops from the fabric and gives a cozy, hand-made texture. To achieve this look, my go-to quilting thread is pearl cotton, size 8. If you prefer a more subtle look, go with a size 12. DMC is my favorite brand. It comes in so many amazing colors and holds up really well. You can order directly from their website and can even get a threaded color card to make sure you’re getting the colors that match your project best.
How do you choose thread colors? That choice is entirely personal! I tend to go with colors that blend in, but I’ve started experimenting with more contrasting colors and it’s a lot of fun! My go to thread color is Ecru (shown below), it’s one of the only colors in the DMC line that is named rather than numbered. I’ve found it to be so versatile and goes with just about everything! I always have a ball or two lying around, ready to go.
If you’re wondering about my storage strategy, I love these Smarra baskets from IKEA (shown below). I bought the 11-3/4” x 11-3/4” x 14” size and use both the lid and the base as baskets. Then I just stack the baskets on top of each other and they fit perfectly in the 13” x 13” cubby on my Kallax shelf (incidentally also IKEA). I’m sure there are better options out there, but this one is inexpensive, practical, and beautiful!


NEEDLES
Needle size varies based on the project you’re working on - the type of stitch you’re using or fabric you’re sewing through. For that reason, I recommend getting a variety pack of Clover Golden Eye Needles so you have several to choose from. When choosing a needle, you want one that is thin enough to move easily through your fabric, but long enough that you can make several stitches at a time. Also pay attention to the eye of the needle. If you’re using thicker thread, like I typically do, you also want the eye of the needle to be large enough to easily thread with a needle threader. Taking these things into consideration, choose one you think will work and try it out! If it’s too bendy, you may need a thicker needle. If you’re having trouble pushing your needle through the fabric, try a thinner one. Play around until you find a needle that feels right to you. After some practice, you’ll know which needles to keep handy! Pro tip: I tend to stick towards the middle needles in the pack shown below. And the little ones don’t have to go to waste, use them for hand finishing a binding like I do!

THIMBLES
Thimbles are designed to cushion the needle as you sew to disperse the pressure and protect your fingertips. Try to sew without one and you probably won’t finish more than a couple stitches before your fingers are protesting! Thimbles come in a variety of materials and sizes. They can be made of metal, leather, silicone, or little pads that stick directly to your finger. My preference is for the leather thimbles. They form to your finger as you use them and make it easier to feel what you’re doing and have more control over the needle and fabric. I love the thimbles from Clover, they come in small, medium, and large sizes so you can get one that fits you most comfortably. You can wear one thimble or a couple, depending on your sewing style. I wear mine on my middle finger, since I like to hold the needle between my thumb and middle finger and push with the pad of my middle finger.


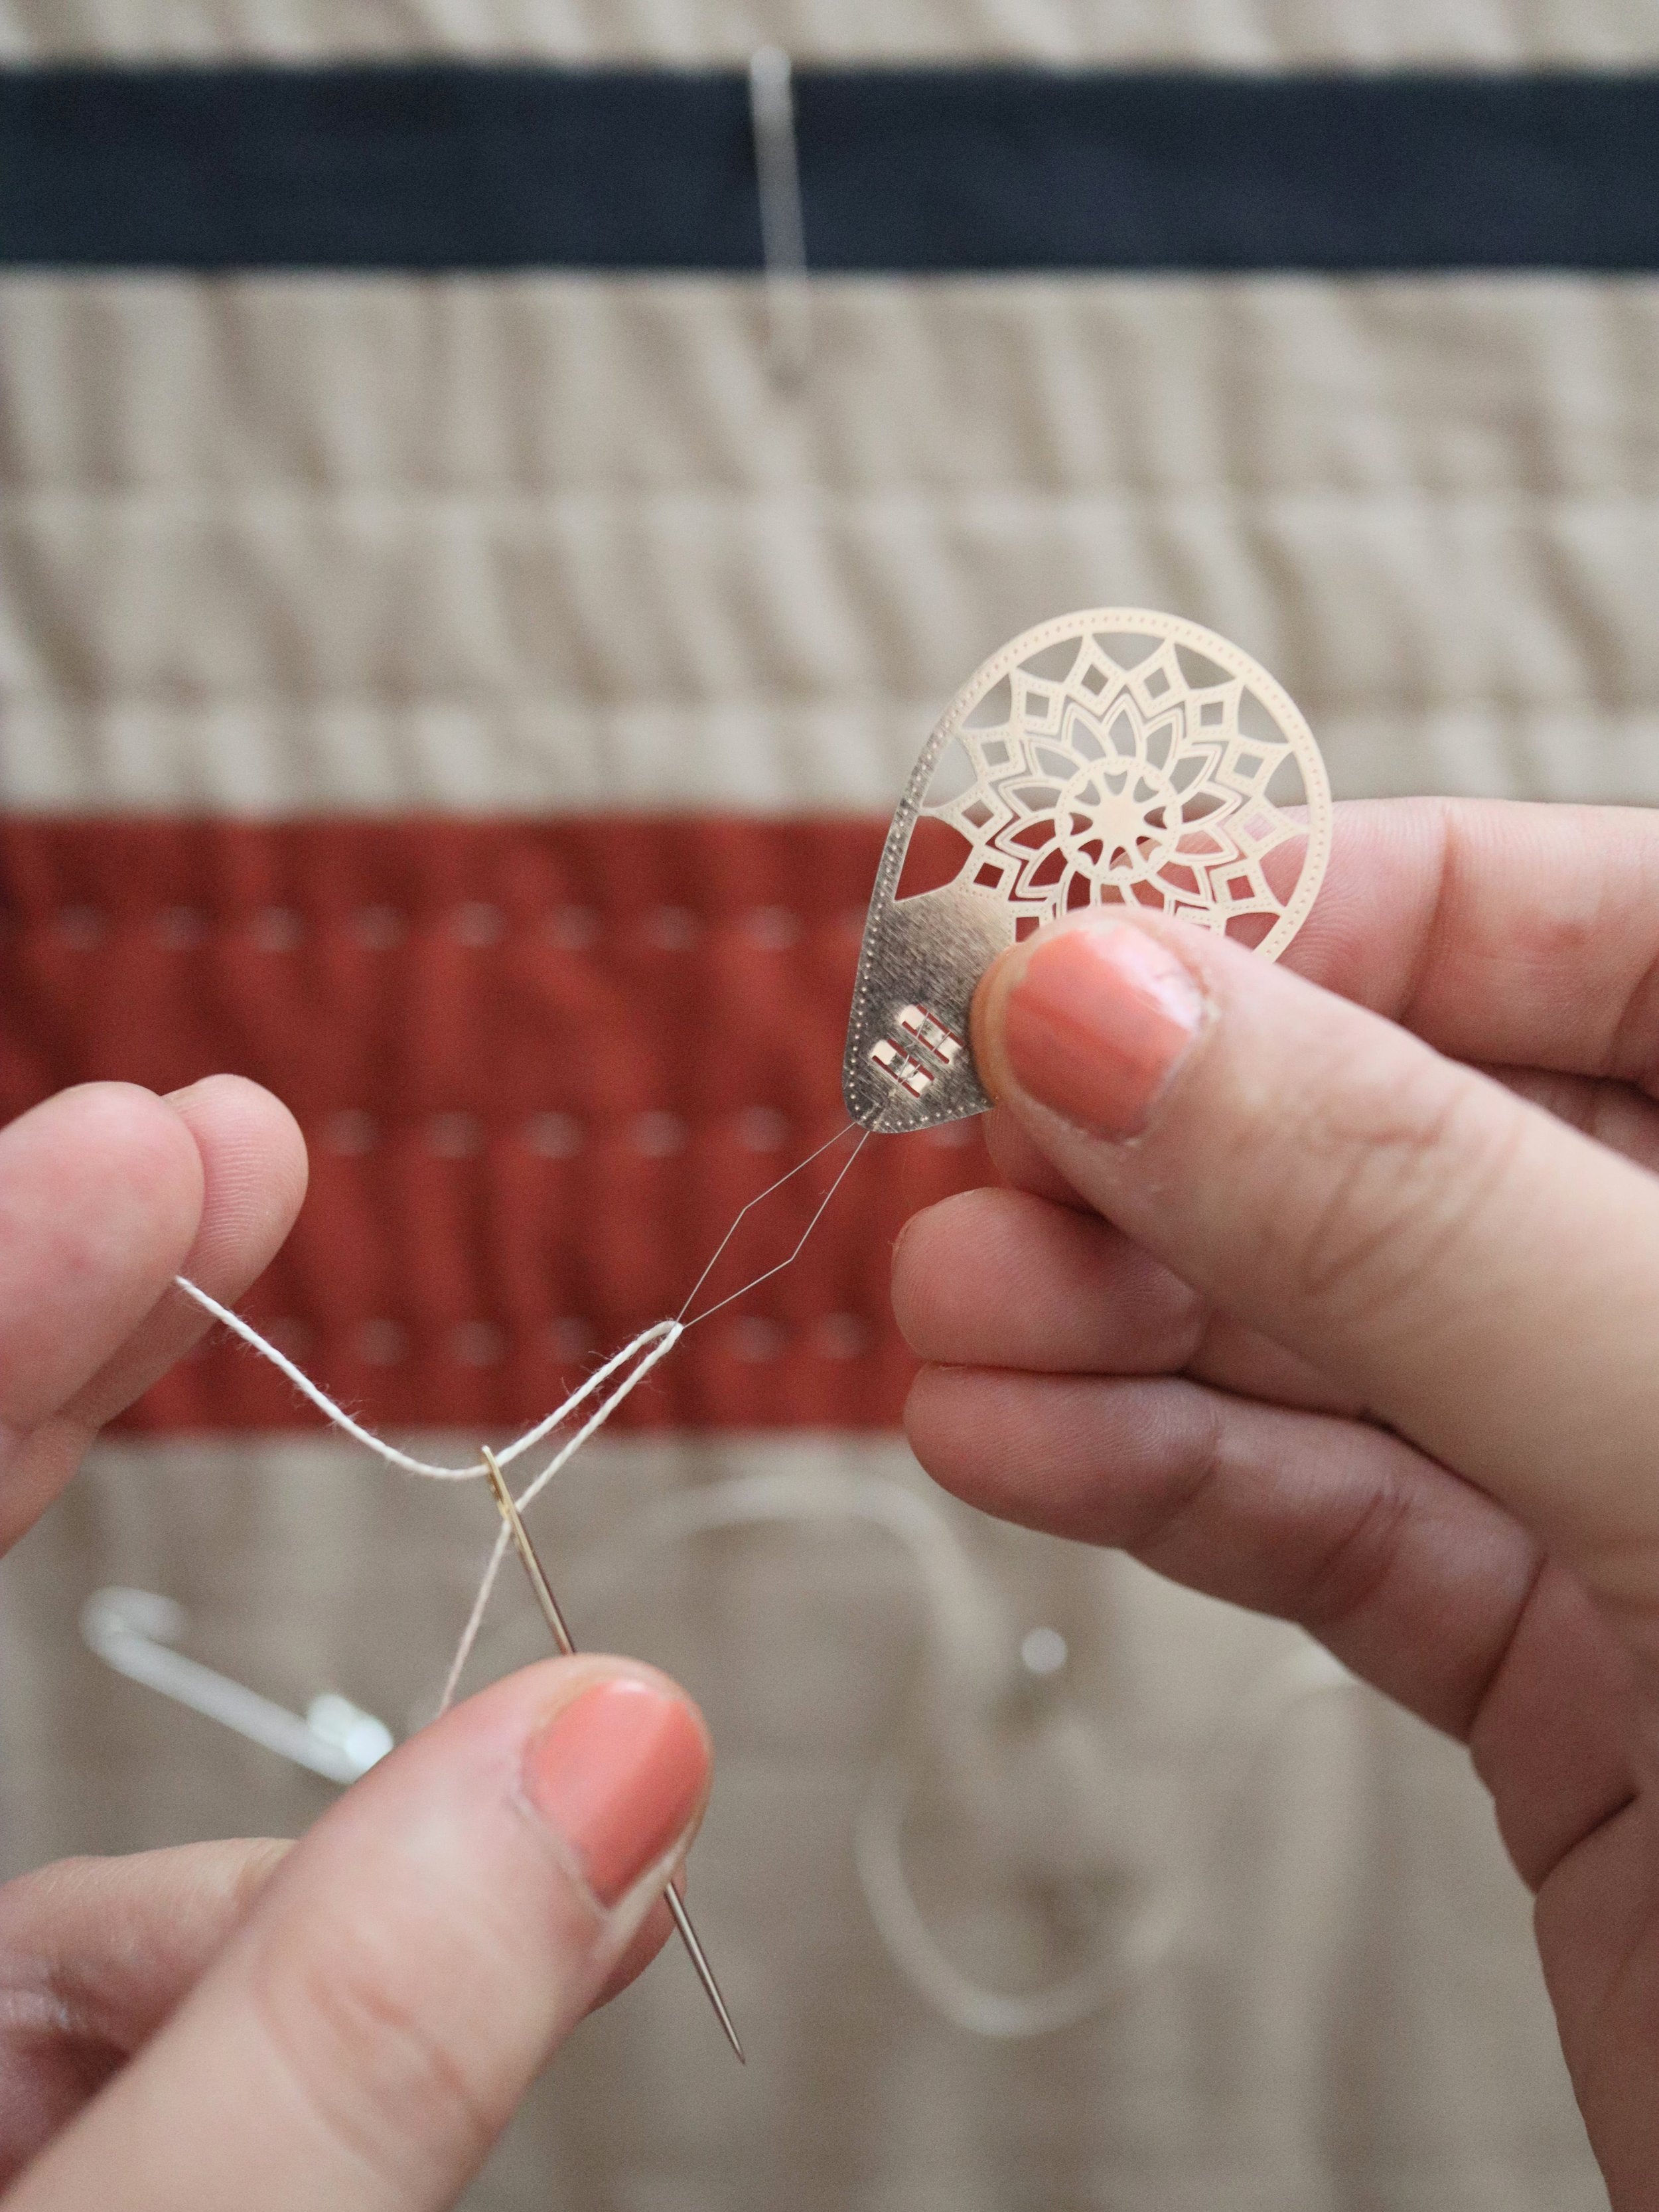
NEEDLE THREADER
These are pretty self-explanatory. They help get your thread through that tiny eye in your needle! They come in a variety of types, but I like the plastic needle threaders best as they hold up better than the traditional metal ones. With that said, they all tend to break fairly easily, especially when using thicker thread, so I recommend having several on hand. To avoid breaking your needle threader too often, I recommend squeezing it at the end as you pull the thread through to keep the small wire secure.
EMBROIDERY SCISSORS
Embroidery scissors are typically small, sharp, and help you trim close to your fabric. There are so many beautiful and adorable embroidery scissors out there, so pick your favorite! Check out Etsy for unique designs or get some like these Stork Embroidery Scissors on Amazon. My favorite are the sheep embroidery scissors shown on the far left below, they’re just so unique and adorable! You can buy your own from The Woolery or on Etsy. I like having a few pairs to choose from so I have one for each hand quilting project in progress. I just pop it into my hand quilting kit (more details on this below), which means I don’t have to track down a single pair of scissors floating around the house!


HOOP
Quilting hoops are not necessary for hand quilting, but they can be especially helpful with certain projects. I use a hoop when I’m working in an confined space on the quilt, like quilting with a block-based design within a single quilt block. This keeps your quilt block from shifting and warping as you sew. For most quilting projects, however, I prefer laying my quilt out on a table to sew edge to edge stitches or simple straight stitches and grids. Laying it out on a table helps to keep the weight distributed for more even stitches. If you are using a hoop, make sure it’s a quilting hoop that has a 14-inch or larger diameter like this Dritz Quilting Hoop.


MARKING TOOL
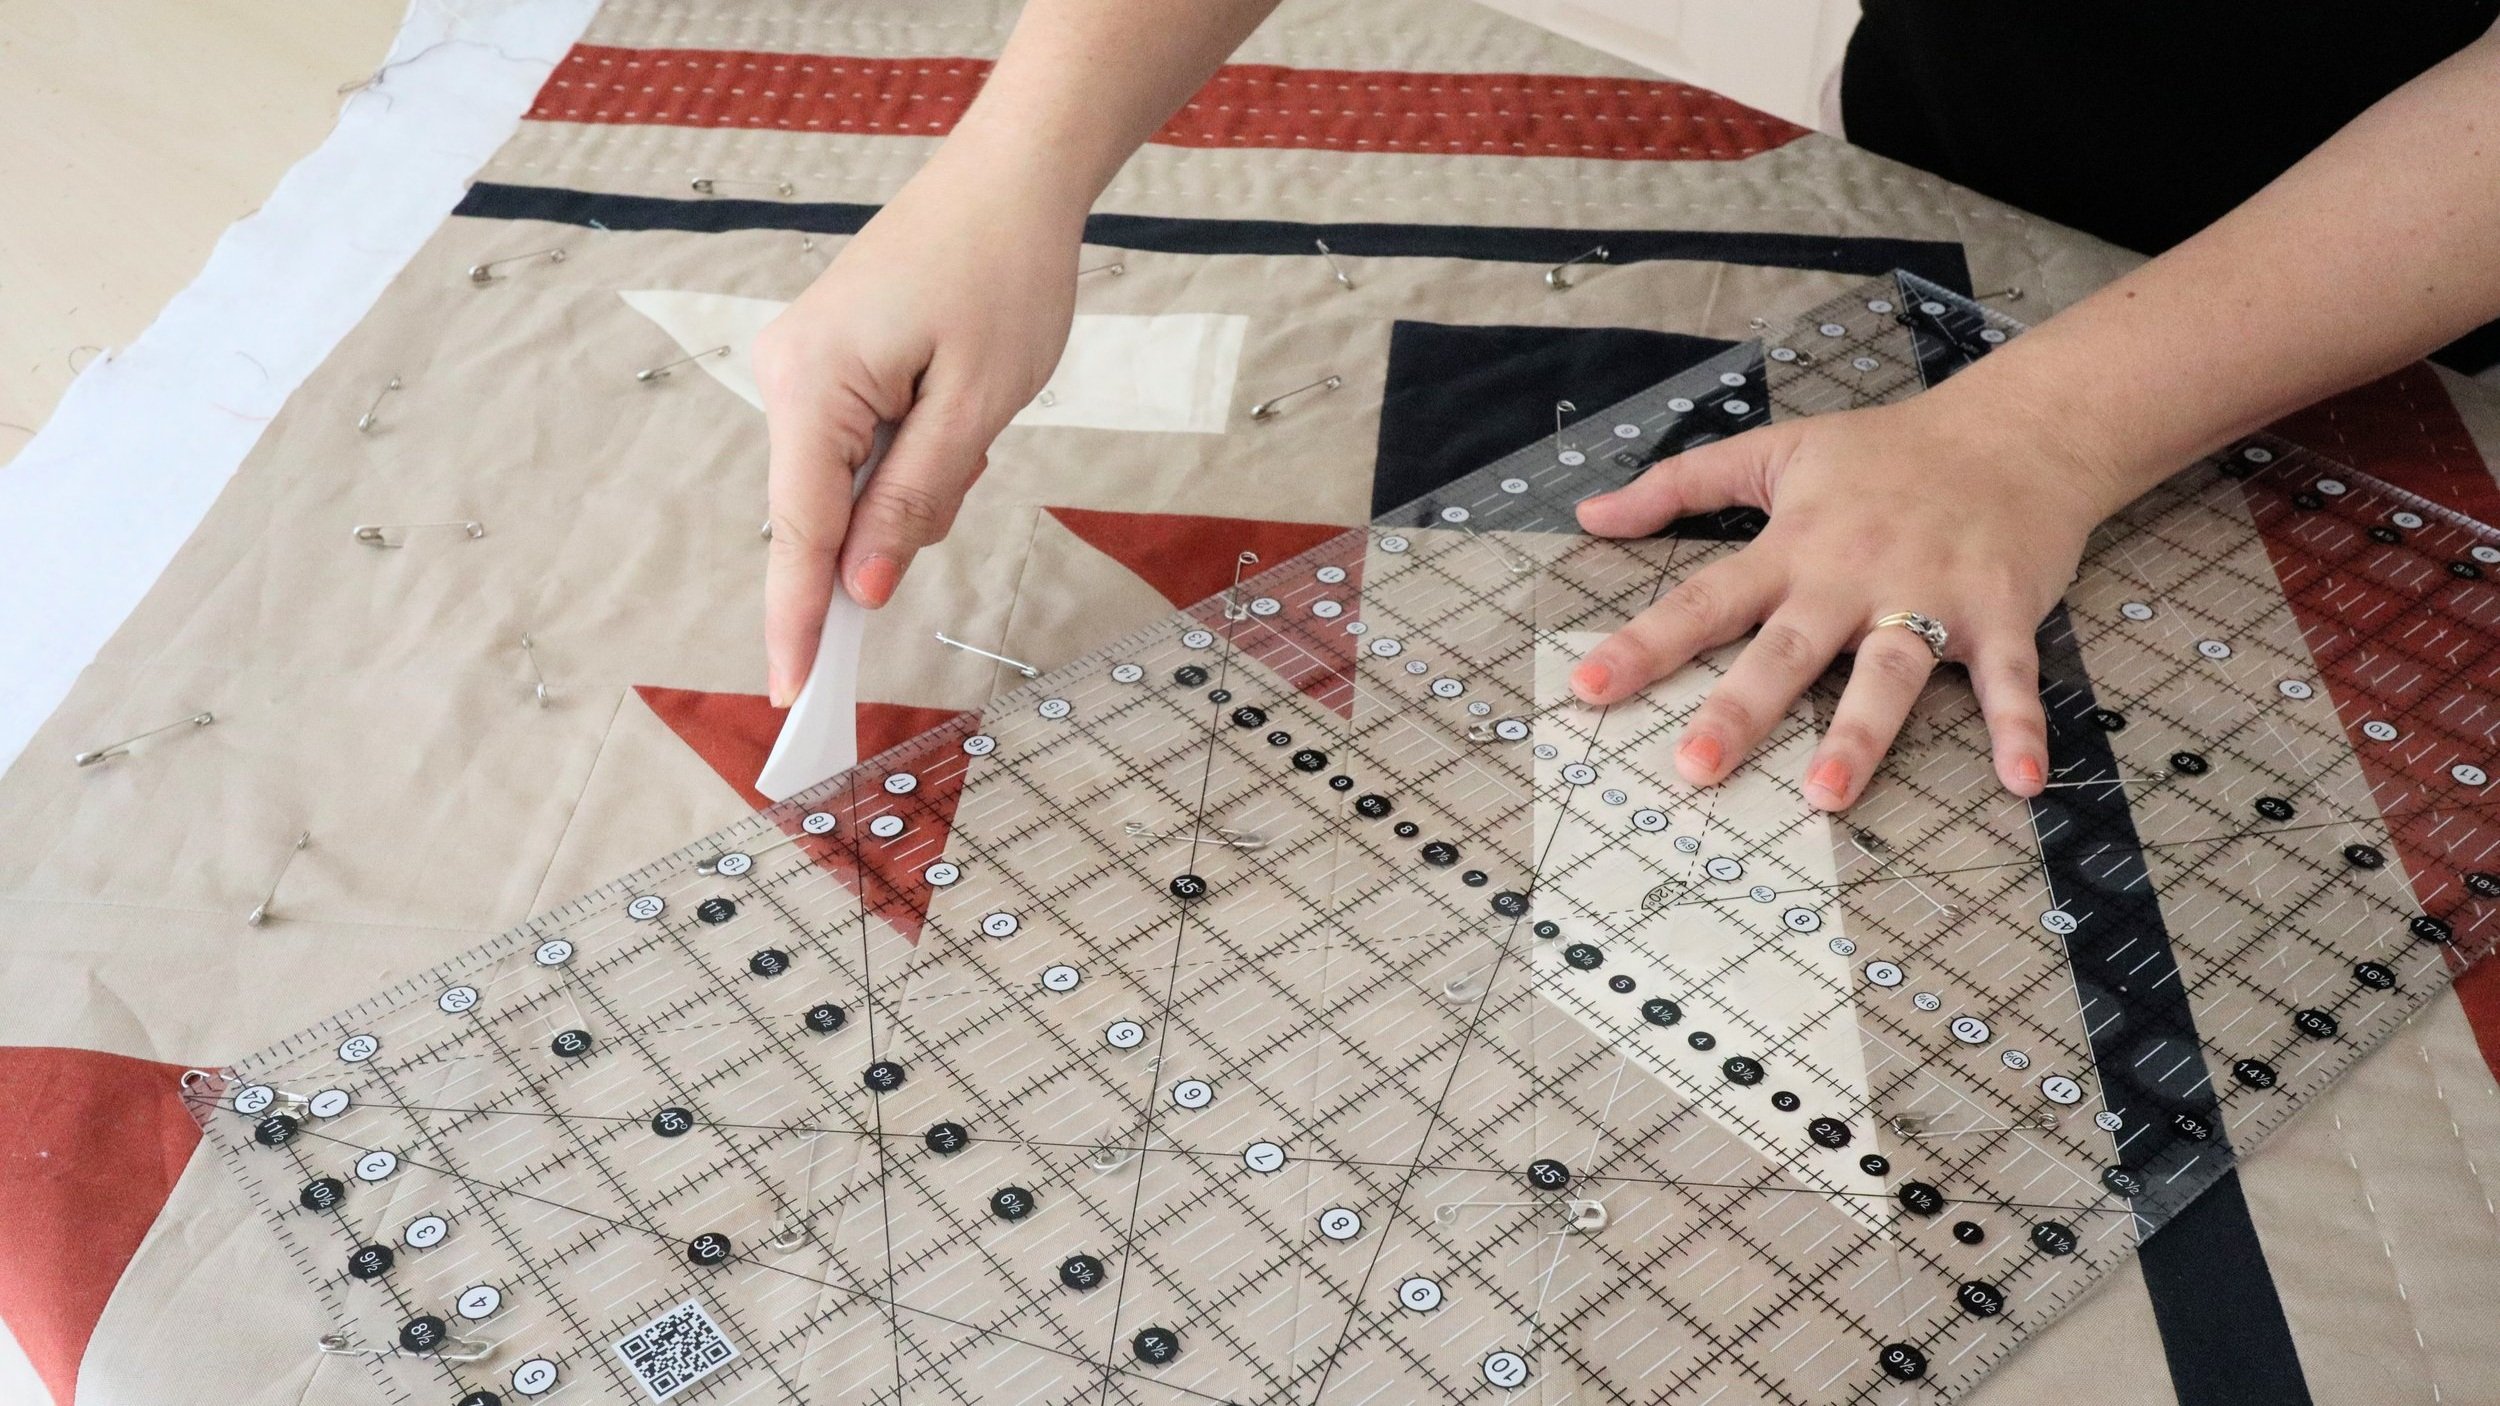
The Hera Marker is my go-to hand quilting marking tool! I don’t like to use any kind of “disappearing” ink on my quilts, so these tools are perfect for me. To use a Hera Marker, all you need to do is press the bladed end of the tool into the fabric and it creates a crease to guide your stitching. You can even use a butter knife in a fix, but they don’t glide as smoothly and are harder to control. I like to use my ruler to measure out my marks and run the Hera Marker along the edge of the ruler to create the creases.
THREAD GLOSS
Thread gloss is designed to help your thread move smoothly through your fabric and keep it from tangling. (Plus it smells great!) I don’t use it often, but I find it to be most helpful with embroidery-type stitching, like in my Chicago Quilt where I’m stitching in a small area and my thread tends to tangle more easily. I love the scents by Ponderosa Creative! It’s super simple to use. Check out the video below to see how easy it is to add it to your thread!

HOW TO USE THREAD GLOSS
Hand Quilting Kit
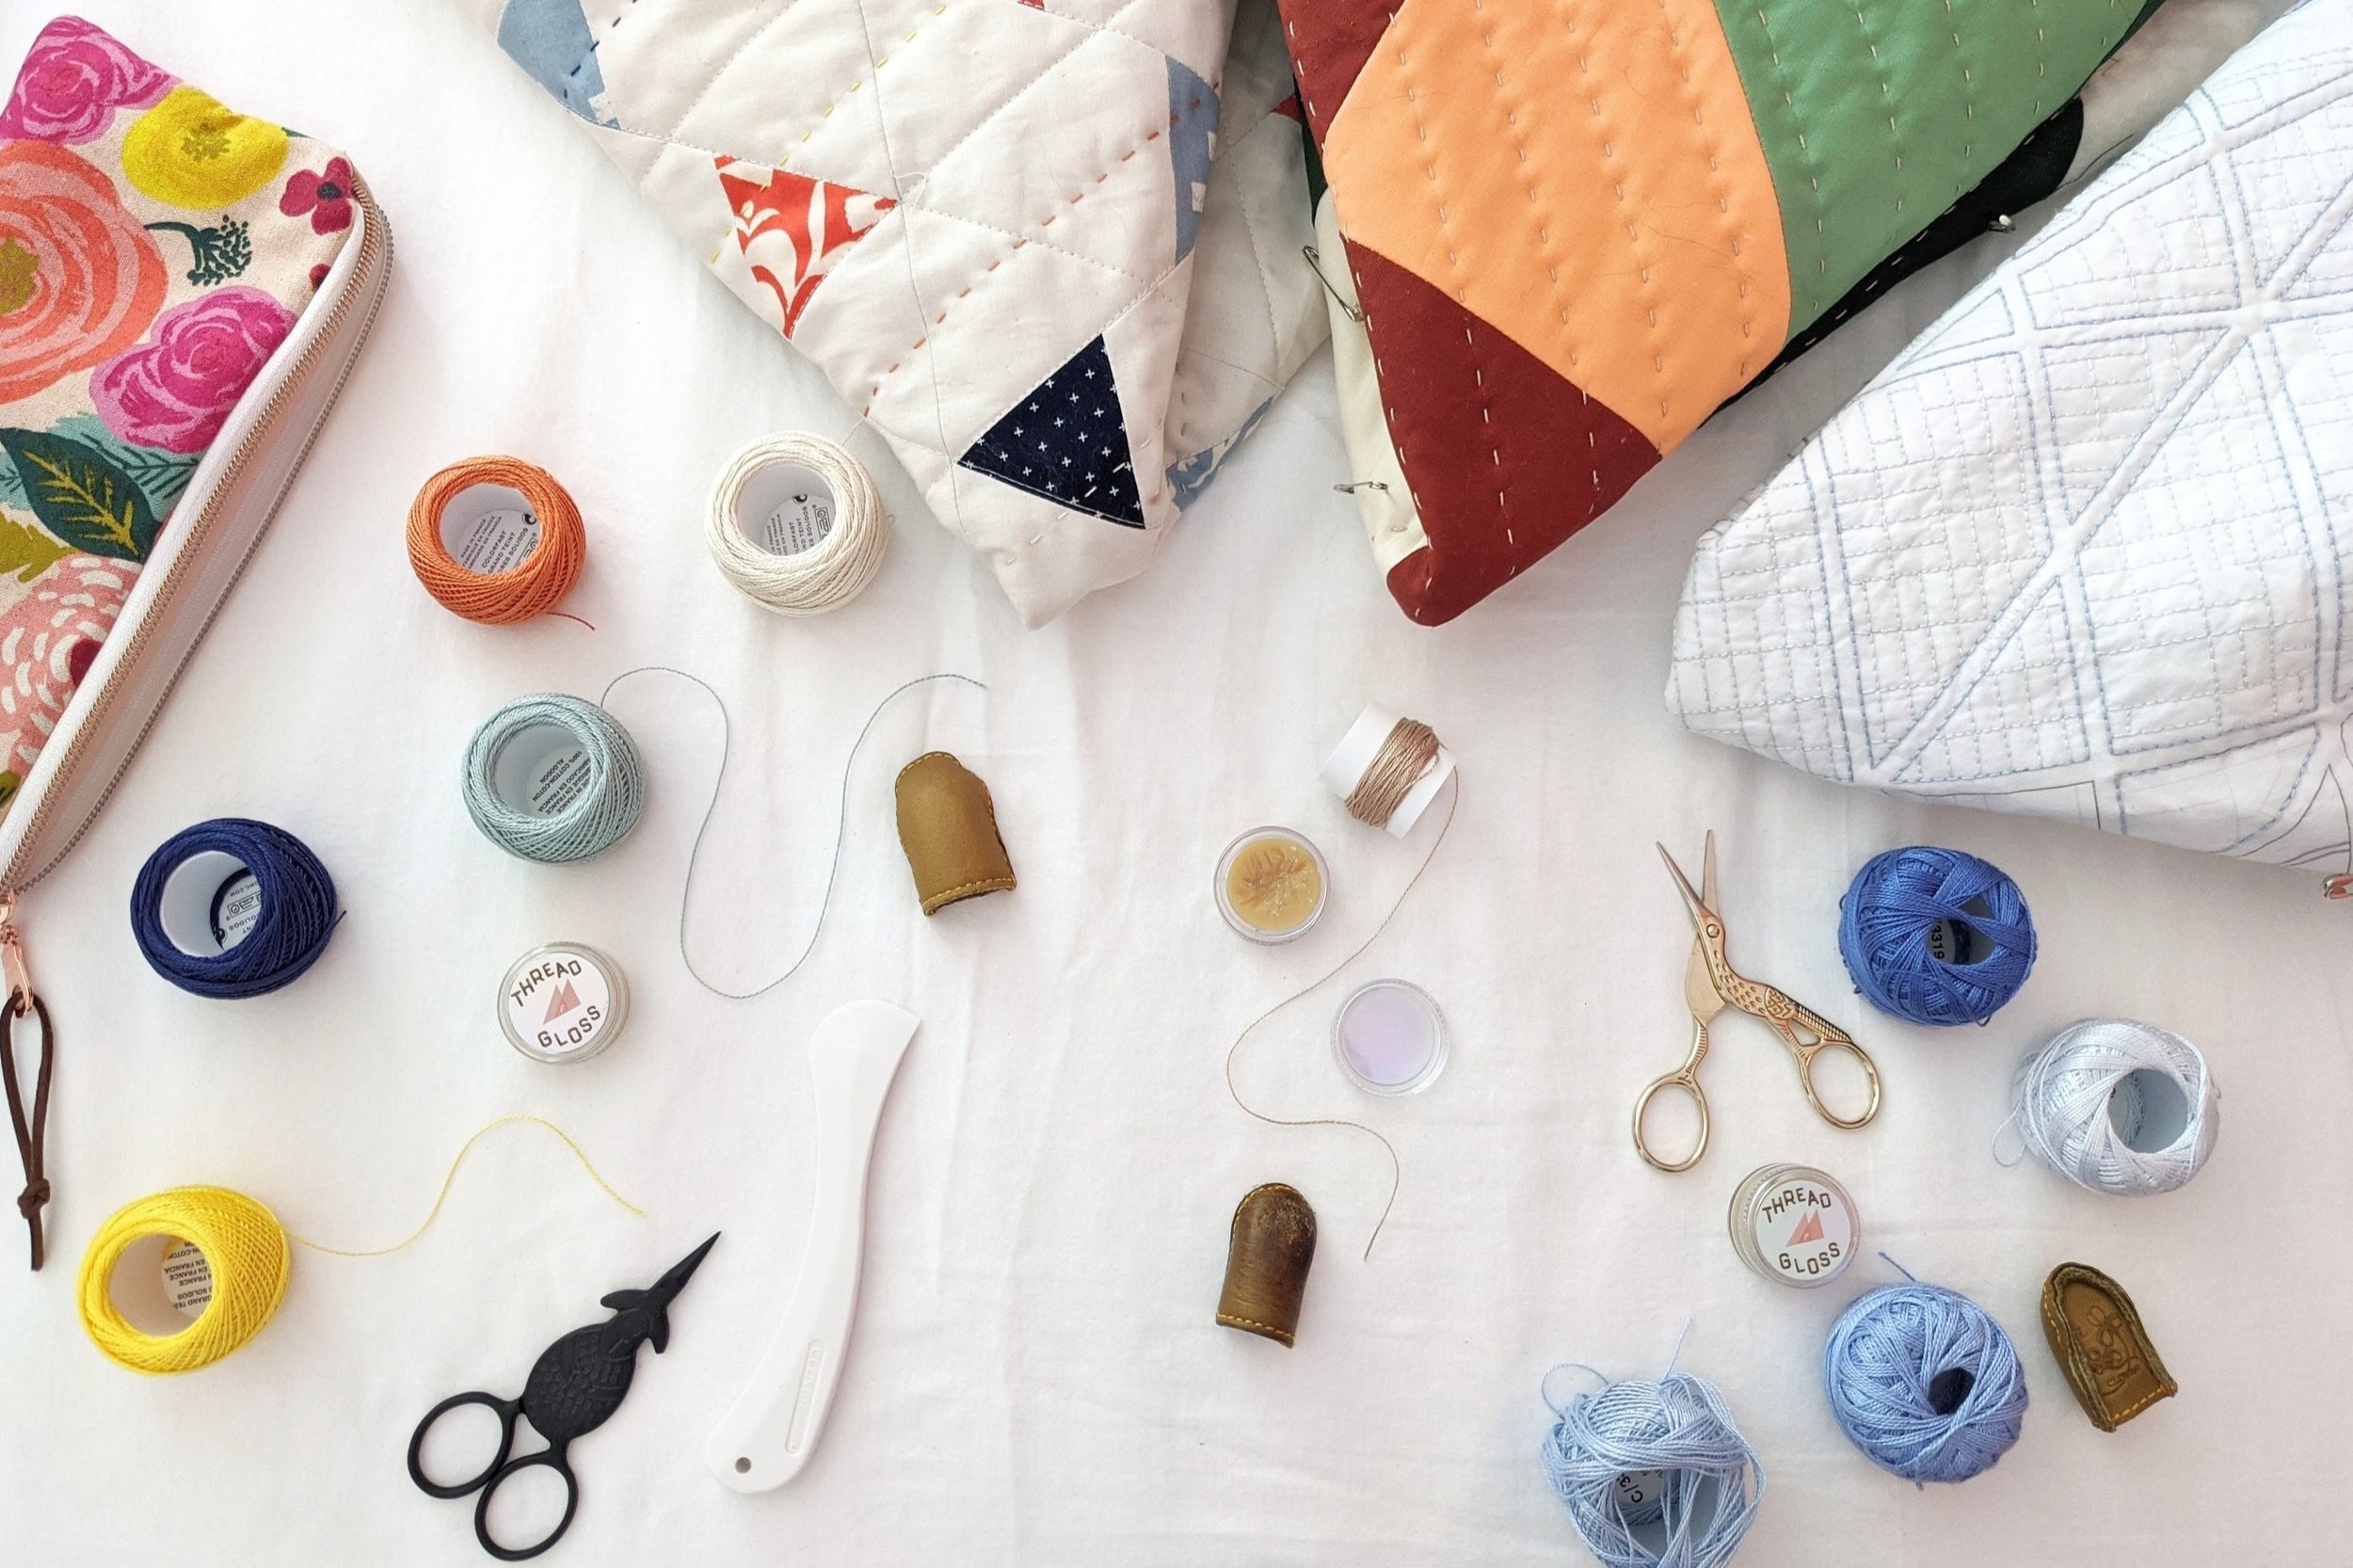
One of my favorite ways to organize my hand quilting tools is with a “hand quilting kit,” and what I mean by this is simple: a small pouch filled with all the tools you need for a single hand quilting project. I’m usually working on several projects at once (Anyone else have a never-ending pile of WIPs??), and keeping track of all the thread and notions I need for a specific project can be challenging. So, I started keeping everything together in a zipper pouch to keep it handy. Into my pouch goes my thread, thimble, needle, snips, a couple needle threaders, and any other notions I might need for that particular quilt.
Having everything together makes it easy to grab and carry with me around the house or out on travels. It also takes away the headache of unfinished projects. I’ve been working on my Haptic Lab Chicago Map Quilt for a million years (or at least that’s what it feels like), but it’s easy to pick up after months of not working on it because everything is together in a little bag. I don’t have to try to remember and locate (or re-order) the thread I was using for that particular project. I highly recommend making your own kit with all your favorite things!


Hand Quilting Tools: The QUICK LIST
DMC Pearl Cotton Size 8 Thread
Clover Golden Eye Embroidery Needles
Clover Leather Thimbles (sizes S, M, L)
Plastic Needle Threaders
Stork Embroidery Scissors
Dritz Quilting Hoop
Hera Marker
Thread Wax or Gloss
Zipper Pouch
So there you have it...
These are the details on all my favorite tools I have by my side while I’m hand quilting. Remember that this list is entirely personal. There are so many options for tools and notions out there and everyone has their own favorites and recommendations, so get out there and try things and figure out for yourself what you like best!
Stay tuned for more in this series on hand quilting! I’m happy share what I’ve learned with you so that you have a place to start. Next up in this series will be all the techniques you need to know to get started on your first hand quilting project. I’ll see you there!
What else would you like to know about hand quilting?
Ask in the comments below!